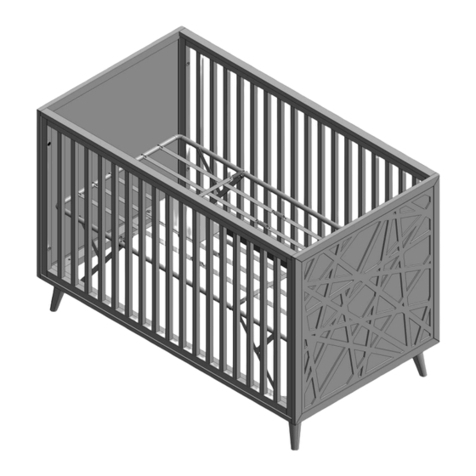
FIGURE 3
WO
7
6
WO
WO
WO
6
7
6
7
7
6
3
STEP 3 (Two adults are required to complete this step)
STEP 2
(10) (6)
)OW()7(
(FS) (EP)
A)
(6)
)PE()OW()B
(6)
C)
(7)
(10))D
(1)
(7)
Don’t overtight
the cam! This is not a fixture involved in your child safety.
(1)
(10)
y as resulted after completing and carefully lace it
with its feet on top, taking care not to scratch its finish. Then, using all
the eight smaller Allen bolts , all the four dowels and all the four
cam fittings , attach the wooden ornaments to the fixed sides
and the end panels , following the next steps (listed on the
next page too):
using a Phillips screwdriver (not supplied) or just the hand, insert a
dowel into one crib’s foot (please see the assembly tip for dowel
correct positioning);
attach the wooden ornament to the end panel , inserting
the dowel into the hole found on the smaller side of the wooden
ornament;
slightly pressing the wooden ornament against the crib’s foot, insert
the cam fitting into the inner face hole of the wooden ornament,
taking care that the little arrow of the cam is pointing to the crib’s foot
(parallel to the dowel’s direction)
insert the smaller Allen bolts , starting the threads by hand.Do not
tighten the bolts completely at this moment, you will be asked to do this
later.
Adjust the position of the wooden ornament to follow the lines of the
crib’s foot by slightly moving the ornament or the fixed side (all the bolts
involved in ornament / fixed side fixing are not completely tighten at this
time) then using the supplied Allen wrench and moderate force,
slightly rotate the cam fitting clockwise (see the cam’s rounded
arrow) by about 90 deg to 120 deg until become tight.
Again, using the supplied Allen wrench and moderate force, tighten
the two smaller Allen bolts .
Repeat the above steps for the rest of the three wooden ornaments.
See the next page for a detailed view of a wooden ornament
accompanied by the same steps
described above.
pbircruoekaT
little
arrow
r
o
u
n
d
e
d
a
r
r
o
w
little
arrow
r
o
u
n
d
e
d
a
r
r
o
w
0+
-6
6
6
assembly tip
REQUIRED
REQUIRED
7
6
3
WO
SB
FS
A
B
C
D
D
D
D
B
DETAILED VIEW
OFAWOODEN ORNAMENT
Wooden ornament mounting example:
using a Phillips screwdriver (not supplied) or just the hand,
insert a dowel into one crib’s foot (please see the assembly
tip for dowel correct positioning);
attach the wooden ornament to the end panel ,
inserting the dowel into the hole found on the smaller side
of the wooden ornament;
slightly pressing the wooden ornament against the crib’s
foot, insert the cam fitting into the inner face hole of the
wooden ornament, taking care that the little arrow of the cam is
pointing to the crib’s foot (parallel to the dowel’s direction);
insert the smaller Allen bolts starting the threads by
hand.Do not tighten the bolts completely at this moment, you
will be asked to do this later.
Adjust the position of the wooden ornament to follow the lines
of the crib’s foot by slightly moving the ornament or the fixed
side (all the bolts involved in ornament / fixed side fixing are
not completely tighten at this time) then using the supplied
Allen wrench and moderate force, slightly rotate the cam
fitting clockwise (see the cam’s rounded arrow) by about 90
deg to 120 deg until become tight.
Again, using the supplied Allen wrench and moderate force,
tighten the two smaller Allen bolts
A)
(6)
)PE()OW()B
(6)
C)
(7)
(10))D
(1)
(7)
Don’t overtight the cam! This is not a fixture involved in
your child safety.
(1)
(10)
0+
-6
6
6
assembly tip
3
3
3
3
3
3
3
3


