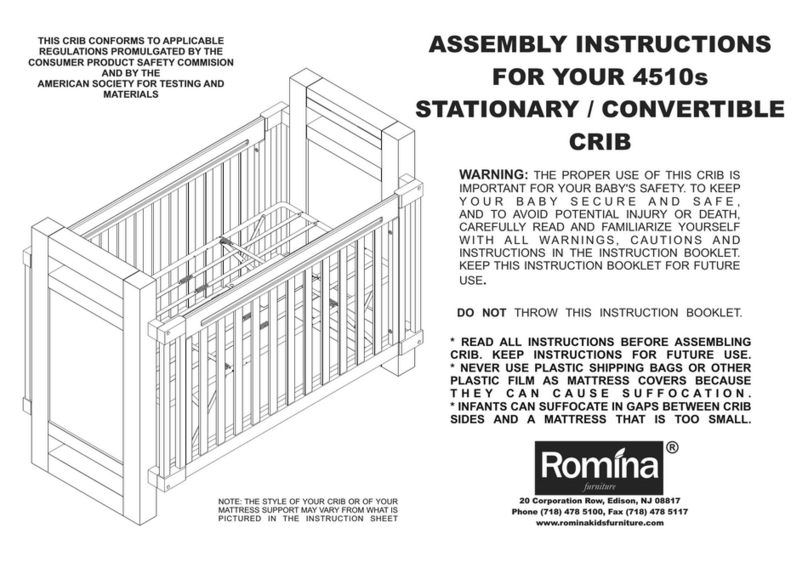
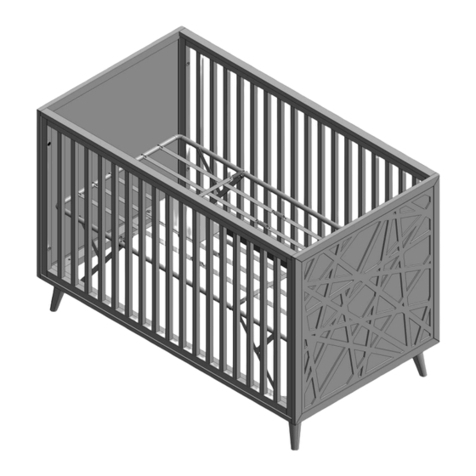
Romina 303 User manual

IMPORTANT:
PLEASE, READ ALL INSTRUCTIONS
BEFORE ASSEMBLING!
PLEASE, SAVE INSTRUCTIONS FOR
FUTURE USE
ASSEMBLY INSTRUCTIONS
FOR
3
YOUR
03 IMPERIO CRIB
NOTE: THE STYLE OF YOUR CRIB OR OF YOUR
MATTRESS SUPPORT MAY VARY FROM WHAT IS
PICTURED IN THE INSTRUCTION SHEET
6323 53rd Drive, Maspeth NY 11378
Phone 718 478 5100, Fax 718 478 5117
www.rominakidsfurniture.com
WARNING:
.
THE PROPER USE OF THIS CRIB IS
IMPORTANT FOR YOUR BABY'S SAFETY. TO KEEP
YOUR BABY SECURE AND SAFE,
AND TO AVOID POTENTIAL INJURY OR DEATH,
CAREFULLY READ AND FAMILIARIZE YOURSELF
WITH ALL WARNINGS, CAUTIONS AND
INSTRUCTIONS IN THIS INSTRUCTION BOOKLET.
KEEP THIS INSTRUCTION BOOKLET FOR FUTURE
USE
DO NOT THROW THIS INSTRUCTION BOOKLET.
THIS CRIB CONFORMS TO APPLICABLE
REGULATIONS PROMULGATED BY THE
CONSUMER PRODUCT SAFETY COMMISION

WARNING: STRINGS CAN CAUSE STRANGULATION! DO NOT PLACE ITEMS
WITH A STRING AROUND A CHILD'S NECK, SUCH AS HOOD STRINGS OR PACIFIER
CORDS. DO NOT SUSPEND STRINGS OVER A CRIB OR ATTACH STRINGS TO TOYS.
READ ALL INSTRUCTIONS BEFORE ASSEMBLING CRIB.
. A STORAGE POUCH & 2 PLASTIC TIES HAVE BEEN PROVIDED IN THE
HARDWARE BAG. ATTACH POUCH TO MATTRESS SUPPORT WITH PLASTIC TIES AND
STORE THE INSTRUCTIONS THERE.
BEFORE EACH USAGE OR ASSEMBLY, INSPECT CRIB FOR DAMAGED HARDWARE,
LOOSE JOINTS, MISSING PARTS OR SHARP EDGES. USE CRIB IF ANY PARTS
ARE MISSING OR BROKEN. ASK YOUR DEALER OR WRITE TO ROMINA FURNITURE
(ADDRESS ON FRONT PAGE) FOR REPLACEMENT PARTS AND INSTRUCTIONAL
LITERATURE IF NEEDED. SUBSTITUTE PARTS.
WHEN A CHILD IS ABLE TO CLIMB OUT OR REACHES THE HEIGHT OF 35 IN. (90 CM),
THE CRIB SHALL NO LONGER BE USED. (SEE CAUTION BELOW)
PLACE CRIB NEAR WINDOW WHERE CORDS FROM BLINDS OR DRAPES MAY
STRANGLE A CHILD.
LEAVE A CHILD IN THE CRIB WITH SIDE LOWERED. BE SURE SIDE IS IN
RAISED AND LOCKED POSITION WHENEVER A CHILD IS IN THE CRIB.
IF REFINISHING, USE A NON-TOXIC FINISH SPECIFIED FOR CHILDREN'S PRODUCTS.
WHEN A CHILD IS ABLE TO PULL HIMSELF TO STANDING POSITION, SET MATTRESS
SUPPORT TO LOWEST POSITION AND REMOVE BUMPER PADS, LARGE TOYS, AND
OTHER OBJECTS THAT COULD SERVE AS STEPS FOR CLIMBING OUT.
NEVER USE PLASTIC SHIPPING BAGS OR OTHER PLASTIC FILM AS MATTRESS
COVERS BECAUSE THEY CAN CAUSE SUFFOCATION.
USE A WATER MATTRESS WITH THIS CRIB.
BEFORE USING THIS CRIB RECHECK ALL SCREWS AND BOLTS TO BE SURE THEY ARE
FASTENED SECURELY. A PERIODIC CHECK SHOULD BE MADE TO BE SURE THESE
ITEMS REMAIN TIGHT.
ANY MATTRESS USED IN THIS CRIB MUST BE AT LEAST 27 1/4 INCHES BY 51 5/8
INCHES WITH A THICKNESS NOT EXCEEDING 6 INCHES.
§
§
§
§
§
§
§
§
§
§
§
KEEP INSTRUCTIONS FOR
FUTURE USE
DO NOT
DO NOT
DO NOT
DO NOT
DO NOT
CAUTION:
§
§
§
§
§
§
WHEN A CHILD'S HEIGHT REACHES 35 INCHES, THE CHILD SHOULD BE PLACED IN A
YOUTH OR REGULAR BED. THIS CRIB HAS AN ADJUSTABLE MATTRESS SUPPORT. FOR
THE CONVENIENCE OF THE PARENT WHEN THE BABY IS VERY SMALL, THE
MAY BE USED IN THE HIGHEST POSITION. WITH
THE IN THE HIGHEST POSITION, BE ABSOLUTELY SURE THAT
THE TOP OF ANY SIDE OF THE BED IS AT LEAST 9 INCHES HIGHER THAN THE TOP
SURFACE OF THE MATTRESS. IF IT IS NOT, LOWER THE TO THE
NEXT HIGHEST POSITION.
USE OF A VAPORIZER NEAR FURNITURE WILL CAUSE WOOD TO SWELL AND FINISH
TO PEEL.
DO NOT STORE CRIB IN AREAS WHERE TEMPERATURES AND CONDITIONS ARE
EXTREME, SUCH AS HOT ATTICS OR COLD DAMP BASEMENTS. BOTH OF THESE
EXTREME CONDITIONS MAY CAUSE THE WOOD TO CRACK AND GLUE JOINTS TO
LOOSEN RESULTING IN STRUCTURAL FAILURE.
SHOULD IT BECOME DESIRABLE TO REFINISH THIS CRIB IN LATER YEARS, THE
MANUFACTURER WARNS THAT ANY MATERIAL USED SHOULD BE NON-TOXIC. AN
OCCASIONAL WAXING, PLUS REGULAR CLEANING WITH MILD SOAP ON A SOFT
CLOTH, FOLLOWED BY A CLEAN DAMP CLOTH, THEN A DRY CLOTH, WILL PRESERVE
THE ORIGINAL LUSTER AND BEAUTY OF THIS FINE FINISH.
THIS CRIB IS NOT EQUIPPED TO HANDLE THE EXCESS WEIGHT OF A CRIB WATER
MATTRESS.
LIFT SLIGHTLY WHEN MOVING ON CARPETING TO PREVENT LEG BREAKAGE.
MATTRESS SUPPORT
MATTRESS SUPPORT
MATTRESS SUPPORT
IMPORTANT:
FAILURE TO FOLLOW THESE WARNINGS AND ASSEMBLY INSTRUCTIONS COULD
RESULT IN SERIOUS INJURY OR DEATH.
WARNING!

Please locate and make sure that you have the
following parts:
F. front panel = 1
B. back panel = 1
L. left panel = 1
R. right panel = 1
S. stabilizing bars = 2
M. mattress support = 1
one bag of hardware with the following:
1. one storage pouch and two plastic ties
2. Allen wrench = 1
3. Allen bolts (1 31/32" or 50 mm) = 16
4. barrel nuts = 4
5. round head bolts (1 3/16" or 30 mm) = 4
6. round head bolts (19/32" or 15 mm) = 4
7. "butterfly" type nut = 4
Required tools:
CAUTION:
Allen wrench (supplied), Phillips
screwdriver (not supplied), flat screwdriver
Do not use a power screwdriver which
can cause screws to break or strip
(not
supplied).
Fasteners shown
in full size
3
5
6
7 4
2
Note:
TIGHTEN COMPLETELY
During the assembly process whenever using screws or bolts, check each by
placing the screw / bolt on the upper diagram which is drawn in actual size. Be sure to
use the proper size and shape specified in the instructions.
Be sure to the screws / bolts when you are asked to do so.
The item
number of your
product is located on
the inner side of the left
pannel, on a black and white
label. Please, refer to this number
in the event that you need to call
ROMINA FURNITURE or your local
distributor.
Note:
Thank you.
Note: The letter that identify
a part is the first letter of the
respective part name (such
method is employed to
facilitate parts recognition
between the drawings and
the parts list).
Phillips screwdriver (not supplied)
B
F
L
R
S
S
M

STEP 1
Attach one of the stabilizing bars (S) to left
side (L) of the crib using 1 Allen bolt (3) and
1 barrel nut (4). Align the tenon attached at
the end of the stabilizing bar with the upper
hole existing on the inner face of the left side
of the crib. Be sure that the drilled face of
the stabilizing bar faces towards the inside
of the crib.
Push the barrel nut into the hole drilled in
the stabilizing bar then align the straight slot
in the head of the barrel nut horizontally, so
the threads in the bolt will insert in the barrel
nut. You can adjust the position of the barrel
nut with a flat head screwdriver (not
supplied) or a coin.
Push the Alen bolt through the left side
panel and into the stabilizing bar. Start the
threads by hand to assure you don't strip the
threads, then, use the suplied Allen wrench.
Do not tighten the bolt completely at this
step, you will be asked to do so later.
FIGURE 1
opposite view
tenon
drilled face
L
S
3
4
4
3
3
4

FIGURE 2
this shows how your crib should look after completing STEP 2
STEP 2
Repeat STEP 1 for the second stabilizing
bar.
S
S
L
3
3

Assemble the result of steps 1&2 with the
right side panel (R) using the same tehnique
described above.
STEP 3
Do not tighten the bolts completely at this
step, you will be asked to do so later.
FIGURE 3
this shows how your crib should look after completing STEP 3
R
L
S
S
3
3
S
S
R
L

LOWEST POSITION
MIDDLE POSITION
HIGHEST POSITION
LOWEST POSITION
MIDDLE POSITION
HIGHEST POSITION
Assemble the mattress support using the 4
bigger round head bolts (5), the 4
STEP 4
Do not tighten the bolts completely at this
step, you will be asked to do so later.
"butterfly"
type nuts (7) supplied and a Phillips
screwdriver (not supplied). There are three
positions for the mattress support (from the
highest one for a newborn to the lowest one
for a child that is 35" tall - see caution note).
You must adjust the height of the mattress
support depending of your child height by
inserting all the four bolts in the same
position (see FIGURE 4).
NOTE: THE STYLE OF YOUR CRIB OR OF YOUR
MATTRESS SUPPORT MAY VARY FROM WHAT IS
PICTURED IN THE INSTRUCTION SHEET FIGURE 4
5
7
5
7
5
7
5
7
5
7

the mattress support on the
stabilizing bars as these resulted after STEP
3, using the 4 smaller round head bolts (6)
STEP 5
Mount
tighten completely all the 8
bolts (5+7, 6) involved in mattress support
fixing using a Phillips screwdriver (not
supplied) (see FIGURE 5).
supplied and a Phillips screwdriver (not
supplied).
Now, you must
FIGURE 5
6
WARNING!
TIGHTEN COMPLETELY!
6
5
7
6
5
7
6
5
7
6
5
7
WARNING!
TIGHTEN COMPLETELY!
WARNING:
VERY IMPORTANT
TO KEEP YOUR BABY
SECURE AND SAFE, AND TO AVOID
POTENTIAL INJURY OR DEATH, IT IS
TO TIGHTEN
COMPLETELY ALL THE 8 BOLTS LISTED
IN STEP 5.

the part of your crib resulted after
STEP 5 to the back panel (B), using 6 Allen
bolts (3)
STEP 6
Attach
Do not tighten the bolts completely at this
step, you will be asked to do so
later.
and the Allen wrench supplied (2).
opposite view
FIGURE 6
B
L
R
S
M
3
3
3
3
3
3
3
3
3
3

FIGURE 7
the part of your crib resulted after
STEP 6 to the front panel (F), using 6 Allen
bolts (3)
STEP 7
Attach
Do not tighten the bolts completely
at this step, you will be asked
to do so later.
and the Allen wrench supplied (2).
3
3
3
3
3
3
3
3
3
F

U
STEP 8
tighten completely all the 16 Allen bolts (3)
remained untighten from all previous steps (see
FIGURE 8).
You have a total of 16 Allen bolts, distributed as
following:
- 6 bolts (3) on the front panel (F);
- 6 bolts (3) on the back panel (B);
- 2 bolts (3) on the bottom part of left panel;
- 2 bolts (3) on the bottom part of right
panel (R).
REMINDER
sing the Allen wrench (2) supplied, you must
WARNING:
VERY IMPORTANT
TO KEEP YOUR BABY
SECURE AND SAFE, AND TO AVOID
POTENTIAL INJURY OR DEATH, IT IS
TO TIGHTEN
COMPLETELY ALL THE 16 ALLEN BOLTS
LISTED IN STEP 8.
FIGURE 8
WARNING!
TIGHTEN COMPLETELY!
WARNING!
TIGHTEN COMPLETELY!
WARNING!
TIGHTEN COMPLETELY!
TIGHTEN THE SAME BOLTS ON
THE RIGHT SIDE OF YOUR CRIB!
3
3
33
33
3
3
3
3
3
B
R
L
F

this shows how your crib should look like after completing assembly
Once completed STEP 8 attach the storage
pouch supplied to the mattress support
spring using the two plastic ties supplied.
Store this instruction booklet in the storage
pouch for future use.

ASSEMBLY INSTRUCTIONS
FOR
3
DAY BED OPTION OF
YOUR 03 IMPERIO CRIB
WARNING (FOR DAY BED OPTION ONLY):
§
§
ANY MATTRESS USED IN THIS CRIB MUST BE AT
LEAST 27 1/4 INCHES BY 51 5/8 INCHES WITH A
THICKNESS NOT EXCEEDING 6 INCHES.
THE MINIMUM AGE SHALL NOT BE LESS THAN 15
MONTHS AND THE MAXIMUM WEIGHT SHALL NOT
BE GREATER THAN 50LB.
IMPORTANT:
PLEASE, READ ALL INSTRUCTIONS
BEFORE ASSEMBLING!
PLEASE, SAVE INSTRUCTIONS FOR
FUTURE USE
NOTE: THE STYLE OF YOUR CRIB OR OF YOUR
MATTRESS SUPPORT MAY VARY FROM WHAT IS
PICTURED IN THE INSTRUCTION SHEET
6323 53rd Drive, Maspeth NY 11378
Phone 718 478 5100, Fax 718 478 5117
www.rominakidsfurniture.com
DO NOT THROW THIS INSTRUCTION BOOKLET.

STEP A
Remove both back panel (B) and front panel
(F) by unscrewing completely all the 12 bolts
(3) using the Allen wrench supplied (2) (see
FIGURE A). Keep these bolts at your hand
for the following steps.
FIGURE A
opposite view
STARTING FROM CRIB
3
3
3
3
3
3
3
3
3
3
3
3
3
3
3
3
3
3
3
B
L
R
F
F
R
B
L

STEP B
Remove all the 4 bigger round head bolts (5)
located on your mattress support, adjust this
to it's lowest position then
bolts (5) and "butterfly" type
nuts (7) in their new position using a Phillips
screwdriver (not supplied). For more details
about mattress support height adjustment
see STEP 4 & FIGURE 4.
tighten
completely this shows how your crib should look after completing STEP B
FIGURE B
5
7
5
75
7
5
7
5
7
5
7
5
7
5
7
WARNING!
TIGHTEN COMPLETELY!
WARNING:
VERY IMPORTANT
TO KEEP YOUR BABY
SECURE AND SAFE, AND TO AVOID
POTENTIAL INJURY OR DEATH, IT IS
TO TIGHTEN
COMPLETELY ALL THE 4 BOLTS LISTED
IN STEP B.

STEP C
Take the front panel (F). Using the supplied
Allen wrench (2), unscrew completely the 4
Allen bolts (x) (previously mounted in
factory) located 2 by 2 on the lateral sides of
the legs. Then, remove the middle panel
resulted (see FIGURE C). Store the middle
panel and the 4 Allen bolts resulted in a
proper place, taking care not to scratch the
finish.
FIGURE C
middle panel
x
x
x
x

STEP D
Assemble the middle part of your crib
resulted after completing STEP B with the
back panel (B) and the front panel resulted
after completing STEP C using 12 Allen
bolts (3) and the Allen wrench supplied (2).
Please, all the 12 bolts
described above.
tighten completely
WARNING!
TIGHTEN COMPLETELY!
WARNING!
TIGHTEN COMPLETELY!
WARNING!
TIGHTEN COMPLETELY!
FIGURE D
B
3
3
3
3
33
3
3
3
3
3
WARNING:
VERY IMPORTANT
TO KEEP YOUR BABY
SECURE AND SAFE, AND TO AVOID
POTENTIAL INJURY OR DEATH, IT IS
TO TIGHTEN
COMPLETELY ALL THE 12 ALLEN BOLTS
LISTED IN STEP D.
TIGHTEN THE SAME BOLTS ON
THE RIGHT SIDE OF YOUR CRIB!
TIGHTEN THE SAME BOLTS ON
THE RIGHT SIDE OF YOUR CRIB!

this shows how your day bed should look after completing STEP D
STARTING FROM SCRATCH
§
§
FOLLOW STEPS 1 TO 5 FROM THE
CRIB ASSEMBLY INSTRUCTIONS.
WHEN YOU REACH STEP 4, PLEASE
ADJUST YOUR MATTRESS SUPPORT TO
ITS LOWEST POSITION (YOU MUST
ALSO SEE STEP B FOR MORE DETAILS).
FOLLOW STEPS C & D FROM THE DAY
BED OPTION ASSEMBLY INSTRUCTIONS.
Please, store this instruction booklet in the
storage pouch for future use.

FULL SIZE BED OPTION OF
YOUR 03 IMPERIO CRIB3
NOTE:
CKC C K
C.
YOUR 303 IMPERIO CRIB CAN CONVERT INTO A
FULL SIZE BED WITH THE PURCHASE OF ROMINA
FURNITURE ITEM CODE ( ONVERSION IT FOR
RIBS)
ASSEMBLY INSTRUCTIONS FOR FULL SIZE BED
OPTION CAN BE FOUND INSIDE OF CKC PACKAGE.
PLEASE, CONTACT ROMINA FURNITURE OR YOUR
LOCAL DISTRIBUTOR FOR MORE INFORMATION.

Regular cleaning with mild soap on a soft cloth, followed by a clean damp
cloth, then a dry cloth, will preserve the original luster and beauty of this
fine finish of your Romina Furniture product.
Visit
for updates, special offers and more new designs.
www.rominakidsfurniture.com
Team
Thank you for beeing one of our distinguished clients.
Table of contents
Other Romina Baby & Toddler Furniture manuals

Romina
Romina 301 Nerva User manual

Romina
Romina TR 9510 User manual

Romina
Romina 8510 User manual

Romina
Romina 15510 User manual

Romina
Romina TR 4501 User manual

Romina
Romina 9510 User manual

Romina
Romina 4510s User manual

Romina
Romina TR 8510 User manual

Romina
Romina 3510s User manual

Romina
Romina TR 1501 User manual