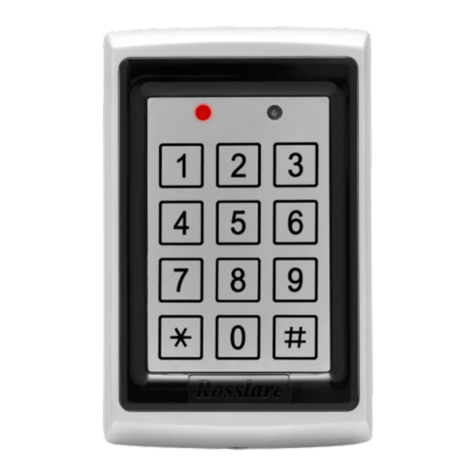
Rosslare AuraSys L-4 User manual

AuraSys™L-4
4-/8-Zone Alarm Panel
User Manual
Models:
L-4
L-4K
L-4PCBA

Copyright © 2012 by Rosslare. All rights reserved.
This manual and the information contained herein are proprietary to ROSSLARE
ENTERPRISES LIMITED and/or its related companies and/or subsidiaries’ (hereafter:
"ROSSLARE"). Only ROSSLARE and its customers have the right to use the information.
No part of this manual may be re-produced or transmitted in any form or by any means,
electronic or mechanical, for any purpose, without the express written permission of
ROSSLARE.
ROSSLARE owns patents and patent applications, trademarks, copyrights, or other
intellectual property rights covering the subject matter in this manual.
TEXTS, IMAGES, AND ILLUSTRATIONS INCLUDING THEIR ARRANGEMENT IN THIS
DOCUMENT ARE SUBJECT TO THE PROTECTION OF COPYRIGHT LAWS AND OTHER
LEGAL RIGHTS WORLDWIDE. THEIR USE, REPRODUCTION, AND TRANSMITTAL TO THIRD
PARTIES WITHOUT EXPRESS WRITTEN PERMISSION MAY RESULT IN LEGAL
PROCEEDINGS.
The furnishing of this manual to any party does not give that party or any third party any
license to these patents, trademarks, copyrights or other intellectual property rights,
except as expressly provided in any written agreement of ROSSLARE.
ROSSLARE reserves the right to revise and change this document at any time, without
being obliged to announce such revisions or changes beforehand or after the fact.

Table of Contents
AuraSys™ L-4 User Guide iii
Table of Contents
1. Introduction....................................................................... 8
1.1 System Features.................................................................................. 8
1.2 System Installation .............................................................................. 8
2. System Technical Specifications...................................... 9
3. Operating the AuraSys L-4 System ............................... 11
3.1 About Everyday Operation ................................................................ 11
3.2 Using the Keypad ............................................................................. 11
3.2.1 About the KE-06/KE-04 ............................................................................. 12
3.2.2 About the KC-06/KC-04 ............................................................................ 12
3.2.3 About the KD-06/KD-04 ............................................................................ 12
3.2.4 Keypad User Functions............................................................................... 13
3.2.5 Indicators Bar ............................................................................................ 14
3.2.6 Numeric Programming Pad ........................................................................ 15
3.2.7 Audible Indicators...................................................................................... 16
3.3 Operational Modes ........................................................................... 17
3.3.1 Disarmed Mode......................................................................................... 17
3.3.2 Bypass Mode............................................................................................. 17
3.3.3 Armed Mode............................................................................................. 18
3.4 User Modes ...................................................................................... 18
3.4.1 Installer Level............................................................................................. 18
3.4.2 Master Programmer................................................................................... 18
3.4.3User .......................................................................................................... 19
3.4.4 Additional Codes....................................................................................... 19
3.4.5 Master Configuration ................................................................................ 19
3.4.6 Entering Master Programming Mode.......................................................... 19
3.4.7 Entering Master Programming Parameters.................................................. 20
4. Using the AuraSys L-4 Security System ........................ 22
4.1 Alarm Mode ..................................................................................... 22
4.1.1 Alarm Mode Armed................................................................................... 22
4.1.2 Alarm Mode Disarmed............................................................................... 22

Table of Contents
iv AuraSys™ L-4 User Guide
4.2 Arming Options ................................................................................ 23
4.2.1 System Home Arming................................................................................ 23
4.2.2 System Instant Arming Mode ..................................................................... 24
4.2.3 Arming/Disarming the L-4 from the System Panel ....................................... 24
4.2.4 System Away Mode................................................................................... 25
4.2.5 Forced Arming .......................................................................................... 25
4.2.6 Quick Arming............................................................................................ 25
4.2.7 Perimeter Arming ...................................................................................... 26
4.3 Disarming Process............................................................................. 26
4.4 Bypass Zone...................................................................................... 26
4.5 Siren................................................................................................. 27
4.6 Entry/Exit Delay Options.................................................................... 27
4.6.1 Entry Delay................................................................................................ 27
4.6.2 Exit Delay .................................................................................................. 27
4.7 Controlling Appliances...................................................................... 28
4.8 Muting System Chimes ..................................................................... 28
4.9 Performing an Emergency Call .......................................................... 28
4.10 Entering the Duress Code ................................................................. 29
4.11 Memory Alarm View......................................................................... 29
4.12 Trouble Status View.......................................................................... 30
A. Programming Worksheets ............................................. 31
A.1 Customer Information....................................................................... 31
A.2 Installer Information.......................................................................... 31
A.3 Device Information ........................................................................... 31
A.4 Zone Worksheet ............................................................................... 32
B. Limited Warranty ............................................................ 33

List of Figures
AuraSys™ L-4 User Guide v
List of Figures
Figure 1: KE-04 LED Keypad Model .............................................................. 12
Figure 2: KC/KD-04 Digital Keypad Models................................................... 13
Figure 3: KE-04, KC-04 and KD-04 Keypad Indicators Bar (example) ............. 14
Figure 4: Numeric Programming Keypad....................................................... 15
Figure 5: L-4 Model...................................................................................... 24
Figure 6: L-4K Model.................................................................................... 25
Figure 7: PGM On/Off .................................................................................. 28
Figure 8: Chime On/Off................................................................................ 28
Figure 9: Emergency..................................................................................... 28
Figure 10: Trouble & Memory Buttons .......................................................... 29

List of Tables
vi AuraSys™ L-4 User Guide
List of Tables
Table 1: AuraSys L-4 Keypad User Functions ................................................. 13
Table 2: AuraSys L-4 Indicators Bar ............................................................... 14
Table 3: AuraSys L-4 Programming Function Buttons .................................... 15
Table 4: AuraSys L-4 Audible Indicators ........................................................ 16

Notice and Disclaimer
AuraSys™ L-4 User Guide vii
Notice and Disclaimer
This manual’s sole purpose is to assist installers and/or users in the safe and
efficient installation and usage of the system and/or product, and/or software
described herein.
Before attempting to install and/or use the system, the installer
and the user must read this manual and become familiar with all
safety requirements and operating procedures.
The system must not be used for purposes other than those for which it
was designed.
The use of the software associated with the system and/or product, if
applicable, is subject to the terms of the license provided as part of the
purchase documents.
ROSSLARE exclusive warranty and liability is limited to the warranty and
liability statement provided in an appendix at the end of this document.
This manual describes the maximum configuration of the system with the
maximum number of functions, including future options. Therefore, not
all functions described in this manual may be available in the specific
system and/or product configuration you purchased.
Incorrect operation or installation, or failure of the user to effectively
maintain the system, relieves the manufacturer (and seller) from all or any
responsibility for consequent noncompliance, damage, or injury.
The text, images and graphics contained in the manual are for the
purpose of illustration and reference only.
All data contained herein subject to change without prior notice.
In no event shall manufacturer be liable for any special, direct, indirect,
incidental, consequential, exemplary or punitive damages (including,
without limitation, any and all damages from business interruption, loss of
profits or revenue, cost of capital or loss of use of any property or capital
or injury).
All graphics in this manual are for reference only, some deviation between
the image(s) and the actual product may occur.
All wiring diagrams are intended for reference only, the photograph or
graphic of the PCB(s) are intended for clearer illustration and
understanding of the product and may differ from the actual PCB(s).

Introduction
8 AuraSys™ L-4 User Guide
1. Introduction
The AuraSys™ L-4 4/8-zone Security System, manufactured by Rosslare
Security Products®, is a compact and advanced 8-zone hardwired control panel
for residential and light commercial intrusion alarms.
Changes or modifications to this equipment not expressly approved by the
party responsible for compliance (Rosslare Ltd.) could void the user’s authority
to operate the equipment.
1.1 System Features
Feature Specification
Onboard dual EOL zone inputs (+ tamper detection) 4
Zone doubling Yes
Max. supported zones 8
4-wire fire zone (using PGM for reset) 1
Onboard PGM output, OC 120 mA 1
Relay sounder outputs, 1A 1
Onboard aux outputs 1 A (L-4, L-4K)
1.7 A (l-4PCBA)
User codes (in addition to 1 master and 1 programmer) 8
Nonvolatile event log size 256
Max. keypads supported (of KE-04, KC-04, KD-04, KE-06,
KC-06, KD-06 types)
4
Wireless Remote supported* 8
Central station accounts (primary, secondary/backup) Yes
Private telephone numbers 3
Wireless expansion supported Yes
*With XR-16A wireless expansion
For additional details, refer to Chapter 2.
1.2 System Installation
To insure proper installation of the AuraSys L-4 system, use skilled technicians
only. The personnel you choose must be familiar with:
General electrical installation procedures
System specific post-installation setup
Your specific security requirements
For a complete description of all installation procedures, refer to the AuraSys L-
4 Installation Manual.

System Technical Specifications
AuraSys™ L-4 User Guide 9
2. System Technical Specifications
The following tables provide electrical and mechanical specifications of the
Security System.
Electrical Characteristics
Input Voltage L-4PCBA
16 VAC with 25 VA transformer
(14-18 VAC 50/60 Hz Range)
24 VDC 1.2 A (20 to 30 VDC range)
L-4/L-4K
16 VAC with 20A transformer
(14-18 VAC 50/60 Hz range)
24 VDC 1 A (20 to 30 VDC range)
Input Current L-4PCBA
Standby – 210 mA
Maximum – 600 mA
L-4/L-4K
Standby – 220 mA
Maximum – 720 mA
Battery (L-4/L-4K) BT-05
Type SLA (Sealed Lead Acid)
Voltage 12 V
Capacity 800 mAh
Battery (L-4/L-4K) BT-16
Type NiMH (Nickel Metal Hydride)
Voltage 12 V
Capacity 2 Ah
Battery (L-4PCBA)
Type SLA
Voltage 12 VDC
Capacity 5 Ah or 7 Ah

System Technical Specifications
10 AuraSys™ L-4 User Guide
Environmental Characteristics
Operating Environment Indoor use only
Operating Temperature Range -15°C to 44°C (5°F to 111.2°F)
Operating Humidity Range 0 to 95% (non-condensing)
RFI Protection > 20 V/m up to 1000 MHz
Supervision Tamper-proof system with constant supervision
Mechanical Specifications
Dimensions:
L-4PCBA
Height x Width
L-4/L-4K
Height x Width x Depth
L-4C/L-4CL/L-4CU
Height x Width x Depth
L-4D/L-4DL/L-4DU
Height x Width x Depth
165 x 65 mm (6.5 x 2.6 in.)
130 x 170 x 38 mm
(5.1 x 6.7 x 1.5 in.)
254 x 255 x 92 mm
(10 x 10.04 x 3.62 in.)
374 x 286 x 109 mm
(14.72 x 11.26 x 4.29 in.)
Weight (without battery) PCBA – 102 g (3.6 oz.)
L-4 – 290 g (10.2 oz.)
L-4K – 303 g (10.7 oz.)
L-4C – 2.50 kg (5.51 lb.)
L-4CL – 2.55 kg (5.62 lb.)
L-4CU – 1.92 kg (4.23 lb.)
L-4D – 2.20 kg (4.85 lb.)
L-4DL – 2.25 kg (4.96 lb.)
L-4DU – 1.62 kg (3.57 lb.)

Operating the AuraSys L-4 System
AuraSys™ L-4 User Guide 11
3. Operating the AuraSys L-4 System
3.1 About Everyday Operation
The AuraSys L-4 system allows you to insure the security of your home while
you are home and while you are away. The system allows you to control
attached sub-systems and appliances such as garage doors, lights, heating, air
conditioner, and more via an expandable PGM output.
The three types of panels are:
L-4 – plastic enclosure supplied, with a 3-state key switch
L-4K – plastic enclosure supplied, with a 6-button keypad for arming and
disarming
L-4 PCBA – no enclosure; adaptable for installation in customer-supplied
cabinet
However, from the user’s perspective, the primary operational interface is the
attached keypad. Sections 3.2 and 3.4 describe the typical use of the attached
keypad in a home application.
3.2 Using the Keypad
The system allows you to choose from a range of keypads. Minimally, all of the
supported keypads provide the following features:
Easy to use 3” x 4” keypads
3 function buttons with indicators
Zone indicators including Bypass indicator
System Trouble and status indicator
In addition, the following features are unique to the KC-04 model and KD-04
model, respectively.
KC-04 (LCD model) provides a clock
KD-04 (Dot Matrix model) provides a clock and features with a Dot-Matrix
Alarm areas
For help in selecting the appropriate keypad for your needs, consult with your
Rosslare product sales representative or refer to the product information
available on the Rosslare website: www.rosslaresecurity.com.

Operating the AuraSys L-4 System
12 AuraSys™ L-4 User Guide
3.2.1 About the KE-06/KE-04
The KE-06 and KE-04 are keypads with LED indicators and buttons.
Figure 1: KE-04 LED Keypad Model
3.2.2 About the KC-06/KC-04
The KC-06 and KC-04 are keypads with LED indicators and buttons and also
have an LCD screen, displaying the hour in 24h or AM/PM format. The LCD
backlight is off unless set to always be on. It turns on per occurrence of events
which cause MMI indications change or from any key press. It goes off
automatically 5 minutes after the last event.
3.2.3 About the KD-06/KD-04
The KD-06 and KD-04 are keypads with LED indicators and buttons that also
feature a digital readout and clock displaying the hour in 24h or AM/PM
format. The chief added value of the KD digital keypad is that alarms are
described in detail.
Indicators
Bar
Function
Buttons
Numeric /
Programming Pad
Buzzer
Grill

Operating the AuraSys L-4 System
AuraSys™ L-4 User Guide 13
Figure 2: KC/KD-04 Digital Keypad Models
3.2.4 Keypad User Functions
The keypad user functions are explained in Table 1. Note that the keypad
functions shown in the table are common to all keypad models.
Table 1: AuraSys L-4 Keypad User Functions
Feature Icon Description
AWAY
Red when armed Away
Home
Red when armed Home.
Flashes red when armed perimeter
Disarm
Green when disarmed and ready to arm
Bypass
Orange when zone(s) bypassed
Function
Buttons
Numeric /
Programming Pad
Buzzer Grill

Operating the AuraSys L-4 System
14 AuraSys™ L-4 User Guide
3.2.5 Indicators Bar
The AuraSys L-4 system supports a range of operational indicators that can be
viewed on the keypad indicators bar.
Figure 3: KE-04, KC-04 and KD-04 Keypad Indicators Bar (example)
The indicators that make up the indicator bar are described briefly in Table 2.
For a detailed description of how to use these functions refer to the keypad’s
product manual.
Table 2: AuraSys L-4 Indicators Bar
Feature Icon Description
Clock (LCD)
The clock flashes if time is not set or on
clock loss
ALARM Illuminated label indicating an alarm in the
system
Zones
8 Red illuminated zone number indicators
Alarm in Memory
Illuminated shape status indicators for
Alarm in Memory
Trouble
Illuminated shape trouble indicator
Low Battery
Illuminated shape low battery indicator
Power
Illuminated shape power fail indicator
Communication
Illuminated shape indicating
communication failure
Programming
Illuminated shape programming mode
indicator

Operating the AuraSys L-4 System
AuraSys™ L-4 User Guide 15
3.2.6 Numeric Programming Pad
The AuraSys L-4 system enables all numerical functions (for example,
installation programming or user code entry) from the attached (and active)
numeric keypad.
Figure 4: Numeric Programming Keypad
The programming function buttons described in Table 3 are applicable to all
programming procedures described in this document.
Table 3: AuraSys L-4 Programming Function Buttons
Programming
Function
Keypad Icon Description
Idle (mode)
PGM ON/OFF buttons, turn on/off the
PGM output
CHIME ON / OFF buttons, toggles chime
on/off
Bypass: if enabled, toggles bypass mode
per bypassed zones programmed (see
Bypass mode) as defined in
Arming/Disarming section.
Mute: if enabled, mutes local buzzer
indications (except trouble beeps which
are set by the installer).
MEMORY: alarm memory zones display
TROUBLE: trouble zones display
Enter Programming with Installer code

Operating the AuraSys L-4 System
16 AuraSys™ L-4 User Guide
Programming
Function
Keypad Icon Description
Enter Programming with Master code
Enter
ENTER (#) key confirms selection or value
entry in Programming mode.
Esc
ESC () key cancels and exits an existing
entry on programming mode.
Emergency
Long pressing, (over 2 seconds)
on 1 and 3
buttons at once start an emergency alarm.
Behaves according to the panel’s
emergency definitions.
3.2.7 Audible Indicators
The AuraSys L-4 system keypads sound a range of audible indicators that notify
the user of programming or status changes in the system. The audible
indicators are described in the Table 4.
Table 4: AuraSys L-4 Audible Indicators
Audible
Indicator
Description
Key
Beeps
Any key press generates a short (150ms) beep.
Approval
Beeps
Keypad valid entry approval is indicated by a sequence of four short
beeps.
Wrong Beeps Invalid or wrong entries are indicated by a single, long beep.
Warning
Beeps
In case of a general warning condition, the system sounds 2 short
beeps every 1 second.
Error
Beep
In case of an error condition due to a wrong entry or system rejection
of a command or request, the keypad sounds a continuous, 1 second
long beep.
Trouble
Beeps
If enabled, the system keypads sounds trouble beeps on a trouble
condition.
Trouble beeps are a sequence of 3 short beeps, repeating.
Chime
Beeps
The keypad buzzer emits 3 chime sounds configured by the installer.

Operating the AuraSys L-4 System
AuraSys™ L-4 User Guide 17
3.3 Operational Modes
This section describes the three operational modes that are controlled from the
keypad:
Disarmed mode
Bypass mode
Armed mode
3.3.1 Disarmed Mode
In Disarmed mode (Idle mode if it is not in programming or memory/trouble
display modes), the indicators behave as follows:
Clock (LCD versions) displays the hour in 24h or AM/PM format as set.
On clock loss, the clock display (LCD) blinks 00:00 every second, awaiting
the clock to be set (in LED models, a clock loss is treated as a trouble
condition and is indicated accordingly). In this event, contact your installer.
Memory and Trouble indicators are continuously lit or off, according to
the status and per their display modes.
The ALARM indication is off.
Function button/indicators behave as described in Section 3.2.4.
The buzzer generates warning beeps (in trouble conditions) – if trouble
beeps are set and in trouble condition – and generates key beeps on
keypad operations.
On LCD models, the LCD backlit is off unless set to Always On. It turns on
per occurrence of events which cause the indicators to change, or per any
key press. It goes off automatically 5 minutes after the last event.
You can disarm a panel, whether alarmed or not, from the keypad as follows:
Press the Disarm key. The keypad initiates the Code Entry process.
Once the code entry is approved by the control panel: the Disarm/Ready
indicator turns on, the keypad updates the indicator status, the buzzer
emits the acknowledge sound and the keypad returns to idle state.
3.3.2 Bypass Mode
If zones are set to be bypassed and bypass is enabled, the bypassed zone
indicators blink twice quickly (200ms/200ms) every two seconds and the
bypass indicator illuminates. The zone indicators are not active when the
system is armed. On arming a bypassed system, the buzzer generates a
sequence of 8 fast beeps before starting the arming process. If enabled and
defined, zone bypassing is activated by pressing the Bypass [0] key for 2
seconds. This is allowed only when the system is disarmed. According to
system definitions, a valid master code or user code entry is required to
activate the bypass state. The same operation toggles back to un-bypass state.

Operating the AuraSys L-4 System
18 AuraSys™ L-4 User Guide
3.3.3 Armed Mode
Zone indicators do not behave in the same way in armed mode as they do in
disarmed mode. Here, trouble beeps behave as you set them. The system
accepts arming requests from the keypad when disarmed, or when armed for
different arming modes (see Section 4.2).
3.4 User Modes
There AuraSys L-4 system supports 3 user modes, which are described in this
section:
Installer
Master Programmer
User
3.4.1 Installer Level
The system allows only a single installer session access at a time and from a
single keypad. All other keypads are locked.
The installer level has authorization to:
Operate user and master level functions
Access all system configuration settings
Update firmware
Add or change user access codes
Change a user relationship
For a detailed description of installer-level programming functions, as well as
the required programming tables, refer to the AuraSys L-4 Installation Guide.
3.4.2 Master Programmer
The master level has a unique code that can be changed but not erased. The
default code is 1000. User and master level accesses are provided by entering
the basic and master codes respectively. The system does not allow installer
access without prior knowledge of the master code.
In addition to the user-level programmable functions, the master can:
Change the master code
Change the duress code
Change, add, or delete basic-level user codes
Change basic level arming/disarming options
Set system time and date
Program private phone numbers

Operating the AuraSys L-4 System
AuraSys™ L-4 User Guide 19
3.4.3 User
Each user code is assigned for arming/disarming the system. When a wireless
expansion is installed in the system, up to eight users can be assigned (by the
master programmer) to use RF keys, in addition to using the manual code
entry. Each user can be programmed by the master programmer or the
installer to:
exercise part or all arming options
disarm the system
set bypassing zones
view Memory and Trouble event logs contents
manually control PGM outputs
enable/disable the chime
enable/disable keypad Mute
3.4.4 Additional Codes
The system accepts an additional code for duress. This code is used for
disarming the system when it is under threat. However, once entered, the
system immediately reports a duress situation (Contact ID) without entering
the alarm mode or activating the sounder and outputs.
3.4.5 Master Configuration
Once the L-4 system is installed, you can program, modify or update the
system from one of the attached keypads. It is a necessary prerequisite for the
system to recognize the master prior to attempting any programming.
The master can assign codes to users, modify access codes, set system time-
and-date, and reset to factory defaults. This section describes the following
procedures for the master level user, as well the system responses.
3.4.6 Entering Master Programming Mode
For the master programmer to enter the system:
1. Press [
][9] one after the other; a beep is heard.
2. Key in the 4-digit master code (default: 1000).
3. Verify the status of the following indicators:
The [P] indicator starts flashing at a medium rate, indicating a
programming code request.
On successful code entry, the [P] indicator becomes lit constantly. It
remains on until exiting programming mode.
The system is now ready to accept parameters from the master.
4. Press (ESC) for three seconds to exit programming mode.
Keypads belonging to the same panel are locked out.

Operating the AuraSys L-4 System
20 AuraSys™ L-4 User Guide
3.4.7 Entering Master Programming Parameters
Once the system is ready to accept parameters, the master programmer must
press #(ENTER) followed by an item number (see Sections 3.4.7.1 and
3.4.7.6). This action locates the proper parameter to be programmed.
During the programming procedure, you hear beeps. Correct and appropriate
entries are acknowledged by a long beep (ACK); wrong entries or erroneous
values are negatively acknowledged by three short beeps (NACK).
To enter master programming parameters:
1. Press #(ENTER) to access the parameter entry mode.
2. Enter an item number from the user codes described in Sections 3.4.7.1
and 3.4.7.6.
The system returns to zone indicator 15 (blinking); indicator 14 is on;
other indicators are off.
3. The panel is now ready and waiting for the next selection.
3.4.7.1 User Code Options
User Default User Default
[01] (0000) [05] (0000)
[02] (0000) [06] (0000)
[03] (0000) [07] (0000)
[04] (0000) [08] (0000)
By default, there are no codes for the users; setting back to code 0000 disables
that user.
3.4.7.2 Duress Code
Section Default
[21] (0000)
Example: 21 4567
By default, there is no Duress code; setting back to code 0000 disables it.
3.4.7.3 Master User
Section Default
[31] (1000)
Example: 31 9876
The default values of Installer, Duress, User and Master codes set according to
the length of the access code.
Other manuals for AuraSys L-4
1
This manual suits for next models
2
Table of contents
Other Rosslare Security System manuals
Rosslare
Rosslare HLX-40 User manual
Rosslare
Rosslare AYC-Q65 Assembly instructions

Rosslare
Rosslare HLX-40 Assembly instructions

Rosslare
Rosslare SA-95 User manual

Rosslare
Rosslare HLX-40 User manual

Rosslare
Rosslare HOME LOGIX HLX-24 Assembly instructions

Rosslare
Rosslare AuraSys L-2 Assembly instructions

Rosslare
Rosslare HLX-40 User manual
Rosslare
Rosslare HLX-40 User manual

Rosslare
Rosslare HLX-40 User manual