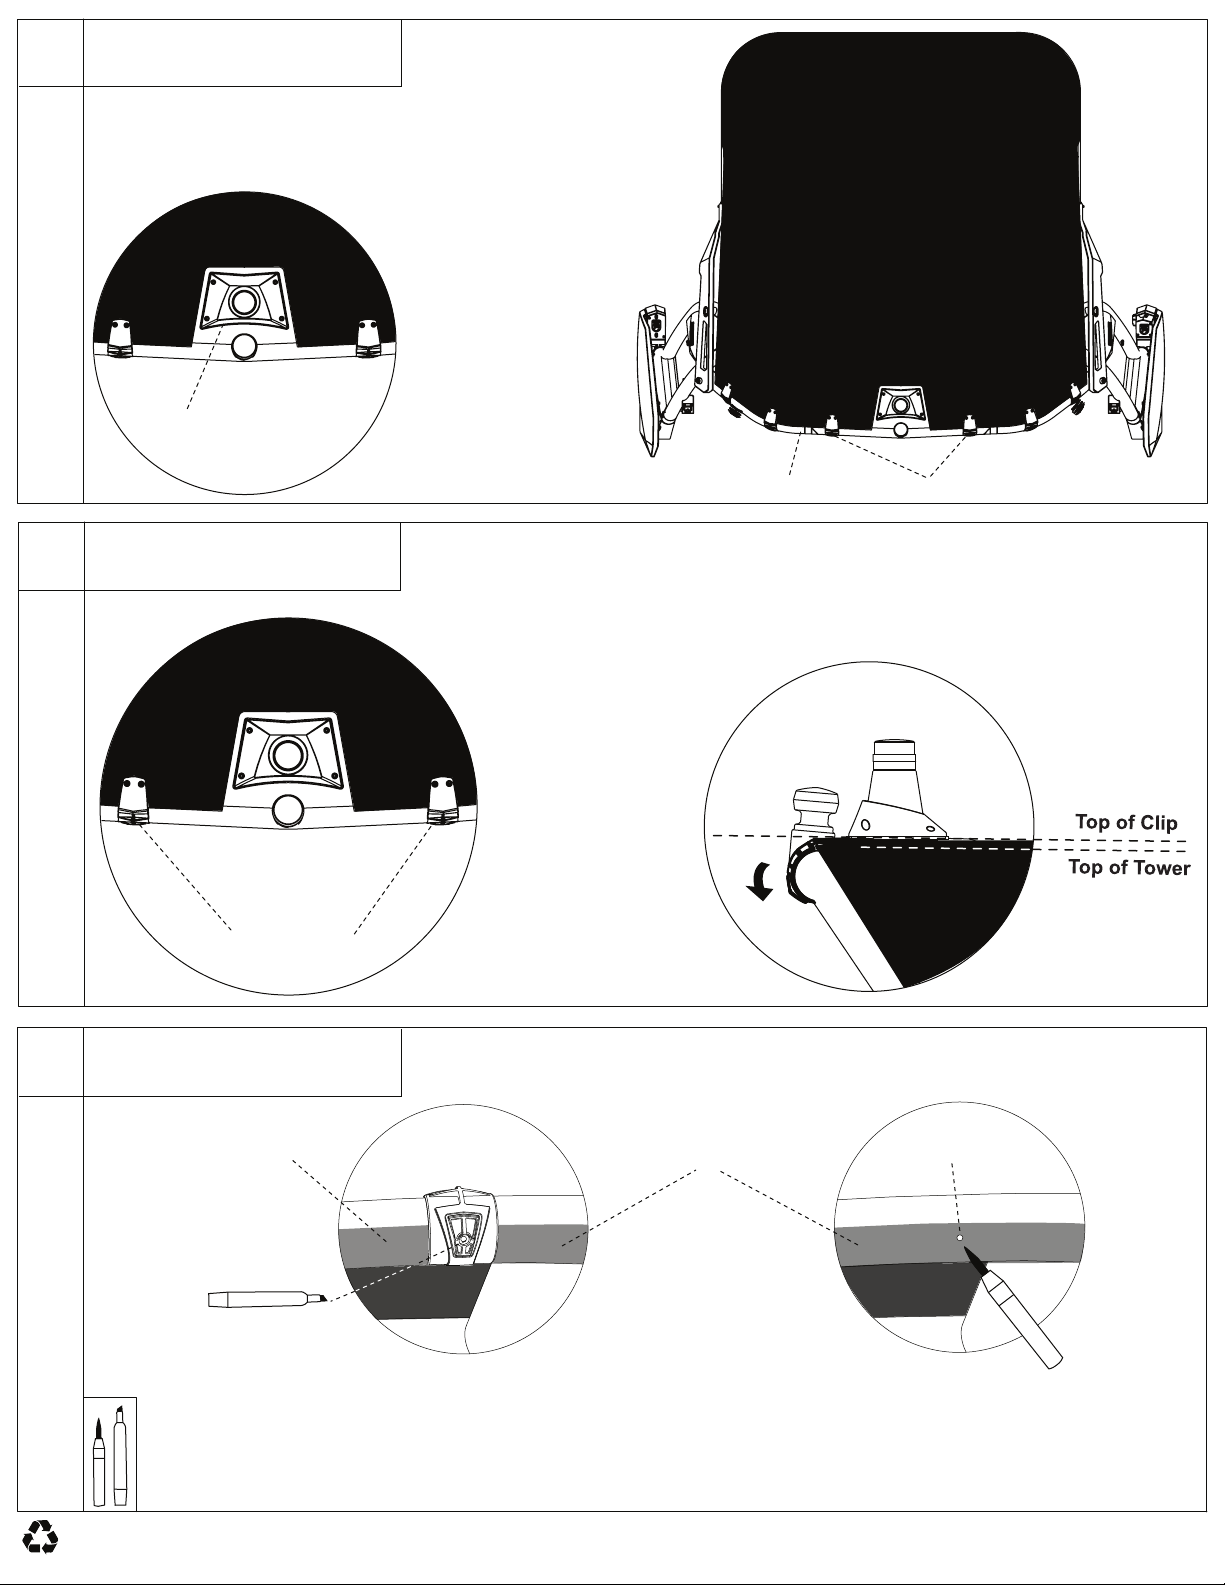
E
Unzip the bimini boot from the bimini frame. Unroll
your fabric, clips and middle bow. Rotate the
frame upwards and insert the quick release pins
into the arms only. Clip all 6 clips onto the rear
tower tube.
F
Apply a strip of 2 inch low
tack masking tape along the
entire rear tower tube from
bimini arm to bimini arm.
The strip should cover the
portion of rear tube that
faces the interior of the boat.
This step is essential to
avoid any accidental
scratches to the tower paint.
Pg. 3/14
Bimini Boot Removal
Bimini Boot
Low tack masking tape
2 inch Low Tack
Masking Tape
Rear Tube
***IMPORTANT***
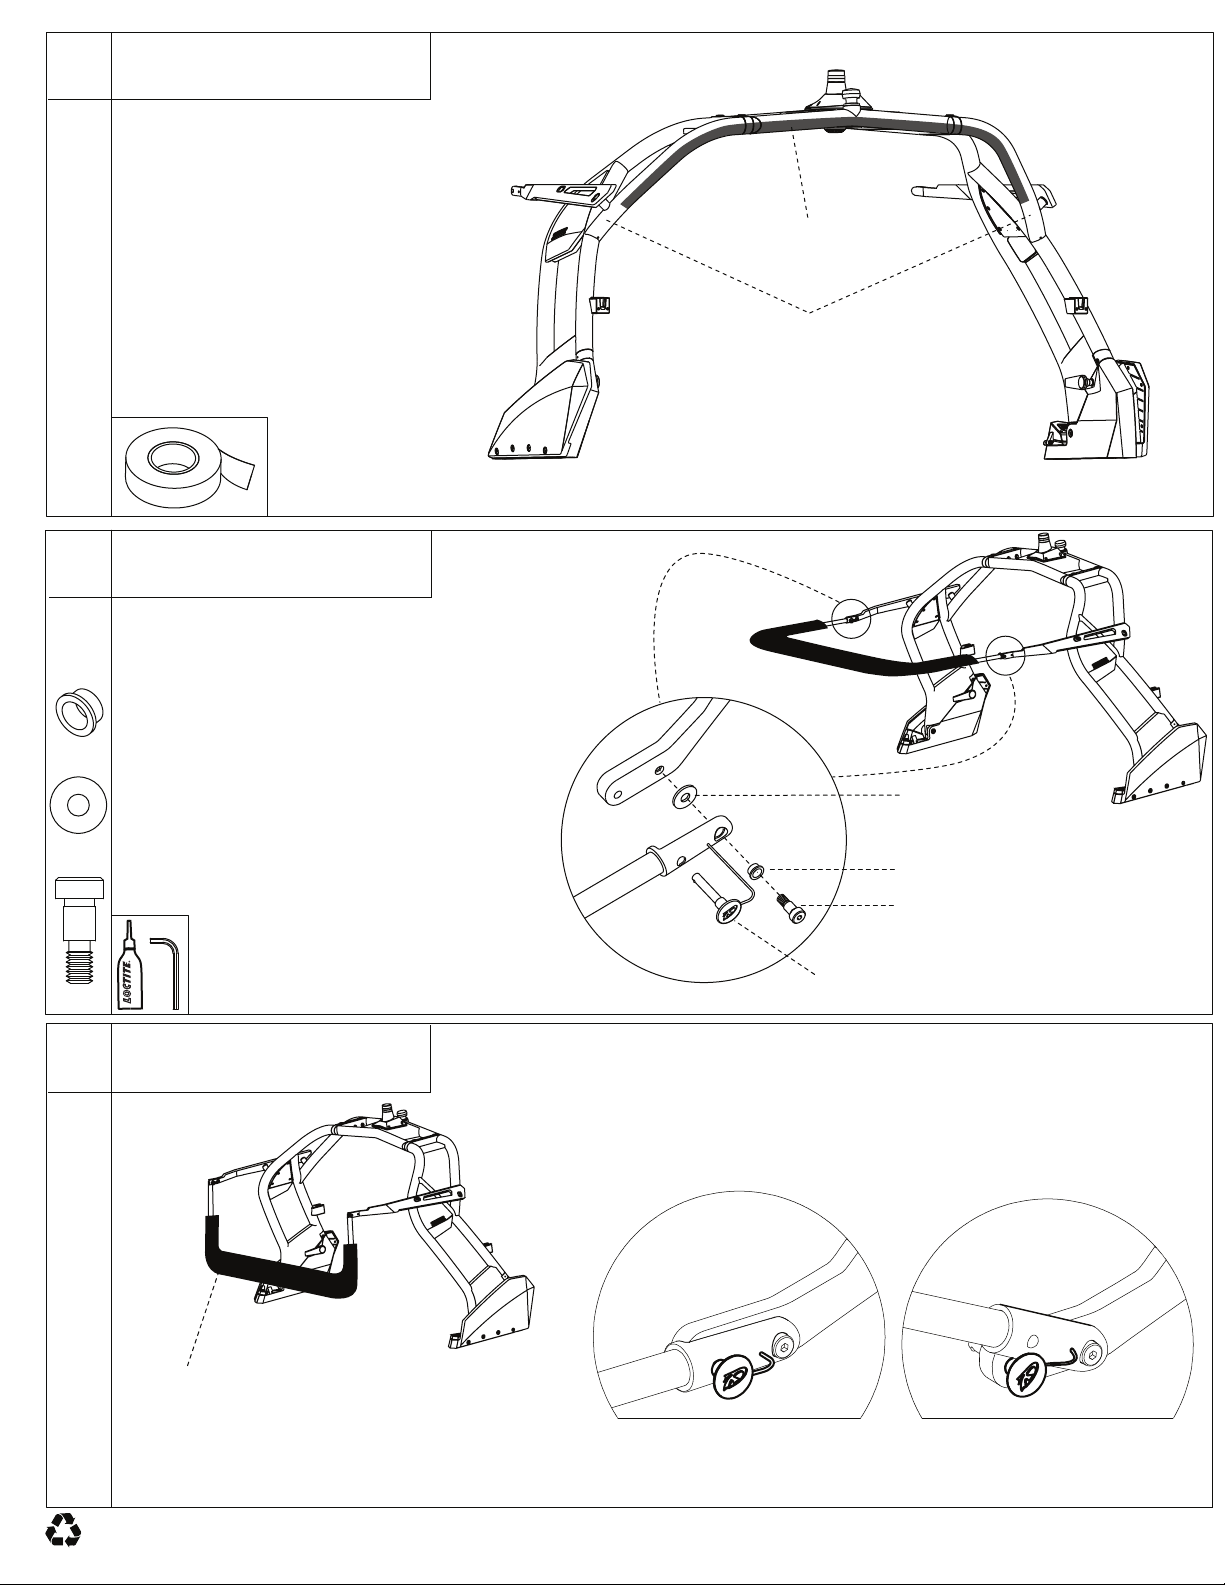
D
THREADLOCKER
3/16"
Bimini Frame Assembly
x2
Remove the plastic wrapping from your
bimini frame. Grab the 2 shoulder
bolts, 2 pivot washers, and 2 shoulder
bolt washers from your bimini box.
Apply red Loctite to the 2 bolts. Attach
the bimini frame to the bimini arms as
illustrated. Make sure the pivot wash-
ers are sandwiched between the bimini
arms and the bimini frame and that the
shoulder bolt washers are under the
heads of the shoulder bolts. Insert the
folding quick release pins.
x2
**This step requires 2 people**
***To avoid installing the frame upside down make sure
the middle bow bimini hinges are facing upward***
Shoulder Bolt
Pivot Washer
Folding Quick Release Pin
Shoulder Bolt Washer
(These may already be installed in your frame)
x2
Position :
- Bimini is in use.
- For initial Installation of
bimini clip harware
Position :
- For clipping or
unclipping bimini clips
If you plan to clip/unclip the bimini clips, your bimini frame
must be rotated upwards with the quick release pins in the
ARMS ONLY.
**Refer to page 14 for Alignment Tip & Tricks**