Rotary RWC101 Manual

O
P
E
R
A
T
I
O
N
&
M
A
I
N
T
E
N
A
N
C
E
M
A
N
U
A
L
© May 2022 by Vehicle Service Group. All rights reserved. CO11823.8
IMPORTANT Any damage caused by failure to follow the instructions in this manual or improper machine
use shall relieve the manufacturer of all liability.
O
P
E
R
A
T
I
O
N
&
M
A
I
N
T
E
N
A
N
C
E
M
A
N
U
A
L
RWC101 (R501Plus) Tire Changer
7504-M003-01
Rev. n. 01 (05/2022)

2
SUMMARY
GENERAL DESCRIPTION __________________________ 3
SYMBOLS USED IN THE MANUAL __________________ 4
PLATES LOCATION DRAWING______________________ 5
1.0 GENERAL INTRODUCTION ___________________ 7
1.1 Introduction __________________________________ 7
2.0 INTENDED USE ____________________________ 7
2.1 Training of personnel ___________________________ 7
3.0 SAFETY DEVICES___________________________ 8
3.1 Residual risks_________________________________ 8
4.0 IMPORTANT SAFETY INSTRUCTIONS __________ 8
4.1 General safety rules____________________________ 9
5.0 PACKING AND MOBILIZATION FOR TRANSPORT 10
6.0 UNPACKING _____________________________ 10
7.0 MOBILIZATION ___________________________ 11
8.0 WORKING ENVIRONMENT CONDITIONS _______ 11
8.1 Working position _____________________________ 11
8.2 Working area ________________________________ 11
8.3 Lighting ____________________________________ 12
9.0 EQUIPMENT ASSEMBLY____________________ 12
9.1 Anchoring system ____________________________ 12
9.2 Assembly procedures _________________________ 13
9.3 Electrical connections _________________________ 15
9.4 Oil check on oil-pressure power unit______________ 16
9.5 Check of motor rotation direction ________________ 16
9.6 Electrical checks _____________________________ 16
10.0 CONTROLS ______________________________ 17
10.1 Control device _______________________________ 17
11.0 USE OF THE EQUIPMENT ___________________ 18
11.1 Precaution measures during tire removal and fitting__ 18
11.2 Preliminary operations_________________________ 18
11.3 Preparing the wheel __________________________ 18
11.4 Wheel clamping______________________________ 18
11.5 Bead breaker arms’ functioning__________________ 20
11.6 Tubeless tires________________________________ 20
11.6.1 Bead breaking____________________________ 20
11.6.2 Demounting______________________________ 21
11.6.3 Mounting________________________________ 22
11.7 Tires with inner tube __________________________ 24
11.7.1 Bead breaking____________________________ 24
11.7.2 Demounting______________________________ 24
11.7.3 Mounting________________________________ 25
12.0 ROUTINE MAINTENANCE___________________ 26
13.0 TROUBLESHOOTING TABLE _________________ 29
14.0 TECHNICAL DATA _________________________ 31
14.1 Technical electrical data _______________________ 31
14.2 Technical mechanical data _____________________ 31
14.3 Dimensions _________________________________ 32
15.0 STORING ________________________________ 33
16.0 SCRAPPING _____________________________ 33
17.0 REGISTRATION PLATE DATA_________________ 33
18.0 FUNCTIONAL DIAGRAMS ___________________ 33
Drawing number A - Wiring diagram____________________ 34
Drawing number B - Hydraulic diagram _________________ 40

3
GENERAL DESCRIPTION FIG. 1
1
20
10
2
3
4
5
6
7
8
9
11
12
13
14
15
16
17
19
21
19
18
KEY
1 - Main switch
2 - Grease-holder ring
3 - Rear bead breaker roller
4 - Self-centering chuck
5 - Chassis
6 - Tool
7 - Bead lever
8 - Rear bead breaker roller holder arm
9 - Rear bead breaker roller movement carriage
10 - Tool positioning handgrip
11 - Electric cabinet
12 - Control unit
13 - Lifting hook
14 - Front bead breaker roller
15 - Front bead breaker roller holder arm
16 - Handwheel for adjustment of rear bead breaker roller
working position
17 - Tire loading platform
18 - Brush
19 - Standard clamp protections for alloy rims
20 - Mounting grease
21 - Clamp for alloy rims (optional)

4
SYMBOLS USED IN THE MANUAL
Symbols Description
Read instruction manual.
Wear work gloves.
Wear work shoes.
Wear safety goggles.
Mandatory. Operations or jobs to be per-
formed compulsorily.
Danger! Be particularly careful.
Warning. Be particularly careful
(possible material damages).
Symbols Description
Move with fork lift truck or pallet truck.
Lift from above.
Note. Indication and/or useful information.
Technical assistance necessary.
Do not perform any intervention.
Caution: hanging loads.
Danger: tires could drop.

5
PLATES LOCATION DRAWING
FIG. 2
VSB2166000
VS99990758
VS999919030
VS999918410
VSB2668000
VSB1541000
VSB4244000
VS99990758
VSB2167000
VSB1594000
VS999916311
VSB2668000
VSB2166000
VSB6247000
VS999923770
VSB4244000
VS999923160
VS999923780
VS99990758
VS999923400
VS999923360
VS999923350
VS999922390
VS999914290
VSB4221000

6
Code numbers of plates
VSB1541000 Danger plate
VSB1594000 Date indicating plate
VSB2166000 Bead breaker danger plate
VSB2167000 Protective clothing plate
VSB2668000 Wheel lifting device danger plate
VSB4221000 Grounding plate
VSB4244000 Rotating parts danger plate
VSB6247000 “Deflate tire…” plate
VS99990758 Electricity danger plate
VS999914290 Serial number plate
VS999916311 Rubbish skip plate
VS999918410 Self-centering chuck plate
VS999919030 Plate for joysticks
VS999922390 Overload protection plate
VS999923160 Prop 65 Attention plate
VS999923350 For indoor use plate only
VS999923360 Disconnect power supply plate
VS999923400 UL-CSA ready plate
VS999923770 220 V - 3 Ph - 60 Hz - 25 A plate
VS999923780 Rotary plate
IF ONE OR MORE PLATES ARE MISSING FROM THE EQUIPMENT OR BECOMES DIFFICULT TO READ, REPLACE IT AND
QUOTE ITS/THEIR CODE NUMBER/S WHEN REORDERING.

7
SOME OF THE PICTURES AND/OR DISPLAY
SCREEN PAGES PRESENT IN THIS MANUAL
HAVE BEEN OBTAINED FROM PICTURES OF
PROTOTYPES, THEREFORE THE STANDARD
PRODUCTION MACHINES AND ACCESSORIES
CAN BE DIFFERENT THAN PICTURED.
1.0 GENERAL INTRODUCTION
This manual is an integral part of the equipment and must be retained
for the whole operating life of the equipment.
Carefully study this manual. It contains important instructions re-
garding FUNCTIONING, SAFE USE and MAINTENANCE.
KEEP THE MANUAL IN A KNOWN, EASILY AC-
CESSIBLE PLACE FOR ALL SERVICE TECHNI-
CIANS TO CONSULT IT WHENEVER IN DOUBT.
THE MANUFACTURER CAN NOT BE HELD RE-
SPONSIBLE FOR ANY DAMAGE TO THE SHOP,
EQUIPMENT OR CUSTOMER WHEEL/TIRE THAT
MAY OCCUR WHEN THE INSTRUCTIONS GIVEN
IN THIS MANUAL ARE NOT FOLLOWED. DISRE-
GARDING THESE INSTRUCTIONS MAY CAUSE
INJURY OR DEATH.
1.1 Introduction
Thanks for purchasing the R501Plus tire changer! The R501Plus is
designed and built for professional garages. The tire changer is
easy to use with safety in mind. Following the care and maintenance
outlined in this tire changer manual your tire changer will provide
years of service.
2.0 INTENDED USE
The equipment described in this manual is a tire changer that
uses two systems:
• anelectricmotorcoupledtoagearboxtohandlethetirerota-
tion, and
• ahydraulicpumpsystemtohandleclampingandmovementof
hydraulic cylinders to more mounting/dismounting tools.
The equipment is to be used only for the mounting and demount-
ing of any type of wheel with the whole rim (drop center and with
bead) with diameters and width values mentioned in “Technical
specifications” chapter.
The equipment is NOT intended to be used for tire inflation.
THIS EQUIPMENT MUST ONLY BE USED FOR
THE PURPOSE FOR WHICH IT IS SPECIFICALLY
DESIGNED.
ANY OTHER USE IS CONSIDERED IMPROPER
AND THEREFORE UNACCEPTABLE.
THE MANUFACTURER CANNOT BE HELD RE-
SPONSIBLE FOR ANY DAMAGE CAUSED BY
IMPROPER, ERRONEOUS, OR UNACCEPTABLE
USE.
2.1 Training of personnel
The equipment to be operated only by suitably trained and author-
ized personnel.
Giventhecomplexityoftheoperationsnecessarytomanagethe
equipment and carry out the operations safely and efficiently, the
personnel must be trained in such a way that they learn all the
information necessary to operate the equipment as intended by
the manufacturer.
CAREFULLY READING THIS INSTRUCTION
MANUAL AND A SHORT PERIOD OF TRAIN-
ING BY SKILLED PERSONNEL REPRESENT A
SATISFACTORY FORM OF TRAINING.

8
4.0 IMPORTANT SAFETY INSTRUCTIONS
When using your garage equipment, basic safety precautions should
always be followed, including the following:
1. Read all instructions.
2. Care must be taken as burns can occur from touching hot parts.
3. Do not operate equipment with a damaged cord or in case the
equipment has been dropped or damaged, until it has been
examinedbyaqualiedserviceperson.
4. Do not let a cord hang over the edge of the table, bench, or
counter or come in contact with hot manifolds or moving fan
blades.
5. Ifanextensioncordisnecessary,acordwithacurrentrating
equal to or more than that of the equipment should be used.
Cords rated for less current than the equipment may overheat.
Care should be taken to arrange the cord so that it will not be
tripped over or pulled.
6. Always unplug equipment from electrical outlet when not in use.
Never use the cord to pull the plug from the outlet. Grasp plug
and pull to disconnect.
7. Let equipment cool completely before putting away. Loop cord
loosely around equipment when storing.
8. To reduce the risk of fire, do not operate equipment in the vicinity
of open containers of flammable liquids (gasoline).
9. Adequate ventilation should be provided when working on
operating internal combustion engines.
10. Keep hair, loose clothing, fingers, and all parts of body away
from moving parts.
11. To reduce the risk of electric shock, do not use on wet surfaces
orexposetorain.
12. Use only as described in this manual. Use only manufacturer’s
recommended attachments.
13. ALWAYS WEAR SAFETY GLASSES. Everyday eyeglasses only
have impact resistant lenses, they are not safety glasses.
SAVE THESE INSTRUCTIONS
3.0 SAFETY DEVICES
DAILY CHECK THE INTEGRITY AND THE FUNC-
TIONALITY OF THE SAFETY AND PROTECTION
DEVICES ON THE EQUIPMENT.
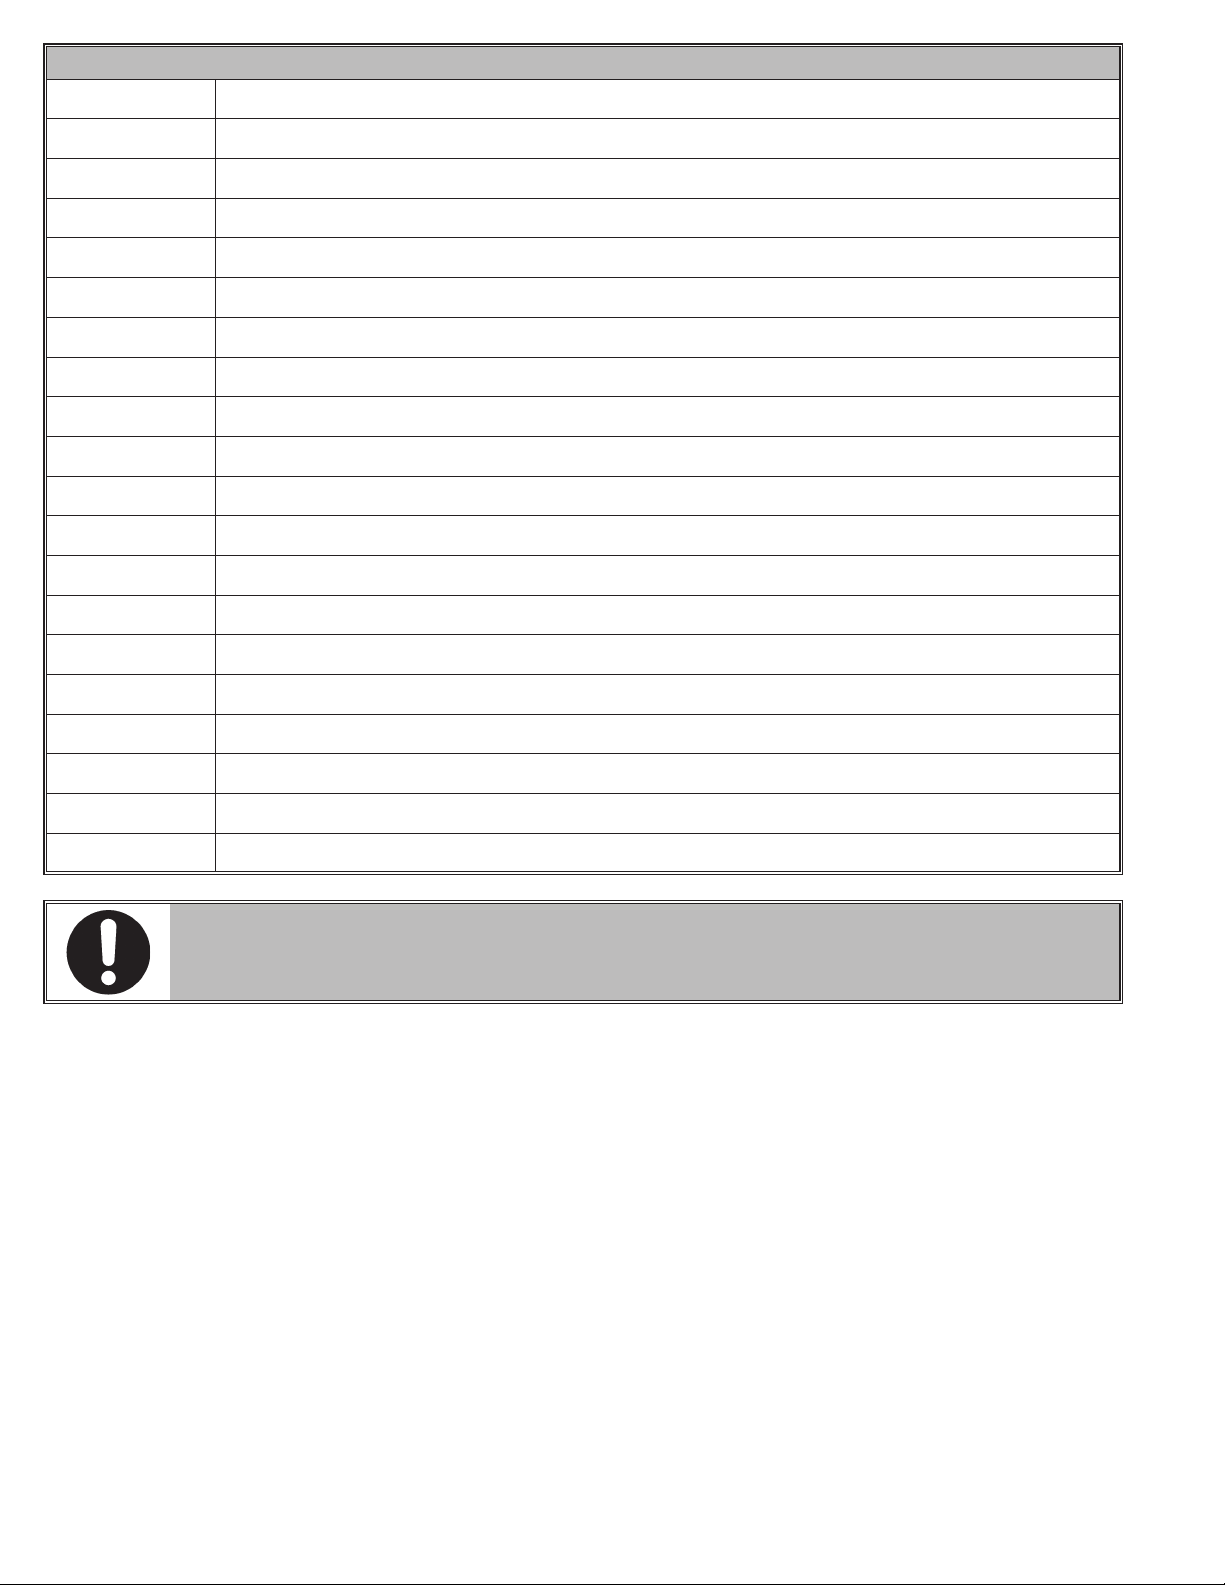
All the machines are equipped with:
• hold-to-runcontrols(immediatestopofoperationwhenthecontrol
is released);
• controlslogicdispositiontopreventtheoperatorfromdangerous
mistakes;
• thermalswitchonthesupplylineofthepowerunitmotor:avoids
the motor overheating in case of intensive use;
NO MODIFICATION OR CALIBRATION OF THE
OPERATING PRESSURE OF THE MAXIMUM
PRESSURE VALVE OR OF THE HYDRAULIC
CIRCUIT PRESSURE LIMITER IS PERMITTED.
• controlledcheckvalveson:
- opening of self-centering chuck jaws,
- lifting of self-centering chuck.
These valves will stop unintended movement of the jaws and of
wheel clamping self-centering unit.
• Fusesontheelectricsupplylineofself-centeringchuckmotor;
• automaticpowersupplydisconnectwiththeopeningoftheelec-
tric cabinet.
•xedprotectionsandguards.
3.1 Residual risks
The equipment was subjected to a complete analysis of risks ac-
cording to reference standard EN ISO 12100.
Risks are as reduced as possible in relation with technology and
equipment functionality.
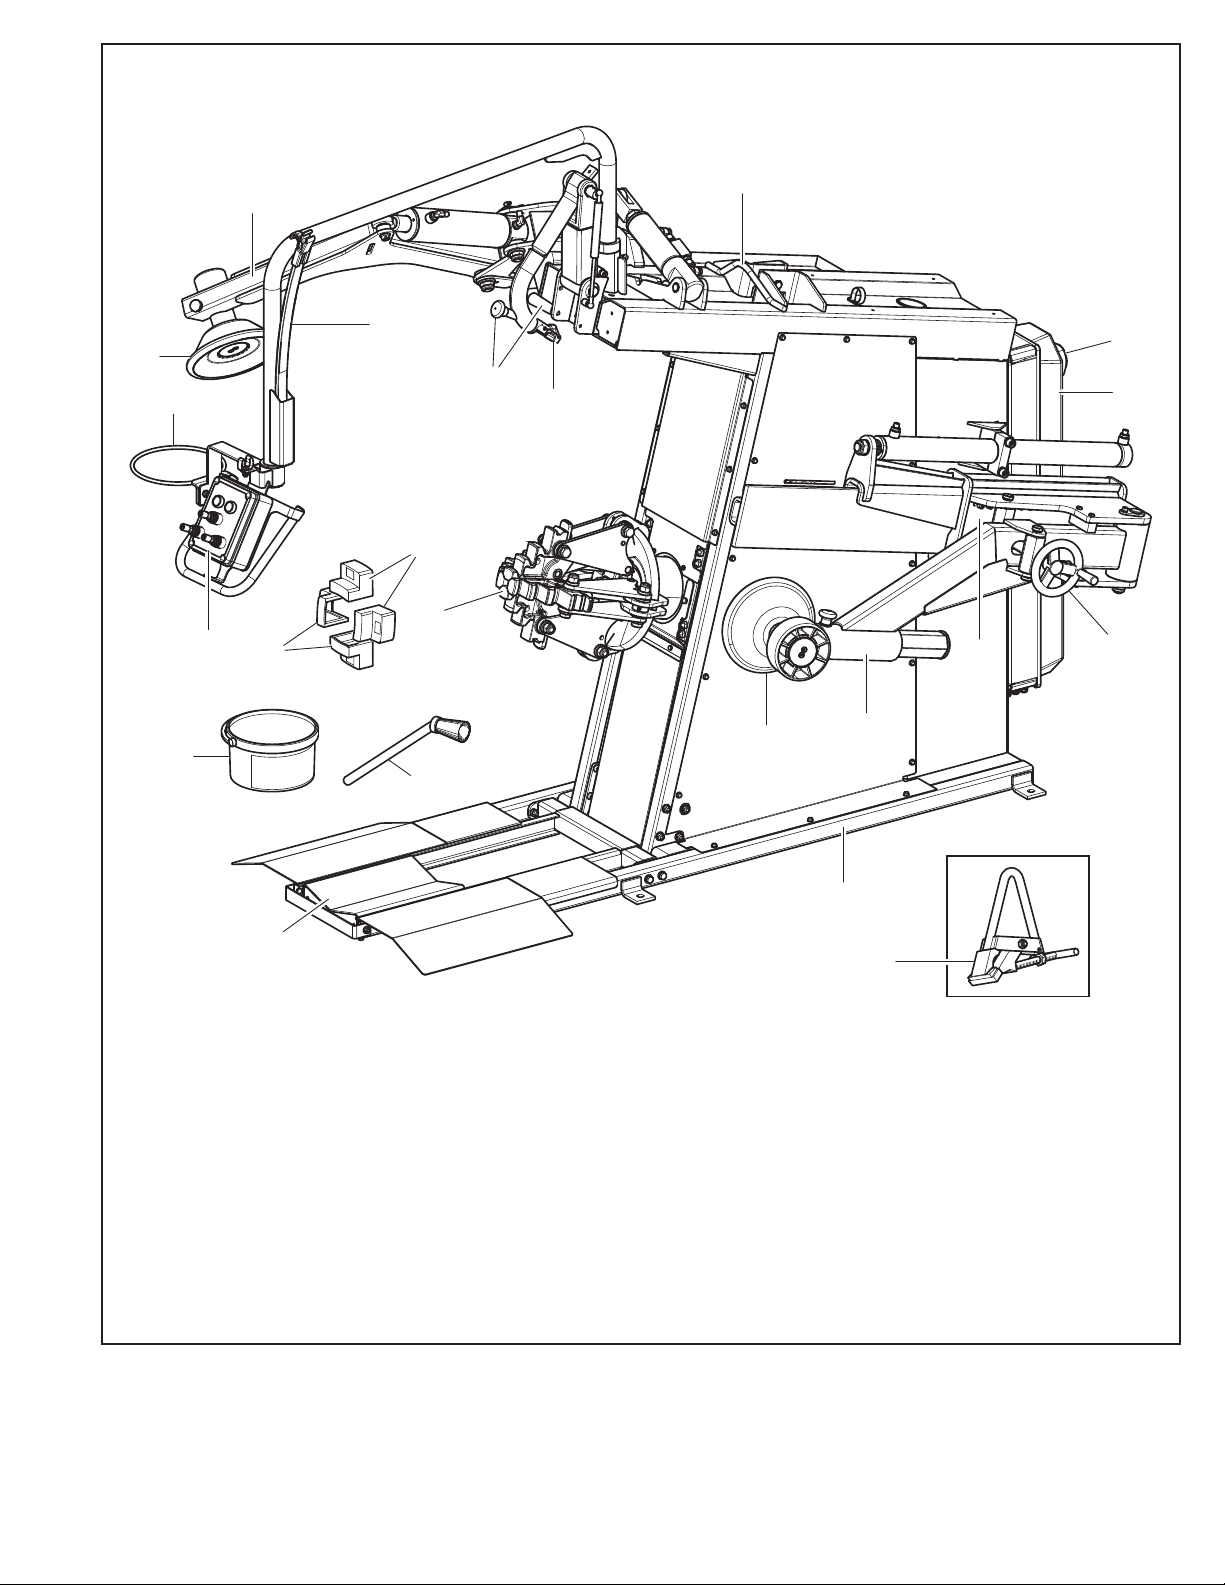
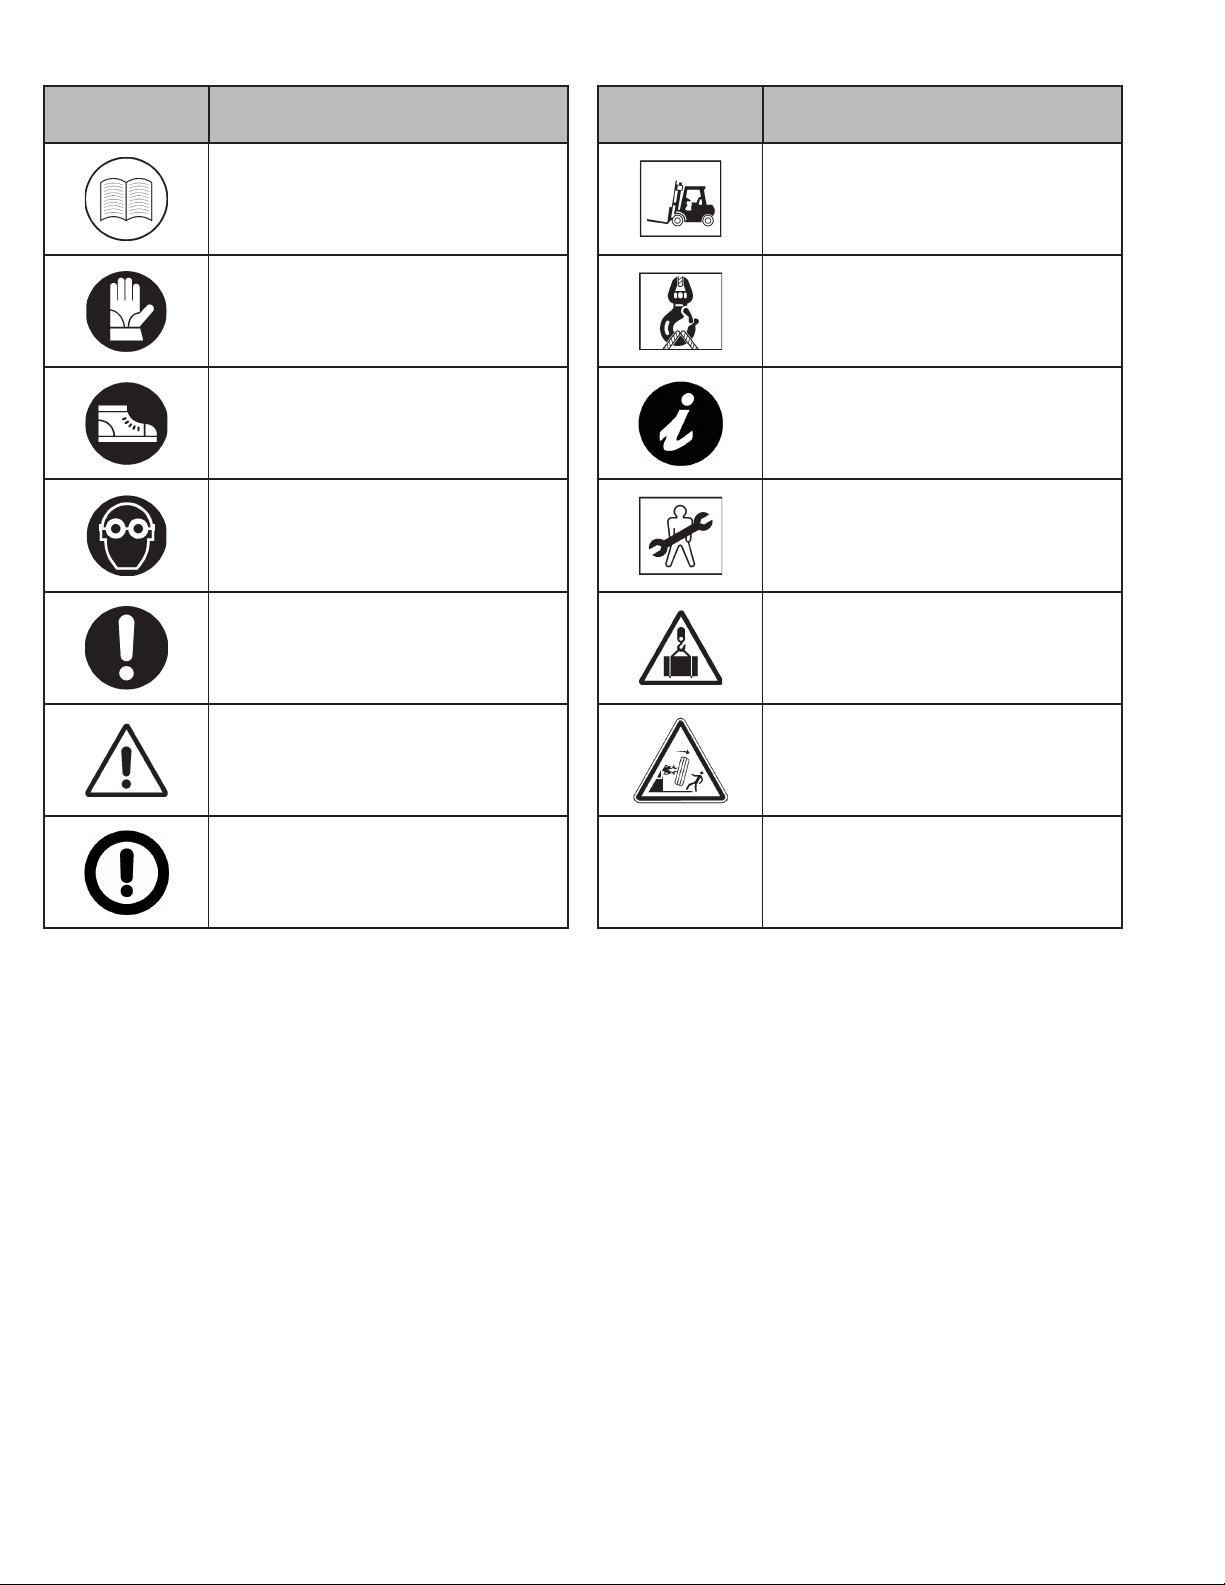
This manual stresses possible residual risks, also highlighted in
pictograms on the present manual and adhesive warning signals
placed on the equipment: their location is represented in “PLATES
LOCATION DRAWING” (see Fig._2).

9
4.1 General safety rules
• Anytamperingwithormodicationtotheequipmentnotprevi-
ouslyauthorizedbythemanufacturerexemptsthelatterfromall
responsibility for damage caused by or derived from said actions.
• Removingofortampering with the safetydevicesorwiththe
warning signals placed on the equipment leads to serious dangers
and represents a transgression of OSHA safety standards.
• Theequipmentmaybeusedonlyinareasfreefromthedanger
ofexplosionorre.
• Theuseofonlyoriginalaccessoriesandsparepartsisadvised.
Our machine is designed to function only with original acces-
sories.
• Theinstallationmustbeperformedbyqualiedpersonnelinfull
compliance with the instructions given below.
• Ensurethattherearenodangeroussituationsduringtheequip-
ment operating manoeuvres. Immediately stop the equipment if it
malfunctions and contact the customer service of the authorized
dealer.
• Inemergencyconditionsandbeforeanymaintenanceorrepair
work, isolate the equipment from energy sources by disconnecting
the power supply using the main switch.
• Ensurethattheareaaroundtheequipmentisfreeofpotentially
dangerous objects and that the area is oil free since this could
damage the tire. Oil on the floor is also a slipping hazard for the
operator.
THE MANUFACTURER DENIES ANY RESPON-
SIBILITY IN CASE OF DAMAGES CAUSED BY
UNAUTHORIZED MODIFICATIONS OR BY THE
USE OF NON ORIGINAL COMPONENTS OR
EQUIPMENT.
OPERATORS MUST WEAR SUITABLE WORK
CLOTHES, PROTECTIVE GLASSES AND GLOVES,
AGAINST THE DANGER FROM THE SPRAYING
OF DANGEROUS DUST, AND POSSIBLY LOWER
BACK SUPPORTS FOR THE LIFTING OF HEAVY
PARTS. DANGLING OBJECTS LIKE BRACELETS
MUST NOT BE WORN, AND LONG HAIR MUST
BE TIED UP. FOOTWEAR SHOULD BE ADEQUATE
FOR THE TYPE OF OPERATIONS TO BE CAR-
RIED OUT.
• Theequipmenthandlesandoperatinggripsmustbekeptclean
and free from oil.
• Theworkshopmustbekeptcleananddryandnotinanoutdoors
location. Make sure that the working premises are properly lit.
The equipment can be operated by a single operator at a time.
Unauthorized personnel must remain outside the working area,
as shown in Fig. 5.
Avoid any hazardous situations. Do not use this equipment when
the shop is damp or the floor slippery and do not use this equip-
ment out doors.
• Whenoperatingand servicing this equipment, carefullyfol-
low all applicable safety and accident-prevention precautions.
The equipment must not be operated by untrained personnel.
THE EQUIPMENT OPERATES WITH PRESSUR-
IZED HYDRAULIC FLUID.
MAKE SURE ALL FITTINGS AND HOSES ARE
LEAK FREE AND IN GOOD CONDITION. ANY
PRESSURIZED LEAKS MAY CAUSE SERIOUS
INJURIES.
ALWAYS KEEP THE HYDRAULIC CONTROLS IN
THE NEUTRAL POSITION.

10
5.0 PACKING AND MOBILIZATION FOR TRANSPORT
HAVE THE EQUIPMENT HANDLED BY SKILLED PERSONNEL
ONLY.
THE LIFTING EQUIPMENT MUST WITHSTAND A MINIMUM
RATED LOAD EQUAL TO THE WEIGHT OF THE PACKED EQUIP-
MENT (see paragraph “TECHNICAL SPECIFICATIONS”).
The equipment is supplied completely assembled, packed in a
cardboardbox.
Handling must be by pallet-lift or fork-lift trolley, Fig. 3.
The fork lifting points are indicated on the packing.
Fig. 3
6.0 UNPACKING
DURING UNPACKING, ALWAYS WEAR GLOVES
TO PREVENT ANY INJURY CAUSED BY CON-
TACT WITH PACKAGING MATERIAL (NAILS,
ETC.).
Thecardboardboxis supported withplasticstrapping.Cut the
strapping with suitable scissors. Use a small knife to cut along the
lateralaxisoftheboxandopenitlikeafan.
Itisalsopossibletounnailthecardboardboxfromthepalletitis
xedto.Afterremovingthepacking,andinthecaseoftheequip-
ment packed fully assembled, check that the equipment is complete
and that there is no visible damage.
If in doubt do not use the equipment and refer to professionally
qualified personnel (to the seller).
Thepacking(plasticbags,expandedpolystyrene,nails,bolts,timber,
etc.) should not be left within reach of children since it is potentially
dangerous. These materials should be deposited in the relevant
collection points if they are pollutants or non biodegradable.
THE BOX CONTAINING THE ACCESSORIES
IS CONTAINED IN THE WRAPPING. DO NOT
THROW IT AWAY WITH THE PACKING.

11
7.0 MOBILIZATION
THE LIFTING EQUIPMENT MUST WITHSTAND A MINIMUM
RATED LOAD EQUAL TO THE WEIGHT OF THE EQUIPMENT (SEE
PARAGRAPH TECHNICAL SPECIFICATIONS). DO NOT ALLOW
THE LIFTED EQUIPMENT TO SWING.
If the equipment has to be moved from its normal work post the trans-
port must be conducted by following the instructions listed below.
• Protecttheexposedcorners with suitable material(Pluribol/
cardboard).
• Donotusemetalliccablesforlifting.
• Makesurethatthepowersupplyoftheequipmentisnotcon-
nected.
• Toperformlifting,usethebracket“A”,picturedinFig. 4, place
the bead breaking arms as close as possible to the equipment,
and the self-centering chuck (Fig. 4 ref. B) as low as possible to
ensure a correct load balancing.
Fig. 4
8.0 WORKING ENVIRONMENT CONDITIONS
The equipment must be operated under proper conditions as follows:
• temperature:+5°C-+40°C(+41°F-+104°F)
• relativehumidity:30-95%(dew-free)
• atmosphericpressure:860-1060hPa(mbar)(12.5-15.4psi).
The use of the equipment in ambient conditions other than those
specified above is only allowed after prior agreement with and ap-
proval of the manufacturer.
8.1 Working position
In Fig. 5 it's possible to define working positions A, B, C which will
be referred to in the description of equipment operative phases.
Positions A and B must be considered as the main positions for tire
mounting and demounting and for wheel clamping on self-centering
chuck, while positions A and C are the best positions to follow tire
bead breaking and demounting operations.
Working in these positions allows better precision and speed during
operating phases as well as greater safety for the operator.
8.2 Working area
Fig. 5
A
B
C
~ 2000 mm
~ 78.74"
~ 1000 mm
~ 39.37"
~ 2000 mm
~ 78.74"
~ 2000 mm
~ 78.74"
USE THE EQUIPMENT IN A DRY AND ADEQUATELY LIT PLACE,
PROTECTED FROM ALL WEATHER CONDITIONS, THIS PLACE
MUST BE IN COMPLIANCE WITH APPLICABLE SAFETY REGU-
LATIONS.
Equipment
overall dimension

12
The location of the equipment requires a usable space as indicated
in Fig. 5.Thepositioningoftheequipmentmustbeexecutedaccord-
ing to the distances shown. From the control position the operator
is able to observe all the equipment and surrounding area.
He must prevent unauthorized personnel or objects that could be
dangerous from entering the area.
The equipment must be secured on a flat floor surface, preferably
of cement or tiled. Avoid yielding or irregular surfaces.
The base floor must be able to support the loads transmitted during
operation. This surface must have a capacity load of at least 500
Kg\m² (100 lb/ft2).
The depth of the solid floor must be sufficient to guarantee that the
anchors hold.
8.3 Lighting
The equipment must be located in an adequately lit environment.
9.0 EQUIPMENT ASSEMBLY
ALL EQUIPMENT ASSEMBLY OR ADJUSTMENTS
MUST BE CARRIED OUT BY PROFESSIONALLY
QUALIFIED STAFF.
After removing the various components from the packing, check
that they are complete, and that there are no missing or damaged
parts, then comply with the following instructions for the assembly
of the components making use of the following series of illustrations.
9.1 Anchoring system
The packed equipment is secured to the support pallet through the
holes on the chassis and indicated in the figure below. Such holes
can be used also to secure the equipment to the floor, using suit-
able concrete anchors (not included). Before concrete anchoring
to floor, check that all the anchor points are flat, or level in contact
with the floor. Shim between the equipment and the floor, as indi-
cated in Fig._6.
Fig. 6
a = 1180 mm / 46.46”
b = 660 mm / 25.98”
• Tosecuretheequipmenttotheground,useanchoringbolts/studs
(Fig._6 ref. 1) with a threaded shank M8 (UNC 5/16) suitable for the
floor on which the tire changer will be secured and in a number
equal to the number of mounting holes on the bottom chassis;
• drillholesintheoor,suitableforinsertingthechosenanchors,
in correspondence with the holes on the bottom chassis;
• inserttheanchorsintotheholesdrilledintheoorthroughthe
holes on the bottom chassis and tighten the anchors;
• tightentheanchorsonthebasechassisandtorqueasindicated
by the manufacturer of the anchors.

13
BEFORE SECURING TO THE FLOOR, SWIVEL
FOOT AND LEVEL TO FLOOR (FIG. 6 REF. 2).
9.2 Assembly procedures
Assemble the equipment as per the illustrations represented and
described hereafter.
1. Remove the packaging and the equipment from the wrapping,
lift it and place it on the floor.
The articulated end (Fig._7 ref._1) appears as illustrated in Fig._7;
Fig. 7
1
2. hook the articulated end (Fig. 8 ref._1) onto the cylinder A to pin
B, as shown by detail B.
Turn the control unit C, as shown by Fig. 8. In order to perform
suchoperation,liftthecontrolunitalongaxis“A”atapproxi-
mately50mm(1.97”)uptoposition“2”,rotatethrough90°to-
wardsequipmentfrontsideandloweritalwaysalongaxis“A”
up to working position “3” (see Fig._11);
Fig. 8
Detail B
1
3. during the installation, the lower bead breaker arm (Fig._9 ref._1)
appears without handwheel.
Fig. 9
1

14
4. mount the handwheel (Fig. 10 ref._1) using the supplied bolt
(Fig. 10 ref._2) and nut (Fig. 10 ref._3), (see detail A);
Fig. 10
13
2
A
Detail A
5. mount the grease-holder ring (Fig._11 ref._6) on the control unit,
through bolts (Fig._11 ref._4) and nuts (Fig._11 ref._5), as shown
in Fig._11.
Fig. 11

15
Model Conformity
standard Voltage Amperage Poles Minimum IP rating
3 Ph
2-speed IEC 309 220 V 25 A 3Poles+Ground IP 44
9.3 Electrical connections
ALL ELECTRICAL CONNECTIONS ARE TO BE
DONE BY QUALIFIED PERSONNEL ONLY.
BEFORE CONNECTING THE EQUIPMENT MAKE
SURE THAT:
•THE MAIN POWER RATING CORRESPONDS
TO THE EQUIPMENT RATING AS SHOWN ON
THE EQUIPMENT PLATE;
•ALL MAIN POWER COMPONENTS ARE IN
GOOD CONDITION;
•THE ELECTRICAL SYSTEM IS PROPERLY
GROUNDED (GROUND WIRE MUST BE THE
SAME CROSS-SECTION AREA AS THE LARG-
EST POWER SUPPLY CABLES OR GREATER);
•MAKE SURE THAT THE ELECTRICAL SYSTEM
FEATURES A CUTOUT WITH DIFFERENTIAL
PROTECTION SET AT 30 mA.
The equipment is supplied with a cable. A plug corresponding to the
following requirements must be connected to the cable:
On delivery, the equipment is pre-set to operate at a 3 Ph voltage
of 220 V.
FIT A TYPE-APPROVED (AS REPORTED ABOVE)
PLUG TO THE EQUIPMENT CABLE (THE
GROUND WIRE IS YELLOW/GREEN AND MUST
NEVER BE CONNECTED TO ONE OF THE TWO
PHASE LEADS).
MAKE SURE THAT THE ELECTRICAL SYSTEM
IS COMPATIBLE WITH THE RATED POWER
REQUIREMENTS SPECIFIED IN THIS MANUAL
AND APT TO ENSURE THAT VOLTAGE DROP
UNDER FULL LOAD WILL NOT EXCEED 4% OF
RATEDVOLTAGE(10%UPONSTART-UP).
FAILURE TO OBSERVE THE ABOVE INSTRUC-
TIONS WILL IMMEDIATELY INVALIDATE THE
WARRANTY AND MAY DAMAGE THE EQUIP-
MENT.

16
9.6 Electrical checks
BEFORE STARTING UP THE TIRE-CHANGER, BE
SURE TO BECOME FAMILIAR WITH THE LOCA-
TION AND OPERATION OF ALL CONTROLS AND
CHECK THEIR PROPER OPERATION (SEE PAR.
“CONTROLS”).
CARRY OUT A DAILY CHECK OF MAINTAINED-
TYPE CONTROLS FOR PROPER FUNCTIONING,
BEFORE STARTING EQUIPMENT OPERATION.
Once the plug/socket connection has been made, turn on the equip-
ment using the main switch (Fig._12 ref. A).
Fig. 12
KEY
A –Main switch
B –Direction rotation of oil-pressure power unit motor
ONCE THE ASSEMBLY OPERATIONS HAVE
BEEN COMPLETED, CHECK ALL EQUIPMENT
FUNCTIONS.
9.4 Oil check on oil-pressure power unit
THE OIL-PRESSURE POWER UNIT IS DELIV-
ERED WITHOUT HYDRAULIC OIL, THEREFORE
MAKE SURE THE TANK PROVIDED IS FILLED
WITH APPROX. 0.7 GALLONS (2.5 LITERS),
BEING CAREFUL NOT TO SPILL IT OUTSIDE
THE TANK.
USE HYDRAULIC OIL WITH A VISCOSITY DE-
GREE APPROPRIATE TO THE AVERAGE TEM-
PERATURES IN THE INSTALLATION COUNTRY
AND IN PARTICULAR:
- VISCOSITY 32 (FOR COUNTRIES WITH ROOM
TEMPERATURE FROM 0°C-+30°C(+32°F-
+86°F);
- VISCOSITY 46 (FOR COUNTRIES WITH ROOM
TEMPERATURE ABOVE +30°C(+86°F).
9.5 Check of motor rotation direction
Once the last electrical connection has been completed, power the
equipment with the main switch.
Make sure the motor of the hydraulic unit rotates in the direction indi-
cated by the arrow (Fig._12 ref._B) visible on the electric motor cap.
If rotation should occur in the opposite direction, the equipment
mustbeimmediatelystoppedandphaseinversionmustbeexecuted
inside the plug connection in order to reset the correct rotation
direction.
FAILURE TO OBSERVE THE ABOVE INSTRUC-
TIONS WILL IMMEDIATELY INVALIDATE THE
WARRANTY.

17
10.0 CONTROLS
10.1 Control device
The control (handle control) can be moved according to the position-
ing necessities of the operator.
MAKE SURE THERE ARE NO PERSONS OR
OBJECTS HIDDEN TO THE OPERATOR VISUAL
FIELD BY THE WHEEL SIDE (ESPECIALLY IN
CASE OF WHEELS WITH LARGE DIMENSIONS).
- The movement of the lever (Fig._13 ref._3) in position A, with hold-
to-run control, operates the bead breaking of rear bead breaker
roller.
- The movement of the lever (Fig._13 ref._3) in position B, with hold-
to-run control, operates the return action of rear bead breaker
roller.
- The movement of the lever (Fig._13 ref._1) in position C with hold-
to-run control, operates the return action of front bead breaker
roller.
- The movement of the lever (Fig._13 ref._1) in position D with hold-
to-run control, operates the bead breaking of rear bead breaker
roller.
- The movement of the lever (Fig._13 ref._1) in position F with hold-to-
run control, brings the front bead breaker arm to working position.
- The movement of the lever (Fig._13 ref._1) in position E with hold-
to-run control, operates the opening of the front bead breaker arm.
- Push button “G” has a hold-to-run control position, and when
pressed, it operates self-centering chuck raising.
- Push button “H” has a hold-to-run control position, and when
pressed, it operates self-centering chuck lowering.
- The movement of the lever (Fig._13 ref._2) in position L with hold-to-
run control, operates the self-centering chuck clockwise rotation.
- The movement of the lever (Fig._13 ref._2) in position I with hold-to-
run control, operates the self-centering chuck counterclockwise
rotation.
- Push button “M” has one hold-to-run control position, and when
pressed, it opens the self-centering chuck.
- Push button “N” has one hold-to-run control position, and when
pressed, it closes the self-centering chuck.
Fig. 13

18
11.0 USE OF THE EQUIPMENT
11.1 Precaution measures during tire removal and fitting
Before fitting a tire, observe the following safety rules:
• rimandtiremustalwaysbeclean,dryandingoodcondition;if
necessary, clean the rims and check that:
- neither the bead nor the tread of the tire are damaged;
- the rim does not have any dents and/or deformations (especially
for alloy rims, dents can cause internal micro-fractures, that
pass unobserved at visual inspection, and can compromise the
solidity of the rim and constitute danger even during inflation);
• adequatelylubricatethecontactsurfaceofrimandthetirebeads,
using specific tire lubricants only;
• replacetheinnertubevalvewithanewvalve,ifthetiretubehas
a metal valve, replace the grommet;
• alwaysmakesurethat tire and rimsizesarecorrectfor their
coupling; never fit a tire unless you are sure it is of the right size
(the rated size of rim and tire is usually printed directly on them);
• donotusecompressedairorwaterjetstocleanthewheelson
the equipment.
11.2 Preliminary operations
In view of the tire changer structure and of its intended use, the
operator must work with large diameter and heavy wheels/tires.
The utmost care while moving the wheels is recommended: make
use of other operators, properly trained and with suitable clothes.
THE CAREFUL LUBRICATION OF THE TIRES
BEADS IS RECOMMENDED, IN ORDER TO PRO-
TECT THEM FROM POSSIBLE DAMAGES AND
TO FACILITATE MOUNTING AND DEMOUNTING
OPERATIONS.
11.3 Preparing the wheel
•Removethewheelbalancingweightsfrombothsidesofthewheel.
REMOVE THE VALVE STEM AND ALLOW THE
TIRE TO COMPLETELY DEFLATE.
• Establishfromwhichsidethetireshouldbedemounted,checking
the position of the drop center.
• Findtherimlockingtype.
WHEN HANDLING WHEELS WEIGHING MORE
THAN 500 KG (1102.5 LBS) A FORK-LIFT TRUCK
OR A CRANE SHOULD BE USED.
11.4 Wheel clamping
DUE TO THE SIZE AND WEIGHT OF THE WHEEL/
TIRE, MAKE USE OF A SECOND OPERATOR TO
HOLD THE WHEEL INTO VERTICAL POSITION,
IN ORDER TO ENSURE SAFE OPERATIVE CON-
DITIONS.
MAKE SURE THAT RIM CLAMPING IS DONE
PROPERLY AND THAT THE GRIP IS SECURE, TO
PREVENT THE WHEEL FROM FALLING DURING
MOUNTING OR REMOVAL OPERATIONS.
DO NOT CHANGE THE SET OPERATING PRES-
SURE VALUE BY MEANS OF THE MAXIMUM
PRESSURE VALVES. THE MANUFACTURER
SHALL NOT BE RESPONSIBLE FOR INJURY
OR DAMAGE ARISING FROM UNAUTHORISED
CHANGES.

19
Fig. 14
Clamping on the central hole
Fig. 15
Clamping on bead seat
THE OPENING/CLOSING MOVEMENT OF THE
SELF CENTERING CHUCK GENERATES A GREAT
DEAL OF COMPRESSIVE FORCE DURING THE
WHEEL LOCKING/UNLOCKING PHASE. KEEP
HANDS/FINGERS OR ANY PART OF THE BODY
AWAY FROM MOVING CLAMPS AT ALL TIMES.
All wheels must be clamped from the inside.
CLAMPING ON THE CENTRAL FLANGE IS AL-
WAYS SAFEST.
FOR WHEELS WITH DROP CENTER RIMS SE-
CURE THE WHEEL SO THAT THE DROP CENTER
IS FACING OUTWARDS COMPARED TO THE
SELF-CENTERING CHUCK.
IF IT IS NOT POSSIBLE TO CLAMP THE RIM IN
THE HOLE OF THE DISC, CLAMP ON THE BEAD
SEAT CLOSE TO THE DISC.
TO SECURE WHEELS WITH ALLOY RIMS AD-
DITIONAL PROTECTIVE JAWS ARE AVAILABLE.
THEY ALLOW YOU TO WORK ON THE RIMS
WITHOUT DAMAGING THEM. THE PROTECTIVE
JAWS ARE FITTED ONTO SELF-CENTERING
CHUCK NORMAL JAWS BY MEANS OF A BAYO-
NET CONNECTION.
To clamp the wheel proceed as follows:
- make sure the front bead breaker arm is in open position (Fig._16
ref._2);
- place the wheel in vertical position onto the platform;
- move the wheel close, by keeping it in vertical position, until graz-
ing self-centering chuck jaws;
- use the corresponding control (Fig._13 ref._G-H) to position the
coaxialself-centeringchuckwiththewheelcenter,inorderto
make jaws edges skim wheel edge;
- adjust the opening of the self-centering chuck through the cor-
responding control (Fig._13 ref._M-N) according to the type of rim
to be locked;
-tiltthewheelatapproximately15°towardstheself-centeringunit;
- operate the control (Fig._13 ref._M) until the wheel is completely
clamped;
- check both that the rim is clamped and centered correctly, and that
the wheel has been raised above from the floor (Fig._13 ref._G),
so that it does not slip during the following operations.
KEEP ON OPERATING RIM CLAMPING CON-
TROL, UNTIL REACHING THE MAXIMUM
OPERATING PRESSURE (130 BAR- 1885 PSI).
THE CAREFUL LUBRICATION OF THE TIRES
BEADS IS RECOMMENDED, IN ORDER TO PRO-
TECT THEM FROM POSSIBLE DAMAGES AND
TO FACILITATE MOUNTING AND DEMOUNTING
OPERATIONS.

20
AFTER COMPLETION OF TIRE MOUNT/DE-
MOUNT OPERATIONS DO NOT LEAVE THE
WHEEL CLAMPED ON THE SELF-CENTERING
CHUCK AND NEVER LEAVE IT UNATTENDED.
11.5 Bead breaker arms’ functioning
During the working phases, the the front bead breaker arm (Fig._16
ref._2) can maintain two firm positions, that is:
1. “working” position (wheel front side) (Fig._16 ref._3);
2. “off-work” position (Fig._16 ref._2).
In “working” position” (Fig._16 ref._3) the front bead breaker arm
isinfrontof the tire,justnexttherim. From thispositionitcan
perform the different tire bead breaking and mounting-demounting
operations.
The adjustment of the correct “working” position of the rear bead
breaker arm (Fig._16 ref._4) is performed through handle’s rotation
(Fig._16 ref._1).
Fig. 16
11.6 Tubeless tires
11.6.1 Bead breaking
NEVER PLACE ANY PART OF YOUR BODY
BETWEEN THE BEAD BREAKER ROLLER AND
THE TIRE.
THROUGHOUT TIRE MOUNTING/DEMOUNT-
ING OPERATIONS, CHECK THAT THE WHEEL IS
FIRMLY CLAMPED BY THE EQUIPMENT CHUCK.
1. Clamp the wheel on the self-centering chuck as described in
“WHEEL CLAMPING” paragraph;
2. move the self-centering chuck to working position (rise fully
home) (Fig._13 ref._G);
3. move to work position A (Fig._5);
4. move rear bead breaker arm (Fig._17 ref._1) to work position with
therolleratapproximately5mm(0.2”)formrim’sedge,usingthe
lateral handwheel (Fig._17 ref._2).
5. move front bead breaker arm (Fig._17 ref._3) to work position,
using lever (Fig._13 ref._1-F).
6. carry out bead breaking of front bead first, then bead-break rear
bead, by turning self-centering chuck counter-clockwise (Fig._17
ref._4);
Fig. 17
This manual suits for next models
1
Table of contents
Other Rotary Tyre Changer manuals