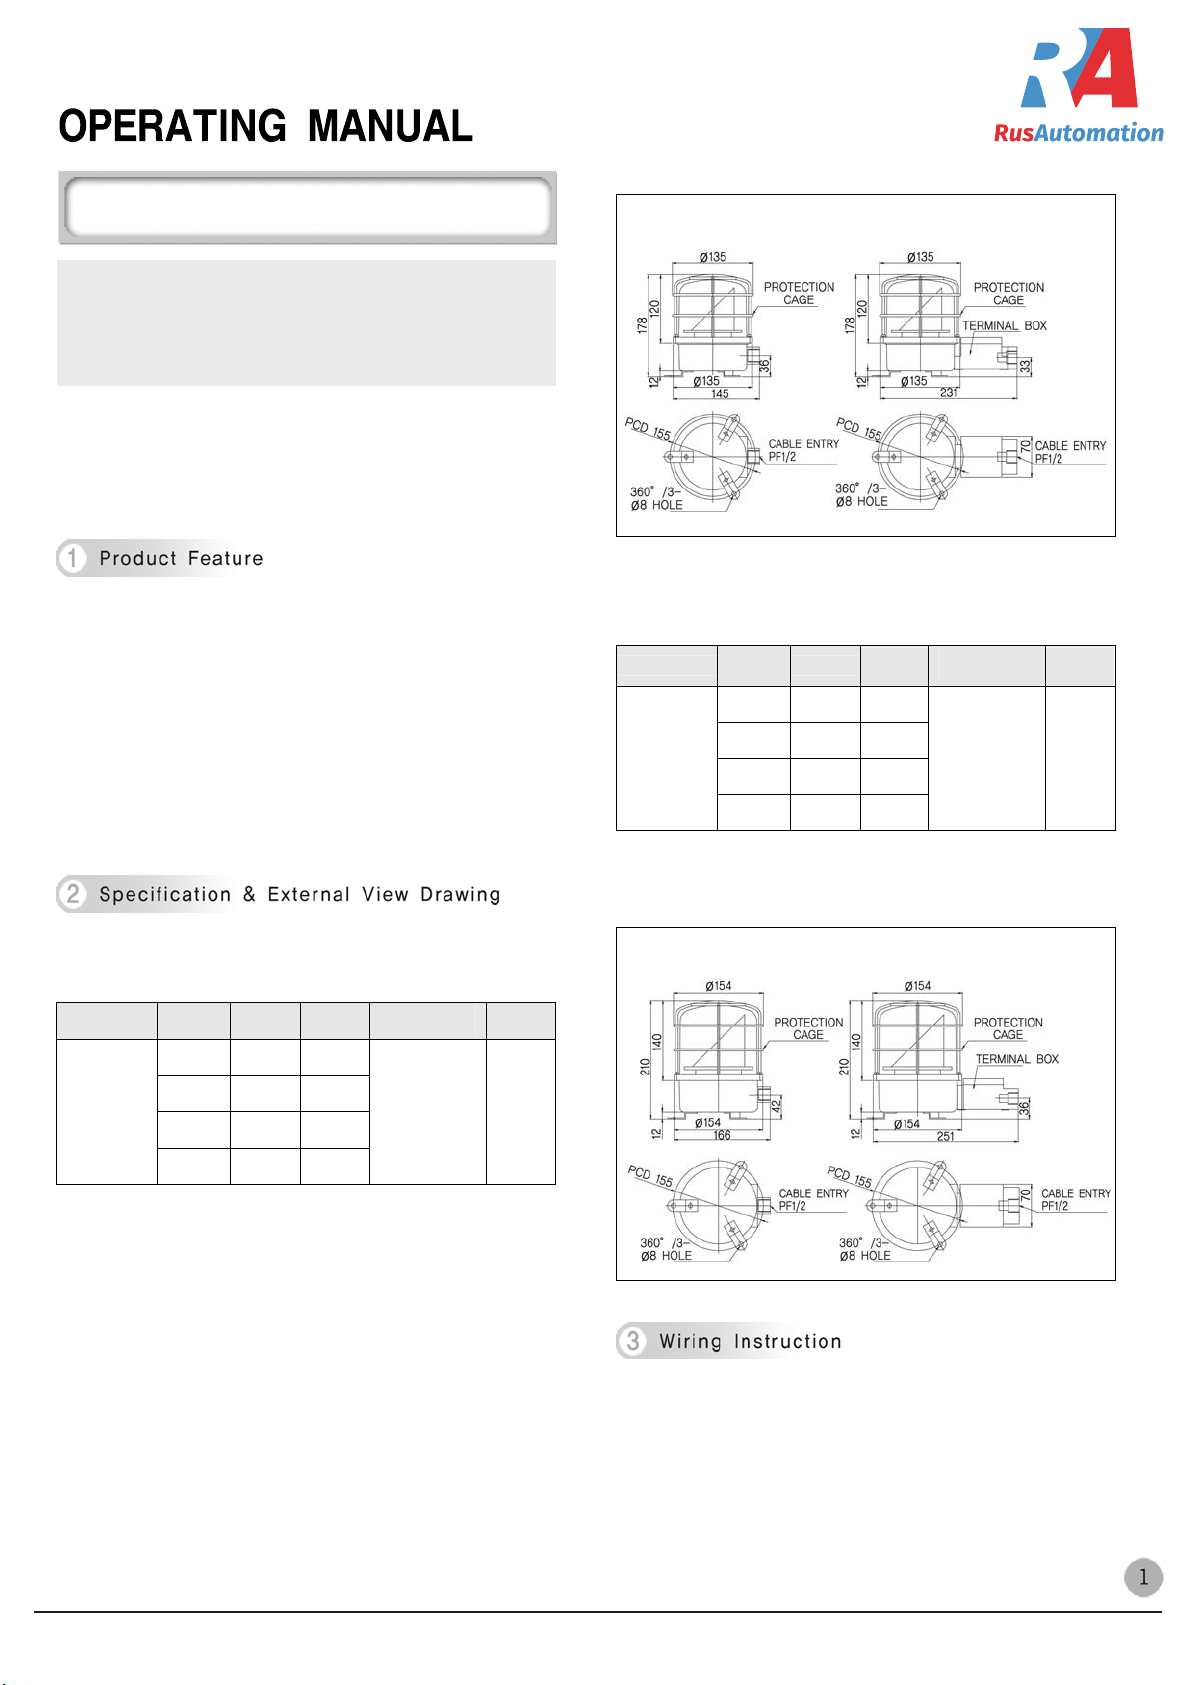
SH1LR/SH2LR SH1TLR/SH2TLR
) SH1LR/ SH2LR
▪ Separate globe ring② and globe③ from the body by loosening
protection cage fastening bolt(M4-4EA)①.
▪ Separate assembling board⑤ by loosening assembling board
fastening bolt(M4 Screw : SH1LR-2EA, SH2LR-3EA )④ and
make sure terminal plate⑥.
2) SH1TLR / SH2TLR
Separate terminal box cover⑧ by loosening terminal box cover
fastening bolt(M5-4EA)⑦ and make sure terminal plate⑥.
3) Wiring Power Line
▪ In case of product using AC voltage, connect the line without
polarity(wire color).
▪ In case of product using DC voltage, black line is negative(-).
4) Treating Cable Terminal
Treat the end of power cable by using “O” or “U” type terminal
for safe wiring.
5) Treating Power Entry
Keep the tightness of power entry⑨ by using water-proof
connector(SH1LR/SH2LR-flexible connector #16, SH1TLR/
SH2TLR-15C nipple is supplied as a standard specification) or
cable grand.
This product is water-proof and anti-corrosion type.
But, install with vertical direction at a place or machine where
exists no big vibration and no strong impact as long as possible.
▪ Refer to below drawing and drill necessary mounting holes on
profitable part of the product.
(Make sure PCD from external view drawing.)
▪ Fix the product by using mounting bolt(M8-3EA).
This product has a volume(1) for controlling revolving speed and
voltage selection switch(2) on assembling board. Refer to
following drawing and explanation for right operating.
1) Lens Set Removal
▪ Refer to previous drawing in wiring instruction and separate
globe ring(protection cage)② and globe③ from the body by
loosening fixing bolt①(M4 bolt 4ea) and make sure voltage
selection switch(2) and speed control volume(1) on assembling
board on following drawing.
2) Revolving Speed Control
▪ The volume(1) for revolving speed control is built-in this
product. Turn it closckwise for increasing revolving speed and
turn it counterclockwise for decreasing revolving speed.
▪ If give excess power to the volume,it can be broken.
Be careful !
3) AC Voltage Selection (AC Voltage Type Product)
▪ One of AC 110V and 220V can be used by using voltage
selection switch(2). The product is originally produced with
220V as standard specification. So,convert to 110V by using
voltage selection switch if power line voltage is 110V.
※ Warning !
▪ Must turn off power supply. Converting switch during power
supply can cause short circuit.
4) Lens Set Assembling
Assemble the glass lens set in reverse order of separating.
ООО “РусАвтоматизация” 454010 Челябинск, Гагарина 5,
русавтоматизация.рф
Россия, тел. 8 800 775 09 57 , +7(351)799 54 26,
тел./факс +7(351)211 64 57
(звонок бесплатный)