RUSTA 901513190101 User manual

FIDEENG SE NO
Manual/Bruksanvisning/Gebrauchsanweisung/Käyttöohje
Item no. 901513190101
Stick vacuum cleaner
Skaftdammsugare / Håndholdt støvsuger /
Stielstaubsauger / Varsipölynimuri

2
Thank you for choosing to
purchase a product from Rusta!
Tack för att du valt att
köpa en produkt från Rusta!
Takk for at du valgte å kjøpe et
produkt fra Rusta!
Danke, dass du dich für den
Kauf eines Produktes von
Rusta entschieden hast!
Kiitos Rusta-tuotteen
ostamisesta!
Read through the entire manual
before installation and use!
Läs igenom hela bruksanvisningen
innan montering och användning!
Les gjennom hele bruksanvisningen
før installasjon og bruk!
Vor der Montage und Benutzung
die gesamte Gebrauchsanleitung
durchlesen!
Lue koko käyttöohje ennen
kokoamista ja käyttämistä!
PRODUCT OVERVIEW
PRODUKTÖVERSIKT / PRODUKTOVERSIKT /
PRODUKTÜBERSICHT / TUOTTEEN ESITTELY
C D E F G
IJKL
H
B
A

3
DE FINOENG SE
AAccessory attachment point / Fästpunkt för tillbehör / Feste for tilbehør /
Befestigungspunkt für Zubehör / Lisävarusteiden kiinnityspiste
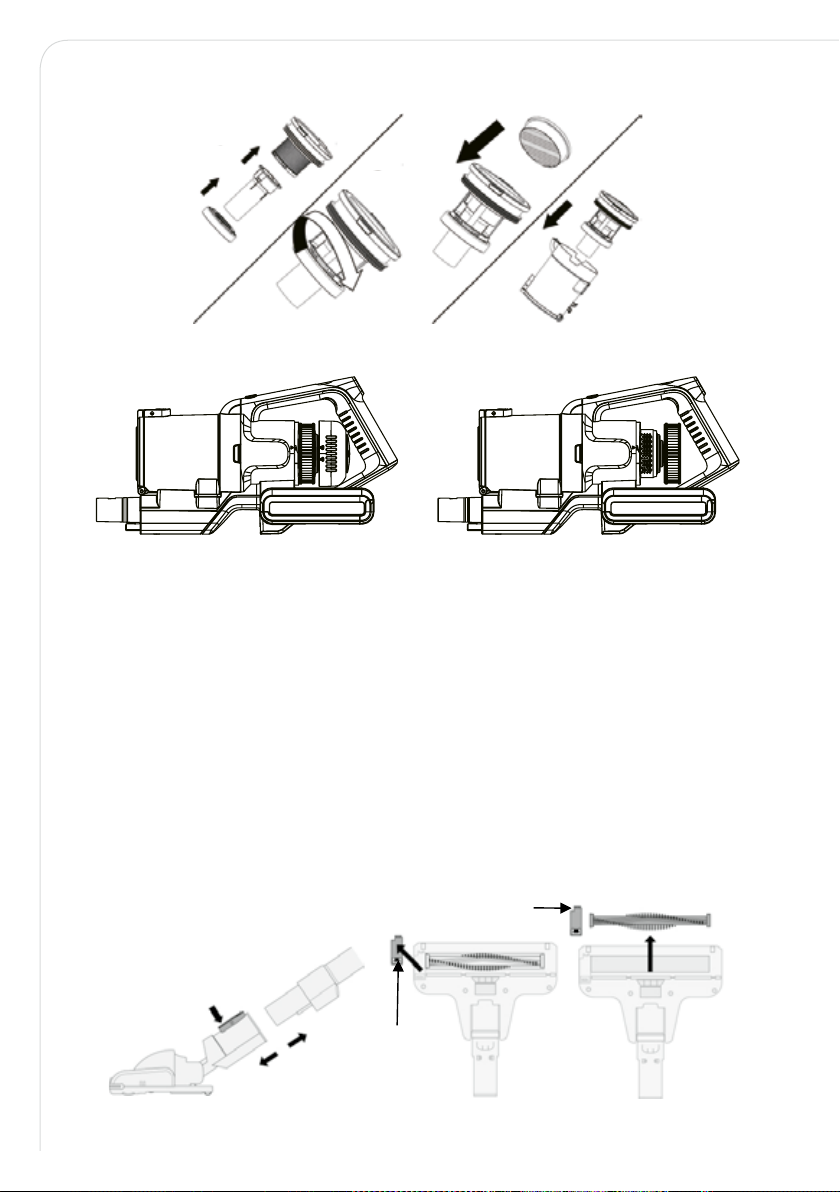
BCollection container lid / Lock för uppsamlingsbehållare / Lokk for oppsamlingsbeholder /
Deckel Staubbehälter / Keräyssäiliön kansi
CDust release button / Frigöringsknapp för damm / Utløser for støv /
Staubentriegelungstaste / Pölyn vapautuspainike
DDust container release button / Frigöringsknapp för dammbehållare / Utløser for
støvbeholder / Entriegelungstaste für Staubbehälter / Pölysäiliön vapautuspainike
EBattery indicator light / Batteriindikatorlampa / Batteriindikatorlampe /
Batterieanzeige / Akun merkkivalo
FLow/high mode button / Lägesknapp låg/hög styrka / Knapp for lav/høy eekt /
Low-/High-Modus-Taste / Matalan/korkean tehotilan painike
GPower on/o button / På-/av-knapp / Av/på-knapp / Ein-/Ausschalter / Virtapainike
HHandle / Handtag / Håndtak / Gri / Kädensija
IFilter cover / Filteröverdrag / Filterdeksel / Filterabdeckung / Suodattimen kansi
JMotor filter / Motorfilter / Motorfilter / Motorfilter / Moottorin suodatin
KMounting recess / Monteringsurtag / Fordypning til holder /
Befestigungsaussparung / Kiinnityssyvennys
LDust container / Dammbehållare / Støvbeholder / Staubbehälter / Pölysäiliö
MFloor head / Golvmunstycke / Gulvmunnstykke / Bodenaufsatz / Lattiapää
NWall bracket / Väggkonsol / Veggbrakett / Wandhalterung / Seinäteline
OWall fixings / Väggfästen / Veggskruer / Wandbefestigungen / Seinäkiinnikkeet
PCombination nozzle / Kombinationsmunstycke / Kombinasjonsmunnstykke /
Kombidüse / Yhdistelmäsuutin
QCrevice nozzle / Spaltmunstycke / Fugemunnstykke / Fugendüse / Rakosuutin
RAdapter/charger / Adapter/laddare / Strømadapter/lader /
Adapter/Ladegerät / Verkkolaite/laturi
SExtension tube / Förlängningsrör / Forlengelsesrør / Verlängerungsrohr / Jatkoputki
M N O S
P Q R

4
SPECIFICATIONS
SPECIFIKATIONER / SPESIFIKASJONER /
PRODUKTBESCHREIBUNG / TEKNISET TIEDOT
Voltage / Spänning / Spenning / Spannung / Jännite 25V
Power / Eekt / Eekt / Leistung / Teho 150W
Suction power / Sugeekt / Sugeeekt /
Saugleistung / Imuteho ≥22W (max)
Dimensions / Mått / Mål / Maße / Mitat 225x255x1180 mm
Weight / Vikt / Vekt / Gewicht / Paino 3.6 kg
Dust container capacity / Dammbehållarens kapacitet /
Støvbeholderens kapasitet / Kapazität des Staubbehälters /
Pölysäiliön tilavuus
0.8 l
Filter / Suodatin Yes
Running time / Körtid / Driftstid / Laufzeit/ Käyttöaika High power: 18 min
Low power: 45 min
Charging time / Laddningstid / Ladetid /
Ladezeit / Latausaika 4–6 h
Cord lenght / Sladdlängd / Ledningslengde /
Kabellänge / Johdon pituus 180 cm
Protection class / Skyddsklass / Beskyttelsesklasse /
Schutzklasse / Suojausluokka II

5
DE FINOSEENG
GET STARTED!
CHARGING THE VACUUM CLEANER
This vacuum cleaner uses a rechargeable 25.2V lithium battery. We recommend fully
charging it before using it for the first time. A full charge takes 4–5 hours.
1. Place the body of the cleaner onto a flat surface, either a table or attach to
the wall bracket.
2. Insert the adapter cord into the DC jack at the end of the vacuum cleaner handle
and plug the adapter into the mains supply socket. (Fig. 1)
3. The light indicator shows the status (Fig. 2):
– Charging: Light 1 flashes, light 2 o.
– Half charged: Light 1 on, light 2 flashes.
– Fully charged: Light 1 & 2 on, then o after 10 minutes.
– Low battery: Light 1 flashes, light 2 o.
NOTE! Light indicator 1 (Fig. 2) will flash when the battery is running low and needs
to be recharged. If recharging is not commenced, the vacuum cleaner will power o.
NOTE! Only charge or recharge the vacuum cleaner indoors.
NOTE! Do not recharge the battery when the air temperature is below 0°C or above 37°C.
NOTE! Batteries get hot after heavy use and become dicult to charge. Allow the battery
to cool after use and wait about an hour between recharges.
Fig. 1 Fig. 2

6
MOUNT THE WALL BRACKETS
• Before drilling into a wall surface, check for hidden cables or pipes.
• Wear safety goggles and a dust mask when drilling.
1. Choose a suitable location for the wall bracket, away from areas where it will
get wet or knocked and close to a socket outlet. Check that the charging cable
will reach the mains socket (max. 180 cm distance) and that there is sucient
space above and below the bracket (approx. 125 cm below) for the fully assembled
vacuum cleaner to be inserted.
ASSEMBLY
1. Attach the extension tube onto the body of the vacuum cleaner as shown (Fig. 4)
and push to secure. A click will be heard.
2. Fit the floor head onto the extension tube. (Fig. 4) A click will be heard. The crevice
nozzle and combination nozzle can be fitted in place of the floor head.
3. Alternatively, do not use the extension tube and fit the crevice nozzle or combination
nozzle directly onto the body of the vacuum cleaner. (Fig. 5) The floor head can be
fitted in a similar manner, but if using in this configuration ensure hands are kept
away from the floor head during operation – due to a potential entrapment hazard.
4. To remove all parts, press the release button and firmly pull apart.
Release button Fig. 4
Release button
Fig. 3
48cm

7
DE FINOENG SESEENG
USE
1. Fit the required nozzle. Ensure that the battery has sucient charge.
2. Click the power button once to start. The LED lights on the floor head (if fitted)
will illuminate and the vacuum cleaner will start on mid power mode. Use the
low/high button to switch between modes. The vacuum cleaner may be used
for up to 18 minutes on High power mode and 45 minutes on low power mode.
3. Click the power button again to stop the vacuum cleaner after use.
4. Store the vacuum in the wall bracket when not in use.
NOTE! Low power mode is indicated with no indicator lights, mid power mode
with the white indicator light and high power mode with the blue indicator light.
Power button
Low/high button
Low/high indicator lights
2
1
Fig. 5

8
CARE AND CLEANING
• Disconnect the charger from the vacuum cleaner before carrying out cleaning
and maintenance.
• To ensure your vacuum cleaner works at optimum eciency, keep the ventilation
holes and vacuum cleaner surface free from dirt.
• Ensure that the dust container is emptied and the air filters are washed regularly.
• Wipe the outside of the vacuum cleaner and accessories with a damp (not wet)
cloth and then wipe dry. Do not use detergents, solvents or abrasives as these
may scratch or damage the surface.
• Never immerse the vacuum cleaner, battery or charger in water.
• When not in use, store in a cool, dry place.
EMPTYING THE DUST CONTAINER
When the dust container reaches the MAX line marked on the container (Fig. 6)
or when the suction power is reduced, it is time to empty the dust container.
1. Position the dust container over a refuse bin, then press the lever at the front
of the container to open the base (Fig. 7) and empty the container. Gently tap
the container against the side of the bin to remove any stubborn dust.
2. The inside of the dust container may be wiped clean with a damp cloth.
Dry with a soft dry cloth before closing the flap. A click will be heard when
it is correctly engaged.
Dust full
Fig. 6 Fig. 7

9
DE FINOSEENG
Pull out
Fig. 8
Press
CLEANING THE FILTERS
The frequency that the filters should be cleaned will depend on appliance usage.
For maximum eciency, the filter within the dust container should be cleaned every
time the dust container is emptied and the exhaust filter at the top every three months.
1. Click the dust container release button, located on the front of the handle just above
the dust container, and pull the dust container out. (Fig. 8)
2. Lift out the cyclone from the dust container (Fig. 9), lift out the pre-motor filter and
shake o dust frequently. Every three months rinse the filter and dry thoroughly.
(Fig. 10) Turn the filter assembly head anti-clockwise to disassemble the inner filter
(Fig. 11), wash with running water, and make sure that it is dry before next use. (Fig. 12)
3. Tap the filter against a dustbin to remove most of the dust and then wash the filter
in cold running water until the water runs clear. Allow to air dry fully. Using a damp
or wet filter will reduce the suction and damage the motor.
4. The filter assembly can also be washed under running water if needed.
5. When the filter and assembly are completely dry, reverse the above steps and refit
the filter into the dust container and close the flap.
6. To clean or replace the post-motor filter, turn the cover anticlockwise and lift o
the cover. (Fig. 13) Remove the filter (Fig. 14) and wash and dry it in accordance
with step 4.
7. Refit the filter and cover onto the cleaner.
Fig. 12
2
1
Fig. 9 Fig. 10
2
1
2
1
Fig. 11

10
CLEANING THE BRUSH
1. The frequency that the brush should be cleaned will depend on appliance usage.
Always stop the vacuum and clean the brush head if the indicators turn white or
if the floor head brush stops rotating.
2. Remove the floor head from the cleaner. (Fig. 16)
3. Push the small lever at the side of the brush in the direction of the front of the floor
head and lift o the retaining plate. (Fig. 17)
4. Lift out the brush roller (Fig. 18) and remove any thread, flu or other obstructions.
The brush roller can also be washed under running water if needed. Allow to fully dry.
5. Refit the brush roller and secure into position by fitting the retaining plate.
Push
Fig. 16 Fig. 17 Fig. 18
Lever
Retaining plate
Fig. 13
1
2
Fig. 15Fig. 14

11
DE FINOENG SE
TROUBLESHOOTING
PROBLEM POSSIBLE CAUSES ACTIONS
The vacuum
cleaner
doesn’t work.
Product has powered o
or battery is low.
Charge the product before use.
Product suction port is blocked. Clean product suction port.
Suction is
too weak.
Dust barrel & filter assembly
is dusty/full.
Clean the dust barrel and filter assembly.
Brush roller is wrapped around
hair and other objects.
Clean brush roller.
Tube has an obstruction. Carefully clean and check for blockages.
Dierent motor
operation sound.
The tube is partially blocked. Carefully clean and clear.
Filter assembly is blocked. Thoroughly clean the filters.
Product cannot
be charged.
Charger not properly connected. Check connections.
Mains supply is not switched on. Check the mains supply is switched on.
Situation still remains. Check with a service centre.

12
SAFETY INSTRUCTIONS
When using an electrical appliance, you should always take basic
safety measures. Always keep the following in mind:
• Read all instructions.
• This appliance complies with international safety standards.
• Children must not play with the appliance. Cleaning and
user maintenance must not be carried out by children
without supervision.
• If the adapter or the appliance itself is damaged, do not use it.
Contact an authorised service centre.
• Prevent damage to the power cable by not squeezing, bending,
or rubbing it on sharp edges.
• Do not touch the appliance or its plug when it is plugged in
if your hands are damp or wet.
• Do not pull the power cable when unplugging the appliance.
• Do not vacuum flammable materials and when vacuuming
cigarette ash, make sure that it has cooled down.
• Do not vacuum water or other liquids.
• Protect the appliance from rain, humidity and heat sources.
• Never use the appliance in or near places where combustible
or flammable environments are present.
• Unplug the appliance before cleaning and maintenance.
• Do not immerse the appliance in water for cleaning.
• Do not attempt to dismantle the appliance.
• Use the original parts or parts recommended by the
manufacturer only.
• Do not attempt to vacuum particles such as cement, plaster
and compressed paper in order to prevent the filter from being
clogged and the motor being damaged.

13
DE FINOENG SE
• If the adapter is damaged, it must be replaced by the manu-
facturer or its agent or a similarly qualified person in order
to avoid hazard.
• Use the appliance only with the power adapter supplied.
• Do not use the appliance without filters fitted, otherwise it
may be damaged.
• If you keep the packaging materials, store them out of
the reach of children.
• Keep fingers, hair and loose clothing from moving parts
and openings whilst using the vacuum cleaner.
• The battery must be removed from the appliance before
it is scrapped.
• Please dispose of used batteries according to local laws
and regulations.
• This appliance contains batteries that are only replaceable
by skilled persons.
• The supply terminals are not to be short-circuited.
• Save these instructions.
WARNING!
If these instructions are not followed, an accident may
lead to serious personal injury or property damage.

14
KOM IGÅNG!
LADDNING AV DAMMSUGAREN
Denna dammsugare använder ett laddningsbart 25,2 V-litiumbatteri. Vi rekommenderar att du
laddar det helt innan du an-vänder den för första gången. En full laddning tar 4–5 timmar.
1. Placera dammsugaren på en plan yta, antingen ett bord eller fäst med
väggkonsolen.
2. Sätt i adaptersladden i DC-uttaget i änden av dammsugarhandtaget och anslut
adaptern till eluttaget. (Bild 1)
3. Ljusindikatorn visar status (Bild 2):
– Laddning: Lampa 1 blinkar, lampa 2 släckt.
– Laddad till hälften: Lampa 1 tänd, lampa 2 blinkar.
– Fulladdad: Lampa 1 och 2 tända, släcks sedan efter 10 minuter.
– Låg batterinivå: Lampa 1 blinkar, lampa 2 släckt.
OBS! Ljusindikator 1 (Bild 2) blinkar när batteriet börjar ta slut och behöver laddas.
Om laddning inte påbörjas stängs dammsugaren av.
OBS! Ladda endast dammsugaren inomhus.
OBS! Ladda inte batteriet när lufttemperaturen ligger under 0°C eller över 37°C.
OBS! Efter kraftig användning blir batterierna varma och svåra att ladda. Låt batteriet
svalna efter användning och vänta ungefär en timme mellan laddningarna.
Bild 1 Bild 2

15
DE FINOENG SE
15
MONTERA VÄGGKONSOLERNA
• Innan du borrar i en väggyta bör du söka efter dolda kablar eller rör.
• Använd skyddsglasögon och dammask vid borrning.
1. Välj en lämplig plats för väggkonsolen, på avstånd från områden där det kan
bli blött eller stött, samt nära ett eluttag. Kontrollera att laddningskabeln når
eluttaget (max 180 cm avstånd) och att det finns tillräckligt med utrymme över
och under fästet (ca 125 cm under) för att den färdigmonterade dammsugaren
ska kunna sättas in.
MONTERING
1. Fäst förlängningsröret på dammsugarens kropp enligt bilden (Bild 4) och tryck för
att säkra det. Ett klick hörs.
2. Montera golvmunstycket på förlängningsröret. (Bild 4), ett klick hörs. Spaltmunstycket
och kombinationsmunstycket kan monteras i stället för golvhuvudet.
3. Använd alternativt inte förlängningsröret och montera i stället spaltmunstycket eller
kombinationsmunstycket direkt på dammsugarens kropp. (Bild 5). Golvmunstycket
kan monteras på ett liknande sätt, men om det används på detta sätt bör du se till att
hålla händerna borta från golvmunstycket då det används på grund av en potentiell
risk för fastklämning.
4. För att ta bort alla delar trycker du på frigöringsknappen och drar kraftigt isär delarna.
Frigöringsknapp Bild 4
Frigöringsknapp
Bild 3
48cm

16
ANVÄNDNING
1. Montera önskat munstycke. Se till att batteriet är tillräckligt laddat.
2. Tryck en gång på strömknappen för att starta. LED-lamporna på golvmunstycket
(om monterat) tänds och dammsugaren startar på medelhög eekt. Använd
låg-/hög-knappen för att växla mellan lägen. Dammsugaren kan användas i upp
till 18 minuter i högeektläge och 45 minuter i lågeektläge.
3. Tryck på strömknappen igen för att stoppa dammsugaren efter användning.
4. Förvara dammsugaren i väggfästet när den inte används.
OBS! Lågeektläge indikeras utan indikatorlampor, medelhögt läge med den vita
indikatorlampan och högeektläge med den blå indikatorlampan.
Strömknapp
Låg-/hög-knapp
Låg-/hög-indikatorlampor
2
1
Bild 5

17
DE FINOENG SE
SKÖTSEL OCH RENGÖRING
• Koppla bort laddaren från dammsugaren innan du utför rengöring och underhåll.
• För att säkerställa att din dammsugare fungerar med optimal eektivitet bör du
hålla ventilationshålen och dammsugarens yta fria från smuts.
• Se till att dammbehållaren är tömd och att luftfiltren tvättas regelbundet.
• Torka av utsidan av dammsugaren och tillbehören med en fuktig (inte våt) trasa
och torka sedan torr. Använd inte rengöringsmedel, lösningsmedel eller slipmedel
eftersom dessa kan repa eller skada ytan.
• Sänk aldrig ned dammsugaren, batteriet eller laddaren i vatten.
• Förvara dammsugaren inomhus i ett svalt och torrt utrymme när den inte används.
TÖMNING AV DAMMBEHÅLLAREN
När dammbehållaren når MAX-linjen markerad på behållaren (Bild 6) eller när
sugeekten minskar är det dags att tömma dammbehållaren.
1. Placera dammbehållaren över en soptunna, tryck sedan på spaken på framsidan
av behållaren för att öppna basen (Bild 7) och töm behållaren. Knacka försiktigt
behållaren mot soptunnans sida för att ta bort eventuellt envist damm.
2. Insidan av dammbehållaren kan torkas av med en fuktig trasa. Torka med en mjuk
torr trasa innan du stänger luckan. Ett klick hörs när den är korrekt kopplad.
Fullt
med damm
Bild 6 Bild 7

18
Dra ut
Bild 8
Tryck
RENGÖRING AV FILTREN
Hur ofta filtren ska rengöras beror på apparatens användning. För maximal eektivitet
bör filtret i dammbehållaren rengöras varje gång dammbehållaren töms och
avgasfiltret i toppen bör rengöras var tredje månad.
1. Klicka på frigöringsknappen för dammbehållaren på handtagets framsida precis
ovanför dammbehållaren och dra ut dammbehållaren. (Bild 8)
2. Lyft ut cyklonen från dammbehållaren (Bild 9), lyft ut förmotorfiltret och skaka
av damm ofta. Skölj filtret var tredje månad och torka ordentligt. (Bild 10) Vrid
filterenhetens huvud moturs för att ta isär det inre filtret (Bild 11), tvätta med
rinnande vatten och se till att det är torrt före nästa användning. (Bild 12)
3. Knacka filtret mot en soptunna för att ta bort det mesta av dammet och tvätta
sedan filtret i kallt, rinnande vatten tills vattnet blir klart. Låt lufttorka helt.
Användning av ett fuktigt eller vått filter minskar sugkraften och skadar motorn.
4. Filterenheten kan även tvättas under rinnande vatten om det behövs.
5. När filtret och enheten är helt torra gör du om de ovan nämnda stegen och
sätter tillbaka filtret i dammbehållaren och stänger luckan.
6. För att rengöra eller byta eftermotorfiltret vrider du locket moturs och lyfter
av locket. (Bild 13) Ta bort filtret (Bild 14) och tvätta och torka det i enlighet
med steg 4.
7. Sätt tillbaka filtret och locket på dammsugaren.
Bild 12
2
1
Bild 9 Bild 10
2
1
2
1
Bild 11

19
DE FINOENG SE
RENGÖRING AV BORSTEN
1. Hur ofta filtren ska rengöras beror på apparatens användning. Stoppa alltid damm-
sugaren och rengör borsthuvudet om indikatorerna blir vita eller om golvmun-
styckets borste slutar rotera.
2. Ta bort golvmunstycket från dammsugaren. (Bild 16)
3. Skjut den lilla spaken på sidan av borsten i riktning mot golvmunstyckets framsida
och lyft av fästplatta. (Bild 17)
4. Lyft ut borstvalsen (Bild 18) och ta bort eventuella trådar, ludd eller andra hinder.
Borstvalsen kan vid behov även tvättas under rinnande vatten. Låt torka helt.
5. Sätt tillbaka borstvalsen och fäst den på plats genom att montera fästplattan.
Skjutknapp
Bild 16 Bild 17 Bild 18
Spak
Fästplatta
Bild 13
1
2
Bild 15Bild 14

20
FELSÖKNING
PROBLEM MÖJLIGA ORSAKER ÅTGÄRDER
Dammsugaren
fungerar inte.
Produkten har stängts av
eller har låg batterinivå.
Ladda produkten före användning.
Produktens sugport är blockerad. Rengör produktens sugport.
Sugkraften är
för svag.
Dammbehållaren och filter-
enheten är dammiga/fulla.
Rengör dammbehållaren
och filterenheten.
Borstvalsen lindas runt hår och
andra föremål.
Rengör borstvalsen.
Det finns ett hinder i röret. Rengör noggrant och kontrollera
avseende blockeringar.
Olika motorljud
vid drift.
Röret är delvis blockerat. Rengör och avlägsna försiktigt hinder.
Filterenheten är blockerad. Rengör filtren noggrant.
Produkten kan
inte laddas.
Laddaren är inte korrekt
ansluten.
Kontrollera anslutningarna.
Eluttaget är inte påslaget. Kontrollera att eluttaget är påslaget.
Situationen kvarstår fortfarande. Kontrollera med ett servicecenter.
Table of contents
Languages:
Other RUSTA Vacuum Cleaner manuals
Popular Vacuum Cleaner manuals by other brands

BLACK DECKER
BLACK DECKER Dustbuster WDA320J Original instructions

Concept2
Concept2 VA0030 manual

TriStar
TriStar SZ-1920 instruction manual

Dirt Devil
Dirt Devil 1-113191-000 owner's manual

EUROPRO
EUROPRO Portable Wonder EP055 Use and care instructions

Filter Queen
Filter Queen Majestic High-Filtration Surface Cleaner owner's manual