4
OPERATION METHOD
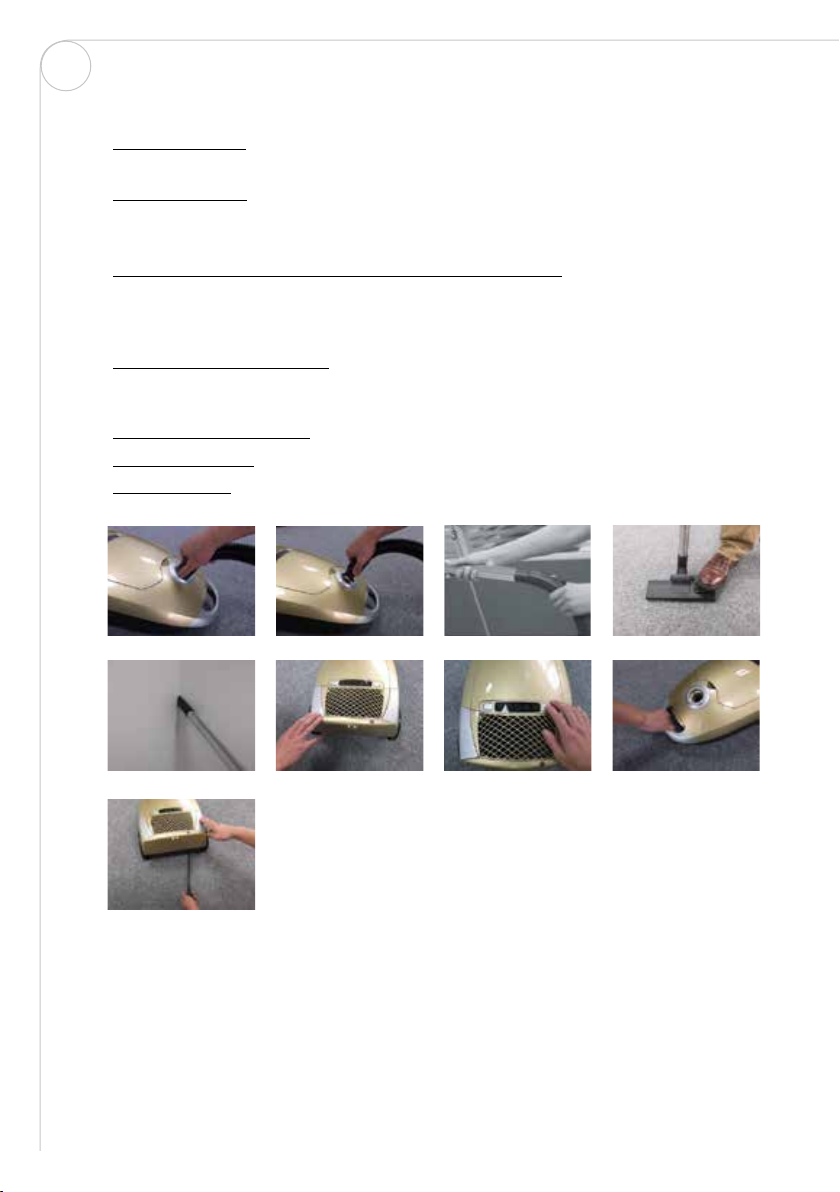
• Connect the hose: Insert the hose end into the hose socket at the front cover and then
hook it. (Fig1)
• Remove the hosE: Press the adaptors at both side of the hose end and then pull the
hose accessories. (Fig. 2).
• Connect the metal tube to the curved end of the hose. (Fig. 3).
• Connect nozzles to the tube for dierent cleaning purpose:
Floor brush (adjusted to the type of ground) for carpet or floor (Fig. 4); crevice nozzle for
sofa, wall surface, curtain, corner or space between furniture and etc. (Fig. 5). To adjust
the suction eect of the nozzle, adjust the position of the control on the handle.
• Turn on the vacuum cleaner: Insert the plug of cord into the power socket which
conform to that on the label for the power supply, and press the on/o switch pedal,
the machine could start working (Fig 6).
• Adjust the vacuum power: Turn the speed control button (Fig 7).
• Move the machine: Use the handle at the back of the vacuum. (Fig 8)
• Cord rewinding: hold the plug and pull out the cord; press the cord rewinding pedal,
the power cord will be drawn in. (Fig 9)
ENG
Fig. 1
Fig 1 Fig 2 Fig 3
Fig 4 Fig 5 Fig 6
Fig 7 Fig 8 Fig 9
Maintenance
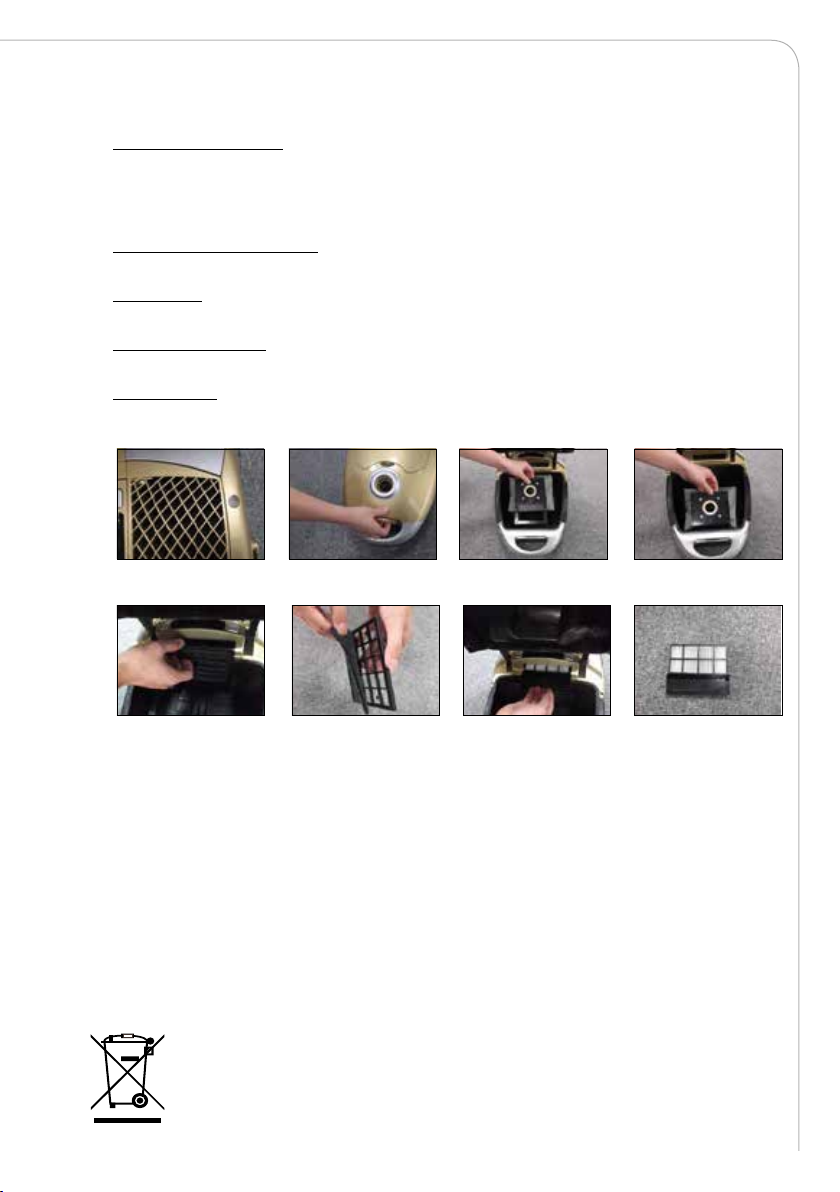
1. Change the dust bag: when the indicator turns to be red, it is time to replace with a new bag.
(Fig 10)
Open the front cover by clipping. (Fig 11)
Take out the bag holder then remove the full dust bag. (Fig 12)
Install the dust bag: insert the dust bag into the bag holder and then put it in the slot
cabinet.(Fig 13)
If the dust bag is not installed, the front cover can't be closed.
2. Inlet filter: clean the filter with warm water once a year and you can install it after dry. If the filter
is damaged, a new filter should be replaced .(Fig 14)
3. Exchange the inlet filter: clip down and remove the inlet cover by hands for exchange of
filter.(Fig 15)
4. Clean the filter: open the front cover and draw out the HEPA frame and filter. Wash it and install
it after dry(Fig 16/17).
Fig 10 Fig 11 Fig 12 Fig 13
Fig 1 Fig 2 Fig 3
Fig 4 Fig 5 Fig 6
Fig 7 Fig 8 Fig 9
Maintenance
1. Change the dust bag: when the indicator turns to be red, it is time to replace with a new bag.
(Fig 10)
Open the front cover by clipping. (Fig 11)
Take out the bag holder then remove the full dust bag. (Fig 12)
Install the dust bag: insert the dust bag into the bag holder and then put it in the slot
cabinet.(Fig 13)
If the dust bag is not installed, the front cover can't be closed.
2. Inlet filter: clean the filter with warm water once a year and you can install it after dry. If the filter
is damaged, a new filter should be replaced .(Fig 14)
3. Exchange the inlet filter: clip down and remove the inlet cover by hands for exchange of
filter.(Fig 15)
4. Clean the filter: open the front cover and draw out the HEPA frame and filter. Wash it and install
it after dry(Fig 16/17).
Fig 10 Fig 11 Fig 12 Fig 13
Fig. 4
Fig. 8
Fig. 2
Fig. 5
Fig. 9
Fig. 3
Fig. 6 Fig. 7
TROUBLESHOOTING
REDUCTION IN VACUUM CLEANER POWER
1. Empty the dust bag.
2. If a blockage is found in the floor brush, hose or tubes, the machine can only be used
again once the blockage has been cleared.
• NOTE! This vacuum cleaner has an over heat protection. If your vacuum cleaner
suddenly stops, unplug and let it cool down completely for at least 30 minutes before
you turn it on again.