OPERATING (Fig.4)
KEEP SAFETY GUARDS IN PLACE.
NEVER COVER THE AIR VENTS SINCE THEY MUST ALWAYS BE
OPEN FOR PROPER MOTOR COOLING.
The key to efficient operating is controlling the pressure and surface contact
between the disc and work piece. Flat surfaces are ground at an acute
angle, usually 10 to 20 degrees with the work piece. Allow the disc to reach
full speed before starting to grind. Too great an angle causes concentration
of pressure on a small area which may gouge or burn work surface.
MAINTENANCE
After use, check the tool to make sure that it is in good condition.
It is recommended that you take this tool to a Ryobi Authorized Service
Centre for a through cleaning and lubrication at least once a year.
DO NOT MAKE ANY ADJUSTMENTS WHILE THE MOTOR IS IN
MOTION.
ALWAYS DISCONNECT THE POWER CORD FROM THE POWER SUPPLY
BEFORE CHANGING REMOVABLE OR CONSUMABLE PARTS
(DIAMOND BLADE, GRINDING WHEEL ETC.), LUBRICATING OR
WORKING ON THE UNIT.
To ensure safety and reliability, all repairs should be performed by
anAUTHORIZEDSERVICECENTRE orotherQUALIFIEDSERVICE
ORGANIZATION.
SAVE THESE INSTRUCTIONS FOR FUTURE REFERENCE.
TOOL - LESS WHEEL GUARD
Release the wheel guard lock lever (11) then turn the tool - less wheel
guard (2) to the desired position.
PowerLightTM
This tool feautres a PowerLightTM (12) which illuminates as soon as the tool
is connected to the power supply. This warns the user that the tool is connected
to live power and will oprerate when the switch is pressed.
Make sure that the tool is only connected to the voltage marked on
the name plate.
Never use the tool if its cover or any bolts are missing. If the cover or
bolts have been removed, replace them prior to use. Maintain all
parts in good working order.
Always secure tools when working in elevated positions.
Never touch the blade, grinding wheel or other moving parts
during use.
Never start a tool when its rotating component is in contact with the
work piece.
Never lay a tool down before its moving parts have come to a
complete stop.
ACCESSORIES : The use of accessories or attachments other than
those recommended in this manual might present a hazard.
REPLACEMENT PARTS : When servicing use only identical
replacement parts.
Do not use wheels having a maximum permissible speed below
12100 RPM.
Check that the speed marked on the grinding wheel is equal to or
greater than the rated speed of the tool.
Ensure that the dimensions of the grinding wheel are compatible
with the tool and that the wheel fits the spindle.
Grinding wheels must be stored in a dry place.
Grinding wheels must not be used for any operation other than grinding.
Grinding wheels must be stored and handled with care in accordance
with the manufacturer’s instruction.
Inspect the grinding wheel before use to ensure that it is not chipped
or cracked. Chips or cracks can cause the wheels to shatter, resulting
in possible serious injury.
Ensure that the wheel is fitted in accordance with this manual.
Ensure that the grinding wheel is correctly mounted and tightened
before use and run the tool at no-load speed for 30 seconds in a
safe position. Stop immediately if there is considerable vibration or if
other defects are detected. If this condition occurs, check the tool to
determine the cause.
Do not use separate reducing bushings or adapters to adapt large
hole grinding wheels.
Check that the work piece is properly supported.
Use only grinding wheels approved by authorized service centre
Ensure that sparks resulting from use do not create a hazard e.g. do
not hit people, or ignite flammable substances.
1 Always use protective safety glasses and ear protectors.
Use other personal protective equipment such as gloves, apron and
helmet when necessary.
Neverplacethetoolonthefloororothersurfaceswhileitisrunning.
Grinding wheels continue to rotate after the tool is switched off.
Never touch the wheel or place it on the floor or other surfaces while
it is rotating.
The flange and outer clamp nut must have same outer diameter.
Donotremovethesoftpaperinthecentreofthegrindingwheel.(If
the paper has been previously removed, insert some soft paper or
rubber between grinding wheel and flange.)
Use the tool only for approved applications. Never use coolants or
water or use the tool as a fixed tool.
Grip the tool securely with both hands while operating.
3
INSTRUCTIONS FOR SAFE HANDLING
DESCRIPTION
ANGLE GRINDER SAFETY PRECAUTIONS
SPECIFICATIONS
EAG95100
Grinding wheel 100 mm (4”)
Voltage* 240 V
Input 900 W
Spindle
No Load speed 11000 min
-1
11000 min
-1
Disc bore size 16 mm 22.2 mm
Net weight 2.34 kg 2.4 kg
thread M10 x 1.5
EAG8012C
125 mm (5")
240 V
800 W
M14 x 2
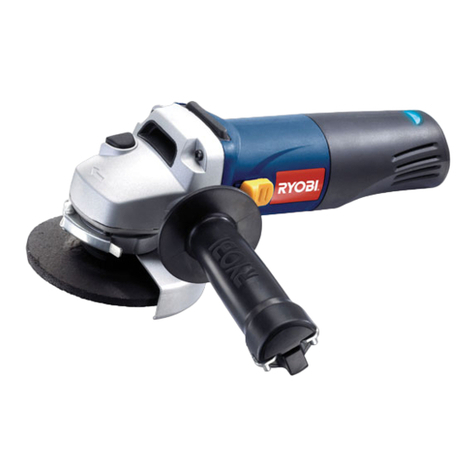
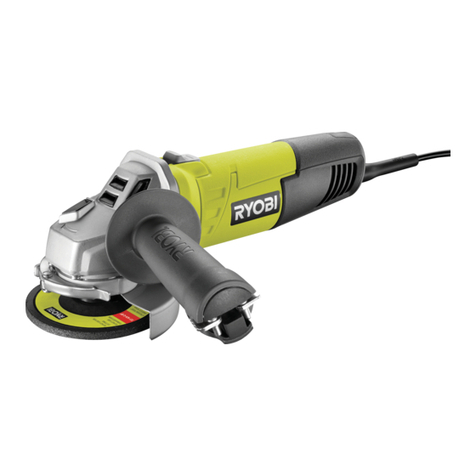
1. Grinding wheel
2.Tool - less wheel guard
7. Outer clamp nut
3.Auxiliary handle
8. Spindle shaft
4. Spindle lock button
9. Wrench
5. Switch
10. Diamond blade (optional)
Wheel guard lock lever
6.Inner disc flange
11.
PowerLightTM
12.
Attach the inner disc flange (6), the diamond blade/flat wheels (10) and
STANDARD ACCESSORIES
Aux. handle, Wrench
A grinding wheel is included in the standard accessories for some
countries.
* Be sure to check the nameplate on the product, because the voltage
is subject to change depending on the area in which the product
is to be used.
APPLICATIONS
(Use only for the purposes listed below.)
Grinding
NOISE BUILD-UP
Noise (sound pressure level) in the workplace can exceed 85 dB (A). In
this case, sound insulation and hearing protection measures must be taken
by the operator.
SWITCH (Fig.2)
This tool is started and stopped by sliding and releasing the switch (5).
For the convenience of continuous operation, slide the switch along and it
will be locked.
To release the lock, press the rear end of the switch
the outer clamp nut (7) upside down, the raised part of the flange does
not face to the spindle shaft (8).
Be sure the inner disc flange is properly seated on the spindle shaft.
Depress the spindle lock button (4) located on the right side of gear case.
Using the wrench (9) provided, tighten the outer clamp nut in a clockwise
direction.
WARNING!
Check carefully whether or not there are cracks in the wheel.
Replace a cracked wheel immediately.
Cutting - for Diamond blade only (optional).
MOUNTING THE GRINDING WHEEL BLADE (Fig.3b & 3c)
Attach the inner disc flange(6) and the wheel on the spindle(8) before
fitting the outer clamp nut. Ensure that the disc(1) is correctly seated over
the boss on the inner disc
flange and outer clamp nut..
Depress the spindle lock button (4) located on the right side of gear case.
Using the wrench (9) provided, tighten the outer clamp nut in a clockwise
direction.
WARNING!
AUXILIARY HANDLE
The auxiliary side handle on this angle grinder houses the wheel lock nut
wrench. To remove the wheel lock nut wrench from the auxiliary handle, pull
it out by the two lugs on the wrench. When finished with the wrench, slide it
back in to the auxiliary handle with the lugs facing out.
