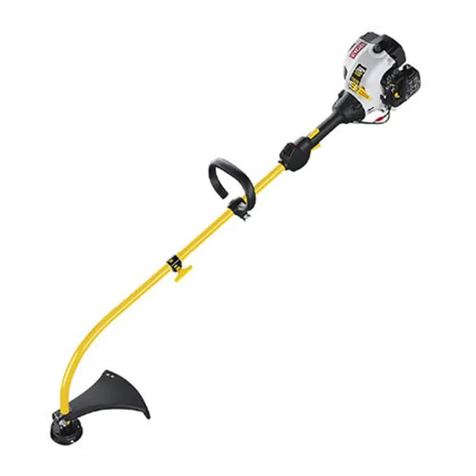
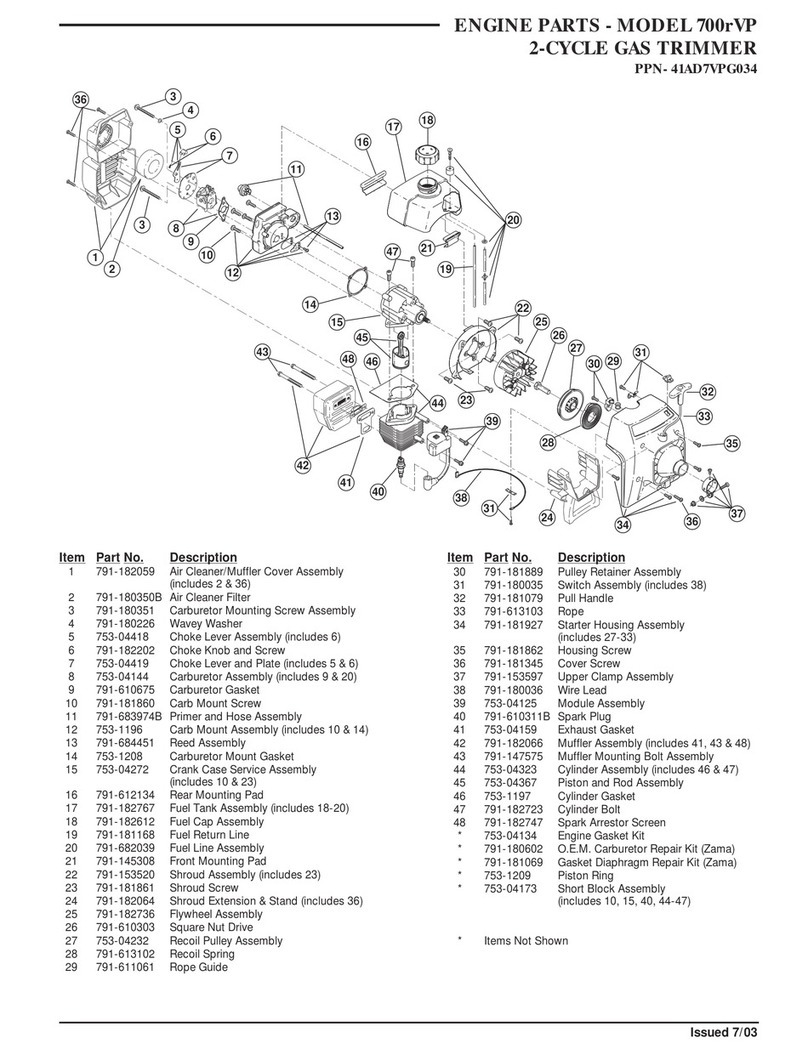
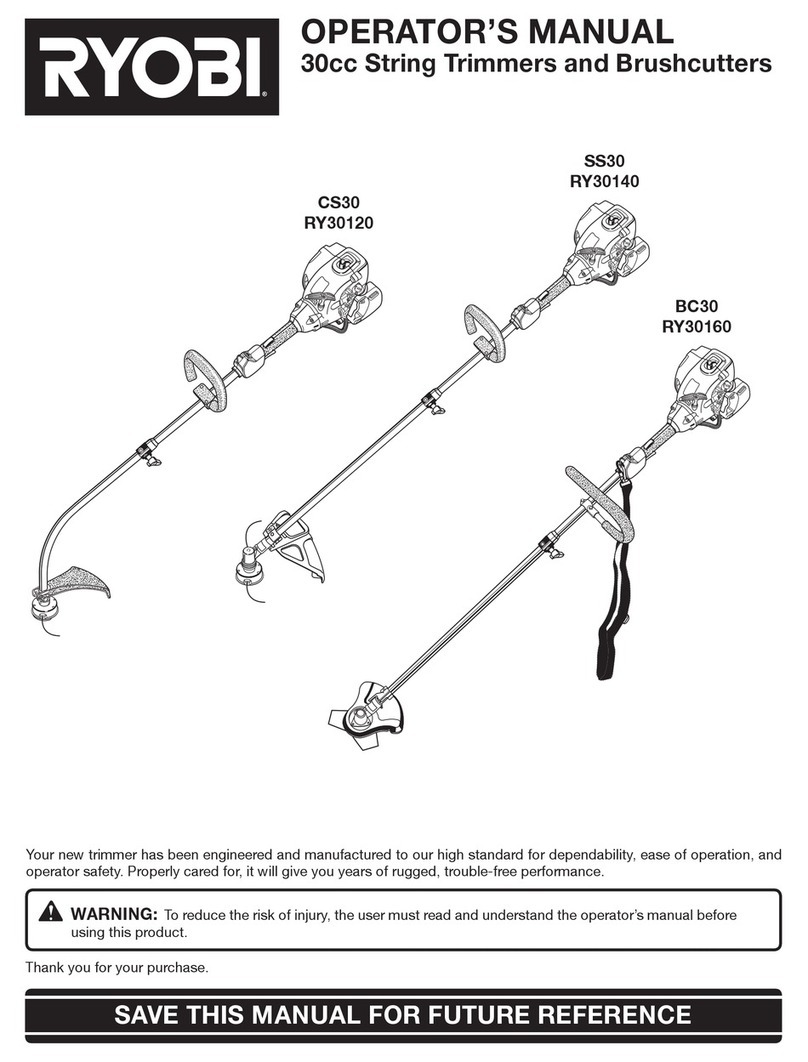
Ryobi RBC30SESNB User manual

STRING TRIMMER / BRUSHCUTTER USER’S MANUAL 1
RECORTADORA DE HILO / CORTADORA DE MALEZA MANUAL DE UTILIZACIÓN 10
GB
E
RBC30SESNB / RBC30SBSNB
RBC30SESNB
RBC30SBSNB

Subject to technical modifications / Bajo reserva de modificaciones técnicas
Important! It is essential that you read the instructions in this manual before
operating this machine.
¡Atención! Es imprescindible que lea las instrucciones de este manual antes del
montaje y de la puesta en servicio.

G B
E
E
G B
1
English
SYMBOLS
Important: Some of the following symbols may be used on your tool. Please study them and learn their meaning.
Proper interpretation of these symbols will allow you to operate the tool better and more safely.
SYMBOLS NAME EXPLANATION
Safety Alert Symbol Indicates danger, warning or caution. it means attention!!!
Your safety is involved.
Read Your Operator's Manual Your manual contains special messages to bring attention to
potential safety concerns as well as operating and servicing
information. Please read all the information carefully to ensure
satification and safe use.
Wear eye, hearing Wear eye, hearing and head protection when operating this
and head protection equipment.
Keep bystanders away Keep all bystanders at least 15m (50 ft) away.
Ricochet Danger of Ricochet.
Tri-Arc blade Tri-Arc blade is appropriate for this unit and is suited for cutting
pulpy weeds and vines.
Do not use toothed blade This unit is not intended for use with a toothed saw type blade.
RPM Decal Rotational direction and maximum speed of the shaft for the
cutting attachment.
Boots Wear non-slip safety footwear when using this equipment.
Gloves Wear non-slip, heavy-duty gloves.
No Smoking Do not smoke when mixing fuel or filling fuel tank.
Petrol Use unleaded petrol intended for motor vehicle use with an
octane rarting of 87([R+M]/2) or higher.
Lubricant Use 2-stroke lubricant for air cooled engines.
Mix Petrol and Lubricant Mix the fuel mix thoroughly and also each time before refuelling.

G B
E
E
G B
2
English
Thank you for buying a Ryobi trimmer/brushcutter.
Your new trimmer/brushcutter has been engineered and
manufactured to Ryobi’s high standard for dependability,
ease of operation, and operator safety. Properly cared for,
it will give you years of rugged, trouble-free performance.
WARNING
To reduce the risk of injury, the user must read
and understand the operator’s manual.
WARNING
Do not attempt to operate this trimmer/brushcutter
until you have read thoroughly and understood
completely all instructions, safety rules etc
contained in this manual. Failure to comply may
result in accidents involving fire, electric shock
or serious personal injury. Save operator’s
manual and review frequently for continuing safe
operation, and instructing others who may use
this tool.
READ ALL INSTRUCTIONS.
GENERAL SAFETY RULES
nFor safe operation, read and understand all
instructions before using the trimmer/brushcutter.
Follow all safety instructions. Failure to follow all
safety instructions listed below, can result in serious
personal injury.
nDo not allow children or untrained individuals to use
this unit.
nNever start or run the engine in a closed or poorly
ventilated area; breathing exhaust fumes can kill.
nClear the work area before each use. Remove all
objects such as rocks, broken glass, nails, wire,
or string which can be thrown or become entangled in
the string head or blade.
nWear full eye and hearing protection while operating
this unit.
nWear heavy long pants, boots, and gloves. Do not
wear loose fitting clothing, short pants, jewellery of
any kind, or use with bare feet.
nSecure long hair so it is above shoulder level to
prevent entanglement in any moving parts.
nKeep all bystanders, children, and pets at least 15 m
away.
nDo not operate this unit when you are tired, ill, or
under the influence of alcohol, drugs, or medication.
nDo not operate in poor lighting.
nKeep firm footing and balance. Do not overreach.
Overreaching can result in loss of balance or
exposure to hot surfaces.
nKeep all parts of your body away from any moving part.
nDo not touch area around the muffler or cylinder of
the trimmer/brushcutter, these parts get hot from
operation.
nAlways stop the engine and remove the spark plug
wire before making any adjustments or repairs except
for carburetor adjustments.
nInspect the unit before each use for loose fasteners,
fuel leaks, etc. Replace any damaged parts before use.
nThe string head or blade will rotate during carburetor
adjustments.
nIt has been reported that vibrations from hand-held
tools may contribute to a condition called Raynaud’s
Syndrome in certain individuals. Symptoms may
include tingling, numbness and blanching of the
fingers, usually apparent upon exposure to cold.
Hereditary factors, exposure to cold and dampness,
diet, smoking and work practices are all thought to
contribute to the development of these symptoms.
It is presently unknown what, if any, vibrations or extent
of exposure may contribute to the condition. There are
measures that can be taken by the operator to possibly
reduce the effects of vibration:
a) Keep your body warm in cold weather. When
opera-ting the unit wear gloves to keep the hands
and wrists warm. It is reported that cold weather is
a major factor contributing to Raynaud’s Syndrome.
b) After each period of operation, exercise to increase
blood circulation.
c) Take frequent work breaks. Limit the amount of
exposure per day.
If you experience any of the symptoms of this condition,
immediately discontinue use and see your physician
about these symptoms.
nKeep the tool well maintained, fasteners tightened
and worn parts replaced.
nMix and store fuel in a container approved for fuel.
nMix fuel outdoors where there are no sparks or flames.
Wipe up any fuel spillage. Move 9 m away from
refueling site before starting engine.
nStop the engine and allow to cool before refueling or
storing the unit.
nAllow the engine to cool; empty the fuel tank and
secure the unit from moving before transporting in a
vehicle.

G B
E
E
G B
SPECIFIC SAFETY RULES FOR TRIMMER USE
nReplace string head if cracked, chipped, or damaged
in any way. Be sure the string head or blade is
properly installed and securely fastened. Failure to do
so can cause serious injury.
nMake sure all guards, straps, deflectors and handles
are properly and securely attached.
nUse only the manufacturer's replacement line in the
cutting head. Do not use any other cutting attachment.
nNever operate unit without the grass deflector in place
and in good condition.
nMaintain a firm grip on both handles while trimming.
Keep string head below waist level. Never cut with
the string head located over 76 cm or more above the
ground.
SPECIFIC SAFETY RULES FOR
BRUSHCUTTER AND BLADE USE
nAfter engine stops, keep rotating blade in heavy grass
or pulpy weeks until it stops.
nDo not operate the brushcutter unless the blade
guard is firmly secured in place and in good condition.
nUse heavy gloves while installing or removing blades.
nAlways stop the engine and remove the spark plug
wire before attempting to remove any obstruction
caught or jammed in the blade or before removing
and installing the blade.
nDo not attempt to touch or stop the blade when it is
rotating.
nA coasting blade can cause injury while it continues
to spin after the engine is stopped or throttle trigger
released. Maintain proper control until the blade has
completely stopped rotating.
nReplace any blade that has been damaged. Always
make sure blade is installed correctly and securely
fastened before each use. Failure to do so can cause
serious injury.
nUse only the manufacturer's replacement TRI-ARC
blade intended for use on this brushcutter. Do not use
any other blade.
nThe TRI-ARC blade is suited for cutting pulpy weeds
and vines only. Do not use for any other purpose.
Never use the TRI-ARC blade to cut woody brush.
nExercise extreme caution when using the blade with
this unit. Blade thrust is the reaction that may occur
when the spinning blade contacts anything it cannot
cut. This contact may cause the blade to stop for
an instant, and suddenly “thrust” the unit away from
the object that was hit. This reaction can be violent
enough to cause the operator to lose control of the unit.
Blade thrust can occur without warning if the blade
snags, stalls, or binds. This is more likely to occur
in areas where it is difficult to see the material being
cut. For cutting ease and safety, approach the weeds
being cut from the right to the left. In the event an
unexpected object or woody stock is encountered,
this could minimize the blade thrust reaction.
nNever cut any material over 13 mm diameter.
nAlways wear the shoulder strap when using the
brushcutter and adjust to a comfortable operating
position. Maintain a firm grip on both handles while
cutting with a blade. Keep the blade away from body
and below waist. Never use the brushcutter with the
blade located 76 cm or more above the ground level.
nCover the blade with the blade protector before
storing the unit, or during transportation. Always
remove the blade protector before using the unit.
If not removed, the blade protector could become a
thrown object as the blade begins to turn.
3
English

G B
E
E
G B
4
English
SPECIFICATIONS
RBC30SESNB RBC30SBSNB
Weight (kg)
- Without fuel, cutting attachment and guard 5.67 6.83
- Without fuel with string head 5.97 7.13
- Without fuel with blade 5.97 7.13
Fuel tank volume [cm3 or (L)] 415 or (0.415) 415 or (0.415)
Cutting swath (mm)
- String head 457 457
- Blade 200 200
Recommended torque for blade (Nm) >=13 >=13
Engine displacement (cm3/ cc) 30 30
Line diameter for Reel EasyTM Head (mm) 2.4 2.4
Line diameter for Pro Cut llTM Head (mm) 2.7 2.7
Maximum engine performance
(in accordance with ISO 8893) (kW) 0.75 0.75
Maximum rotational frequency
of the the spindle (min-1) 10,000 10,000
Engine speed (rotational frequency)
at recommended max. spindle
rotational frequency (min-1) 12,000 12,000
Engine speed (rotational frequency)
at idle (min-1) 2,800-3,800 2,800-3,800
Fuel consumption (in accordance
with ISO 8893) at max. engine performance [kg/h or (L/h)] 0.42 or (0.58) 0.42 or (0.58)
Specific fuel consumption
(in accordance with ISO 8893)
at max. engine performance [g/kW.h or (L/kW.h)] 560 or (0.77) 560 or (0.77)
Vibration level idling (Trimmer) (m/s2)
- Front handle / Left handle 3.6 2.6
- Rear handle / Right handle 2.7 4.7
Vibration level racing (Trimmer) (m/s2)
- Front handle / Left handle 22.6 21.4
- Rear handle / Right handle 19.6 25.6
Vibration level idling (Brush Cutter) (m/s2)
- Front handle / Left handle 3.7 2.2
- Rear handle / Right handle 2.7 3.2
Vibration level racing (Brush Cutter) (m/s2)
- Front handle / Left handle 21.1 10.2
- Rear handle / Right handle 16.3 14.4
Sound pressure level at operator's ear
(in accordance with EN 27917) dB (A) 105.1 104.3
Sound power level (in accordance
with ISO 10884) dB (A) 113 112

G B
E
E
G B
DESCRIPTION
1. Primer Bulb
2. Choke lever
3. Fuel Cap
4. Starter Grip
5. Throttle Lock
6. On / Off Switch
7. Throttle Trigger
8. Rear Handle (RBC30SESNB)
9. Front Handle (RBC30SESNB)
10. Shoulder Strap
11. Shaft
12. Blade Guard
13. Tri-arc Blade
14. Grass Deflector
15. Cutting Line
16. Idle Speed Screw
17. Knob
18. Hanger Cap
19. Trigger Handle (RBC30SBSNB only)
20. Left Handle (RBC30SBSNB only)
21. Throttle interlock (RBC30SBSNB only)
22. Pro Cut llTM
23. Reel EasyTM
ASSEMBLY
Please refer to Fig. 2a - 2d.
WARNING
If any parts are damaged or missing, do not
operate this tool until the parts are replaced.
Failure to heed this warning could result in
serious personal injury.
WARNING
Do not attempt to modify this product or create
accessories not recommended for use with this
product. Any such alteration or modification is
misuse and could result in a hazardous condition
leading to possible serious personal injury.
WARNING
To prevent accidental starting that could cause
serious personal injury, always disconnect the
engine spark plug wire from the spark plug when
assembling parts.
WARNING
Never attach or adjust any attachment while
power head is running. Failure to stop the engine
may cause serious personal injury.
WARNING
Be certain the knob is fully tightened before
operating equipment; check it periodically for
tightness during use to avoid serious injury.
OPERATION
Read the operation manual and follow all
warnings and safety instructions.
Wear eye, hearing, and head protection.
Keep all bystanders, especially children and
pets, at least 15 m from the operating area.
FUEL AND REFUELING
HANDLING THE FUEL SAFELY
nAlways handle fuel with care, it is highly flammable.
nAlways refuel outdoors where there are no sparks
and flames. Do not inhale fuel vapors.
nDo not let petrol or lubricant come in contact with your
skin.
nKeep petrol and lubricant away from the eyes. If
petrol or lubricant comes in contact with the eyes,
wash them immediately with clean water. If irritation is
still present, see a doctor immediately.
nClean up spilled petrol immediately.
MIXING THE FUEL (Fig. 3)
nThis product is powered by a 2-stroke engine and
requires pre-mixing petrol and 2-stroke lubricant. Pre-
mix unleaded petrol and 2-stroke engine lubricant in a
clean container approved for petrol.
nThis engine is certified to operate on unleaded petrol
intended for automotive use with an octane rating
of 87 ([R + M] / 2) or higher.
nDo not use any type of pre-mixed petrol / lubricant from
fuel service stations, this includes the pre-mixed petrol
/ lubricant intended for use in mopeds, motorcycles,
etc.
nUse synthetic 2-stroke lubricant only. Do not use
automotive lubricant or 2-stroke outboard lubricant.
nMix 2% synthetic 2-stroke lubricant into the petrol.
This is a 50:1 ratio.
nMix the fuel thoroughly and also each time before
fueling.
nMix in small quantities. Do not mix quantities larger
than usable in a 30 day period. Synthetic 2-stroke
lubricant containing a fuel stabilizer is recommended.
5
English

G B
E
E
G B
FILLING THE TANK
nClean surface around fuel cap to prevent
contamination.
nLoosen fuel cap slowly to release pressure and to
keep fuel from escaping around the cap.
nCarefully pour fuel mixture into the tank. Avoid spillage.
nPrior to replacing the fuel cap, clean and inspect
the gasket.
nImmediately replace fuel cap and hand tighten.
Wipe upany fuel spillage. Move 9 m away from
refueling site before starting engine.
Note: It is normal for smoke to be emitted from a new
engine during and after first use.
WARNING
Always shut off engine before fueling. Never add
fuel to a machine with a running or hot engine.
Move at least 9 m from refueling site before
starting engine. Do not smoke!
1 Litre + 20 ml =
2 Litres + 40 ml =
3 Litres + 60 ml = 50:1 (2%)
4 Litres + 80 ml =
5 Litres + 100 ml =
STARTING AND STOPPING (Fig. 4a - 4b)
WARNING
Never start or run the engine inside a closed or
poorly ventilated area; breathing exhaust fumes
can kill.
NOTE: Be sure to return the stop switch to the "I" (RUN)
position before trying to start unit.
To start a cold engine:
DO NOT squeeze the throttle trigger until the engine
starts and runs.
nLay the brush cutter on a level surface.
nPlace the engine switch to the on “I” position.
nPRIME - press the primer bulb 10 times slowly.
nSET the choke lever to the "START" position.
nPULL the starter rope with a quick firm and consistent
upward motion until the engine starts. Note: If
difficulties with starting are experienced (this may
occur in colder conditions) refer to troubleshooting
section in this manual.
nAllow engine to warm up for 5-20 seconds, then
squeeze the throttle trigger to run.
Note: Squeezing and releasing the throttle trigger
releases the start lever to the RUN position.
To start a warm engine:
DO NOT squeeze the throttle trigger until the engine
starts and runs.
With the engine switch on “I” position; PULL the starter
rope with a quick firm and consistent upward motion until
the engine starts.
To stop the engine:
Press and hold the switch in the stop “ O ” position until
the engine stops.
OPERATING THE TRIMMER (Fig. 5)
RBC30SESNB : Hold the trimmer with the right hand on the
rear handle and the left hand on the front handle.
RBC30SBSNB: Hold the trimmer with the right hand on the
trigger handle and the left hand on the left handle.
Keep a firm grip with both hands while in operation. Trimmer
should be held at a comfortable position with the trigger
handle about hip height.
Always operate trimmer at full throttle. Cut tall grass
from the top down. This will prevent grass from wrapping
around the shaft housing and string head which may
cause damage from overheating. If grass becomes
wrapped around the string head, stop the engine,
disconnect the spark plug wire, and remove the grass.
Prolonged cutting at partial throttle will result in lubricant
dripping from the silencer.
CUTTING TIPS (Fig. 6)
ADVANCING THE LINE (Fig. 7)
For Reel EasyTM Only
OPERATING THE BRUSHCUTTER (Fig. 5)
RBC30SESNB: Hold the brushcutter with the right hand on
the rear handle and the left hand on the front handle.
RBC30SBSNB: Hold the brushcutter with the right hand on
the trigger handle and the left hand on the left handle.
Keep a firm grip with both hands while in operation.
Brushcutter should be held at a comfortable position with
the trigger handle about hip height. Maintain your grip and
balance on both feet. Position yourself so that you will
not be drawn off balance by the kick-back reaction of the
cutting blade.
6
English
}

G B
E
E
G B
Adjust the shoulder strap to position the brushcutter at
a comfortable operating position and to assure that the
shoulder strap will reduce the risk of operator contact
with the blade.
Exercise extreme caution when using the blade with this
unit. Blade thrust is the reaction which may occur when
the spinning blade contacts anything it cannot cut. This
contact may cause the blade to stop for an instant, and
suddenly “thrust” the unit away from the object that was hit.
This reaction can be violent enough to cause the
operator to lose control of the unit. Blade thrust may
occur without warning if the blade snags, stalls or binds.
This is more likely to occur in areas where it is difficult to
see the material being cut. For cutting ease and safety,
approach the weeds being cut from the right to the left.
In the event that an unexpected object or woody stock is
encountered, this could minimise the blade thrust reaction.
CUTTING TECHNIQUE - BLADE (Fig. 8)
WARNING
Extreme care must be taken when using blades
to ensure safe operation. Read the safety
information for safe operation using the blade,
refer to “Specific Safety Rules for Brushcutter
and Blade Use” earlier in this manual.
MAINTENANCE
WARNING
Use only original manufacturer's replacement
parts, accessories and attachments. Failure to
do so can cause possible injury, poor perfor-
mance and may void your warranty.
nThe cutting attachment must not work in idle mode.
If this requirement is not satisfied, the clutch has
to be adjusted or the machine needs an urgent
maintenance by a qualified technician.
nYou may make adjustments and repairs described
here. For other repairs, have the trimmer serviced by
an authorized service agent.
nConsequences of improper maintenance may
include excess carbon deposits resulting in loss of
performance and discharge of black lubricant residue
dripping from the muffler.
nMake sure all guards, straps, deflectors and handles
are properly and securely attached to avoid the risk of
personal injury.
STRING REPLACEMENT (Fig. 9)
For Reel EasyTM Only
BLADE PROTECTOR (Fig. 10)
CLEANING THE EXHAUST PORT AND MUFFLER
Depending on the type of fuel used, the type and amount
of lubricant used, and/or your operating conditions, the
exhaust port and muffler may become blocked with
carbon deposits. If you notice a power loss with your
petrol powered tool, a qualified service technician will
need to remove these deposits to restore performance.
SPARK ARRESTOR
The spark arrestor must be cleaned or replaced every
25 hours or yearly to ensure proper performance of
your product. Spark arrestors may be in different locations
depending on the model purchased. Please contact
your nearest service dealer for the location of the spark
arrestor for your model.
ATTACHING THE STORAGE HANGER (Fig. 11)
CLEANING THE AIR FILTER SCREEN (Fig. 12)
For proper performance and long life, keep air filter
screen clean.
nRemove the air filter cover by pushing down on the latch
with your thumb while gently pulling on the cover.
nBrush the air filter screen lightly to clean.
nReplace the air filter cover by inserting the tabs on the
bottom of the cover into the slots on the air filter base;
push the cover up until it latches securely in place.
FUEL CAP
WARNING
A leaking fuel cap is a fire hazard and must be
replaced immediately.
The fuel cap contains a non-service able filter and a
check valve. A clogged fuel filter will cause poor engine
performance. If performance improves when the fuel cap
is loosened, check valve may be faulty or filter clogged.
Replace fuel cap if required.
SPARK PLUG REPLACEMENT (Fig. 13)
This engine uses a Champion RCJ-6Y or NGK BPMR7A
spark plug with .05 in. electrode gap. Use an exact
replacement and replace annually.
IDLE SPEED ADJUSTMENT (Fig. 14)
If the cutting attachment turns at idle, the idle speed
screw needs adjusting on the engine. Turn the idle speed
screw counterclockwise to reduce the idle RPM and
stop the cutting attachment movement. If the cutting
attachment still moves at idle speed, contact a service
dealer for adjustment and discontinue use until the repair
is made.
7
English

8
English
G B
E
E
G B
STORING THE PRODUCT
nClean all foreign material from the product. Store idle
unit indoors in a dry, well-ventilated area that is in-
accessible to children. Keep away from corrosive agents
such as garden chemicals.
nAbide by all ISO and local regulations for the safe
storage and handling of petrol.
When storing 1 month or longer:
nDrain all fuel from tank into a container approved for
petrol. Run engine until it stops.
1. Check spark. Remove spark plug. Reattach the spark
plug cap and lay spark plug on metal cylinder. Pull
the starter rope and watch for spark at spark plug
tip. If there is no spark, repeat test with a new spark
plug.
2. Push primer bulb until bulb is full of fuel. If bulb
does not fill, primary fuel delivery system is blocked.
Contact a servicing dealer. If primer bulb fills, engine
may be flooded, proceed to next item.
3. Set the start lever to the START position. Squeeze
the trigger and pull the rope repeatedly until the
engine starts and runs. NOTE: Depending on the
severity of the flooding, this may require numerous
pulls of the rope.
4. Contact a servicing dealer.
1. Lay the brush cutter on a level surface.
2. Place the engine switch to the on "I" position.
3. PRIME - press the primer bulb 10 times slowly.
4. SET the choke lever to the "START" position.
5. PULL the starter rope with a quick firm and
consistent upward motion until the engine starts/
fires.
6. Re-adjust choke lever to half way and allow engine
to warm up for 5-20 seconds. If the engine has
attempted to start but fails to run on, Re-start the
engine in the half choke position (half way between
start and run) and allow engine to warm up.
7. Squeeze throttle trigger to disengage the fast idle
(which automatically adjusts choke to run position).
1. No spark.
2. No fuel.
3. Engine is flooded.
4. Starter rope pulls harder
now than when new.
Fuel is having trouble
atomizing in cold conditions.
Engine will not start.
Engine has difficulties starting in
colder (winter) conditions.
TROUBLESHOOTING
IF THESE SOLUTIONS DO NOT SOLVE THE PROBLEM, CONTACT YOUR AUTHORISED SERVICE DEALER.
PROBLEM POSSIBLE CAUSE SOLUTION

G B
E
E
G B
9
English
PROBLEM POSSIBLE CAUSE SOLUTION
Engine starts, runs, and Idle speed screw on Turn idle speed screw clockwise to increase idle
accelerates but will not idle.
carburetor requires adjustment
speed. (Fig. 14)
Blade continues to rotate Carburetor requires. Contact a servicing dealer.
at idle speed. adjustment.
Line will not advance. 1. Line welded to itself. 1. Lubricate with silicone spray.
2. Not enough line on 2. Install more line. Refer to “Line Replacement”
spool. earlier in this manual.
3. Line worn too short. 3. Pull lines while alternately pressing down on
and releasing bump head.
4. Line tangled on spool. 4. Remove line from spool and rewind. Refer to
“Line Replacement” earlier in this manual.
5. Engine speed too slow. 5. Advance line at full throttle.
Grass wraps round shaft 1. Cutting tall grass at 1. Cut tall grass from the top down.
housing and bump head. ground level.
2. Operating trimmer at 2. Operate trimmer at full throttle.
part throttle.
T
Bump knob hard to turn. Screws threads dirty or Clean threads and lubricate with grease - if no
damaged. improvement, replace bump knob.
Oil drips from muffler. 1. Operating trimmer at 1. Operate trimmer at full throttle.
part throttle.
2. Check oil/fuel mixture. 2. Use fresh fuel and the correct synthetic 2-stroke oil mix.
3. Air filter dirty. 3. Clean per instruction in Maintenance Section.
Allow engine to completely warm up. If engine does
not accelerate after three minutes, contact a servicing
dealer.
Contact a servicing dealer.
1. Use fresh fuel and the correct 2-stroke oil mix.
2. Clean air filter. Refer to Cleaning the Air Filter
Screen earlier in this manual.
3. Contact a servicing dealer.
Engine requires
approximately three minutes
to warm up.
Carburetor requires
adjustment.
1. Check oil fuel mixture.
2. Air filter is dirty.
3. Spark arrestor screen is
dirty.
Engine starts but will not
accelerate.
Engine starts but will only run at
high speed at half choke.
Engine does not reach full speed
and emits excessive smoke.
NOTE: If your unit exhibits specific performance problem(s) where the Troubleshooting section recommends a clockwise screw
adjustment on the carburetor and no adjustments have been made since original purchase, the unit should be taken to
an authorised service centre for repair. In most cases, the needed adjustment is a simple task for the trained service
representative.

G B
E
E
G B
10
Español
SÍMBOLOS
Importante: Algunos de los símbolos que se indican a continuación pueden figurar en la herramienta. Aprenda a
reconocerlos y recuerde su significado. La correcta interpretación de estos símbolos le permitirá utilizar la herramienta
con mayor seguridad y de manera adecuada.
SÍMBOLOS NOMBRE SIGNIFICADO
Símbolo de alerta de seguridad Indica un peligro, una advertencia o un aviso. Significa:
¡atención, su seguridad está en juego!
Lea atentamente el manual El manual de utilización contiene advertencias especiales
de utilización destinadas a llamar su atención sobre potenciales riesgos,
e informaciones sobre el funcionamiento y el mantenimiento
de la herramienta. Lea atentamente el presente manual para
utilizar la herramienta con toda seguridad y de manera óptima.
Utilice gafas de seguridad, Utilice elementos de protección ocular y auditiva, y un casco
elementos de protección cuando utilice esta máquina.
auditiva y un casco
Mantenga a distancia a toda Mantenga a las demás personas como mínimo a una distancia
otra persona de 15 m de la zona de corte.
Rebote Riesgo de rebotes.
Hoja de tres dientes Esta herramienta se utiliza como desbrozadora con una hoja
de tres dientes, diseñada para cortar las malas hierbas y las
plantas tiernas.
No utilice hojas para sierras Con esta herramienta no se puede utilizar hojas para
circulares sierras circulares.
Velocidad de rotación (r.p.m.) Sentido de rotación y velocidad máxima del dispositivo de corte
en salida del árbol.
Botas Lleve calzado de seguridad antideslizante cuando utilice esta
herramienta.
Guantes Lleve guantes de trabajo gruesos de máxima adhesión.
Prohibido fumar No fume cuando haga la mezcla de carburante o cuando llene
el depósito de combustible.
Gasolina Utilice gasolina sin plomo para automóviles con un índice de
octano de 87 ([R+M]/2) o superior.
Aceite Utilice un aceite de síntesis de dos tiempos para motores de
enfriamiento de aire.
Mezcla gasolina + aceite Mezcle bien el carburante antes de llenar el depósito.

G B
E
E
G B
Le agradecemos su confianza por haber comprado
una herramienta Ryobi.
Este cortabordes / desbrozadora ha sido diseñado y
fabricado por Ryobi siguiendo elevados criterios de
exigencia, por lo cual se trata de una herramienta
fiable, de utilización sencilla y segura. Si efectúa un
mantenimiento correcto de la máquina, podrá utilizar
esta herramienta resistente y de excelentes prestaciones
durante muchos años.
ADVERTENCIA
Para reducir el riesgo de heridas, lea atentamente
y comprenda el presente manual de utilización.
ADVERTENCIA
No utilice esta herramienta antes de haber leído y
comprendido cabalmente todas las instrucciones
y consignas de seguridad que figuran en este
manual. El incumplimiento de estas consignas
podría ocasionar accidentes como incendios,
descargas eléctricas o heridas corporales graves.
Conserve este manual de utilización y consúltelo
a menudo para trabajar con total seguridad e
informar a otros posibles usuarios.
LEA TODAS LAS INSTRUCCIONES.
INSTRUCCIONES GENERALES DE
SEGURIDAD
nPara trabajar sin correr riesgos innecesarios, lea y
comprenda todas las instrucciones antes de utilizar
el cortabordes / desbrozadora. Cumpla todas las
instrucciones de seguridad. El incumplimiento de
las recomendaciones de seguridad que se indican a
continuación puede provocar heridas corporales graves.
nNo deje en ningún caso que los niños o cualquier otra
persona inexperimentada utilice esta herramienta.
nNo ponga el motor en marcha en una sala cerrada o
mal ventilada, ya que los gases de escape pueden
resultar mortales.
nDespeje la zona de corte antes de cada utilización.
Retire las piedras, trozos de vidrio, clavos, cables
metálicos, cuerdas y demás objetos que podrían
resultar proyectados o atascarse en la cabeza de
corte o en la hoja.
nLleve gafas de seguridad y protecciones auditivas
cuando utilice esta herramienta.
nUtilice también un pantalón largo y grueso, botas y
guantes. No use prendas amplias ni pantalón corto ni
joyas, y no trabaje descalzo.
nSi tiene el cabello largo, átelo por encima de los
hombros para evitar que se coja en los elementos en
movimiento.
nMantenga a los niños, a las demás personas y a los
animales a no menos de 15 metros del lugar donde
trabaja.
nNo emplee la máquina si está cansado o enfermo,
si ha consumido alcohol o drogas, o si está tomando
algún medicamento.
nNo utilice esta herramienta si no tiene luz suficiente
para trabajar.
nMantenga siempre el equilibrio. Afírmese bien en
sus piernas y no extienda demasiado el brazo. De
lo contrario, podría caerse o tocar algún elemento
caliente.
nMantenga el cuerpo lejos de las piezas en
movimiento.
nNo acerque las manos al escape o al cilindro del
cortabordes / desbrozadora, ya que estos elementos
se calientan mucho al trabajar.
nDetenga el motor y desenchufe el cable de la bujía
antes de efectuar cualquier ajuste o reparación,
excepto cuando se trate de regular el carburador.
nControle la herramienta antes de cada utilización
para comprobar que ninguna pieza está aflojada,
que la herramienta no pierde carburante, etc.
Substituya cualquier pieza deteriorada antes de
utilizar la herramienta.
nTenga mucho cuidado, la cabeza de corte o la hoja
gira cuando se regula el carburador.
nEn algunas personas, las vibraciones sufridas al
trabajar con una herramienta portátil pueden producir
la “enfermedad de Raynaud”, cuyos síntomas son:
hormigueo, entumecimiento y un cambio de color
de los dedos, que se observa generalmente durante
una exposición al frío. Al parecer, estos síntomas
se ven favorecidos por factores hereditarios,
por una exposición al frío y a la humedad, por
ciertos regímenes alimentarios, así como por
el tabaco y ciertas costumbres de trabajo. En el
estado actual del conocimiento, no se sabe qué
cantidad de vibraciones o qué tiempo de exposición
a las vibraciones puede producir la enfermedad.
No obstante, tome algunas precauciones para limitar
su exposición a las vibraciones, tales como:
a) Lleve ropa de abrigo cuando haga frío. Cuando
utilice esta herramienta, póngase guantes para
mantener las manos y las muñecas calientes.
En efecto, al parecer, el frío es uno de los
principales factores que favorecen la aparición de
la enfermedad de Raynaud.
b) Después de cada utilización, haga algunos
ejercicios para estimular la circulación sanguínea.
11
Español

G B
E
E
G B
INSTRUCCIONES DE SEGURIDAD
ESPECÍFICAS PARA LOS CORTABORDES
c) Haga pausas con regularidad y limite su exposición
diaria a las vibraciones.
Si experimenta alguno de estos síntomas, deje
inmediatamente de utilizar la herramienta y consulte
a un médico.
nMantenga la herramienta en buen estado,
comprobando que las piezas estén bien ajustadas y
substituyendo cualquier pieza deteriorada.
nMezcle y guarde el carburante en un bidón diseñado
para contener gasolina.
nMezcle el carburante y llene el depósito de
combustible lejos de chispas o llamas. Limpie todo
rastro de carburante derramado. Manténgase alejado
como mínimo a una distancia de 9 m del lugar donde
ha llenado el depósito de carburante antes de poner
en marcha el motor.
nDetenga el motor y espere hasta que se enfríe
antes de llenarlo con carburante o de guardar la
herramienta.
nAntes de transportar el cortabordes en un vehículo,
espere hasta que el motor se haya enfriado y sujete
la herramienta para evitar que se mueva durante el
transporte.
nReemplace la cabeza con el hilo de corte si está
resquebrajada, fisurada o dañada de una u otra
forma. Cerciórese de que la cabeza para hilo de
corte esté correctamente montada y bien fijada.
El incumplimiento de esta consigna puede provocar
heridas corporales graves.
nCerciórese de que los dispositivos de protección,
las correas, las empuñaduras y los deflectores estén
bien instalados y correctamente sujetos.
nAl cambiar el hilo de corte, utilice hilo recomendado
por el fabricante exclusivamente. No utilice ningún
otro dispositivo de corte.
nNo utilice nunca el cortabordes si el deflector no está
colocado o no está en buenas condiciones.
nPara trabajar, sostenga el cortabordes firmemente de
ambas empuñaduras. Mantenga la cabeza de corte
por debajo del nivel de su cintura. No trabaje nunca
con la cabeza de corte a una altura que supere los
76 cm del suelo.
nDespués de parar el motor, mantenga la hoja en
rotación en la hierba gruesa o en las malas hierbas
hasta que deje de girar.
nNo utilice la desbrozadora si el protector de hoja no
está correctamente instalado y fijado, o si no está en
buenas condiciones.
nPóngase guantes gruesos cuando instale o retire
una hoja.
nPare el motor y desenchufe el cable de la bujía antes
de intentar retirar cualquier elemento atascado en la
hoja, y antes de cambiar o retirar una hoja.
nNo intente tocar o parar la hoja cuando está girando.
nUna hoja que sigue girando por inercia después de
parar el motor o al soltar el gatillo puede provocar
heridas graves. Controle la herramienta hasta que la
hoja se haya detenido completamente.
nSubstituya la hoja cuando esté deteriorada.
Antes de utilizar la herramienta, cerciórese de
que la hoja esté colocada correcta y sólidamente.
El incumplimiento de esta consigna puede provocar
heridas corporales graves.
nSi debe substituir la hoja, utilice únicamente una hoja
de tres dientes específicamente diseñada para la
desbrozadora. No utilice ningún otro modelo de hoja.
nLas hojas de tres dientes están diseñadas para
cortar las malas hierbas y las plantas tiernas exclusi-
vamente. No utilice esta herramienta para otros
fines. No utilice nunca una hoja de tres dientes para
cortar arbustos.
nTenga mucho cuidado cuando utiliza esta
herramienta equipada con una hoja. Puede
producirse un rebote cuando la hoja entra en
contacto con un elemento que no puede cortar.
Este contacto puede provocar una parada brusca
de la hoja durante un corto instante y proyectar
repentinamente la herramienta lejos del objeto con
el que ha chocado. Esta reacción puede ser bastante
violenta y hacer que el usuario pierda el control de
la herramienta. Puede producirse un rebote si la
hoja choca contra un obstáculo, si se bloquea o se
tuerce. El rebote puede producirse sobre todo en una
zona en donde sea difícil ver el material que se está
cortando. Para trabajar en buenas condiciones y con
toda seguridad, corte las malas hierbas efectuando
un movimiento de derecha a izquierda. Si un objeto
o un trozo de madera se encuentra en el lugar por
donde pasa la hoja, este movimiento lateral permite
reducir el efecto de rebote.
12
Español
INSTRUCCIONES
DE SEGURIDAD ESPECÍ-
FICAS PARA LAS DESBROZADORAS Y
PARA LA UTILIZACIÓN DE UNA HOJA

G B
E
E
G B
nNo corte nunca elementos de más de 13 mm de
diámetro.
nUtilice siempre el arnés al trabajar con la
desbrozadora y ajústelo para obtener una posición
de trabajo cómoda. Al cortar, sujete sólidamente la
herramienta de ambas empuñaduras. Mantenga la
hoja alejada de su cuerpo y por debajo del nivel de su
cintura. No utilice nunca la desbrozadora colocando
la hoja a más de 76 cm del suelo.
nProteja la hoja de tres dientes colocando la
protección de la hoja antes de guardar o transportar
la herramienta. Retire la protección de la hoja antes
de utilizar la herramienta. Si la protección de la hoja
no está retirada, podría resultar proyectada cuando la
hoja gira.
13
Español
INSTRUCCIONES
DE SEGURIDAD ESPECÍ-
FICAS PARA LAS DESBROZADORAS Y
PARA LA UTILIZACIÓN DE UNA HOJA

G B
E
E
G B
CARACTERÍSTICAS TÉCNICAS
Peso (kg)
- sin combustible, ni sistema de corte ni protección
- sin combustible, con cabeza para hilo de corte
- sin combustible, con hoja
Capacidad del depósito de combustible [cm3o (L)]
Anchura de corte (mm)
- Cabeza para hilo de corte
- Hoja
Par recomendado para la hoja (Nm)
Cilindrada (cm3/ cc)
Diámetro del hilo Reel EasyTM Head (mm)
Diámetro del hilo Pro Cut llTM Head (mm)
Potencia máxima del motor (conforme a la
norma ISO 8893) (kW)
Velocidad máxima de rotación del árbol (min-1)
Régimen motor a la velocidad de rotación máxima (min-1)
Régimen motor al ralentí (min-1)
Consumo de combustible (conforme a la norma ISO 8893)
con rendimiento máximo del motor [kg/h o (L/h)]
Consumo específico de combustible (conforme a la norma
ISO 8893) con rendimiento máximo del motor [[g/kW.h o (L/kW.h)]]
Nivel de vibraciones al ralentí (cortabordes) (m/s2)
- Empuñadura delantera / empuñadura izquierda
- Empuñadura trasera / empuñadura derecha
Nivel de vibraciones a máxima velocidad (cortabordes) (m/s2)
- Empuñadura delantera / empuñadura izquierda
- Empuñadura trasera / empuñadura derecha
Nivel de vibraciones al ralentí (desbrozadora) (m/s2)
- Empuñadura delantera / empuñadura izquierda
- Empuñadura trasera / empuñadura derecha
Nivel de vibraciones a máxima velocidad (desbrozadora) (m/s2)
- Empuñadura delantera / empuñadura izquierda
- Empuñadura trasera / empuñadura derecha
Presión acústica (conforme a las normas EN 27917) dB (A)
Potencia acústica (conforme a la norma ISO 10884) dB (A)
14
Español
RBC30SESNB RBC30SBSNB
5.67 6.83
5.97 7.13
5.97 7.13
415 o (0.415) 415 o (0.415)
457 457
200 200
>=13 >=13
30 30
2.4 2.4
2.7 2.7
0.75 0.75
10,000 10,000
12,000 12,000
2,800-3,800 2,800-3,800
0.42 o (0.58) 0.42 o (0.58)
560 o (0.77) 560 o (0.77)
3.6 2.6
2.7 4.7
22.6 21.4
19.6 25.6
3.7 2.2
2.7 3.2
21.1 10.2
16.3 14.4
105.1 104.3
113 112

G B
E
E
G B
DESCRIPCIÓN
1. Bomba de mano
2. Palanca del starter
3. Tapón del depósito de combustible
4. Arrancador
5. Botón para liberar el gatillo
6. Interruptor Marcha / Parada
7. Gatillo acelerador
8. Empuñadura trasera (RBC30SESNB)
9. Empuñadura delantera (RBC30SESNB)
10. Arnés
11. Tubo
12. Protector de hoja
13. Hoja de tres dientes
14. Deflector de hierba
15. Hilo de corte
16. Tornillo de ralentí
17. Tornillo de bloqueo
18. Soporte para colgar la máquina
19. Empuñadura principal con gatillo (RBC30SBSNB
únicamente)
20. Empuñadura izquierda (RBC30SBSNB únicamente)
21. Botón de bloqueo del gatillo (modelo RBC30SBSNB
únicamente)
22. Pro Cut llTM
23. Reel EasyTM
MONTAJE
Véase la Fig. 2a - 2d.
ADVERTENCIA
Si falta alguna pieza o piezas o si están
dañadas, no utilice esta herramienta hasta
que se hayan restituido las piezas necesarias.
El incumplimiento de esta advertencia puede
causar heridas de gravedad.
ADVERTENCIA
No intente modificar este producto o crear
accesorios no recomendados para su uso
con este producto. Cualquier alteración o
modificación dará lugar a un uso incorrecto y
podría crear una situación peligrosa susceptible
de causarle lesiones de gravedad.
ADVERTENCIA
Para impedir arranques accidentales que podrían
provocar lesiones de gravedad, desconecte
siempre el cable que conecta el motor con la
bujía cuando esté montando piezas.
ADVERTENCIA
No coloque ni ajuste ningún accesorio con la
cabeza de corte en funcionamiento. Si no para el
motor, podría sufrír lesiones de gravedad.
ADVERTENCIA
Asegúrese de que el botón de bloqueo
esté totalmente apretado antes de utilizar
la herramienta; compruebe su apriete
periódicamente durante el uso para evitar
lesiones de gravedad.
UTILIZACIÓN
Lea atentamente este manual de utilización y
cumpla todas las advertencias y consignas de
seguridad.
Utilice gafas de seguridad, elementos de
protección auditiva y un casco.
Mantenga a las demás personas, y en
especial a los niños y a los animales, a una
distancia mínima de 15 m de la zona de corte.
CARBURANTE Y LLENADO DEL DEPÓSITO
MANIPULAR EL CARBURANTE CON TODA
SEGURIDAD
nManipule el combustible con precaución; se trata de
una substancia sumamente inflamable.
nMezcle el carburante y llene el depósito de
combustible al aire libre, lejos de chispas o llamas.
No inhale los vapores del carburante.
nEvite todo contacto con la gasolina o el aceite.
nEvite particularmente toda proyección de gasolina o
de aceite a los ojos. Si le salpica gasolina o aceite
a los ojos, enjuáguelos inmediatamente con agua.
Si la irritación persiste, consulte inmediatamente a
un médico.
nLimpie inmediatamente todo rastro de carburante
derramado.
MEZCLAR EL CARBURANTE (Fig. 3)
nLa herramienta funciona con un motor de 2 tiempos
que necesita una mezcla de gasolina y de aceite de
síntesis 2 tiempos. Mezcle la gasolina sin plomo y el
aceite de síntesis 2 tiempos en un recipiente limpio
homologado para contener gasolina.
nEl motor funciona con gasolina sin plomo para
automóviles con un índice de octano de 87 ([R+M]/2)
o superior.
nNo utilice las mezclas de gasolina y aceite que
se venden en las gasolineras, especialmente las
mezclas para motos, velomotores, etc.
nUtilice aceite de síntesis de dos tiempos
exclusivamente. No utilice aceite de motor para
coches ni aceite 2 tiempos para fuera bordas.
nMezcle la gasolina y el aceite de síntesis 2 tiempos
en una proporción de 50:1 (2%).
15
Español

G B
E
E
G B
nMezcle bien el carburante antes de llenar el depósito.
nMezcle el carburante en pequeñas cantidades:
no mezcle carburante para un período superior
a un mes. Le recomendamos igualmente que utilice
un aceite de síntesis 2 tiempos con estabilizador
de carburante.
LLENAR EL DEPÓSITO
nLimpie el depósito alrededor del tapón para evitar
contaminar el carburante.
nAfloje lentamente el tapón del depósito para reducir
la presión y evitar que el carburante se derrame
alrededor del tapón.
nVierta con precaución la mezcla de carburante en el
depósito, sin derramarla.
nAntes de volver a ajustar el tapón, limpie la junta y
cerciórese de que se encuentra en buen estado.
nVuelva a colocar inmediatamente el tapón del
depósito y apriételo firmemente. Limpie todo rastro
de carburante derramado. Manténgase alejado como
mínimo a una distancia de 9 m del lugar donde ha
llenado el depósito de carburante antes de poner en
marcha el motor.
Observación: Es normal que el motor produzca
humo durante la primera utilización, y a veces
también en posteriores utilizaciones.
ADVERTENCIA
Detenga siempre el motor antes de llenar el
depósito. No llene nunca el depósito de
combustible de una herramienta cuando el
motor esté funcionando o cuando todavía esté
caliente. Manténgase alejado como mínimo a
una distancia de 9 m del lugar donde ha llenado
el depósito de carburante antes de poner en
marcha el motor. ¡No fume!
1 Litro + 20 ml =
2 Litros + 40 ml =
3 Litros + 60 ml = 50:1 (2%)
4 Litros + 80 ml =
5 Litros + 100 ml =
PUESTA EN MARCHA Y PARADA DEL
CORTABORDES (Fig. 4a - 4b)
ADVERTENCIA
No ponga nunca el motor en marcha en una sala
cerrada o mal ventilada, ya que los gases de
escape pueden resultar mortales.
Observación: esta herramienta está equipada de un
interruptor marcha/parada. Antes de poner en marcha el
motor, cerciórese de que el interruptor esté en posición
MARCHA “I”.
Para arrancar un motor frío:
NO apriete el gatillo acelerador hasta que el motor
arranque y empiece a funcionar.
nApoye la desbrozadora sobre una superficie plana y sin
vegetación
nCEBADO - Pulse la bomba de mano 10 veces.
nPONGA el gatillo de arranque en la posición START
nTIRE de la cuerda hasta que el motor arranque.
nEspere entre 6 y 10 segundos, entonces apriete el
acelerador.
NOTA: Al apretar y soltar el gatillo acelerador el gatillo de
arranque vuelve a la posición RUN.
Arrancar un motor caliente:
TIRE de la cuerda hasta que el motor arranque.
Detener el motor:
Mantenga pulsado el interruptor en la posición de parada
“O” hasta que el motor se pare.
UTILIZAR EL CORTABORDES (Fig. 5)
RBC30SESNB: Sostenga la empuñadura trasera del
cortabordes con la mano derecha y la empuñadura
delantera con la mano izquierda.
RBC30SBSNB: Sostenga la empuñadura derecha del
cortabordes con la mano derecha y la empuñadura
izquierda con la mano izquierda.
Sostenga firmemente el aparato con ambas manos
mientras esté trabajando. El cortabordes debe
sostenerse en una posición de trabajo cómoda,
con la empuñadura derecha a la altura de la cadera.
Trabaje siempre con el motor a máxima velocidad.
Corte la hierba alta de arriba hacia abajo para que la hierba
cortada no se enrolle alrededor del tubo o de la cabeza
que aloja el hilo de corte, produciendo un recalentamiento
del motor. Si se enreda hierba en la cabeza que aloja el
hilo de corte, pare el motor, desenchufe el cable de la
bujía y retire la hierba atascada. El uso prolongado de la
máquina a velocidad moderada producirá una fuga de
aceite por el tubo de escape.
16
Español

G B
E
E
G B
CONSEJOS DE CORTE (Fig. 6)
SALIDA DEL HILO DE CORTE (Fig. 7)
Sólo para Reel EasyTM.
UTILIZAR LA DESBROZADORA (Fig. 5)
RBC30SESNB: Sostenga la empuñadura trasera de la
desbrozadora con la mano derecha y la empuñadura
delantera con la mano izquierda.
RBC30SBSNB: Sostenga la empuñadura derecha de
la desbrozadora con la mano derecha, y la empuñadura
izquierda con la mano izquierda.
Sostenga firmemente la herramienta con ambas
manos mientras esté trabajando. La desbro-zadora
debe sostenerse en una posición de trabajo cómoda,
con la empuñadura derecha a la altura de la cadera.
Sostenga firmemente la herramienta y mantenga una
posición estable. De este modo, evitará perder el equilibrio
si la hoja rebota.
Ajuste el arnés para obtener una posición de trabajo
cómoda. El arnés permite igualmente mantener la hoja a
una distancia prudente de su cuerpo.
Tenga mucho cuidado cuando utiliza esta herramienta
equipada con una hoja. Puede producirse un rebote
cuando la hoja entra en contacto con un elemento que no
puede cortar. Este contacto puede provocar una parada
brusca de la hoja durante un corto instante y proyectar
repentinamente la herramienta lejos del objeto con el que
ha chocado. Esta reacción puede ser bastante violenta y
hacer que el usuario pierda el control de la herramienta.
Puede producirse un rebote si la hoja choca contra un
obstáculo, si se bloquea o se tuerce. El rebote puede
producirse sobre todo en una zona en donde sea difícil
ver el material que se está cortando. Para trabajar en
buenas condiciones y con toda seguridad, corte las
malas hierbas efectuando un movimiento de derecha a
izquierda. Si un objeto o un trozo de madera se encuentra
en el lugar donde pasa la hoja, este movimiento lateral
permite reducir el efecto de rebote.
CONSEJOS DE CORTE CON LA HOJA (Fig. 8)
ADVERTENCIA
Tenga mucho cuidado cuando utiliza una hoja.
Lea atentamente la sección “Instrucciones de
seguridad específicas para las desbrozadoras y
para la utilización de una hoja” de este manual.
MANTENIMIENTO
ADVERTENCIA
Para el mantenimiento, utilice exclusivamente
piezas, accesorios y herramientas originales.
El incumplimiento de esta consigna podría
ocasionar un funcionamiento incorrecto de la
herramienta y producir heridas graves. Además,
anularía y cancelaría la garantía.
nNo utilice el sistema de corte con el motor al ralentí.
En caso de incumplimiento de esta consigna,
es necesario ajustar el embrague o hacer reparar
urgentemente la herramienta por un técnico cualificado.
nEfectúe exclusivamente los ajustes y las reparaciones
que se describen en el presente manual. Para
cualquier otra operación en la máquina, lleve el
cortabordes a un Centro de Servicio Habilitado Ryobi.
nUn mantenimiento incorrecto de la herramienta puede
producir un exceso de calamina, lo cual puede reducir
la eficacia de la herramienta y provocar una pérdida
de residuo aceitoso negro por el escape.
nCerciórese de que los dispositivos de protección,
las correas, las empuñaduras y los deflectores estén
bien instalados y correctamente sujetos. De este modo,
reducirá el riesgo de heridas graves.
SUBSTITUCIÓN DEL HILO (Fig. 9)
Sólo para Reel EasyTM.
PROTECCIÓN DE LA HOJA (Fig. 10)
LIMPIAR EL ORIFICIO DE ESCAPEY EL ESCAPE
Según el tipo de carburante que se utiliza, el tipo y la
cantidad de aceite y/o las condiciones de uso, el orificio
de escape y el escape pueden resultar obstruidos por un
exceso de calamina. Si observa una pérdida de potencia
de la herramienta, hágala limpiar por un técnico cualificado.
PARACHISPAS
El parachispas debe limpiarse o substituirse después
de 25 horas de utilización o una vez al año para
garantizar el correcto funcionamiento de la herramienta.
El parachispas puede situarse en distintos lugares en
función del modelo de la herramienta. Contacte con el
Centro de Servicio Habilitado Ryobi más cercano para
localizar el parachispas en su herramienta.
FIJACIÓN DEL SOPORTE PARA COLGAR EL
DISPOSITIVO (Fig. 11)
LIMPIAR EL FILTRO DE AIRE (Fig. 12)
Para un mantenimiento adecuado y una larga duración,
mantenga limpia la pantalla del filtro de aire.
nRetire la cubierta del filtro de aire empujando hacia
abajo el mosquetón con su pulgar mientras tira con
cuidado de la cubierta.
nCepille la pantalla del filtro de aire suavemente para
limpiarla.
17
Español

18
Español
G B
E
E
G B
nCambie la cubierta del filtro de aire introduciendo
las pestañas de la parte inferior de la cubierta en las
ranuras de la base del filtro de aire; empuje la cubierta
hasta que se quede bien sujeta en su sitio.
TAPÓN DEL DEPÓSITO DE CARBURANTE
ADVERTENCIA
Un tapón no hermético puede producir incendios
y debe substituirse inmediatamente.
El tapón del depósito de combustible contiene un filtro y
una válvula de comprobación no reutilizables. Un filtro de
combustible atascado causará un rendimiento del motor
pobre. Si su rendimiento mejora cuando se afloja el
tapón del combustible, la válvula de comprobación puede
estar defectuosa o el filtro atascado.
Cambie el tapón del depósito de combustible si es
necesario.
CAMBIO DE LA BUJÍA (Fig. 13)
Este motor utiliza una bujía Champion RCJ-6Y o NGK
BPMR7A con una abertura para el electrodo de 0,05
pulgadas. Utilice un recambio igual y cámbielo una vez
al año.
AJUSTE DE LA VELOCIDAD DE RALENTÍ (Fig. 14)
Si el accesorio de corte se pone al ralentí, hay que
ajustar los tornillos de la velocidad de ralentí del motor.
Gire el tornillo de la velocidad de ralentí en sentido
contrario a las agujas del reloj para reducir las RPM al
ralentí y parar el movimiento
del accesorio de corte. Si el accesorio de corte sigue
moviéndose a velocidad de ralentí, póngase en contacto
con el servicio técnico para su ajuste y deje de utilizar el
aparato hasta su reparación.
GUARDAR EL PRODUCTO
nLimpie todo material ajeno al producto. Guarde la
unidad inactiva a cubierto, en una zona seca y bien
ventilada, a la que no puedan acceder los niños.
Manténgala lejos de agentes corrosivos como
químicos de jardines y sales de descongelación.
nRespete todas las normativas ISO y locales para el
almacenamiento y manejo seguro de gasolina.
Para almacenamientos de un mes o más:
nDrene todo el combustible del depósito a un
contenedor autorizado para gasolina. Haga funcionar
el motor hasta que se detenga.
This manual suits for next models
1
Table of contents
Languages:
Other Ryobi Trimmer manuals

Ryobi
Ryobi RBC430SESD User manual

Ryobi
Ryobi RBC254FSBSN User manual

Ryobi
Ryobi RY30520 User manual

Ryobi
Ryobi RHT5555RS User manual

Ryobi
Ryobi C430 RY34421 User manual

Ryobi
Ryobi R36HTRBL User manual

Ryobi
Ryobi P2606 User manual

Ryobi
Ryobi R18PHT120 User manual

Ryobi
Ryobi RY40600 User manual

Ryobi
Ryobi RLT26CDY User manual