manuals.online logo
Brands
  1. Home
  2. •
  3. Brands
  4. •
  5. S SELDORAUK
  6. •
  7. Security System
  8. •
  9. S SELDORAUK TL-850 User manual

S SELDORAUK TL-850 User manual

EP665 / 0238261/TL-850
« E’clipse Détection » alarm security
system/ Watchdog barking sound
Instruction manual
2 accessories:
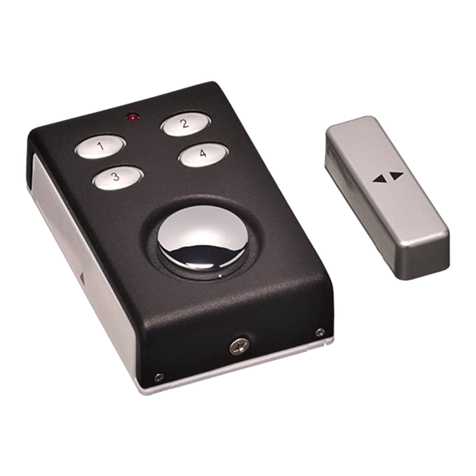
A - An infrared PIR sensor with built-in transmitter.
B - A 2 in 1 light and sound receiver.
DESCRIPTION
A. Infra‐redPIRsensor/Builtintransmitter
withON/OFFbutton
B. Soundandlightreceiverwithbutton
selectors
C. Setof3screws+1smallscrewdriver D. Double‐sidedadhesive
E. Fasteningbase F. Side‐coversforsensor
First of
light re
1)
2)
t
s
all, you mu
s
ceiver .
Remove th
e
Use the in
c
t
he letters
a
s
ynchroniz
e
s
t synchro
e
battery c
o
c
luded flath
e
a
nd numbe
r
e
d. Exampl
e
IN
S
nize your i
n
o
mpartmen
t
e
ad screwd
r
s are exac
t
e
: First dial
S
TALLATI
O
n
frared pr
e
t
cover fro
m
river to adj
u
t
ly the sam
e
P - 2nd di
a
O
N
e
sence se
n
m
the two b
o
u
st the sm
a
e
on the de
v
a
l 16 on ea
c
n
so
r
wit
h
o
xes.
a
ll dials on
e
v
ices whic
h
c
h of the 2
b
h
your sou
n
e
ach devic
e
h
should be
b
oxes.
n
d and
e
so that
3)
O

Y
a
O
d
O
nce the t
w
batteries -
n
Infrared PI
R
Bac
k

INSTALLA
INFRARE
D
Y
our sens
o
a
dvise you
mounting b
O
nce the b
a
d
own acco
r
w
o boxes a
r
n
ot include
d
R
Sensor
k
of Infrared
TION :
D
PIR SEN
S
o
r should b
e
to install it
ase to
t
a
se in plac
e
r
ding to the
r
e on the s
a
d
– while re
s
/ AA-LR0
6
PIR sens
o
S
OR
e
installed
o
under cove
t
he place y
o
e
on its su
p
diagram in
a
me letters
s
pecting th
e
6
Batteries
or
o
utdoors. Al
t
r. Use the
d
o
u have ch
o
p
port, insert
the next p
a
and same
n
e
polarity.
A
for Sound
a
Back of
s
t
hough it is
d
ouble-side
o
sen - exte
r
the infrare
d
a
ge:
n
umbers, t
h
A
A
A
-LR03
B
a
nd Light R
e
s
ound and
guarantee
d
d adhesive
s
r
nal wall, b
e
d
PIR sens
o
h
en insert t
h
B
atteries fo
r
e
ceive
r
.
light receiv
e
d
to be IP4
4
s
or screw
s
e
am, windo
w
o
r while sli
d
h
e
r
er
4
, we
s
, fix the
w
-
d
ing it
SOUN
D
The so
u
the hou
s
a
a
T
c

W
D
AND LIG
H
u
nd and lig
h
se, or be fi
x
Infrared PI
R
s
omeone e
a
nd light re
La surface
a
movibles
f
T
he sensin
g
c
overs incl
u
W
ithout an
y
ranging fro
m
H
T RECEI
V
h
t receiver
c
x
ed to the
w
R
senso
r
nters the s
p
ceive
r
t
o
de détectio
f
ournis sel
o
g
surface o
u
ded accor
d
y
cover, th
e
m
0 to 7 m
e
V
ER
c
an either
b
w
all with a
s
O
P
:The infra
r
p
ace, it det
e
o
warn you.
n du capte
u
o
n schémas
f the senso
d
ing to the
d
e
perceptio
n
e
ters betwe
e
b
e placed o
n
s
crew - incl
u
P
ERATI
O
r
ed PIR se
n
e
cts this pr
e
u
r dépend
d
ci-dessou
s
r depends
o
d
iagrams i
n
n
angle is a
b
e
n the per
s
n
a shelf a
n
u
ded -
O
N
n
sor covers
e
sence and
d
e l’utilisati
o
s
:
o
n the use
-
n
the next p
a
b
out 110 °,
s
on and the
n
d then mo
v
the space
i
sends a si
g
o
n - ou non
-
or not - of
a
ge:
with a cov
e
sensor.
v
ed anywh
e
i
n front of it
g
nal to the
- des cach
e
the remov
a
e
rage dista
n
e
re in
. If
s
ound
e
s
a
ble
n
ce
With the use of a side cover - simply clip it on the sensor - the angle toggle to about
80 ° with a coverage distance ranging from 0 to 7 meters between the person and the
sensor.
With the use of 2 covers - one on each side - the angle is reduced to about 30 ° with
a coverage distance between the person and the sensor, from 0 to 7 meters.
WARNING :
Detectionangle
Detectionangle
-
a
-
a

S
o
Your s
o
when r
e
of the s
w
In order no
t
a
bout 15 °
-
Make sure
a
ccording t
o
o
und an
d
o
und and li
g
e
ceiving th
e
w
itch belo
w
t
to detect t
-
see diagr
a
to position
y
o
your choi
c
d
light re
c
g
ht receiver
,
e
signal sen
w
:
he presen
c
a
m below -
y
our senso
c
e.
c
eiver
,
which sho
t by the se
n
c
e of small
a
r according
uld be posi
t
n
sor. The
w
a
nimals, th
e
ly and test
t
t
ioned insi
d
w
arning is
m
e
vertical d
e
t
he inclinat
i
d
e your ho
m
m
ade accor
d
e
tection an
g
i
on of the s
e
m
e, warns y
o
d
ing to the
p
g
le is
e
nsor
o
u
p
osition
-
-
-
The so
barkin
g
in the i
l
button.
-
T
c
o
Sound
A
light
s
S
und selec
t
g
1/ Dog
b
l
lustration,
T
he volum
e
c
hoose am
o
o
nce it rea
c
signal - 4
o
s
ignal only
S
ound + lig
t
ion –Ding
b
arking 2/
on the ne
x
e
can also
b
o
ng 4 soun
c
hes the m
a
o
ptional sou
- flashing b
ht at the s
a
dong/Wel
Dog bar
k
x
t page) a
n
b
e adjusted
d levels. E
a
a
ximum, re
t
nd effects
a
lue light -
a
me time
come/Si
m
k
ing 3– is
o
n
d the so
u
, using the
a
ch press o
t
urns to the
a
vailable -
m
ons/Bee
p
o
perated
w
u
nd is cha
n
receiver bu
f the butto
n
minimum
v
p
/Alarm s
o
w
ith the bu
t
n
ged by si
m
tton b
e
n
increases
v
olume:
o
und/Dog
t
ton (s
m
ply pres
s
e
low. You c
a
the volum
e
ee icon
s
the
a
n
e
and
. Once
t
operati
o
Remin
d
the PI
R
We are
satisfa
c
Warnin
‐
W
d
‐
W
A
lthoug
can ch
o
large h
o
provid
e
These
n
with yo
u



t
his last ste
o
nal and re
a
d
er: You ca
n
R
sensor
sure that
y
c
tion.
g:
W
hen the
e
d
etector s
e
W
hen the
s
recomme
n
2
n
h your "Ecl
o
ose to ext
e
o
use with
m
e
you with
n
ew acces
s
u
r system.
V
olta
g
Dust / m
o
F
r
p is compl
e
a
dy for use
.
n
easily act
.
y
our "Ecli
p
e
xternal s
e
e
nds a sig
n
s
ound of y
n
d changin
g
n
dSection
ipse Detec
t
e
nd its oper
m
any openi
n
these acc
e
s
ories are s
y
g
e -
A
mper
a
Power
o
isture resi
r
equency
e
ted, your "
E
.
ivate and
d
p
se Detect
i
e
nsor dete
c
n
al again.
our receiv
e
g
the batt
e
ADD AUX
I
t
ion / Watc
h
ation by ad
n
gs. to p
r
ot
e
e
ssories (s
y
nchronize
d
TECHNIC
A
a
ge
stance
E
clipse Det
d
eactivate
i
on / Watc
h
c
ts motion
e
r begins
t
e
ries.
I
LIARY TR
A
h
dog" secu
r
ding other
s
e
ct.
Y
our d
i
ee catalog
d
to the ca
s
A
L SPECI
F
3
ection" sec
it with the
h
dog" syst
e
, you mus
t
t
o decreas
e
A
NSMITT
E
r
ity system
i
s
ensors, su
i
stributor
«
or websit
e
s
e in the sa
m
F
ICATION
S
3
x
A
AA L
R
urity syste
m
ON / OFF
b
e
m will bri
t
wait 7 se
c
e
or the lig
E
R SENSO
R
i
s fully ope
r
ch as if yo
u
«
L’Homm
e
e
).
m
e way as
t
S
4.5 Volt
R
03 / 3 x A
A
NOP
433 Mh
z
m
is fully
b
utton loc
a
ng you co
m
c
onds bef
o
ht is dim
m
R
S
r
ational as i
t
u
decide to
e
e
Moderne
”
those deliv
e
s
A
LR06 /D
C
z
a
ted on
m
plete
o
re the
m
er, we
t
is, you
e
quip a
”
can
e
red
C
5V


Popular Security System manuals by other brands

Dakota Digital CMD-4000 Series owner's manual

Dakota Digital

Dakota Digital CMD-4000 Series owner's manual

Optiview 10X Day/Night Speed Dome PTZ Camera 10XSPD Specifications

Optiview

Optiview 10X Day/Night Speed Dome PTZ Camera 10XSPD Specifications

BURG-WACHTER BURGsmart PROTECT Contact 2032 manual

BURG-WACHTER

BURG-WACHTER BURGsmart PROTECT Contact 2032 manual

Apollo 55100-021 MAR installation guide

Apollo

Apollo 55100-021 MAR installation guide

Amcrest WLD895 user manual

Amcrest

Amcrest WLD895 user manual

Bosch Solution 16i installation manual

Bosch

Bosch Solution 16i installation manual

Eaton i-on Series Administration and User Manual

Eaton

Eaton i-on Series Administration and User Manual

Risco Agility 3 Quick installation guide

Risco

Risco Agility 3 Quick installation guide

Vighnaharta VCOP GOLD user manual

Vighnaharta

Vighnaharta VCOP GOLD user manual

M-system 48NDVA instruction manual

M-system

M-system 48NDVA instruction manual

Pixavi ST5000 user manual

Pixavi

Pixavi ST5000 user manual

Audiovox Pursuit Series owner's manual

Audiovox

Audiovox Pursuit Series owner's manual

GRI GT10 quick start guide

GRI

GRI GT10 quick start guide

SecurityMan DigiLCDDVR2 Specifications

SecurityMan

SecurityMan DigiLCDDVR2 Specifications

Avolites AvoKey Installation

Avolites

Avolites AvoKey Installation

HAI Omni Pro II owner's manual

HAI

HAI Omni Pro II owner's manual

SMS Senator 2 installation manual

SMS

SMS Senator 2 installation manual

AL-KO AKS 1300 user manual

AL-KO

AL-KO AKS 1300 user manual

manuals.online logo
manuals.online logoBrands
  • About & Mission
  • Contact us
  • Privacy Policy
  • Terms and Conditions

Copyright 2025 Manuals.Online. All Rights Reserved.