Installation &
Maintenance
SUV-S Range User Guide
For systems: - SUV-S-132-2
- SUV-S-250-2
WARNING - Please read before installation. Retain these instructions for future reference.
Install by a qualied person and in accordance with applicable local laws and plumbing
codes of practise.
- Avoid direct exposure to germicidal ultraviolet rays as they are harmful to the eyes and skin.
- Lamps lose dosage levels after 1 year of continuous service. It is unsafe practise to use lamps beyond the
stated lifetime.
- Unplug the equipment before any servicing of the assembly.
- To be effective, the UV units require the water to be clear, use pre-ltration.
- Ultraviolet lamp and quartz sleeve are easily damaged. Hold lamp by ends only. For safety, wear protective
gloves when handling quartz sleeves.
- Maximum pressure 100 psi or 6.9 Bar, the use of a pressure regulator is sometimes advisable to avoid
pressure surges.
- Temperature range 2°C - 40°C. The system must be protected from freezing and is for use with cold water systems.
Installation
1. Ensure the location is well lit, accessible, close to where the water enters the property and adequate space is
left for replacement of lamps and sleeves.
2. Attach mounting brackets to the wall.
3. Attach stainless steel reactor chamber to mounting brackets.
4. Connect plumbing to inlet and outlet ports.
5. Install quartz sleeves and lamps, as follows;
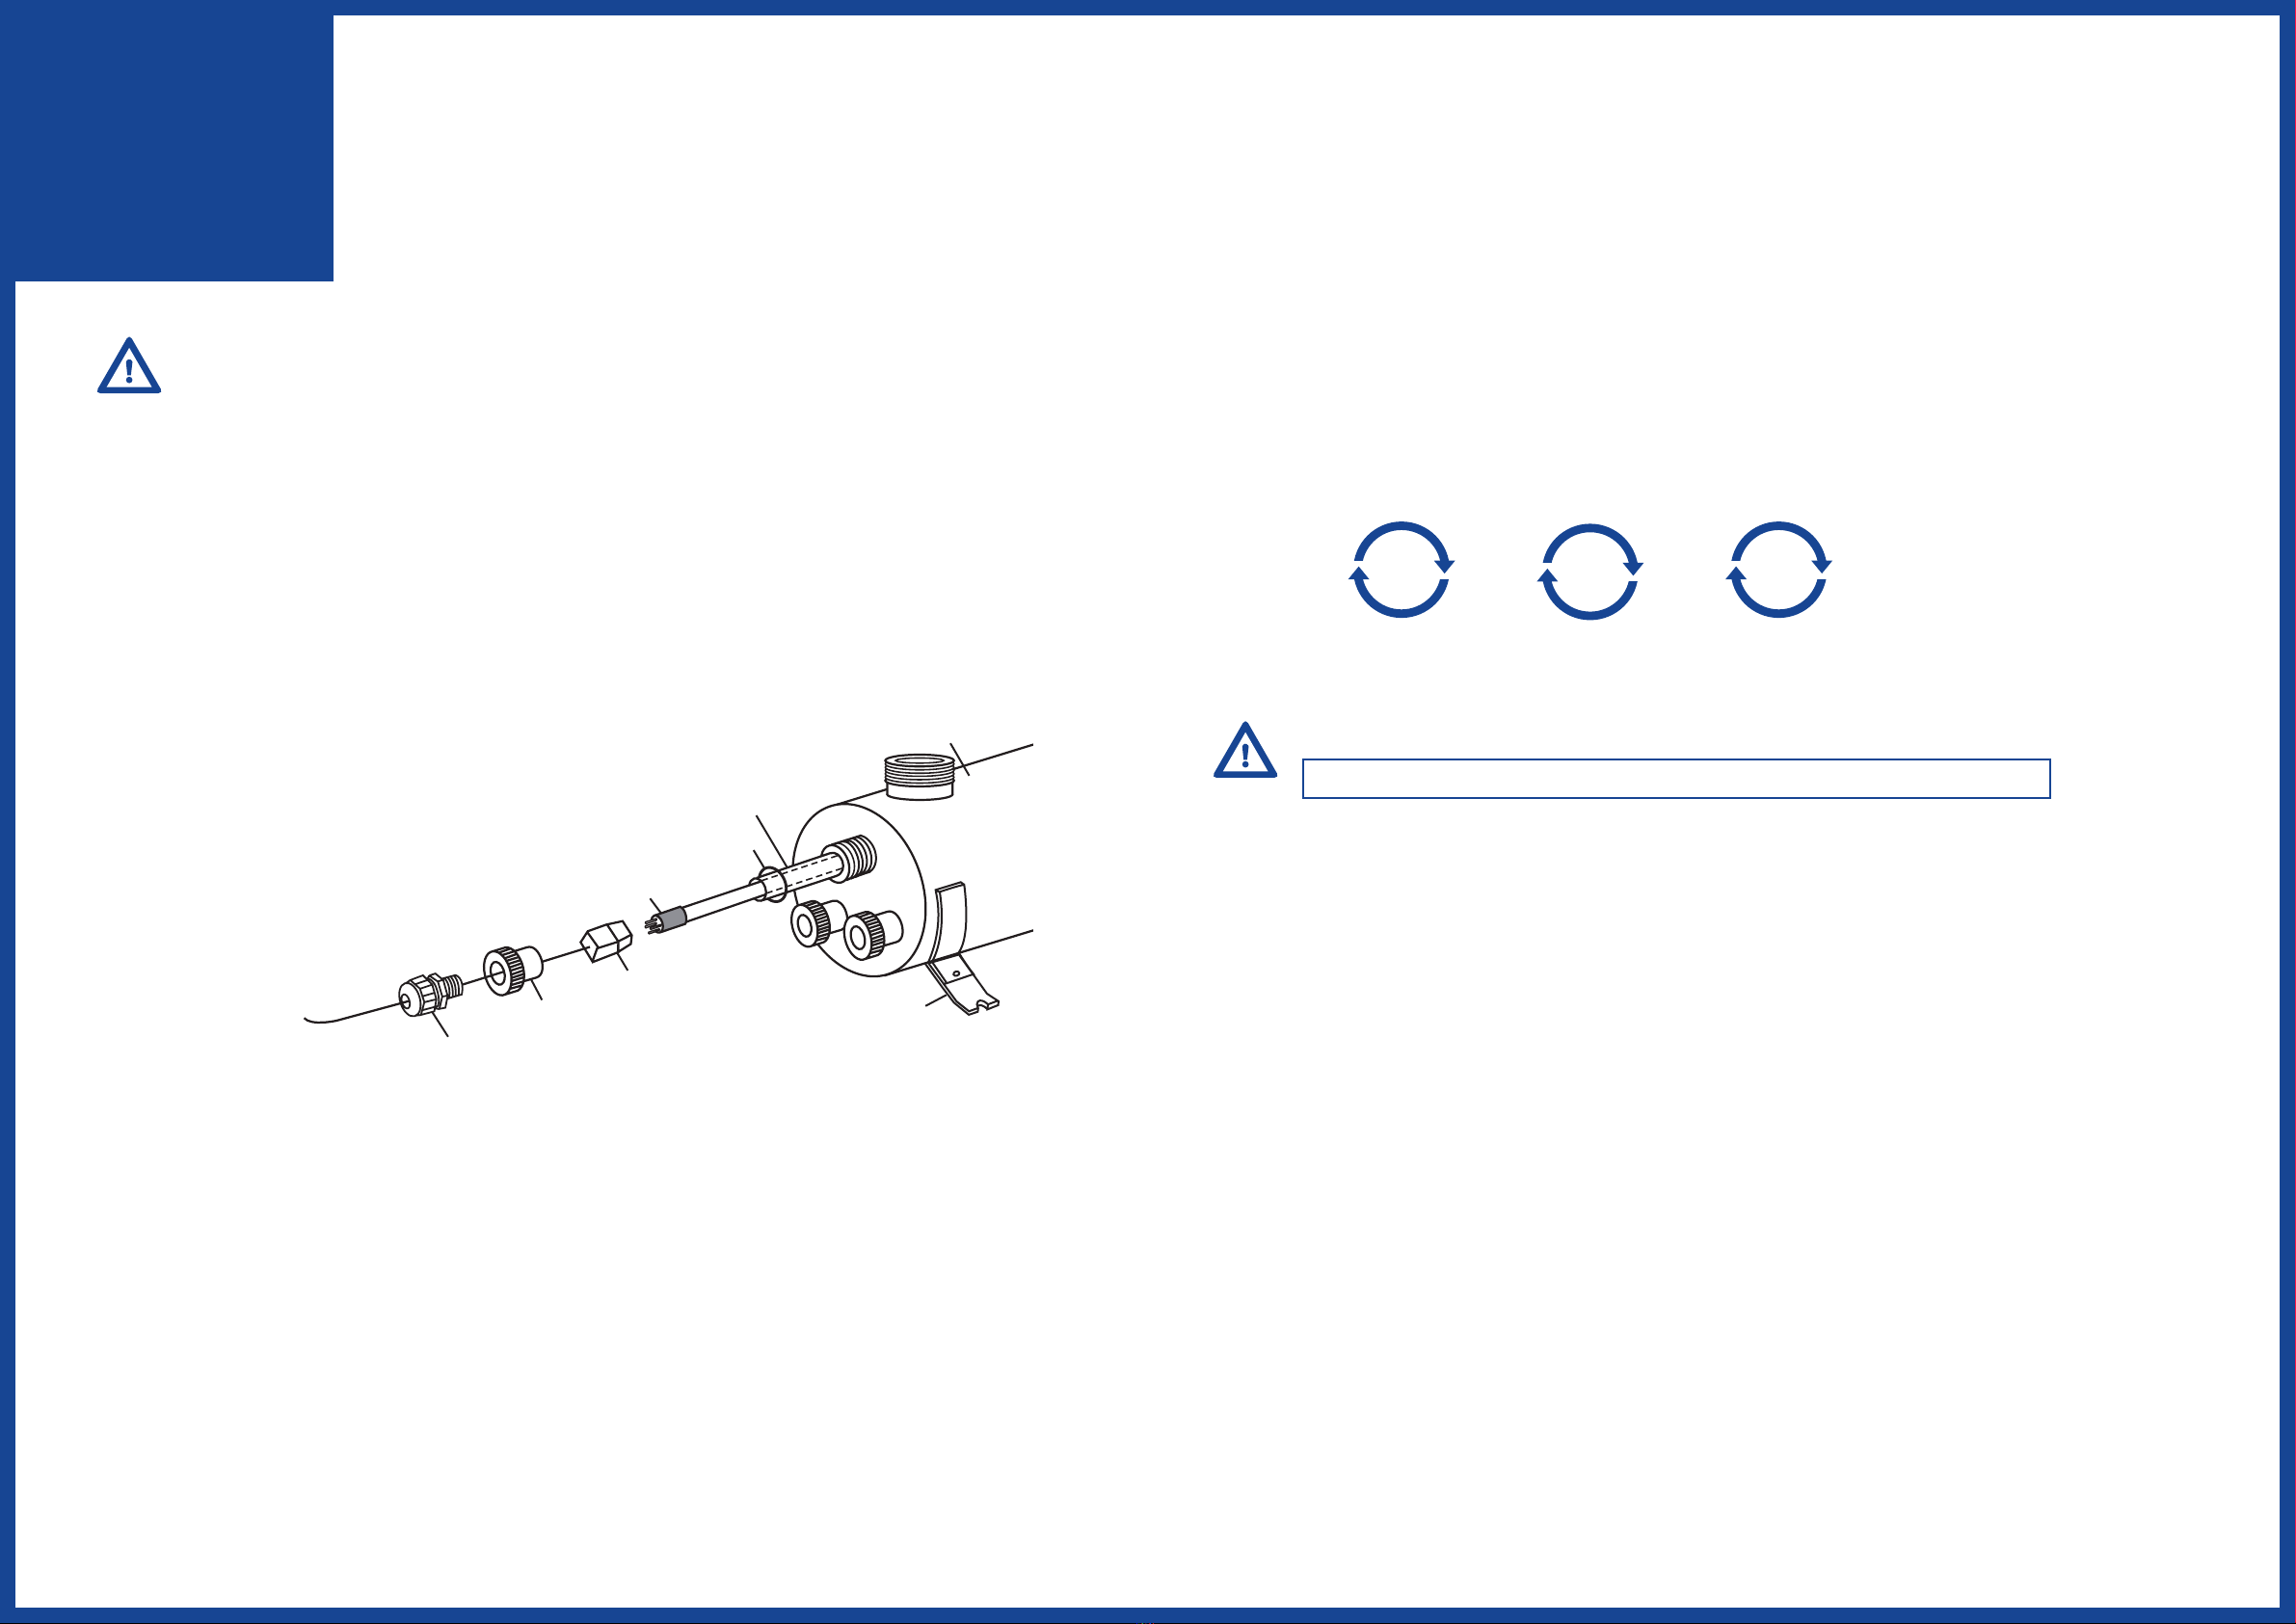
a) Remove aluminium nuts.
b) Slide the quartz sleeves through the reactor chamber.
c) Roll the O-rings on to the ends of the quartz sleeves.
d) Slide the lamps into the quartz sleeves. CAUTION: Do not to touch the lamp glass as any ngerprints or dirt
will reduce the efciency of the lamp and may cause it to fail.
e) Connect the lamps to the lamp sockets.
f) Screw the nuts on to the reactor chamber hand tight and screw the waterproof strainer to the nut
6. Turn on the water and inspect for leaks.
7. Plug the control box into the electrical socket. Protection by a Ground Fault Interrupt (GFI) circuit is recommended.
8. Run water through the unit for 5-10 minutes before rst use.
Maintenance - To ensure the system remains effective, routine maintenance must be performed.
Frequency of maintenance will depend on source water quality and system usage.
- Clean quartz sleeves with an alcohol wipe or similar every 3-6 months.
- It is recommended that UV lamps are replaced within 9000 hours or 12 months (365 days x 24 hours = 8760 hours)
of use to ensure the system continues to operate as intended.
- After 24 months, quartz sleeves should be inspected for scratches or reduced visibility, replace if necessary.
Operation
- UV Disinfection systems are designed for continuous use. When in operation the GREEN lights will show for
each lamp separately. This GREEN light is an indicator that the lamp is lit and not of its dosage rate, change
lamps annually to maintain required ultraviolet dosage levels.
- If a RED light is shown and the alarm sounds, the lamp or lamp socket needs attention or replacing. In the event
of power loss to the unit the RED lights will show briey and the alarm will sound briey, the cooling fan will
stop, then no lights will show.
- Ballasts in the control box can be replaced individually in the event of malfunction.
Replacing UV lamp and servicing UV System
Note: Avoid touching the sides of the quartz sleeve and lamp, handle by the ends only.
1. Disconnect power.
2. Turn water off and open the downstream of the system to relieve pressure.
3. Remove the waterproof strainers and aluminium nuts.
4. Carefully withdraw lamps approximately 5 cm from the reactor chamber.
5. While holding lamp ends, carefully remove lamp sockets from the exposed ends.
6. Carefully withdraw the lamps fully from the reactor chamber.
7. Carefully remove O-rings from the ends of the quartz sleeves.
8. Carefully remove the quartz sleeves.
9. To reinstall follow instructions 8 through to 1 in reverse.
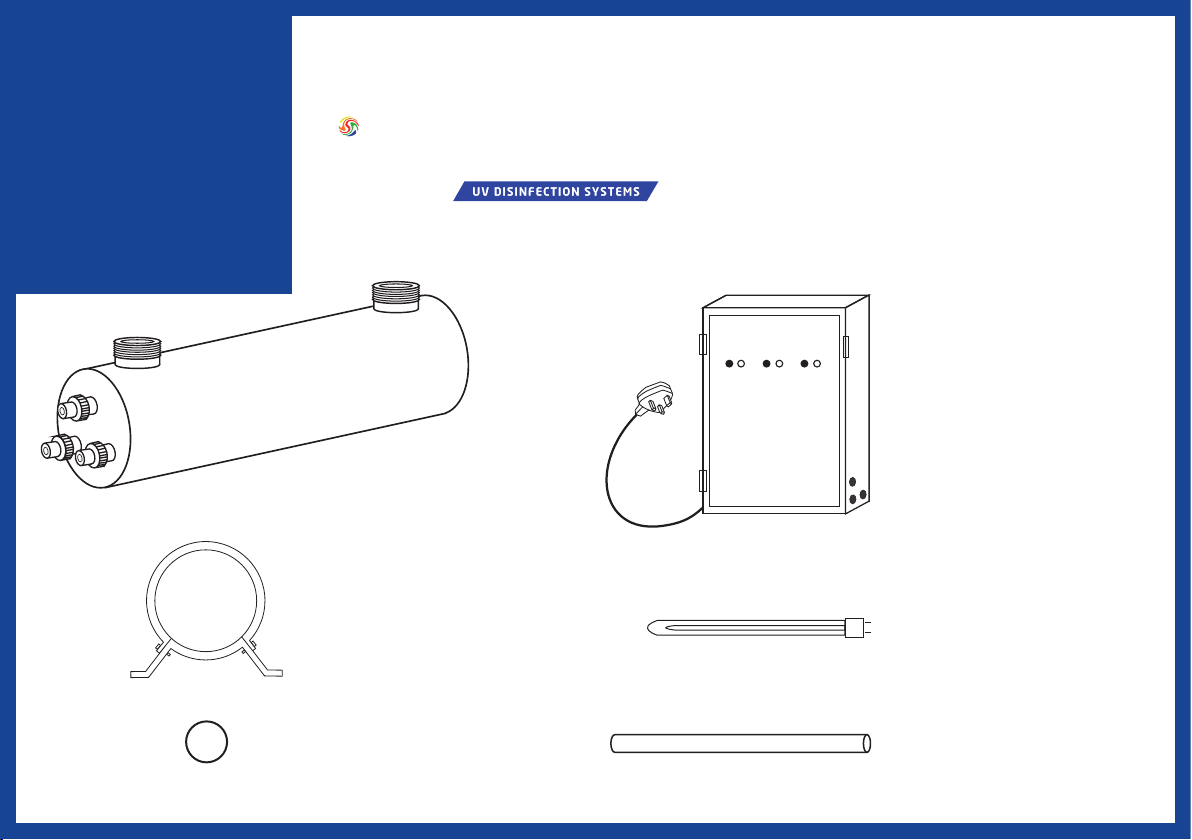
Quartz Sleeve
Reactor Chamber
Mounting
Bracket
UV Lamp
Aluminium
Nut
Waterproof
Strainer
Lamp Socket
& Lead
3-6
Months
Clean quartz
sleeve
12
Months
Replace
UV lamp
24
Months
Replace quartz
sleeve if damaged
O-ring