manuals.online logo
Brands
  1. Home
  2. •
  3. Brands
  4. •
  5. Salus
  6. •
  7. Thermostat
  8. •
  9. Salus iT500 User manual

Salus iT500 User manual

EN Go back to the previous screen or hold to
return to main screen.
GE Rückkehr zum vorherrigen Bilrdschirm oder
gedrückt halten um zum Hauptbildschirm
zurück zu gehen.
DK Gå tilbage tilden forrige skærm,eller hold for
at vende tilbage til hovedskærm
NL Ga terug naar het vorige scherm of houd
ingedrukt omterugte keren naar
hoofdmenu
FR Revenir àl’écran precedent oumaintenir pour
revenir à l’écran principal.
12
ON
1
AUTO
OFF
AM
PM
4
EN Confirm your option and move to the next screen.
GE Bestätigen Sie Ihre Auswahl und fahren sie mit dem
nächsten Bildschrim fort.
DK Bekræft din mulighed og gå til den næste skærm
NL Bevestig uw optie of ga naar het volgende scherm
FR Confirmez votre option ou aller sur l’écran suivant.
12
ON
1
AUTO
OFF
AM
PM
3
iT500 Internet Thermostat
Quick Guide
3. iTG500 4. System Configuration 5. Pairing the iT500 and iT500RX Receiver
Connected to the SALUS Controls Server when the LED is green.
Insert a paper clip into the hole marked SYNC
SteckenSie einen dünnen/spitzen Gegenstand in
das Loch mit der Aufschrift Sync.
Indsæt en papirclips i hullet markeret med SYNC
Steek een paperclip in het gat met tekst SYNC
Insérer un trombone dans le trou marqué SYNC
The red LED will indicate that the iT500RX
is ready to pair.
Die rote LED zeigt an das der iT500RX zum
verbinden bereit ist.
Den røde LED-lampe indikerer, at iT500 RX er
klar til parring.
Het rode LED toont dat de iT500RX is klaar om
te pairen.
Le LED rouge indiquera que l’iT500RX est prêt à
être appairer.
Mit dem SALUS Controls verbunden wenn LED Grün leuchtet.
Forbundet til SALUS Controls serveren, når LED-lampen er grøn.
Verbonden met de SALUS Controls Server zodra de LED groen is.
Connecté au serveur de controle SALUS quand le LED est vert.
EN Select your system configuration in association with the wiring of the receiver by pressing and hold
GE WählenSie ihre Systemkonfigurationin Verbindung mitder Verdrahtung desEmpfängers durch drückenund halten.
DK Vælg den konfiguration af kedelmodtageren ved at trykke og holde
NL Selecteert u uw systeemconfiguratie i.s.m. de bedrading van de ontvanger door op te drukken en ingedrukt houden
FR Selectionner votre configuration de système avec le cablâge du receveur on pressant et maintenant
12
ON
1
AUTO
OFF
AM
PM
12
ON
1
AUTO
OFF
AM
PM
12
ON
1
AUTO
OFF
AM
PM
12
ON
1
AUTO
OFF
AM
PM
12
ON
1
AUTO
OFF
AM
PM
12
ON
1
AUTO
OFF
AM
PM
EN Select the heating or cooling mode for your system.
GE Wählen Sie Heiz-oder Kühlmodus für Ihr System
DK Vælg varme eller køling af system
NL Kies de verwarming of cooling modus voor uw systeem
FR Selectionner le mode chauffage ou climatisation de votre système.
EN The internet connection is ON.
GE Mit Internet verbunden.
DK Internetforbindelsen er slået TIL
NL De internet verbinding is ON
FR La connection internet fonctionne.
EN Set your time zone. 0 hr=GMT
GE Wählen Sie ihre Zeitzone. 0hr=GMT
DK Indstil din tidszone. 0 t=GMT
NL Uw tijd zone 0 hr=GMT instellen
FR Régler votre fuseau horaire 0 hr=GMT
EN Set your DST(daylight saving time) ON.
GE WählenSieDST ( Sommer/Winter Umstellung)
DK Slå din sommertid (DST) TIL.
NL Uw DST (daylight saving time) ON instellen
FR Régler votre DST (Temps éco lumière du jour)
12
34
5
6
When the iT500RX Receiver and the iT500
Thermostat are paired the LED will be green.
Wenn der iT500RX und der iT500 Thermostat
verbunden sind wird die LED Grün.
Når iT500RX modtageren og iT500 termostaten er
parret, vil LED-lampen være grøn.
Als de iT500RX ontvanger en de iT500 Thermostaat
gepaired zijn dan is het LED groen.
Quand le receveur iT500RX et le thermostat
iT500 sont appairés; le LED sera vert.
Time and temperature settings can be altered by using the iT500 Plus App or the thermostat menu.
Please download the iT500 Plus App from App Store and Google Play. You can also use the website:
www.salus-it500.com. Full manual is available at www.salus-manuals.com
i
Zeit und Temperatur können mittels der iT500 Plus app geändert werden oder im Thermostat Menü.Bitte
laden Sie die iT500 Plus app aus dem App Store oder Google Play runter. Eine PDF-Version der Anleitung
können Sie auf www.salus-manuals.com einsehen.
Tijd en temperatuur instellingen kunnen worden verander met de iT500 Plus App of het thermostaat menu.
S.v.p. download de iT500 Plus App uit de App Store en Google Play. U kunt ook de website gebruiken.
www.salus-it500.com. De volledige handleiding is beschikbaar op www.salus-manuals.com
Les réglages de temperature et de temps peuvent être altérés en utilisant l’Appli iT500 Plus ou le
menu du thermostat. Merci de télécharger l’Appli iT500 Plus depuis l’Apple Store et Google play.
www.salus-it500.com. Le man uel complet est disponible sur www.salus-manuals.com
Tids- og temperaturindstillinger kan ændres ved hjælp af iT500 Plus-appen eller termostat-menuen.
Download iT500 Plus-appen fra App Store og Google Play. Du kan også bruge websitet: www.salus-it500.
com. Den komplette manual er tilgængelig på www.salus-manuals.com
12
ON
1
AUTO
OFF
AM
PM
12
ON
1
AUTO
OFF
AM
PM
12
ON
1
AUTO
OFF
AM
PM
12
ON
1
AUTO
OFF
AM
PM
Press or to return to home screen
12
ON
1
AUTO
OFF
AM
PM
12
ON
1
AUTO
OFF
AM
PM
Drücken Sie auf or um zum
Hauptbildschirm zurückzukehren
12
ON
1
AUTO
OFF
AM
PM
12
ON
1
AUTO
OFF
AM
PM
Tryk eller vend tilbage til startskærm
12
ON
1
AUTO
OFF
AM
PM
12
ON
1
AUTO
OFF
AM
PM
Druk of keer terug naar home screen
12
ON
1
AUTO
OFF
AM
PM
12
ON
1
AUTO
OFF
AM
PM
Appuyer sur ou etourner à l’écran d’accueil
12
ON
1
AUTO
OFF
AM
PM
12
ON
1
AUTO
OFF
AM
PM
12
ON
1
AUTO
OFF
AM
PM
12
ON
1
AUTO
OFF
AM
PM
EN Set your temperature display mode.
GE Wählen Sie die Temperaturanzeige
DK Vælg ønsket temperaturenhed
NL Uw temperatuur-weergavemodus instellen
FR Régler votre mode d’affichage de temperature.
1
EN Access the Settings Menu.
GE Zugriff auf das Einstellungsmenü.
DK Åbn indstillingsmenuen
NL Ga naar Instellingen.
FR Accédez au menu de Réglages.
12
ON
1
AUTO
OFF
AM
PM
2
EN Go down or navigate through the options.
GE Runter oder navigieren Sie durch die Optionen.
DK Gå ned eller naviger gennem mulighederne.
NL Ga naar beneden of navigeer door de keuzes.
FR Descendre ou naviguer dans les options.
12
ON
1
AUTO
OFF
AM
PM
5
EN LCD light turns on, when pressed.
GE LCD-Licht geht an wenn gedrückt
DK LCD-lys tændes ved tryk.
NL LCD licht gaan branden indien ingedrukt.
FR L’écran s’allume une fois appuyé
6
EN Go up or navigate through the options.
GE Hoch oder navigieren Sie durch die Optionen
DK Gå op eller naviger gennem mulighederne
NL Ga naar boven of navigeer door de keuzes
FR Remonter ou naviguer dans les options.
12
ON
1
AUTO
OFF
AM
PM
7
3
1
4
2 5
6
7
EN Legend GE Legende DK Symboler NL Legenda FR Legende
12
ON
1
AUTO
OFF
AM
PM
12
ON
1
AUTO
OFF
AM
PM
12
ON
1
AUTO
OFF
AM
PM
12
ON
1
AUTO
OFF
AM
PM
12
ON
1
AUTO
OFF
AM
PM
12
ON
1
AUTO
OFF
AM
PM
12
ON
1
AUTO
OFF
AM
PM
12
ON
1
AUTO
OFF
AM
PM
12
ON
1
AUTO
OFF
AM
PM
12
ON
1
AUTO
OFF
AM
PM
12
ON
1
AUTO
OFF
AM
PM
Head Oce
SALUS Controls plc
SALUS House
Dodworth Business Park South,
Whinby Road,
Dodworth, Barnsley S75 3SP,
UK.
T: +44 (0) 1226 323961
E: [email protected]
DE / NL / FR:
[email protected]
tel: +49 6108 8258515
DK: sales@salus-controls.dk
Tel: (+45) 53534499
UK: [email protected]
tel: +44 (0) 1226 323961
www.salus-controls.com
SALUS Controls is a member of the Computime Group
Maintaining a policy of continuous product development SALUS Controls plc reserve the right to
change specification, design and materials of products listed in this brochure without prior notice.
For PDF Installation guide please go to
www.salus-manuals.com
Ver003 Issue July 2016
230V
0V
BOILER
Volt Free - Combination Boiler
BOILER
230V230V
2 x CH Zones - Volt Free Combination Boiler
BOILER
OV - 230v
B
O
I
L
E
R
OV 230
230V
230V
230V
0V System Boiler 1 x CH Zone and 1 x HW Zone
BOILER
OV
B
O
I
L
E
R
OV
230V
230V
BOILER
230V Switching - Combination Boiler
BOILER
230V230V
230V Combination Boiler 2 x CH Zones -
Potential Volt Free Switching
BOILER
OV - 230v
B
O
I
L
E
R
OV 230
230V
230V
230V
0V System Boiler 1 x CH Zone and 1 x HW Zone
BOILER
OV
B
O
I
L
E
R
OV
230V
230V
230V
230 V Switching - S Plan
BOILER
230
B
O
I
L
E
R
23
0
Permanent
230V
2C
230V
0V
BOILER
Volt Free - Combination Boiler
BOILER
230V230V
2 x CH Zones - Volt Free Combination Boiler
BOILER
OV - 230v
B
O
I
L
E
R
OV 230
230V
230V
230V
0V System Boiler 1 x CH Zone and 1 x HW Zone
BOILER
OV
B
O
I
L
E
R
OV
iT500 Quick Guide
Always isolate the AC Mains supply
before installing or working on any
components that require 230 VAC
50Hz supply.
iT500 Quick Guide
Isolér altid vekselstrømsforsyningen,
før installation eller arbejde på
komponenter, som kræver 230 VAC
50Hz-forsyning.
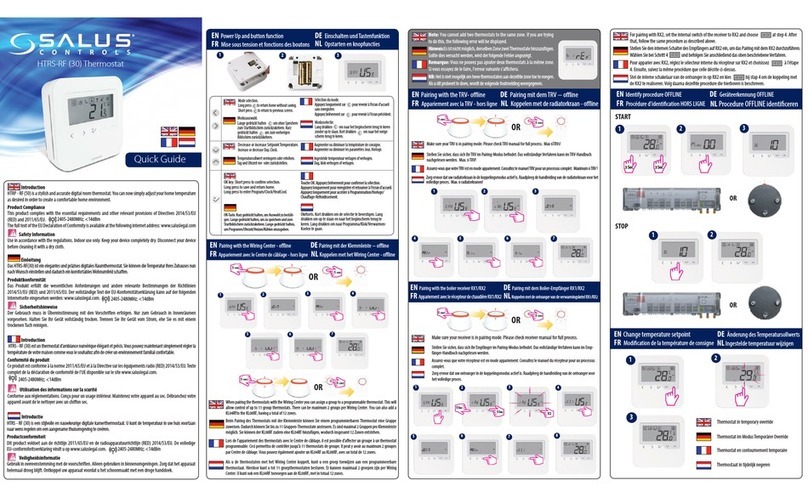
Introduction
L’iT500 de Salus est un thermostat
programmable connecté via
internet avec des options pour
deux zones de chauffage et l’eau
chaude.
Pour obtenir la version complète
du manuel en format PDF, allez sur
www.salus-manuals.com.
Conformité produit
Et EU Directives: 2014/30/
EU, 2014/35/EU, 2014/53/EU
et 2011/65/EU. Merci de vous
rendre à l’adresse suivante pour
les informations complètes
www.saluslegal.com
Informations relatives
à la sécurité
Pour usage a l’intérieur
du bâtiment uniquement.
Conservez votre appareil
totalement au sec. The produit
doit être installé uniquement par
une personne compétente et en
respectant les réglementations
européennes et nationales en
vigueur.
iT500 Guide d’installation rapide
L’alimentation électrique doit
toujours être coupé avant d’installer
ou de manipuler n’importe quel
appareil fonctionnant en 230Volt
50Hz.
Einführung
Das SALUS iT500 ist
ein programmierbarer
Internetthermostat mit der
Option für Warmwasser und 2
Heizzonen.
Eine PDF-Version der Anleitung
können sie auf www.salus-manuals.
com einsehen.
Produktkonformität nach
EU 2014/30/EU, 2014/35/EU,
2014/53/EU und 2011/65/EU.
Please check www.saluslegal.
com for the full information.
Sicherheitsinformation
Nur in Einklang mit EU
und nationalen Richtlinien
verwenden. Nur im Innenbereich
verwenden. Halten Sie das
Gerät trocken. Dieses Produkt
muss von einer Fachkraft
und in Einklang mit EU und
nationalen Richtlinen installiert
werdennational regulations.
Introduction
The SALUS iT500 is an Internet
Programmable Thermostat with
options for hot water control and
two zone heating.
Go to www.salus-manuals.com for the
full PDF version of the manual.
Product Compliance
EU Directives: 2014/30/EU,
2014/35/EU, 2014/53/EU and
2011/65/EU. Please check www.
saluslegal.com for the full
information.
Safety Information
Use in accordance with the EU
and national regulations.
For indoor use only.
Keep your device completely dry.
This product must be installed
by a competent person and in
accordance with all the EU and
national regulations.
Introduktion
SALUS iT500 er en termostat,
der kan programmeres over
internettet og giver mulighed
for varmtvandskontrol og
opvarmning i to zoner. Gå til
www.salus-manuals.com for
den komplette PDF-version af
manualen.
Produktoverensstemmelse
EU-direktiver: 2014/30/EU,
2014/35/EU, 2014/53/EU og
2011/65/EU. Se venligst www.
saluslegal.com for komplet
information.
Sikkerhedsinformation
Anvend i henhold til EU-
bestemmelserne og de nationale
bestemmelser. Kun til indendørs
brug. Hold din enhed helt tør.
Dette produkt skal installeres
af en kompetent person og i
henhold til EU- og nationale
forordninger.
iT500 Kurzanleitung
Vor Arbeiten an 230Vac /50Hz muss
das Stromnetz getrennt werden.
iT500 korte handleiding
Schakel de stroom altijd uit voordat
u apparaten met 230V installeert of
gaat openen/ repareren.
iT500 Plus App
1. iT500RX 2. iT500TR
3a
3b
3c
3e
3f
3d
3
1 2
4
3a. Contact sec – Récepteur de chaudière
3b. Alimentation 230V – Récepteur de chaudière
3c. Alimentation 230V – Plan S
3d. Alimentation 230V – Plan Y
3e. 2x Zones de Chauffage – Recepteur de Chaudière alimentation 230V
3f. 2x Zones de Chauffage – Recepteur de Chaudière contact sec
3a. Volt free - Combination Boiler
3b. 230V Switching - Combination Boiler
3c. 230V Switching - S Plan
3d. 230V Switching - Y Plan
3e. 2xCH Zones - 230V Switching Combination Boiler
3f. 2xCH Zones - Volt Free Combination Boiler
3a. Potentialfreier - Kombi Boiler
3b. 230V Kombi-Boiler Schaltplan
3c. 230V S-Schaltplan
3d. 230V Y-Schaltplan
3e. 2xCH Zonen -230V Kombi Boiler Schaltplan
3f. 2xch Zonen - potentialfreier Kombi Boiler Schaltplan
3a. Volt vrij – Combinatie Boiler
3b. 230V aan/uit – Combinatie boiler
3c. 230V aan/uit – S Plan
3d. 230V aan/ uit – Y Plan
3e. 2xCH Zones – 230V aan/ uit Combinatie Boiler
3f. 2xCH Zones – Volt vrij combinatie Boiler
3a. Voltfri - Kombikedel
3b. 230V Omskiftning - Kombikedel
3c. 230V Omskiftning - S-plan
3d. 230V Omskiftning - Y-plan
3e. 2xCH Zoner-230V Omskiftning kombikedel
3f. 2xCH Zoner - Voltfri kombikedel
+
+
STA Code.
1
2
S T A
Before inserting the batteries, please make a note of
your STA number and register your device on the app.
Ehe die Batterien eingelegt werden notieren Sie sich
die STA Nummer. Registrieren Sie Ihr Gerät auf der App.
Notér STA-nummer, før batterierne indsættes.
Registrér din enhed på appen.
Voordat u de batterijen plaatst, noteer eerst uw
STA number en register uw apparat m.b.v. de app.
Avant d’installer les piles, merci de noter votre numéro
de série et d’enregistrer votre appareil sur l’Appli.
3
4
Wiring Diagrams
Schaltpläne
Tilslutningsdiagram
Bedradingsdiagram
Schéma de câblage
Introductie
De SALUS iT500 is een internet
programeerbare Thermostaat met
toepassingen voor heet water en
2 zones voor verwarming.
Ga naar www.salus-manuals.com voor
de PDF versie van de handleiding
Product aansprakelijkheid
EU richtlijnen: 2014/30/EU,
2014/35/EU, 2014/53/EU En
2011/65/EU. Bezoek s.v.p. www.
saluslegal.com voor meer
informatie.
Veiligheids Informatie
Gebruik volgens de EU en
national geldende regels.
Alleen in huis gebruiken.
Houd uw apparaat geheel droog.
Dit product moet worden
geïnstalleerd door een geschikt
persoon volgens de EU en
nationaal geldende regels.

Other manuals for iT500

8

This manual suits for next models

1

Other Salus Thermostat manuals

Salus CT100 User manual

Salus

Salus CT100 User manual

Salus RT520RF User manual

Salus

Salus RT520RF User manual

Salus ST620ROF User manual

Salus

Salus ST620ROF User manual

Salus RT510+ User manual

Salus

Salus RT510+ User manual

Salus VS10WRF User manual

Salus

Salus VS10WRF User manual

Salus RTS00RF User manual

Salus

Salus RTS00RF User manual

Salus HTRS-RF (30) User manual

Salus

Salus HTRS-RF (30) User manual

Salus Quantum SQ610 User manual

Salus

Salus Quantum SQ610 User manual

Salus HTR2420 User manual

Salus

Salus HTR2420 User manual

Salus 091FLRF User manual

Salus

Salus 091FLRF User manual

Salus TH-3 User manual

Salus

Salus TH-3 User manual

Salus RT510BC User manual

Salus

Salus RT510BC User manual

Salus RT520 User manual

Salus

Salus RT520 User manual

Salus THERMO 091FL User manual

Salus

Salus THERMO 091FL User manual

Salus VS30W User manual

Salus

Salus VS30W User manual

Salus iT500 User manual

Salus

Salus iT500 User manual

Salus Quantum WQ610 User manual

Salus

Salus Quantum WQ610 User manual

Salus HTR-RF(20) User manual

Salus

Salus HTR-RF(20) User manual

Salus RT300 User manual

Salus

Salus RT300 User manual

Salus CT100 User manual

Salus

Salus CT100 User manual

Salus VS20WRF User manual

Salus

Salus VS20WRF User manual

Salus QUANTUM SQ610RF User manual

Salus

Salus QUANTUM SQ610RF User manual

Salus iT500BM User guide

Salus

Salus iT500BM User guide

Salus RT510RF User manual

Salus

Salus RT510RF User manual

Popular Thermostat manuals by other brands

Danfoss 088U0212 instructions

Danfoss

Danfoss 088U0212 instructions

Carrier TSTATCCPS701 installation instructions

Carrier

Carrier TSTATCCPS701 installation instructions

Bryant OM TSTAT-1 User's information manual

Bryant

Bryant OM TSTAT-1 User's information manual

Thermogroup Thermotouch 7.6iG Installation & user guide

Thermogroup

Thermogroup Thermotouch 7.6iG Installation & user guide

Black & Decker BDXHTSL1 Installation & operation manual

Black & Decker

Black & Decker BDXHTSL1 Installation & operation manual

Kampmann 148917 quick guide

Kampmann

Kampmann 148917 quick guide

Beretta HRT-177WS Installation and user instruction guide

Beretta

Beretta HRT-177WS Installation and user instruction guide

Carrier 33AW-CS1 installation manual

Carrier

Carrier 33AW-CS1 installation manual

GSM Gecapp crono Wi-Fi manual

GSM

GSM Gecapp crono Wi-Fi manual

Emerson EE542-1Z user manual

Emerson

Emerson EE542-1Z user manual

Honeywell T834H quick start guide

Honeywell

Honeywell T834H quick start guide

Vive Comfort TP-N-751 installation manual

Vive Comfort

Vive Comfort TP-N-751 installation manual

SMaBiT AV2011/38 quick start guide

SMaBiT

SMaBiT AV2011/38 quick start guide

POLA HP12 Handbook

POLA

POLA HP12 Handbook

Esic HTC625 operating manual

Esic

Esic HTC625 operating manual

DeDietrich AD254 Installation, user and service manual

DeDietrich

DeDietrich AD254 Installation, user and service manual

Wattstemp 860 manual

Wattstemp

Wattstemp 860 manual

Imit WPT OT SL instructions

Imit

Imit WPT OT SL instructions

manuals.online logo
manuals.online logoBrands
  • About & Mission
  • Contact us
  • Privacy Policy
  • Terms and Conditions

Copyright 2025 Manuals.Online. All Rights Reserved.