SAMSONIX SM-7070WR User manual

User Manual
SM-7070WR
PRODUCT FUNCTIONANDAPPLICATION
INTRODUCTION

1. Product function
•7 inch digital panel
Screen Ratio: 16: 9
•Resolution: 800*RGB*480
•Front Key Function: 7pcs mechanical keys
•Remote Control Function: Small six key remote control
•1 wireless video input
•1 wireless audio input
•Adopt digital wireless encryption technology to code connection, have strong anti-interference capacity
•13PCS 2.4G wireless signal frequency (2412MHz~2472MHz)
•2.4G wireless transmitting distance can reach 100M in open area
•Power Supply: DC12-24V
•Power Consumption: 6W
•Working temperature: 0℃~60℃
•Storing temperature: -10℃~70℃
•Size: 180×121×24mm
2.Product Application
This product adopted high resolution TFT color digital screen and 2.4G digital wireless technologies, which used
embedded processor and embedded operating system, combined several latest technologies in the IT field, such as audio
and video compression/decompression technology, special shockproof technology. It has no radiation, low power
consumption, flicker-free and gorgeous vivid color and could be easily installed and widely used in various kinds of
vehicles.

3.Product Introduction
A. Front Panel Introduction
Monitor Panel Introduction
1. 2.4G antenna
2. Display screen
3. Metal LOGO plate
4. MENU: open or exit the menu
5. Brightness decrease: decrease the screen brightness value
6. Brightness increase: increase the screen brightness value
7. Power: Under power off state, press shortly to start up, press and hold to power off; under power on state,
press shortly to close the display screen, press and hold to power off
8. Volume decrease: decrease the volume
9. Volume increase: increase the volume
10. MODE: up, down, left, right rotation
11. Remote control window
1
2
3
4
5
6
7
8
9
10
11

Camera Introduction
1、2.4G antenna
2、U shaped bracket and sun shade
3、Power cable: DC 12-24V input
4、Pairing button
B.Menu Settings Introduction
1.Pairing setting
Press the “MENU” key on the panel or remote control to open the menu interface; then press “”on the
panel or “VIDEO”“MODE”on remote control to switch to the “Pairing” option; and then press “”on
the panel or “LEFT”“RIGHT”on remote control, at the same time, hold the camera pairing button to pair. There will
show “Pair OK”after 2-5 seconds if pair successfully, otherwise will show “Pair fail”and need to re-pair. Just as shown
in the following pictures.
1
2
3
4

2、Camera brightness Setting
Press “”on the panel or “VIDEO”“MODE”on remote control to switch to“Brightness”option, and then
press “”on the panel or “LEFT”“RIGHT”on remote control to open the camera brightness setting and
adjust the specific parameters. Just as shown in the following pictures.
3、Camera contrast Setting
Press “”on the panel or “VIDEO”“MODE”on remote control to switch to“Contrast”option, and then
press “”on the panel or “LEFT”“RIGHT”on remote control to open the camera contrast setting and
adjust the specific parameters. Just as shown in the following pictures.
4、Camera Saturation Setting
Press “”on the panel or “VIDEO”“MODE”on remote control to switch to“Saturation”option, and then

press “”on the panel or “LEFT”“RIGHT”on remote control to open the camera saturation setting and
adjust the specific parameters. Just as shown in the following pictures.
5、Language setting
Press “”on the panel or “VIDEO”“MODE”on remote control to switch to“Language”option, and then
press “”on the panel or “LEFT”“RIGHT”on remote control to open the monitor language setting and
set the language to Chinese or English display. Just as shown in the following pictures.
6、Rotation Setting
Press “”on the panel or “VIDEO”“MODE”on remote control to switch to“Rotation”option, and then
press “”on the panel or “LEFT”“RIGHT”on remote control to make the image up/down/left/right
rotated. Just as shown in the following pictures.
7、Reversing delay setting
Press “”on the panel or“VIDEO”“MODE”on remote control to switch to“Others”option, and then press

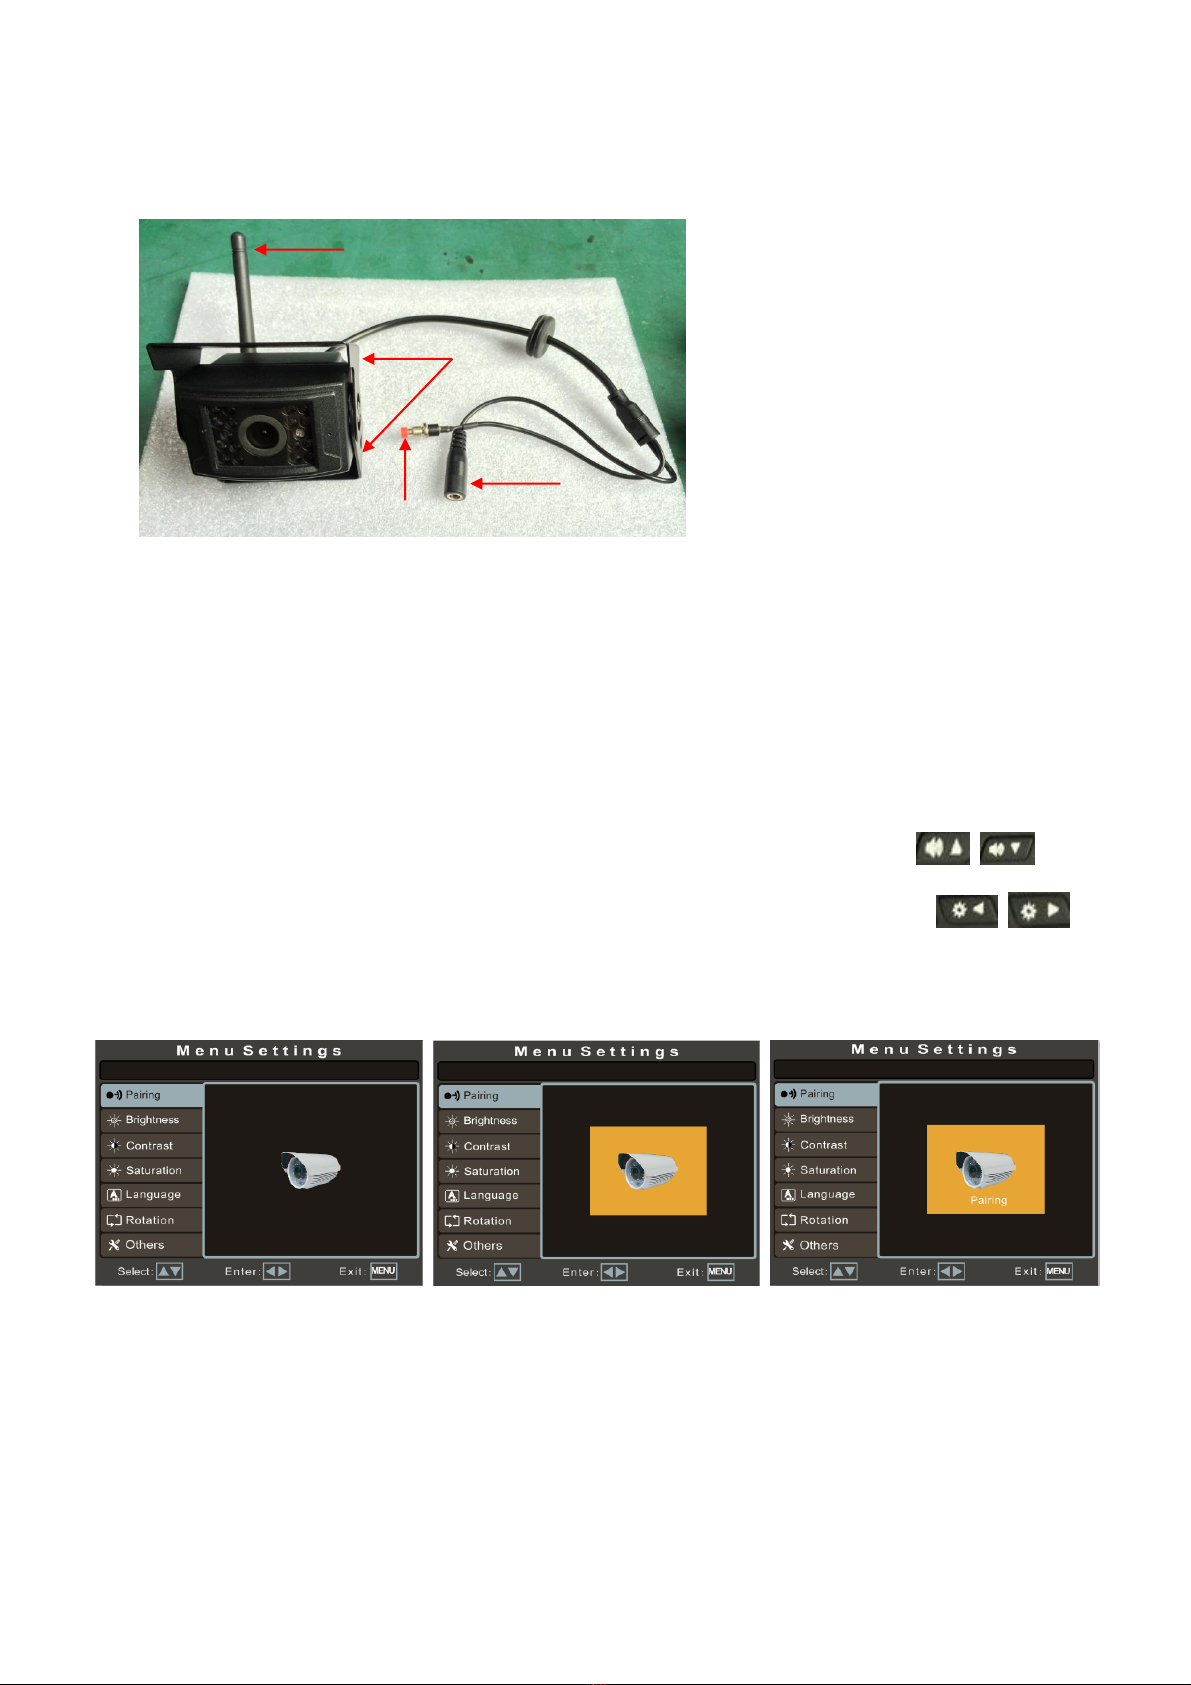
“”on the panel or“LEFT”“RIGHT”on remote control to “Delay”option and press them again to set the
delay time. There are 0 sec, 5 sec and 10 sec optional. The default value is 0 sec, closed. Just as shown in the following
pictures.
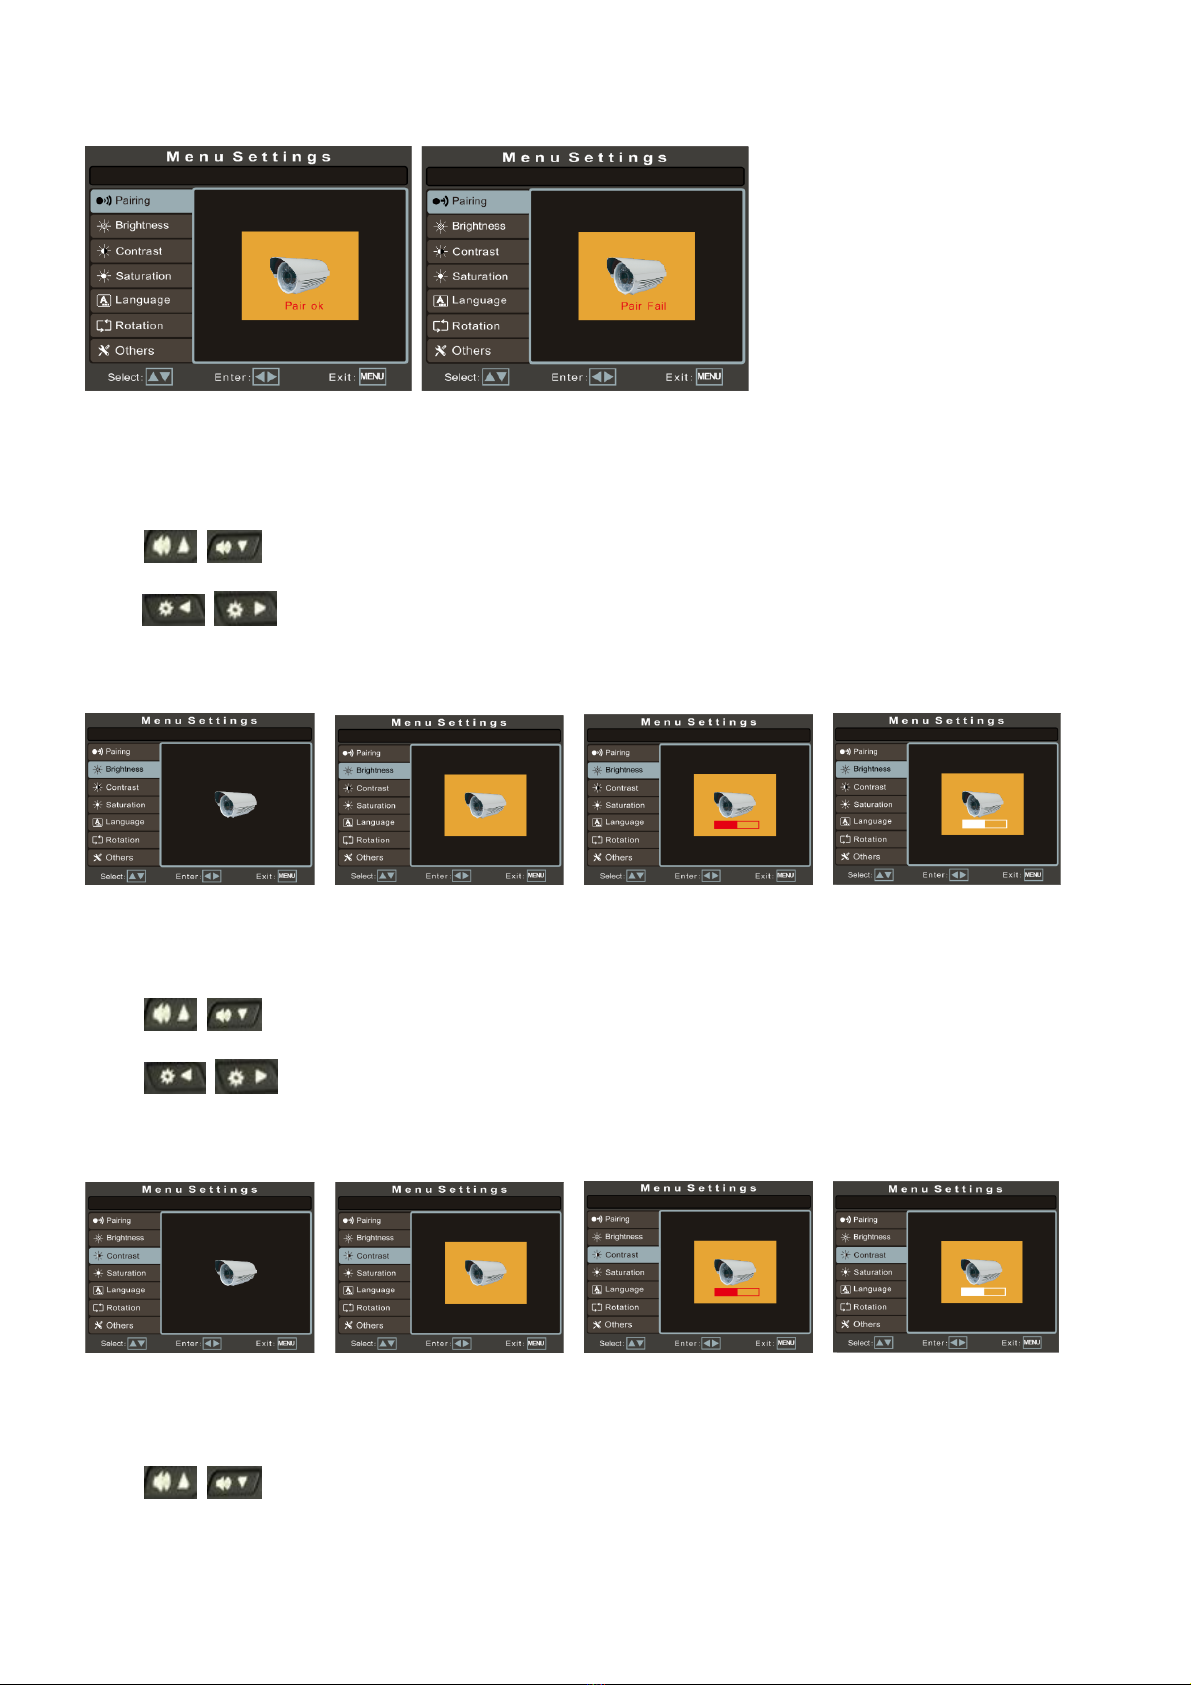
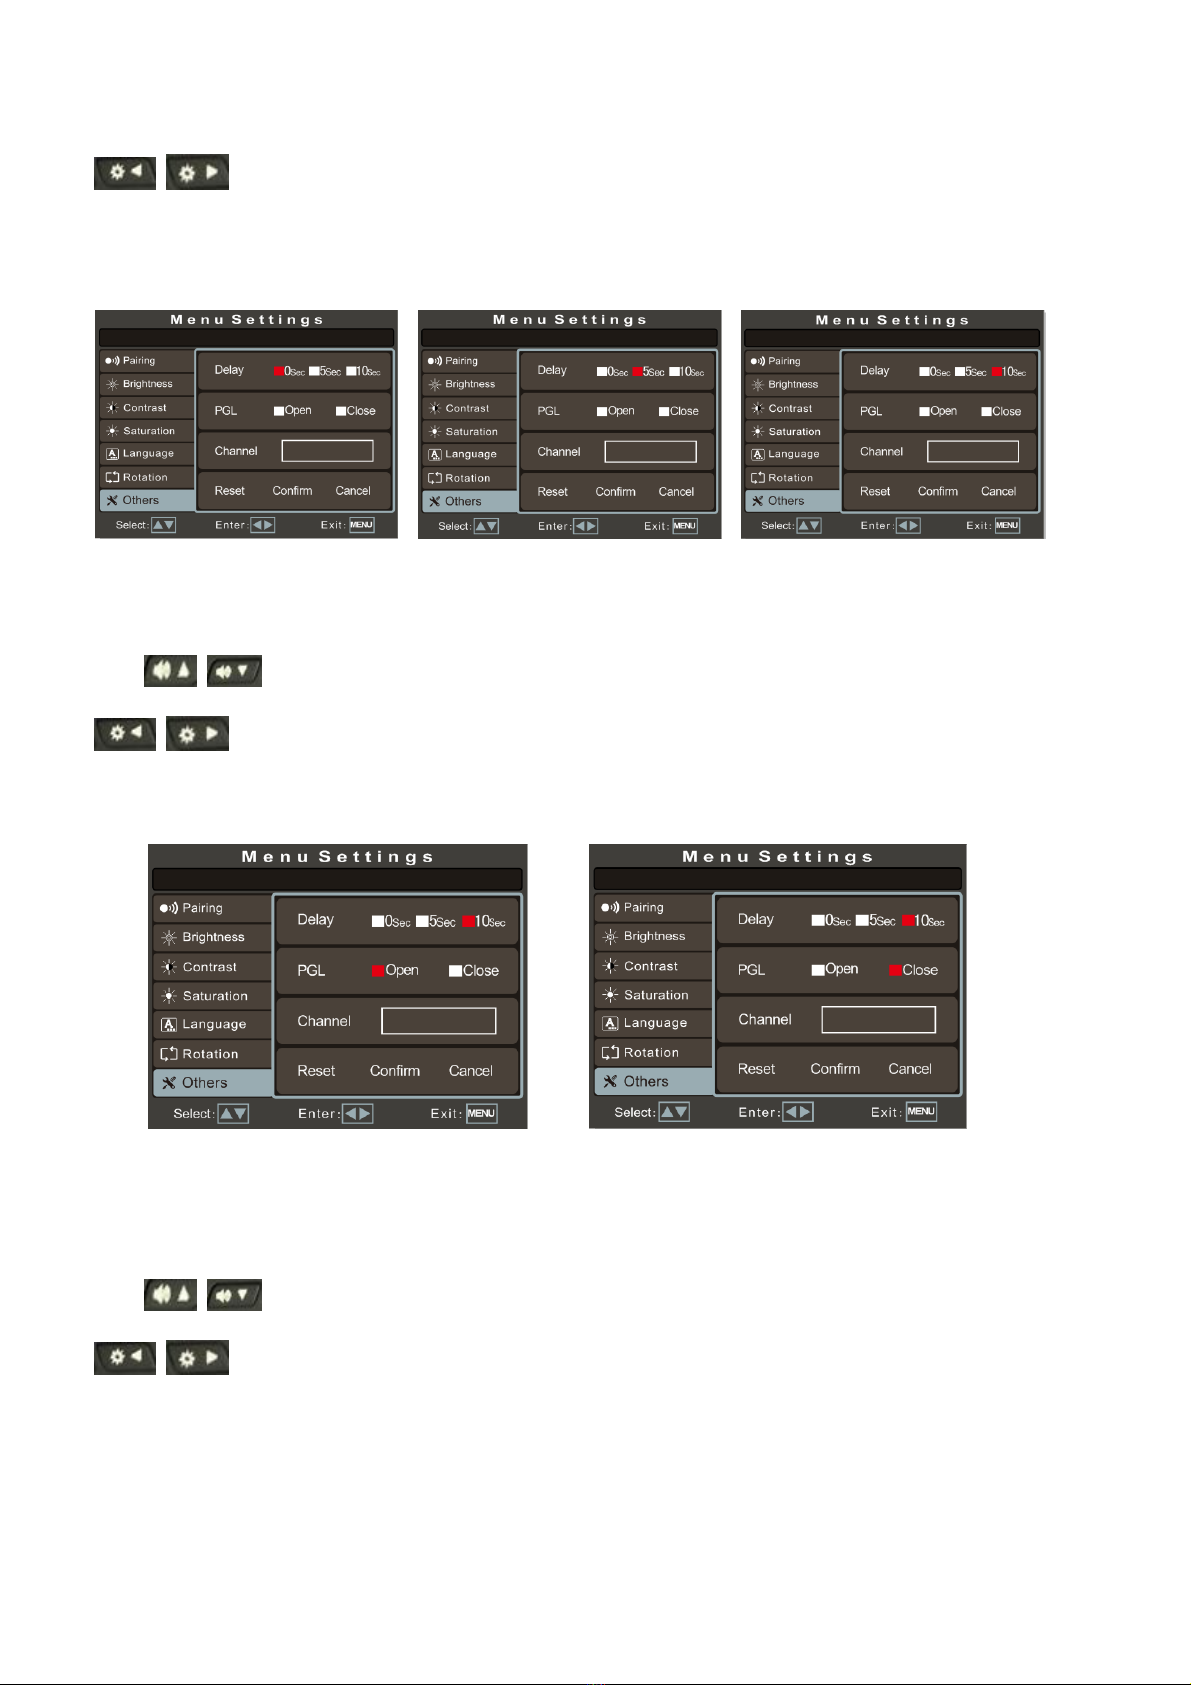
8、Parking guide line switch setting
Press “”on the panel or“VIDEO”“MODE”on remote control to switch to“Others”option, and then press
“”on the panel or “LEFT”“RIGHT”on remote control to “Scale line”option and press them again to
open and close it. The default state is closed. Just as shown in the following pictures.
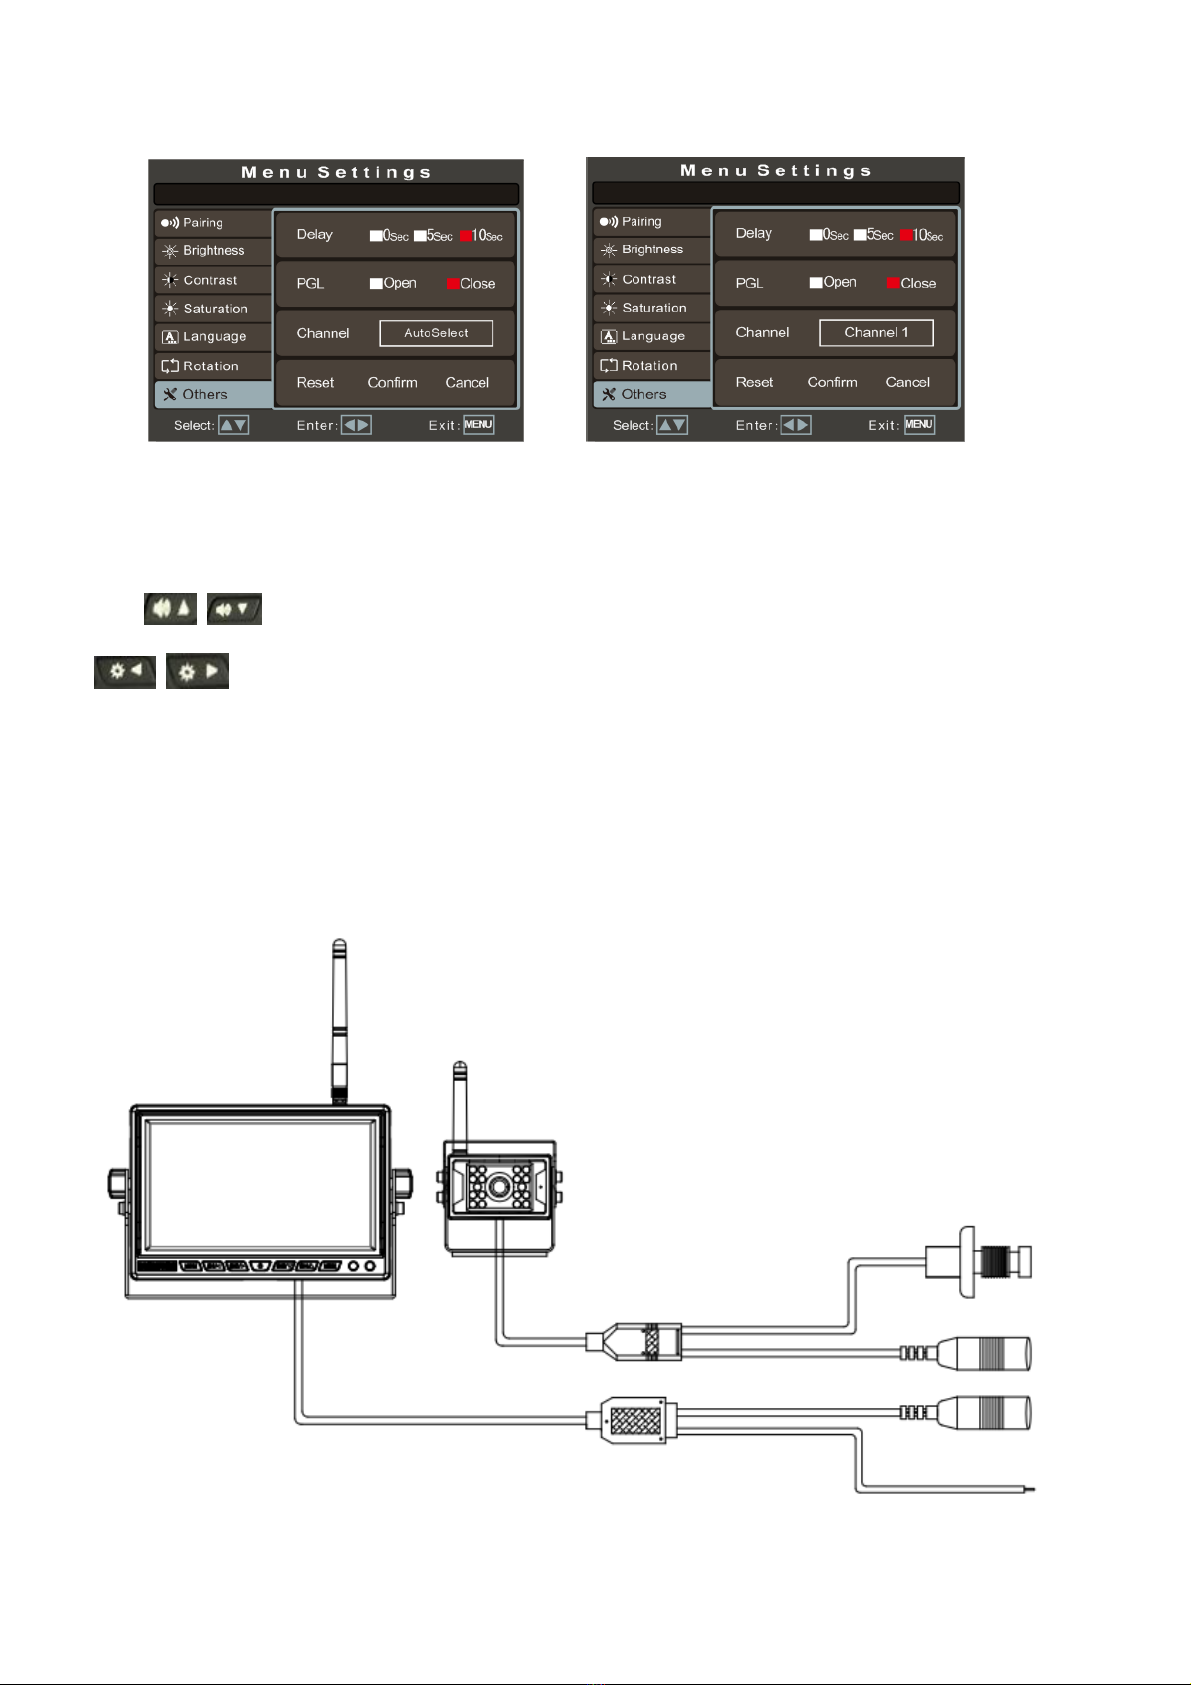
9、Wireless signal channel setting
Press “”on the panel or“VIDEO”“MODE”on remote control to switch to“Others”option, and then press
“”on the panel or “LEFT”“RIGHT”on remote control to “Channel”option and press them again to set
the wireless signal frequency. The default state is chosen the channel automatically. There are 13PCS wireless signal
channel optional (2412~2484MHZ). If there is several monitors work on the same frequency, may have signal unstable
or image flicker problem, which could be improved by changing the frequency. Just as shown in the following pictures.

10、Reset Setting
Press “”on the panel or“VIDEO”“MODE”on remote control to switch to“Others”option, and then press
“”on the panel or “LEFT”“RIGHT”on remote control to the “Reset”option and press them again to
confirm or cancel recover to factory settings. Just as shown in the following pictures.
Connection
1
2
3
4
5
6

1、Monitor
2、Camera
3、Camera Pairing button
4、Camera power supply port: DC12-24V input
5、Monitor power supply port: DC12-24V input
6、Reversing trigger line
Power extension cable
7、Red electronic wire: DC12-24V power input
8、Black electronic wire: GND
9、DC Male connector: connect to the monitor or camera
三、Remote Control
1) POWER: open or close monitor
2) VIDEO: increase volume
3) Left direction key: decrease brightness
4) MENU: open or exit menu
5) Right direction key: increase brightness
6) MODE: decrease volume
1
2

Accessories
1、Power extension cable*2PCS
2、Remote control*1PCS
3、User Manual*1PCS
4、Hexagon wrench*2PCS
4、2.4G antenna*2PCS
4MM hexagon
wrench
3MM hexagon
wrench

5、2.4G 3M antenna extension cable*1PCS
6、2.4G wireless camera*1PCS
Table of contents