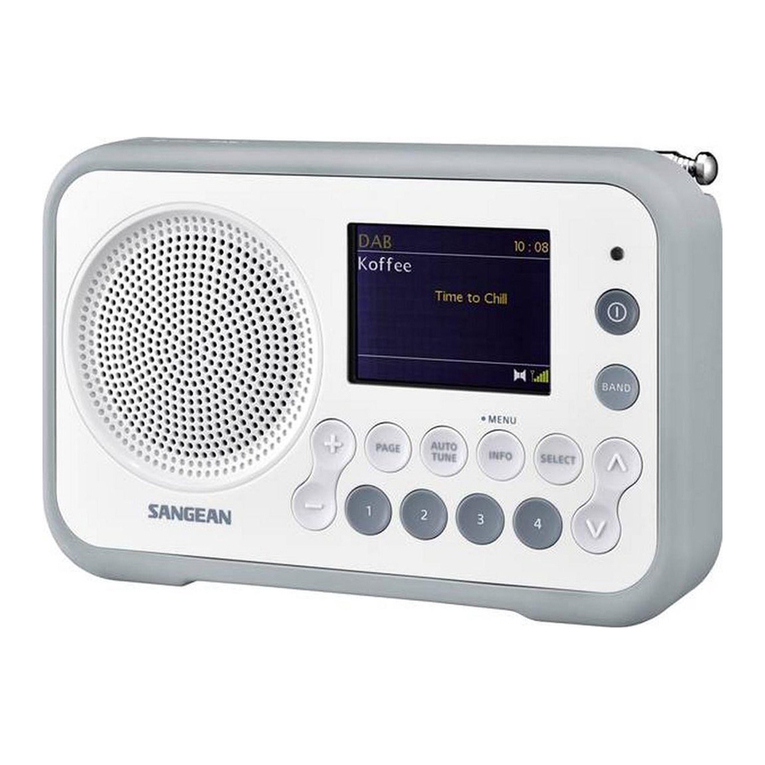
Sangean DPR-16 User manual

DPR-16
3A81XF1000000
Operating instruction
Mode d’emploi
Instruccions de manejo
Gebruiksaanwijzing
Bedienungsanleitung
GB
F
E
NL
D
DAB+ / FM-RDS / Digital Receiver
DAB+ / FM-RDS / Récepteur numérique
DAB+ / FM-RDS / Receptor digital
DAB+ / FM-RDS / Digitale ontvanger
DAB+ / UKW-RDS / Digitalempfänger

1
Important safety instructions
Read these instructions.
Keep these instructions.
Heed all warnings.
Follow all instructions.
Do not use this apparatus near water.
Clean only with dry cloth.
Do not block any ventilation openings. Install in accordance
with the manufacturer’s instructions.
Do not install near any heat sources such as radiators, heat
registers, stoves, or other apparatus (including ampliers) that
produce heat.
Do not defeat the safety purpose of the polarized or grounding-
type plug. A polarized plug has two blades with one wider
than the other. A grounding type plug has two blades and
a third grounding prong. The wide blade or the third prong
are provided for your safety. If the provided plug does not fit
into your outlet. Consult an electrician for replacement of the
obsolete outlet.
Protect the power cord from being walked on or pinched
particularly at plugs, convenience receptacles, and the point
where they exit from the apparatus.
1.
2.
3.
4.
5.
6.
7.
8.
9.
10.

2
GB
Only use attachments/accessories specied by the manufacturer.
Use only with the cart, stand, tripod, bracket, or table specied
by the manufacturer, or sold with the apparatus. When a cart is
used, use caution when moving the cart/apparatus combination
to avoid injury from tip-over.
Unplug this apparatus during lightning storms or when unused
for long periods of time.
Refer all servicing to qualified service personnel. Servicing is
required when the apparatus has been damaged in any way,
such as power-supply cord or plug is damaged. liquid has been
spilled or objects have fallen into the apparatus, the apparatus
has been exposed to rain or moisture, does not operate
normally, or has been dropped.
To Reduce the Risk of Fire or Electric Shock, Do not Expose
This Appliance To Rain or Moisture.
The Shock Hazard Marking and Associated Graphical Symbol
is provided on the rear of unit.
Apparatus shall not be exposed to dripping or splashing and no
objects lled with liquids, shall be placed on the apparatus.
Excessive sound pressure on ear- and headphones could
impair the hearing ability. Higher setting that idle on the
equalizer leads to higher signal voltages on the output for ear
and headphones.
11.
12.
13.
14.
15.
16.
17.
18.

3

4
GB
Controls
Speaker
Nap button
LCD display
Snooze button/Sleep timer button
Alarm button
Menu button/Info button
Band button
Standby button
Charge/Low battery indicator
Volume up/down
Tuning control rotary/Select/Auto tuning
Mute button
Preset button
DC IN socket
Headphone socket
USB socket for software update
Telescopic aerial
Battery compartment
Alkaline/NiMH/NiCad rechargeable battery switch
1
2
3
4
5
6
7
8
9
10
11
12
13
14
15
16
17
18
19

5
Display icon
Two line text display
Alarm 1 indicator
Snooze indicator
Sleep indicator
Volume indicator
AM/PM indicator
Nap timer indicator
Alarm 2 indicator
Clock digits
FM indicator
DAB indicator
K
J
I
H
G
F
E
D
C
B
A

6
GB
Battery operation
Battery operation using alkaline batteries
1. Remove the battery cover on the rear of the unit by pressing the
catch.
Note:
Before you insert the batteries, if you use non-rechargeable
batteries, make sure the NiMH/Alkaline switch which located inside
the battery compartment is switched to Alkaline position. If you use
rechargeable batteries, make sure to switch NiMH/Alkaline switch
to NiMH position.
2. Insert four UM-1 (D size) batteries into the spaces in the compartment.
3. Take care to ensure all batteries are inserted with correct polarity
as shown on the rear cabinet. Replace the battery cover.
4. Reduced power, distortion and a “stuttering sound” are all signs
that the batteries need replacing.
5. If the radio is not to be used for any extended period of time, it is
recommended that the batteries are removed from the radio.

7
Battery operation using rechargeable batteries
1. Slide the battery switch to the NiHM position.
2. Insert 4 UM-1 batteries into spaces in the compartment. Make
sure all batteries are inserted with the correct polarity as shown
on the rear cabinet.
Note:
Do not use a mix of old and new rechargeable batteries.
Do not use a mix of full and empty rechargeable batteries.
Do not use batteries that have a different mAh capacity
Do not use damaged or leaking batteries
3. Make sure the radio is switched off and connected to the AC
adaptor. When the charge indicator flashes yellow indicating
batteries are charging. Batteries will be fully charged in around
10 hours. The battery shows steady yellow light when the battery
charging is complete.
Note:
Duration for charging your battery fully can be varied according to
the mAh capacity of a battery. Higher mAh batteries required longer
charging time.

8
GB
Using the AC power adaptor
The AC power adaptor required for this unit should be 7.5 volts DC
at 0.8A center pin positive.
Insert the adaptor plug into the DC socket on the left side of the
radio.
Plug the adaptor into a standard mains socket outlet.
Whenever the adaptor is used, the batteries are automatically
disconnected. The AC adaptor should be disconnected from the
main supply when not in use

9
Setting the clock
Automatically updating the clock
Your radio can set its clock from DAB or FM radio broadcasts. After
a power failure the radio will then set its clock the next time you
turn on the radio in DAB or FM mode. Alternatively you may specify
that the time is not automatically updated. In this case, the clock
must always be set manually after a power interruption.
1. With you radio switched on, press and hold the Menu button to
access the menu for the current mode.
2. Rotate the Tuning Control Rotary until “System” is highlighted on
the display. Press the Tuning Control Rotary to enter the system
setting menu.
3. Rotate the Tuning Control Rotary until “Time” is highlighted on
the display. Press the Tuning Control Rotary to enter the time
setup.
4. Rotate the Tuning Control Rotary until “Auto update” is highlighted
on the display. Press the Tuning Control Rotary to enter the
auto-update menu.
5. Rotate the Tuning Control Rotary to choose an update option
from “Update from DAB”; “Update from FM”; ”Update from Any”
or “No update” as required. Press the Tuning Control Rotary to
conrm your choice. The radio will then exit to the previous menu
display.

10
GB
Setting the clock format
The clock display used in standby mode and on the playing mode
screens can be set to 12 or 24 hour format. The selected format is
then also used when setting the alarms.
1. With your radio switched on, press and hold the Menu button to
access the menu for the current mode.
2. Rotate the Tuning Control Rotary until 'System' is highlighted on
the display. Press the Tuning Control Rotary to enter the system
settings menu.
3. Rotate the Tuning Control Rotary until 'Time' is highlighted on the
display. Press the Tuning Control Rotary to enter the time setup.
4. Rotate the Tuning Control Rotary until 'Set 12/24 hour' is highlighted
on the display. Press the Tuning Control Rotary to enter the clock
format menu. The current clock display format is marked with an
asterisk.
5. Rotate the Tuning Control Rotary to select either 12 or 24 hour
format. Press the Tuning Control Rotary to conrm your choice
of clock format.
The display will then revert to the previous menu. If the 12 hour
clock format is chosen, the radio will then use the 12 hour clock for
the setting of alarms, and will display a 12 hour clock with an AM or
PM indicator.

11
Setting the date format
1. With your radio switched on, press and hold the Menu button to
access the menu for the current mode.
2. Rotate the Tuning Control Rotary until 'System' is highlighted on
the display. Press the Tuning Control Rotary to enter the system
settings menu.
3. Rotate the Tuning Control Rotary until 'Time' is highlighted on the
display. Press the Tuning Control Rotary to enter the time setup.
4. Rotate the Tuning Control Rotary until 'Set date format' is highlighted
on the display. Press the Tuning Control Rotary to enter the date
format menu. The current clock display format is marked with an
asterisk.
5. Rotate the Tuning Control Rotary to select required date format.
Press the Tuning Control Rotary to conrm your choice of date
format. The display will then revert to the previous menu.

12
GB
Manually setting the clock
1. Press the Standby button to switch on your radio.
2. To set all time settings press and hold the Menu button to access
the menu for the current mode.
3. Rotate the Tuning Control Rotary until 'System' is highlighted on
the display. Press the Tuning Control Rotary to enter the system
settings menu.
4. Rotate the Tuning Control Rotary until 'Time' is highlighted on the
display. Press the Tuning Control Rotary to enter the time setup.
5. To change the current time or date setting rotate the Tuning Control
Rotary until 'Set Time/Date' is highlighted on the display, then
press the Tuning Control Rotary to enter the time and date setting
screen. Now the hour digit will ash.
6. Rotate the Tuning Control Rotary until the correct hour is shown
on the display. Press the Tuning Control Rotary to enter the
selection. The minute digit will then ash.
7. Rotate the Tuning Control Rotary to select the correct minute.
Press the Tuning Control Rotary to enter the date selection. Now
the date digit will ash.
8. Rotate the Tuning Control Rotary until the correct date is shown
on the display. Press the Tuning Control Rotary to enter the
selection. The month digits will then ash.

13
Rotate the Tuning Control Rotary to select the correct month.
Press the Tuning Control Rotary to enter the selection. The
year digits will then ash.
Rotate the Tuning Control Rotary to select the correct year.
Press the Tuning Control Rotary to conrm the setting. Now the
time and date setting is completed and the display will show
“Time Saved.”
9.
10.

14
GB
DAB Radio
Using DAB mode for the rst time
1. Carefully extend the telescopic aerial.
2. Press the Standby button to switch on the radio. The display will
show “Welcome to Digital Radio” for a few second. If the radio
has been used before the last used mode will be selected.
3. Press the Band button as needed so that DAB radio mode is
selected on the display.
4. If this is the rst time that DAB mode is used a quick scan of the
Band III DAB channels will be carried out. The display will show
'Scanning'. (If the radio has been used before the last used
station will be selected instead.) During the scanning process, as
new stations are detected the station counter will increase and
the stations will be added to the list which is stored in the radio.
The bar graph indicates the progress of the scan.
5. When scanning is completed the radio will list the stations found
(in numeric-alpha order 0....9...A...Z), unless it has previously
been tuned to a DAB station. Rotate the Tuning Control Rotary
to scroll through the list of available DAB radio stations. Press
the Tuning Control Rotary to select the highlighted station. The
display may show 'Connecting...' while the radio re-tunes. Use
the Volume buttons to set the sound level or press the Mute
button to mute the sound as needed.
6. If the station list is still empty after the scan the display will show
'NO DAB Stations'. If no stations are found it may be necessary
to relocate your radio to a position giving better reception.

15
Selecting a DAB radio station
1. When playing a DAB radio station, the display normally shows
the name of the current station with other related information.
2. Rotate the Tuning Control Rotary to access the radio station list
and to scroll through the available stations.
3. Press the Tuning Control Rotary to select the highlighted station.
The display may show 'Connecting...' while the radio re-tunes.
4. Use the Volume buttons to set the sound level or press the Mute
button to mute the sound as needed.
Note:
If the display shows 'Station Not Available' it may be necessary
to relocate your radio to a position giving better reception. A
question-mark in front of the station name merely indicates that the
station has not recently been detected by the radio. It may still be
available.
Secondary services
Certain radio stations have one or more secondary services
associated with them. Typically these are not broadcast continually.
If a station has a secondary service associated with it, the display
will show “>>” next to the station name on the station list. The
secondary service will then appear immediately after the primary
service as you press the Tuning Control Rotary.
1. To listen to a secondary service, rotate the Tuning Control Rotary
to scroll to the chosen station, and press the Tuning Control Rotary
to tune to the station. If the secondary service is not available
(off-air) then the primary service will be selected.

16
GB
Display modes - DAB
Your radio has seven display modes:-
1. Press the Info button to cycle through the various modes.
a. Scrolling text Displays scrolling text messages such
as artist/track name, phone in number
etc.
b. Program Type Displays the type of station being
listened to e.g. Pop, Classic, News
etc.
c. Multiplex Name Displays the name of DAB multiplex
to which the current station belongs.
d. Time and date Displays the current the time and
date.
e. Frequency Displays the frequency of the DAB
multiplex for the station listened to.
f . Bit rate & audio type Displays the digital bit rate & audio
type for the station being listened to.
g. Signal Strength Displays a graph showing the
signal strength for the station being
received.

17
Finding new DAB radio stations
Should you wish to use your radio for DAB reception in a new
location, or if no stations were detected during the initial scan, you
can follow this procedure to allow your radio to nd out which DAB
radio stations are available.
1. Ensure that the telescopic antenna is extended. With the radio
switched on and in DAB mode, press and hold the Menu button.
2. Rotate the Tuning Control Rotary until 'Full scan' is highlighted
on the display.
3. Press the Tuning Control Rotary to initiate the scan. The display
will show 'Scanning' and your radio will perform a scan of the
DAB Band III frequencies. As new radio stations are found the
station counter on the right-hand side of the display will increase
and the radio stations will be added to the list stored in the radio.
The bar graph indicates the progress of the scan.

18
GB
Manual Tuning
Manual tuning allows you to tune directly to the various Band III
DAB channels (5A to 13F).
1. When in DAB mode press and hold the Menu button so that the
display shows the DAB menu.
2. Rotate the Tuning Control Rotary until 'Manual tune' is highlighted.
3. Press the Tuning Control Rotary to enter manual tune option.
4. Rotate the Tuning Control Rotary to choose the required DAB
channel.
5. Press the Tuning Control Rotary to cause the radio to tune to the
chosen channel. When the radio has tuned, the display shows
the channel number and frequency, and the name of the DAB
multiplex found (if any). A bar graph shows the signal strength
and is useful if you need to reposition the radio or its aerial. The
minimum signal marker 'I' which separates the left and right parts
of the signal graph shows the minimum signal level required for
satisfactory reception. Any new radio stations found on the tuned
DAB multiplex will be added to the list stored in the radio.
6. Press and release the Tuning Control Rotary to choose a different
frequency.
7. Press the Menu button a second time to access the main DAB
menu then select 'Station list' to return to normal tuning.

19
Dynamic Range Control setting
Dynamic Range Control (also known as DRC) can make quieter
sounds easier to hear when your radio is used in a noisy
environment by reducing the dynamic range of the audio signal.
1. Press the Standby button to switch on your radio.
2. Press the Band button as needed to select DAB radio mode.
3. Press and hold the Menu button to enter the DAB menu.
4. Rotate the Tuning Control Rotary until 'DRC' is highlighted on
the display.
5. Press the Tuning Control Rotary to enter the DRC adjustment
mode. The current DRC setting will be indicated with an asterisk.
6. Rotate the Tuning Control Rotary to highlight the required DRC
setting (the default is 0).
'DRC 0' - DRC is switched off, Broadcast DRC will be ignored.
'DRC 1' - DRC is set as sent by broadcaster.
'DRC 1/2' - DRC level is set to 1/2 that sent by broadcaster.
7. Press the Tuning Control Rotary to conrm the setting.
Note:
Not all DAB broadcasts use the DRC function. If the broadcast
does not provide DRC information, then the DRC setting in the
radio will have no effect.
Table of contents
Languages:
Other Sangean Receiver manuals

Sangean
Sangean PR-D5 User manual

Sangean
Sangean ProTravel PT10 User manual

Sangean
Sangean H203D User manual

Sangean
Sangean WFR-70 User manual

Sangean
Sangean ATS-818ACS User manual

Sangean
Sangean DT-110 User manual

Sangean
Sangean CP-100D User manual

Sangean
Sangean SR-25 User manual

Sangean
Sangean ProTravel PT-50 User manual

Sangean
Sangean PR-D4 User manual

Sangean
Sangean U-1 Owner's manual

Sangean
Sangean MMR-77 User manual

Sangean
Sangean WR-11 User manual

Sangean
Sangean HEDONIC 70 PR-D7 User manual

Sangean
Sangean DPR-25+ User manual

Sangean
Sangean ATS-818 User manual

Sangean
Sangean U-3 User manual

Sangean
Sangean WR-2 User manual

Sangean
Sangean SG-118 Instruction sheet
Sangean
Sangean PR-D15 User manual