Thank
you
for
purchasing
the
Sansui
TU-777.
In
doing
so,
you
have
made
a
wise
choice,
one
that
promises
you
many
delightful
years
of
rich
stereo
enjoyment.
Model
TU-777,
incorporates
the
very
latest
in
circuitry
design,
including
a
new
FET
front
end
for
increased
FM
sensitivity,
high
stability
and
low
distortion.
It
also
features
a
dignified
black
faced
front
panel,
symbolic
of
all
Sansui
high-grade
sound
equip-
ment.
Before
leaving
the
Sansui
factory,
this
model
was
tested,
inspected
and
certified
to
be
in
perfect
working
order.
To
keep
it
that
way,
it
is
imperative
that
you
read
the
Opera-
tion
section
of
this
manual
thoroughly
before
attempting
to
in-
stall
and
use
the
tuner.
Since
this
manual
also
contains
other
helpful
information
on
checking
and
servicing
the
tuner,
and
in-
stalling
it
in
a
custom-made
cabinet,
you
will
undoubtably
want
to
retain
it
for
future
reference.
Again,
our
sincere
thanks
for
purchasing
the
TU-777
and
our
best
wishes
for
many
years
of
trouble-free
stereo
enjoyment.
CONTENTS
OPERATION
SECTION
Switches
&
Controls:
-i2vivissaticedi
tis
Mon
tear
ete
sakes’
3,
4
Anterina
Contection:
cecchatevigeced
estat
hots
sean
adeee
ned
5,
6
Amplifier
Connection:
¢02)
hie
os
sepaccdsen
esa
bid
tera
terior
dyaees
6
OpetatiOnt
o5..50
nent
tee
tree
es
ea
tae
eee
est
7
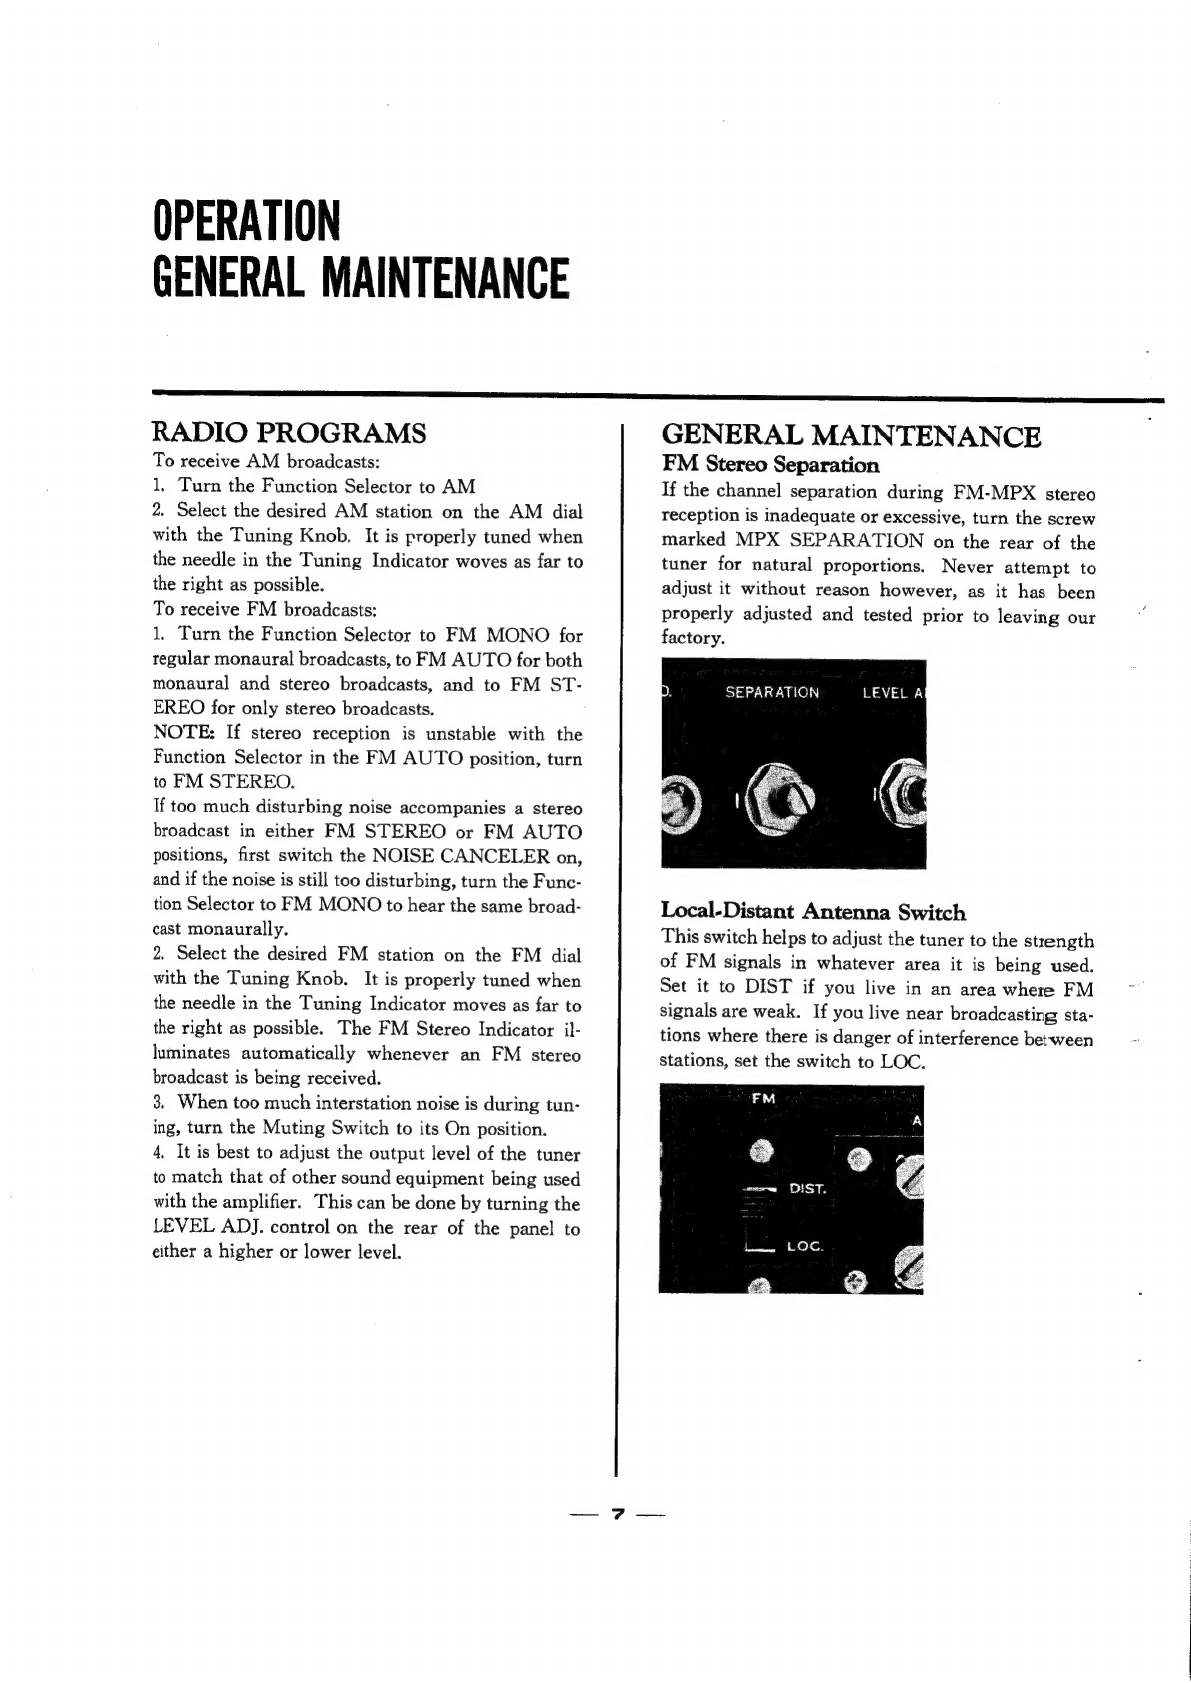
General
Maintenance
se:
i5e5-so055
se.
Saeenioueieat
cupedacs
7,8
Specifications/Characteristics
..........
0...
:ce
ee
eeecee
eee
eeeene
9,
10
SERVICE
SECTION
General
Troubleshooting
Chart
.................
2.
cee
ee
senna
11,
12
Disassembly
Procedure.................cccccccceeeseeeeeeseeseeees
13
Dial.
Mechamisint
sc.cecedetietet
even
Stone
es
eee
eo
Sea
vs
13
Custom
Mounting
.............
ccc
cece
cece
cee
ce
cece
cane
sec
eeenees
14
‘Lest
Poitits
Charticceois
test
artasse
eta
reaeeweedechieienditwesnnets
15
Alignment
Procedure
PM
ores
ei
eesen
hein
sere
eid.
bees
ied
te
basen
eepetendlnawdeaua
ded
ee
hes
16
PMEMULTIPLER:
tacicimersuccioaigah
cede
viestortastands
alee
17
PM
i
aria
ness
te
Gh
adele
en
np
aa
ene
caMencgsaet
aa
aeaN
18
Printed-Circuit
Sheets
&
Parts
List
............
19,
20,
21,
22,
23
Biéek
Diagram
\cdisvisscvss
cath
detec
dueeuc
aden
caSddsaas
bathe
24
Other
Parts
&
Theiv
Pusition
on
Chassis
..................
25,
26