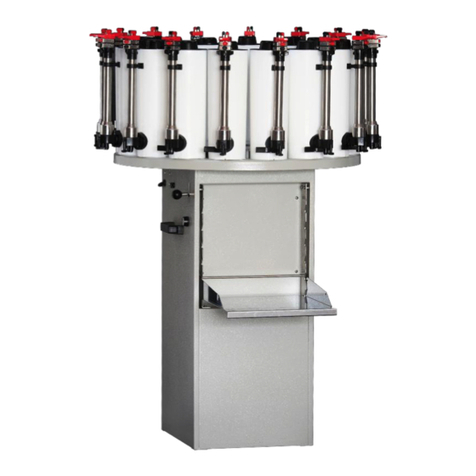
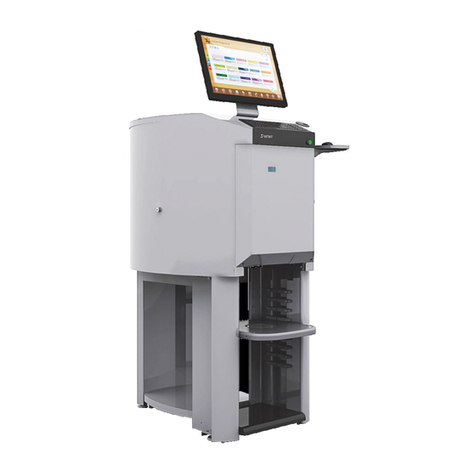
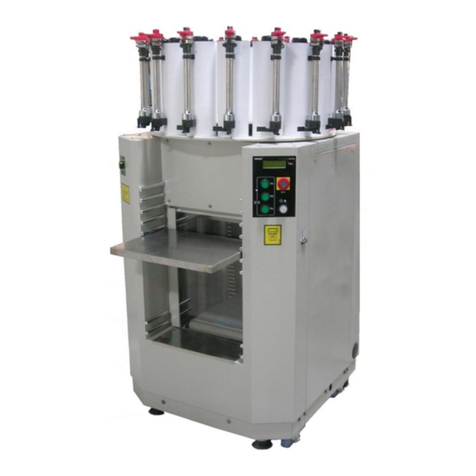
Santint A4B Series User manual

A4b Automatic Dispenser
User Manual
ISO 9001: 2008 Certified

Contents
1. Using Requirement…………………………………………………………………1
2. Specifications…………………………………………………………………………1
3. Safety Instructions……………………………………………………………………2
4. Machine Composition…………………………………………………………………3
5. Installation………………………………………………………………………………5
5.1 Machine…………………...…………………………………………………………………………5
5.2 Computer……………………………………………………………………………………………6
5.3 Software………………….…………………………………………………………………………7
6. Machine Adjustment…………………………………………………………………7
6.1 Software……………………………………………………………………………………………7
6.2 Machine……………………………………………………………………………………………10
6.3 Add Colorants……………………………………………………………………………………10
6.4 Purge………………………………………………………………………………………………11
6.5 Calibration……………………..……………………………………………………………………11
7. Operation………………………………………………………………………………12
7.1 Load Base Paint Can……………………..…………………………………………………………12
7.2 Change Water for Cleaning Box…………….……………………………………………………13
8. Maintenance…………………………………………………………………………14
8.1 Daily Maintenance……………………….…………………………………………………………14
8.2 Periodical Maintenance……………………..………………………………………………………14
9. Change Spare Parts…………………………………………………………………14
10. Circuit Diagram………………..………………………………………………………16
11. Troubleshooting………………………...………………………………………………17
Warning Labels:
Electrical Shock Danger! Cut off power supply before cleaning and maintenance.
Important Information! Read carefully.

A4b Automatic Dispenser V1.0 1
1. Using Requirement
1) Please read the manual carefully before installation and operation.
2) Working environment temperature: 0 ℃~+55 ℃, relative humidity: 15% ~90%.
Transformation and storage temperatures shall be within a range of -10 ℃to +55 ℃
and for short periods not exceeding 24h at up to +60 ℃
3) The machine is for indoors use only.
4) The machine is not explosion-proof, neither the machine as a whole nor its internal
components are intended for use in potential explosive atmospheres.
5) Do keep the children away from the machine. Do not operate the machine except for the staff
6) Do provide separate power supply socket and overcurrent protection device for this machine.
Make sure the loading capacity of the socket shall be in line with the requirements listed
in the Nameplate. Please provide every single phase at least 1.5mm²power supply wire for
this machine.
7) Please confirm that there is dependable ground wire with the electrical socket before usage
8) Before installation and maintenance, must cut off the power supply and Unplug from outlet.
9) Do not unplug by pulling on cord. To unplug, grasp the plug, not the cord
10) Do not operate any appliance with a damaged cord or plug, or after the appliance
malfunctions or is dropped or damaged in any manner. Return appliance to the nearest
authorized service facility for examination, repair, or electrical or mechanical
adjustment.
11) Do not lengthen the power line at pleasure in case of accident
12) Keep this machine on the solid ground, then adjust the foundation to make the foundations
on a horizontal status before working
13) Do not operate the machine in case the machine shell is removed.
14) Computer composition:
1
CPU PIII
2
CD-ROM Driver
3
15 Inches Monitor, screen resolution is 1024X768 pixels or higher

A4b Automatic Dispenser V1.0 2
3.1
4
USB/COM Interface
5
Windows 2000 or higher operating system
2. Specifications
Type:A4b Mode:aaa
Item
Content
Item
Content
Number of Canisters
24/20/18/16/12
Min Dispensing
0.077ml(1Y/384)
Flow Rate/Frequency
400ml/min 200ml/min
Canister Size
2.3/3.8 Ltr
Pump Size
62mltr
Stirring Speed
20 Cycles/minute
Diameter of the punch’s head
25mm
Max Base Paint Can Weight
40KG
Power
≤200W
Power Supply
See Nameplate
Can Size(D x H)
MAX320mm×390mm
MIN80mm×110mm
Stirring Timing
Stir 10 minutes
every 4 hours
Noise Level
<70dBA
Weight:
270±3 kg
Machine Size (Height x Width x Depth)
1335×900×1000(mm)
Notes: Timed stirring function is available for customization.
3. Safety Instructions
1). Please read this manual carefully before installation and operation.
2). All the operation and maintenance must be carried out by authorized personnel.
3). Prolonging wire is prohibited.
4). The machine is only available for 0.5 liter to 20 liter (40kg) paint cans.
5). The machine should be powered on all the time to make the stirring available.
6). Press the emergency stop button, the machine will stop working and the stirring will stop at the same
time.
7). If it is not used for a long time, the canisters should be cleaned and plugged off.
8). During first use, please discharge the fixing seats of the machine( as fig. 3.1, left one and right one)
and keep the fixing seats for next transportation.
Fixing Seat
色浆桶部件

A4b Automatic Dispenser V1.0 3
9). During working time of dispenser, please do not put your hand into the dispenser to avoid hurt of the
punch head; please do not touch the punch head while out of use.
10).During transportation, the machine should be leveled, preventing from being shocked, pressed, and
bottomed up or side faced on the ground. The machine should be kept in ventilated and dry room
which is moisture-proof, fire-proof.
11). It is forbidden to work the machine in the inflammable and explosive environment.
12). The dismantling procedures of the fixing screws are as follows if you need to remove the machine
from the foundation.
13). Take out the mouse seat and the two M5X12 inner hexagon screw. Put the Ф5 flat washer and spring
washer on it. Then fix the mouse seat onto the machine.
4. Machine Composition
Use 17-19 solid spanner to
remove the screws of the
both sides.
注意:左右共两处
Mouse Seat
Inner Hexagon Screw
M5X12(with Ф5 flat
washer and spring
washer)

A4b Automatic Dispenser V1.0 4
4.4
4.2
4.1
Canisters
Cleaning Parts
色浆桶部件
Turntable
Lifting Parts
色浆桶部件
4.3
Base Paint Can Tray
4.5
PunchAssembly
色浆桶部件
Turntable Drive Assembly
色浆桶部件

A4b Automatic Dispenser V1.0 5
Canister assembly: container of colorant is with piston pump and valve, on the valve there is a valve
handle and a nozzle for colorant dispensing ,as fig 4.1.
1. Do not overtake the maximum colorant volume.
2. The nozzle should be kept clean.
3. After refilling canister, the lid should be fastened to prevent colorant from drying.
TurntableAssembly: it is used to fix the canisters and drive them to the
dispensing position as well as stir the colorants to prevent the sedimentation.
See 4.1.
Cleaning Parts:clean the nozzle after dispensing, the washing wheel
Inside the cleaning box shall be kept clean. Check the water level and
change the water every day (do not exceed the MAX). See 4.1 and 4.6.
Lifting Parts:it drives the puncher; controls the piston pump during
dispensing; and open the valve. Only authorized personnel are allowed to open the front door for service.
See 4.2.
Hydraulic Loading Parts: base paint cans are located here. See 4.3.
Puncher:it is used to punch the base paint can cover. See 4.4.
Turntable Driving Parts: poly v-belt is adopted to drive the turntable for sending the canisters to the
dispensing positions. See 4.5.
5. Installation
5.1 Machine
Keep this machine on the solid ground, then adjust the feet to make the foundations on a horizontal
status before working.
Before installation and maintenance, must cut off the power supply and unplug from outlet.
Do not unplug by pulling on cord. To unplug, grasp the plug, not the cord.
Do not operate any appliance with a damaged cord or plug, or after the appliance malfunctions or is
dropped or damaged in any manner. Contact the nearest authorized service facility for examination,
repair, or electrical or mechanical adjustment.
Do not lengthen the power line.
4.6

A4b Automatic Dispenser V1.0 6
5.1.3
Do not operate the machine in case the machine shell is removed.
Take out tool box; check the items inside according to the packing list. Preserve the tool box for
next use.
Find the two side door keys and open the door lock. Press the button to pop out the handle. Rotate
the handle to open the side door. See 5.1.1.
Use spanner 19 to remove the four bolts connecting the machine and the tray. Lift the machine to the
required site and level it.
Open the right/left side door and top door, remove the two fixing seats of the turntable. See 5.1.2.
Connect the machine with power supply.
Insert the nine-pin serial port line or the USB wire into the corresponding socket which is under the
change-over switch and fix it well. See 5.1.3.
The machine is installed now.
5.2 Computer
Install the mainframe, monitor, key board and mouse:Put the mainframe in the cavity at bottom of
the machine, or put mainframe on the top cover of the machine, then put the key board and the
mouse on the top cover of the machine.
Connect the power supply wire, data wire with the monitor, and connect the monitor with the
5.1.2
Seat
5.1.1
USB Interface
色浆桶部件
Socket
Air Switch

A4b Automatic Dispenser V1.0 7
mainframe.
Insert the serial port line or the USB wire into the socket of the machine. Now the computer is
installed. See 5.2.1.
5.3 Software
1. Turn on the switch on the back of machine:
2. Turn on monitor and mainframe, enter Windows system;
3. Insert the U flash disk equipped with the machine into the USB port of the computer.;
See Software Manual for detail info about installation and using.
6. Machine Adjustment
The machine has been tested before leaving factory. Normally the professional goes to your site to do machine
adjustment. If you don’t need it, please install and adjust the machine under the guidance of the professional.
6.1 Software
1. Turn on the switch on the back of machine, and ensure that the Emergency
Stop button is on (If equips uninterruptible power supply, please ensure that
the power supply is on.)
2. Open (double-click the icon) Color Expert 2.0 program;
3. Machine begins to initialize, and pop up the interface shown in 6.1.1. If there is abnormal sound coming
from the machine, press emergency button and start troubleshooting.
1、如图所示,将左侧立板用
两个六角螺栓 M8×20、两个垫圈
8通过底板固定到底梁上。
2、如图所示,区分小桶架板
总成、大桶架板总成、顶层架板总
成。
5.2.1
USB Wire
色浆桶部件
USB Wire
Air Switch

A4b Automatic Dispenser V1.0 8
6.2 Machine
When the software shows Ready, please start to adjust the machine.
Dismantle the cleaning box, fill some water or washing liquid, the cleaning wheel runs normally.
Check whether the piston is on the bottom; the initialization of turntable should be in normal condition.
Locate the base paint can in the center of tray. If there is no can or the can is taken away, the software
shows E18 “No Paint Can, colorant cannot be spouted out”.
Test the switch of top cover: the machine cannot work when the top cover is opened.
Press the Emergency Stop button if there is any issue.
Stirring would be stopped if the emergency Stop button is pressed.
6.3 Add Colorants
Before colorant is added into canister, it must be fully mixed by stirring ruler. Mixer is not recommended
for mixing since too many bubbles will be produced and it will affect the accuracy.
The machine has two kinds of canisters, the volume for small canister is 2.3L, The volume for big
canister is 3.8L. Pay attention to the maximum adding volume note on the canister; don’t add more
colorant into the canister.
See AllotCansColor.exe in the bin file of the installation catalog; With the instruction of Software
Manual, please assign the colorants to respective canisters if necessary to change.
The left side of the machine is default side for adding the colorant.
Open maintenance, choose the colorant code, click “add colorant” to add corresponding colorant (6.3.1),
please ensure the colorant names in the software match the colorant of the canisters.
Fig. 6.3.1

A4b Automatic Dispenser V1.0 9
Open the top cover of the machine, the corresponding labels for the colorant are stick on the canister in
order.
Open the cover of the canister and insert the stirring ruler, and then the colorant can be poured into canister
along the stirring ruler. Be careful not to pour the colorant out of the canister. Cover the canister cover
when you finish adding the colorant. When the top cover is opened, machine will not rotate.
Add the actual corresponding colorant quantity in the adding colorant interface, and click “add”.
Rotate the turntable to drive the other canister to the left side of the machine and add the corresponding
colorant.
Click the stir to stir the colorant.
6.4 Purge
Air in the pump affects the accuracy, so emptying the air in pumps is a must.
The machine has the automatic emptying function.
The machine can automatically lift the piston pole and then press it to the bottom and repeat for 3 times.
If the colorants are filled for the first time, a cup or original can is needed to put under the dispensing
nozzle. Tool –Manual Dispense, input 30ml, then the machine lifts the piston pole automatically, then
please open the valve and press the pole down to bottom, then repeat this for three time, finally filling the
cup.
Do not pour the colorants in the cup back into the canister. Do not lift the piston rod at will.
Rotate the turntable and empty all the pumps in this way. Do not dispense different colorants into the same
cup.
Please cover the lids promptly to avoid evaporation.
6.5 Calibration
The machine had been calibrated in the factory. Customers can also recalibrate in 4-7 hours after colorants
have been filled if they need. A scale with minimum accuracy of 0.001g and the colorant densities are required
for recalibration.
Stir for 30 minutes after adding colorants, to remove bubbles.
When no continuous dispensing of colorants, please re-empty air or check if nozzle is blocked.
In 4 hours, the machine can be calibrated again.

A4b Automatic Dispenser V1.0 10
7. Operation
See the Software Manual for details of how to search, use, modify the formula. The operators shall be trained
and follow the instructions listed in the manual.
The machine should be powered on all the time, there will be no action when emergency button is
pressed
The colorant level in canister should not be lower than 0.5L.
For the sake of safety, any part of your body is strictly forbidden to be put upon/over the loading tray
during its lifting process.
7.1 Locate Base Paint Can
The base paint can shall be located near to the panel plate, thus the punched holes would be the nearest to
the central position of the can.
If punching is selected during the dispensing, press both of the lifting switches after locating the base paint
can properly. When the lifting switch is pressed upwardly, the tray would be lifted. When the lifting switch
is pressed downwardly, the tray would be lowered. The tray would automatically stop lifting when the can
lid is up to the stop switch. Then the punching and dispensing would be done by operating the computer.
If punching is not selected during the dispensing, when you press the lifting switch upwardly, the tray
would be lifted. The tray would automatically stop lifting when the base can covers the sensor. The tray
would be lowered when you press the lifting switch downwardly. Then the punching and dispensing
would be done by operating the computer.
Press down the lifting switch after finishing the dispensing. Release the lifting switch when the base can
and the tray are lowered to a proper height. Repeat the foregoing procedures for other cans to continue the
dispensing.
1、如图所示,将左侧立板用
两个六角螺栓 M8×20、两个垫圈
8通过底板固定到底梁上。
2、如图所示,区分小桶架板
总成、大桶架板总成、顶层架板总
成。

A4b Automatic Dispenser V1.0 11
7.2 Change Water for Cleaning Box
Lift lock handle to loose cleaning box.
Hold the box handle, take it out.
Clean box and add water. (Water level should be lower than wheel axis)
Put the cleaning box back. Make sure it is in bottom position. Push down lock handle.
7.2
Wheel
Lock Handle
Box Hanlde
7.1

A4b Automatic Dispenser V1.0 12
8. Maintenance
Routine maintenance is needed to ensure that the machine remains in good working condition and has a long
service life. Maintenance and any repairs should only be carried out by qualified personnel.
8.1 Daily Maintenance
Clean and change water every two days for cleaning box. Keep the nozzle clean.
Add colorant in time when software shows low colorant warning. If the colorant in the canister is too little,
less than 0.5L, which will affect the accuracy of the dispensing. Cover the canister cover as soon as
finishing adding colorant.
Keep machine power on; even it is not used. Or the colorants would not be stirred.
Clean all the plastic tubes every week manually according to the user manual to ensure the dispensing
accuracy. Notice: moving parts may cause injury.
Clean the nozzle if the colorant is not dispensed out in straight line.
If the machine hasn’t been used for more than 3 days, every colorant
needs to be dispensed 0.3ml to ensure the accuracy.
8.2 Periodical Maintenance
Do the following maintenance every 1-6 months:
Check stirring paddle inside each canister, see whether it works; if not, repair.
Rotate the valve handle to clean the nozzle. The handle shall move back
to its original position automatically.
Lubricate screw and guiding rod every 6 months.
Lubricate puncher rail every 6 months.
If the machine has not been used for a long time (more than 2 weeks),
clean each nozzle first
9. Change Spare Parts
1) Change Outer Canister.
Loose the fixing screws of the fixing plate. See 9.1. Remove the fixing plate. Loose the fixing screws of
the canister. Rotate the canister clockwise to remove it from the turntable.
2) Change Middle Canister.
8.1.1
8.2.1
Guide Rod Behind Screw

A4b Automatic Dispenser V1.0 13
Loose the fixing screws of the fixing plate. Remove the fixing plate. Loose the fixing screws on the
cylinder rack and the turntable. Hold the rack and the caniste, push them to take them out. Be careful not
to outpour the colorants inside the canister.
3) Change Inner Canister.
Loose the fixing screws of the fixing plate. Remove the fixing plate. Loose the fixing screws on the
cylinder rack and the turntable. Hold the rack and the caniste, pull them to take them out. Be careful not to
outpour the colorants inside the canister.
4) Change pipe cover
Turn the handle away from the nozzle. Remove the old cover and install the new one. See 9.2.
9.1
Fixing
Plate
9.2
Pipe
Cover

A4b Automatic Dispenser V1.0 14
10. Circuit Board

A4b Automatic Dispenser V1.0 15
11. Troubleshooting
Problem
Cause
Action
Stirring motor doesn’t
working
1. Machine is not power on
2. Fuse is broken
3. Motor is not connected
4. Motor is broken
1.Check the power
2.Change the fuse
3.Open the side door, reconnect wire
4. Change the motor
Colorant dispense out
not continually
1. There is air in the pump
cylinder
2. Colorant level is too low
3. Colorant is dry and blocked
1. Purge cylinder
2. Add colorant
3. Clean canister
Canister is loosed
Fasten screw is loosed
Fasten Screw
Colorant is difficult to be
dispensed out
1. Nozzle is blocked
2. Valve Motor is broken
3. Valve handle cannot open
1. Clean Nozzle
2. Change valve motor
3. Adjust the motor and valve
position
Piston difficult to move
1. Colorant is dried inside
2. Screw, guiding rod is not
lubricated
3. Fastening screw is loosed
1. Empty colorant, clean canister and
pump cylinder
2. Lubricate screw and guiding rod
3. Fasten screw
Abnormal noise from step
motor
1. Voltage is out of normal range
2. Screw and guiding rod is not
lubricated
3. Fastening screw is loosed
1. Check the power supply
2. Lubricate screw and guiding rod
3. Fasten screw
Colorant appeared on the
nozzle
Sealing washer is damaged
Change sealing washer
LCD show “Emergency
Button Pressed”
1. Emergency button is pressed
2. Emergency button is broken or
the wire is disconnected
Release emergency button
Change emergency button or connect
wire
LCD show “Door Open”
The door is not closed well
Close the door

A4b Automatic Dispenser V1.0 16
Error Code
Cause
Action
E11
Emergency button is pressed
Release emergency button
E12
Cover is open
Cover micro switch is broken。
Close cover
Change micro switch
E18
No base paint can
Base paint can is too far away from
sensor
Sensor is broken
Put base paint can
Push base paint can close
Adjust or change bas paint can sensor
E31
Valve motor is broken
Vale motor driver is broken
Right valve sensor too far away
Right valve sensor is broken
Change valve motor
Change motor driving board
Close sensor
Change sensor
E32
Stepping motor is broken
Stepping motor driver is broken
Original position sensor for lifting block
is too far away.
Original position sensor for lifting block
is broke
Change Stepping motor
Change motor driving board
Close sensor
Change sensor
E34
Canister position sensor too far away
Canister position sensor is broken
Adjust the sensor
Change the sensor
E35
Turning table motor broken turning Plate
don’t move
Turing table driver broken
Canister code sensor broken
Change turning table motor。
Change driving board
Change code sensor
E36
Counting magnet is in wrong position
Canister code sensor broken
Put magnet in right position
Change code sensor
E37
Canister position error
Canister position sensor too far away
Canister position sensor is broken
Turntable moves.
No canister found
Closer sensor
E38
Piston rod is lifted
Piston head sensor too far away
Put the piston rod back
Closer sensor
E39
Turning table move while stepping motor
and valve not in home position 。
Check Valve is in home position
Stepping motor home sensor is lighted
E41
Valve motor is broken
Vale motor driver is broken
Left valve sensor too far away
Left valve sensor is broken
Change valve motor
Change motor driving board
Close sensor
Change sensor
Contact the supplier for other issue(s). Get the model and serial number of the machine prepared.

A4b Automatic Dispenser V1.0 1
ZHENGZHOU SANHUATECHNOLOGY & INDUSTRY CO., LTD.
ADD: Feilong Road, Xingyang City, Henan 450121 P.R. China
TEL:(86) 371-67857168 After-Service:(86) 371-67857219
FAX:(86) 371-67857166 WEB:http://www.santint.com
E-mail:[email protected]
Table of contents
Other Santint Dispenser manuals