9
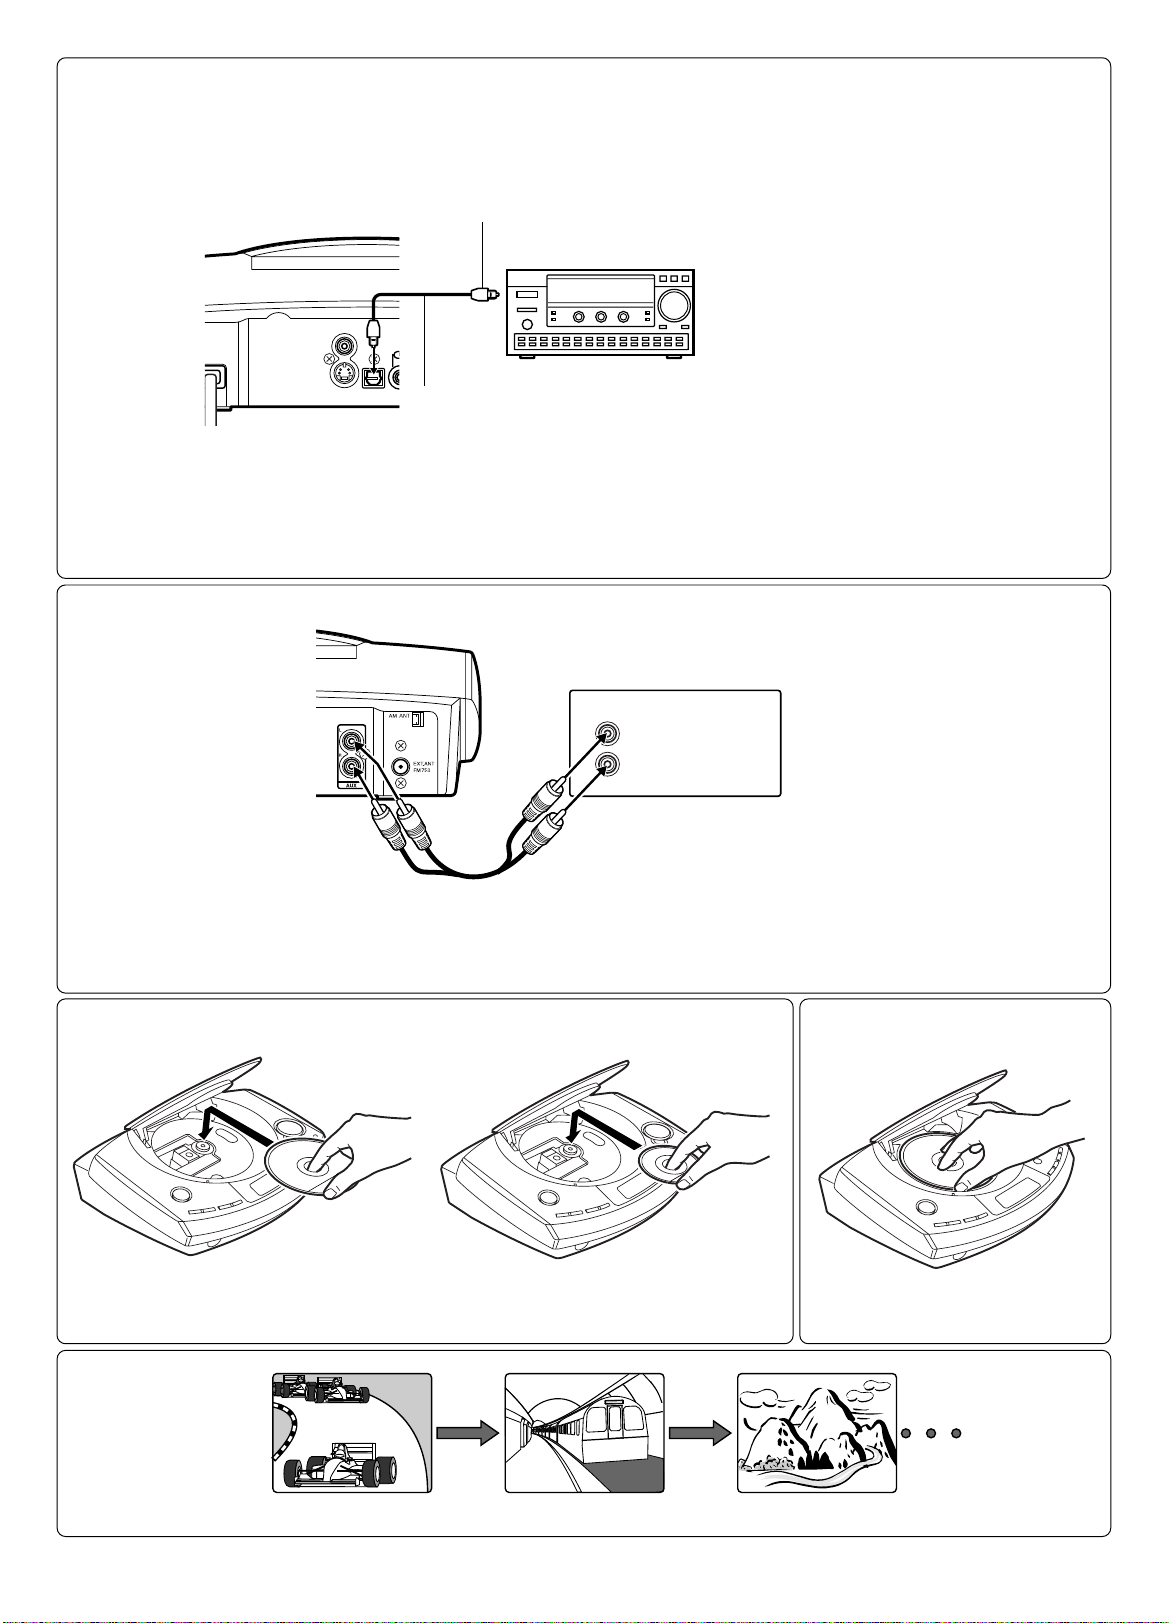
ADDITIONAL CONNECTIONS EXAMPLES
Connecting to a TV with an S-video lead
If your TV has an S-video input socket, connect the unit as shown in
Fig. 10. (The VIDEO OUT socket connection is not necessary.) You can
enjoy clearer picture playback.
Connecting to a digital multi-channel AV amplifier
(Fig. 11)
Thedigitalmulti-channelsoundofaDVDcanbestbedecodedandplayed
with a multi-channel AV amplifier (Dolby Digital decoder or MPEG-2
decoder).
The AV amplifier has to be able to process the DTS audio signal in order
to play a DVD with DTS. If it cannot, then you will not be able to hear the
DVD.
Note:
Select “Setting digital out” setting as follows. (See Page 18.)
- To enjoy Dolby Digital sound, select “Dolby Digital: BitStream”.
- To enjoy DTS sound, select “DTS: On”.
- To enjoy MPEG-2 sound, select “MPEG: BitStream”.
- Toenjoy 2channeldigitalstereosound,select“DolbyDigital:LPCM”,
“DTS: Off”, “MPEG: LPCM”.
Auxiliary equipment connection (Fig. 12)
Connectanaudiolead(notsupplied)betweentheAUXsocketsoftheunit
and the audio output sockets of the auxiliary equipment.
Headphones
Connect stereo headphones (not supplied) to the PHONES socket for
monitoring or for private listening. The speakers are automatically
disconnected when headphones are connected.
Manufactured under license from Dolby Laboratories.
“Dolby” and the double-D symbol are trademarks of Dolby Laboratories.
DVDdisc withDTSmaynotworkcorrectly.Youcanseethepictureonthe
TV screen, but there is no sound.
- If using an amplifier with DTS decoder, the DTS sound will be heard.
“DTS” and “DTS Digital Out” are trademarks of Digital Theater Systems,
Inc.
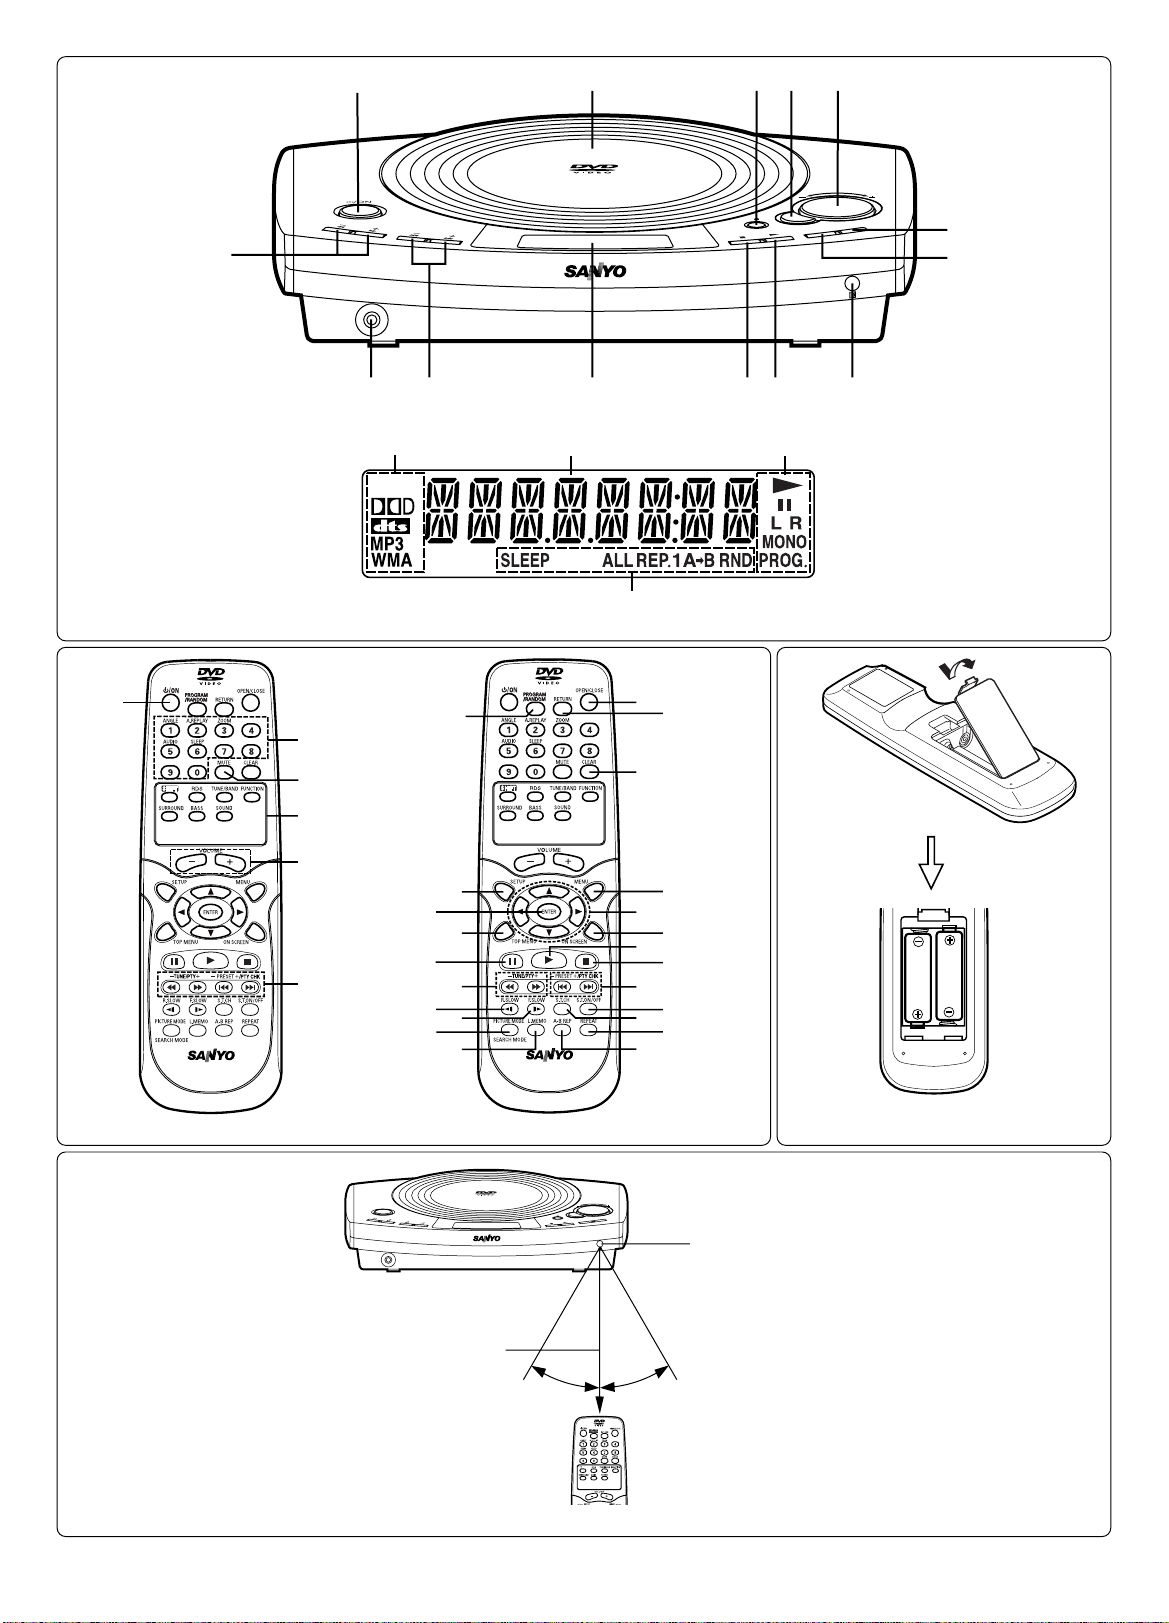
BEFORE OPERATION
This instruction manual explains the various
functions of this unit using the remote control.
Thebuttonsonthemainunitperformsimilarfunctionstosimilarly
marked buttons on the remote control.
Turning the power on and off
Press the z/ON button. “HELLO” appears briefly on the display. (After
connecting the mains lead, when you press the z/ON button for the first
time,the volume-resetfeature automaticallysets theinitial volumelevel.)
Toturnthepoweroff,pressthez/ONbuttonagain.“GOOD-BYE”appears
briefly.
- When the mains lead is connected to the AC outlet, the unit will
respond to commands from the remote control.
Direct start function
If the following buttons are pressed when the unit is in standby, the unit
turns on automatically and the selected function is activated.
Remote control a(Play), TUNE/BAND, OPEN/CLOSE
Main unit a, q
Selecting the function
Pressthe FUNCTION buttontoselect thedesiredfunction. Each timethe
button is pressed, the display changes as follows:
DVD/CD
v
AUX
v
FM TUNER
v
AM TUNER
v
. . .
- When the function selection is changed, disc play is automatically
stopped.
Adjusting the volume
Press the “+” or “–” VOLUME button (or turn the VOLUME control on the
mainunit). Thevolume levelappearson thedisplay (VOL0 ~ VOLMAX).
To reduce the volume temporarily
Press the MUTE button. “MUTE” blinks on the display. To restore the
previous volume setting, press the MUTE button again.
Surround system
Selecting Spatializer N-2-2TM virtual surround sound mode [Only
DVD]
PresstheSURROUNDbuttontosettheSpatializerN-2-2virtualsurround
sound. Press the button again to return to the original mode.
SURR ON
v
SURR OFF . . .
Portions of this product are licensed from Desper Products, Inc., a
subsidiary of Spatializer Audio Laboratories, Inc. Copyright ©1997-2003
Spatializer Audio Laboratories, Inc. All Rights Reserved Worldwide.
Spatializer
®, N-2-2™ and the circle-in-square device are trademarks of
Desper Products, Inc.
Pure active surround system [Except DVD]
This newly developed surround system gives natural spread-out
atmosphere. Press the SURROUND button to select on or off.
SURR ON
v
SURR OFF . . .
Bass boost system
Press the BASS button to select the desired bass boost effect.
BOOST
v
BASS LOW
v
NORMAL . . .
- TheBASSbuttondoesnotfunctionwhileheadphonesareconnected.
Selecting the sound mode
1. PresstheSOUNDbuttonrepeatedlytoselectthedesiredsoundmode
(“BASS”, “TREBLE” or “NIGHT”:Night).
2. Press the button as desired.
Sound mode Press Display change
BASS 4or 5“+5” ~ “–5”
TREBLE 4or 5“+5” ~ “–5”
NIGHT ENTER “OFF” or “ON”
Note for “NIGHT”:
WhenenjoyingaDVDdiscwiththevolumesetlowatnight,selectthis
mode. It enhances spoken lines making speech clearer.
3. Repeat steps 1 - 2 for another sound mode.
4. Press the SOUND button repeatedly to close the display.
Adjusting the display brightness
While pressing the nbutton on the main unit, press the ON SCREEN
button on the remote control.
DIMMER 1
v
DIMMER 2
v
DIMMER 0 . . .