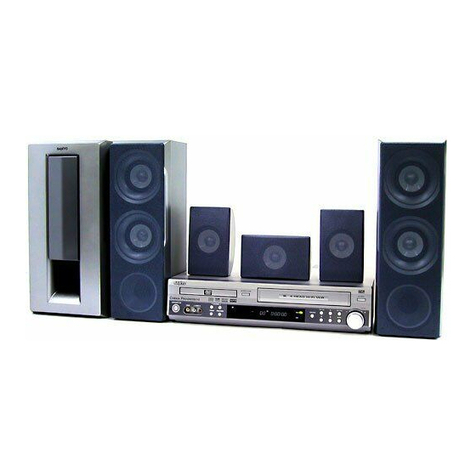
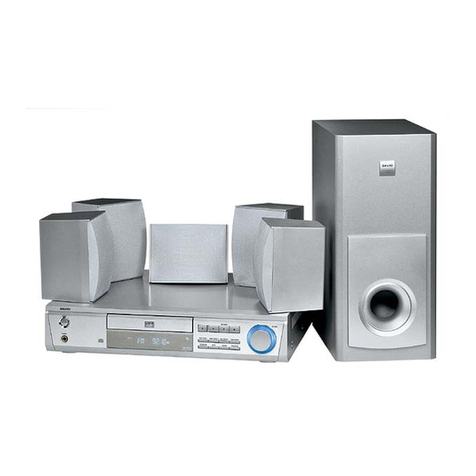
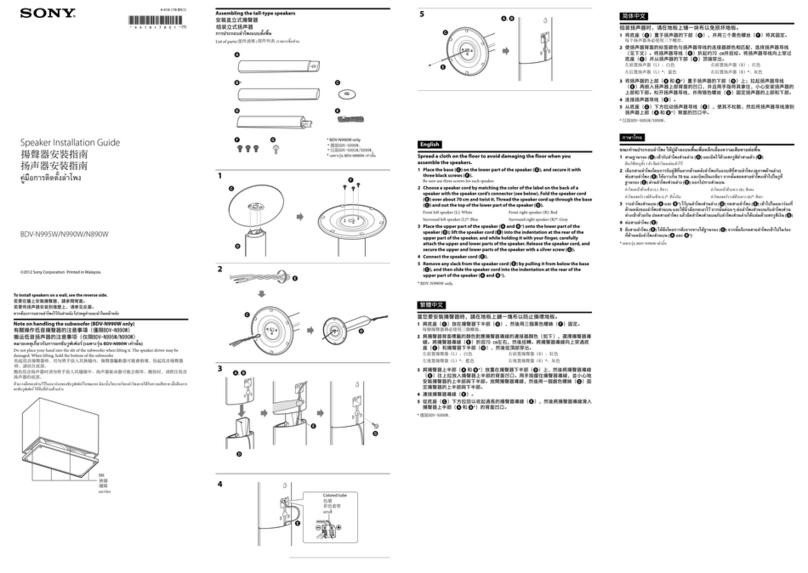
Sanyo DWM-3000 User manual

INSTRUCTION MANUAL
DVD & Hi-FiVCR HomeTheater
1AD6P1P1813--
DWM-3000, Issue Number 1
DWM-3000
English
SANYO'S HELP-LINE
Call the toll-free number below if you have any difficulties operating this product.
1-800-813-3435 (Weekdays: 7:30 AM - 4:00 PM Central Time)
Before operating the unit, please read this manual thoroughly.
Only cassettes marked can be used with this video cassette recorder.

-E1-
SAFETY PRECAUTIONS
WARNING
RISK OF ELECTRIC SHOCK
DO NOT OPEN
WARNING: TO REDUCE THE RISK
OF ELECTRIC SHOCK
DO NOT REMOVE COVER (OR BACK)
NO USER-SERVICEABLE PARTS INSIDE
REFER SERVICING TO QUALIFIED SERVICE
PERSONNEL.
This lightning flash with arrowhead symbol within an
equilateral triangle is intended to alert the user to the
presence of uninsulated dangerous voltage within the
product’senclosurethatmaybeofsufficientmagnitude
to constitute a risk of electric shock to persons.
The exclamation point within an equilateral triangle is
intended to alert the user to the presence of important
operating and maintenance (servicing) instructions in
the literature accompanying the product.
WARNING: TO REDUCE THE RISK OF FIRE OR ELECTRIC
SHOCK, DO NOT EXPOSE THIS APPARATUS TO RAIN OR
MOISTURE.
CAUTION: TO PREVENT ELECTRIC SHOCK, MATCH WIDE
BLADE OF PLUG TO WIDE SLOT, FULLY INSERT.
ATTENTION: POUR ÉVITER LES CHOC ÉLECTRIQUES,
INTRODUIRE LA LAME LA PLUS LARGE DE LA FICHE DANS
LA BORNE CORRESPONDANTE DE LA PRISE ET POUSSER
JUSQU’AU FOND.
WARNING: Do not install this equipment in a confined space such
as a book case or similar unit.
NOTE TO CABLE/TV INSTALLER: Thisreminder is providedto call
the cable TV system installer’s attention to Article 820-40 of the
National Electric Code (U.S.A.). The code provides guidelines for
proper grounding and, in particular, specifies that the cable ground
shall be connected to the grounding system of the building, as close
to the point of the cable entry as practical.
CAUTION:
This DVD/VCR employs a Laser System.
To ensure proper use of this product, please read this owner’s
manual carefully and retain for future reference should the unit
require maintenance, contact an authorized service location.
Use of controls, adjustments, or the performance of procedures
other than those specified herein may result in hazardous radiation
exposure.
To prevent direct exposure to laser beam, do not try to open the
enclosure.Visible laserradiation whenopen. DONOT STARE INTO
BEAM.
CAUTION: The apparatus should not be exposed to water (dripping
or splashing)and no objects filled with liquids, such as vases, should
be placed on the apparatus.
FCCWARNING:Thisequipmentmaygenerateoruseradiofrequency
energy. Changes or modifications to this equipment may cause
harmfulinterferenceunlessthemodificationsareexpresslyapproved
in the instruction manual. The user could lose the authority to
operate this equipment if an unauthorized change or modification is
made.
REGULATORY INFORMATION: FCC Part 15
This product has been tested and found to comply with the limits for
aClassB digitaldevice,pursuantto Part 15ofthe FCC Rules.These
limits are designed to provide reasonable protection against harmful
interferencewhentheproductisoperatedin a residential installation.
This product generates, uses, and can radiate radio frequency
energyand,if notinstalledandusedinaccordancewiththe instruction
manual, may cause harmful interference to radio communications.
However, there is no guarantee that interference will not occur in a
particularinstallation. Ifthis productdoes cause harmfulinterference
to radio or television reception, which can be determined by turning
the product off and on, the user is encouraged to try to correct the
interference by one or more of the following measures:
•Reorient or relocate the receiving antenna.
• Increase the separation between the product and receiver.
•Connect the product into an outlet on a circuit different from that
to which the receiver is connected.
•Consult the dealer or an experienced radio/TV technician for
help.
NOTES ON COPYRIGHTS:
It is forbidden by law to copy, broadcast, show, broadcast via cable,
play in public, or rent copyrighted material without permission.
This product features the copy protection function developed by
Macrovision. Copy protection signals are recorded on some discs.
When recording and playing the pictures of these discs on a VCR,
picture noise will appear.
This product incorporates copyright protection technology that is
protected by method claims of certain U.S. patents and other
intellectual property rights owned by Macrovision Corporation and
otherrights owners. Useof this copyrightprotectiontechnology must
be authorized by Macrovision Corporation, and is intended for home
and other limited viewing uses only unless otherwise authorized by
Macrovision Corporation. Reverse engineering or disassembly is
prohibited.
SERIAL NUMBER: The serial number is found on the back of this
unit. This number is unique to this unit and not available to others.
You should record requested information here and retain this guide
as a permanent record of your purchase.
Model No.___________________________________
Serial No.___________________________________
To operate the built-in TVGuardian®
This unit has the built-in TVGuardian®Foul Language Filter (TVG®).
When a disc supporting closed caption is played, it will mute the audio during the entire phrase containing offensive
language. For more details, see page E52.
Please ReadThis Manual.
BecauseDVDisanewtechnology,werecommendthatyoureadthismanualcarefullybeforeconnectingyourDVD&VCR
Home Theater System and operating it for the first time.
Keep the manual in a safe place for future reference.

-E2-
CAUTION: PLEASE READ AND OBSERVE ALL WARNINGS AND INSTRUCTIONS IN THIS OWNER’S MANUAL AND THOSE
MARKED ON THE UNIT. RETAIN THIS BOOKLET FOR FUTURE REFERENCE.
This set has been designed and manufactured to assure personal safety. Improper use can result in electric shock or fire hazard. The
safeguards incorporated in this unit will protect you if you observe the following procedures for installation, use, and servicing.
This unit does not contain any parts that can be repaired by the user.
DO NOT REMOVE THE CABINET COVER, OR YOU MAY BE EXPOSED TO DANGEROUS VOLTAGE. REFER SERVICING TO
QUALIFIED SERVICE PERSONNEL ONLY.
10.Cleaning
Unplug this product from the wall outlet before cleaning.
Do not use liquid cleaners or aerosol cleaners. Use a damp
cloth for cleaning.
11.Power-Cord Protection
Power-supply cords should be routed so that they are not
likely to be walked on or pinched by items placed upon or
against them, paying particular attention to cords at plugs,
convenience receptacles, and the point where they exit from
the product.
12.Overloading
Do not overload wall outlets, extension cords, or integral
convenience receptacles, this can result in a risk of fire or
electric shock.
13.Outdoor Antenna Grounding
If an outside antenna or cable system is connected to the
product, be sure the antenna or cable system is grounded so
as to provide some protection against voltage surges and
built-up static charges. Article 810 of the National Electrical
Code (U.S.A.), ANSI/NFPA 70 provides information with
regard to proper grounding of the mast and supporting
structure,groundingofthelead-inwiretoanantennadischarge
unit, size of grounding conductors, location of antenna-
discharge unit, connection to grounding electrodes, and
requirements for the grounding electrode.
EXAMPLE OF GROUNDING ACCORDING TO NATIONAL
ELECTRICAL CODE INSTRUCTIONS
Antenna Lead in Wire
Antenna Discharge Unit
(NEC Section 810-20)
Grounding Conductors
(NEC Section 810-21)
Ground Clamps
Power Service Grounding
Electrode System
(NEC Art 250, Part H)
NEC - NATIONAL ELECTRICAL CODE
Ground
Clamp
Electric Service
Equipment
14.Lightning
Unplugthisapparatusduring lightningstormsorwhenunused
for long periods of time. This will prevent damage to the
product due to lightning and power-line surges.
1. Read These Instructions
All the safety and operating instructions should be read
before the product is operated.
2. Follow All Instructions
All operating and use instructions should be followed.
3. Keep These Instructions
The safety and operating instructions should be retained for
future reference.
4. Heed All Warnings
All warnings on the product and in the operating instructions
should be adhered to.
5. Power Sources
This product should be operated only from the type of power
source indicated on the marking label. If you are not sure of
the type of power supply to your home, consult your product
dealer or local power company. For products intended to
operate from battery power, or other sources, refer to the
operating instructions.
6. Grounding or Polarization
Do not defeat the safety purpose of the polarized plug has
two blades with one wider than the other. A grounding-type
plug has two blades and a third grounding prong. The wide
bladeorthe prongareprovided foryoursafety. Iftheprovided
plug does not fit into your outlet, consult an electrician for
replacement of the obsolete outlet.
7. Ventilation
Slots and openings in the cabinet are provided for ventilation
and to ensure reliable operation of the product and to protect
it from overheating. These openings must not be blocked or
covered. The openings should never be blocked by placing
the product on a bed, sofa, rug or other similar surface. This
product should not be placed in a built-in installation such as
a bookcase or rack unless proper ventilation is provided or
the manufacturer’s instructions have been adhered to.
8. Heat
The product should be situated away from heat sources such
asradiators,heatregisters,stoves,orotherproducts(including
amplifiers) that produce heat.
9. Water and Moisture
Do not use this product near water – for example, near a bath
tub,washbowl,kitchensink,orlaundrytub,inawetbasement,
or near a swimming pool.
IMPORTANT SAFETY INSTRUCTIONS

-E3-
15. Power Lines
An outside antenna system should not be located in the
vicinity of overhead power lines or other electric light or
power circuits, or where it can fall into such power lines or
circuits. When installing an outside antenna system, extreme
care should be taken to keep from touching such power lines
or circuits as contact with them might be fatal.
16.Object and Liquid Entry
Never push objects of any kind into this product through
openings as they may touch dangerous voltage points or
short-out parts that could result in a fire or electric shock.
Never spill liquid of any kind on the product.
17.Attachments
Do not use attachments not recommended by the product
manufacturer as they may cause hazards.
18.Accessories
Do not place this product on an unstable
cart, stand, tripod, bracket, or table.
The product may fall, causing serious
injury to a child or adult, and serious
damage to the product. Use only with a
cart, stand, tripod, bracket, or table
recommended by the manufacturer, or
sold with the product. Any mounting of
the product should follow the manufacturer’s instructions,
and should use a mounting accessory recommended by the
manufacturer.
19.Damage Requiring Service
Unplug this product from the wall outlet and refer servicing to
qualified service personnel under the following conditions:
a. If the power-supply cord or plug is damaged.
b. If liquid has been spilled, or objects have fallen into the
product.
c. If the product has been exposed to rain or water.
d. If the product does not operate normally by following the
operating instructions. Adjust only those controls that are
covered by the operating instructions as an improper
adjustment of other controls may result in damage and
will often require extensive work by a qualified technician
to restore the product to its normal operation.
e. If the product has been dropped or the cabinet has been
damaged.
f. If the product exhibits a distinct change in performance.
20.Servicing
Do not attempt to service this product yourself as opening or
removing the cover may expose you to dangerous voltage or
other hazards. Refer all servicing to qualified service
personnel.
21.Replacement parts
When replacement parts are required, be sure the service
technician has used replacement parts specified by the
manufactureror havethe samecharacteristicsas theoriginal
part. Unauthorized substitutions may result in fire, electric
shock, or other hazards.
22.Safety Check
Upon completion of any service or repairs to this product, ask
the service technician to perform safety checks to determine
that the product is in proper operating condition.
23.Disc Tray
Keep your fingers well clear of the disc tray as it is closing.
It can cause personal injury.
24.Burden
Do not place a heavy object on or step on the product. The
object may fall, causing serious personal injury and serious
damage to the product.
25.Connecting
When you connect the product to other equipment, turn off
the power and unplug all of the equipment from the wall
outlet. Failure to do so may cause an electric shock and
serious personal injury. Read the owner’s manual of the
other equipment carefully and follow the instructions when
making any connections.
26.Sound Volume
Reduce the volume to the minimum level before you turn on
the product. Otherwise, sudden high volume sound may
cause hearing or speaker damage.
27.Sound Distortion
Do not allow the product to output distorted sound for a
longtime. It may cause speaker overheating and fire.
28.Earphone
When you use the earphone, keep the volume at a moderate
level. If you use the earphone continuously with high volume
sound, it may cause hearing damage.
29.Laser Beam
Do not look into the opening of the disc tray or ventilation
opening of the product to see the source of the laser beam. It
may cause sight damage.
30.Disc
Do not use a cracked, deformed, or repaired disc. These
discs are easily broken and may cause serious personal
injury and product malfunction.
CONDENSATION
Moisture will form in the operating section of the DVD/VCR if
the player is brought from cool surroundings into a warm room
or if the temperature of the room rises suddenly. When this
happens, the DVD/VCR’s performance will be impaired.
To prevent this, let the DVD/VCR stand in its new surroundings
for about an hour before switching it on, or make sure that the
room temperature rises gradually.
Condensation may also form during the summer if the DVD/
VCR is exposed to the breeze from an air conditioner. In such
cases, change the location of the DVD/VCR.

-E4-
CONTENTS
SAFETY PRECAUTIONS ..................................................... E1
IMPORTANT SAFETY INSTRUCTIONS............................... E2
CONTENTS .......................................................................... E4
ACCESSORIES .................................................................... E5
PRECAUTIONS .................................................................... E5
CONTROLS .......................................................................... E6
Front Panel ...................................................................... E6
FL Display........................................................................ E6
Rear Panel....................................................................... E6
REMOTE CONTROL ............................................................ E7
Controls ........................................................................... E7
Inserting Batteries ........................................................... E8
Remote Control Range.................................................... E8
To Set the Remote Control Code for TV .......................... E9
BASIC CONNECTIONS........................................................ E9
TV Antenna Connections ................................................ E9
Basic TV Connections ................................................... E10
Audio/Video Connection ................................................ E10
Optional, Preferred TV Connections.............................. E11
CATV (CABLE TV) Connections.................................... E12
Speaker Connections .................................................... E14
Speaker Placement ....................................................... E15
FM/AM Antenna Connections ....................................... E16
Power Supply (Main Unit and Powered Subwoofer) ...... E16
BEFORE OPERATION........................................................ E17
Common Operation ....................................................... E17
Selecting Surround Mode.............................................. E18
Adjusting the SpeakerVolume Balance......................... E19
Adjusting the Speaker and Subwoofer Level................. E19
Changing the Delay Time .............................................. E20
Setting the Video Channel............................................. E21
Setting the Language .................................................... E21
Auto Clock Setting ......................................................... E22
Manual Clock Setting..................................................... E24
Tuner Setting ................................................................. E25
To ADD/DELETE Channels........................................... E26
Noise Elimination........................................................... E26
CASSETTE TAPE PLAYBACK ........................................... E27
Loading and Unloading a Cassette Tape....................... E27
Basic Playback .............................................................. E28
Special Playback ........................................................... E29
ZERO RETURN Function.............................................. E30
Video Index Search System .......................................... E30
RECORDING ...................................................................... E31
Recording a TV Program............................................... E31
One-touch Timer Recording (OTR) ............................... E33
Timer Recording............................................................ E34
Stereo Recording and Playback .................................... E36
Separate Audio Program (SAP) .................................... E36
Duplicating a Video Tape ............................................... E37
PLAYABLE DISCS .............................................................. E38
DISC PLAYBACK ................................................................ E39
Preparations .................................................................. E39
Basic Playback .............................................................. E39
Stopping Playback......................................................... E40
Chapter (Track) Skip...................................................... E40
Selecting a DVD Menu .................................................. E41
Selecting a Title Menu [DVD]......................................... E41
Title Search [DVD] ......................................................... E42
Chapter Search [DVD] ................................................... E42
Time Search [DVD]........................................................ E42
Time Search [CD] .......................................................... E43
Track Search [CD] ......................................................... E43
Fast Playback ................................................................ E44
Slow Motion Playback [DVD] ......................................... E44
Still Picture (Pause) ....................................................... E44
Frame by Frame Advance Playback [DVD].................... E45
Picture Zoom [DVD]....................................................... E45
Viewing from a Desired Camera Angle (Multi-Angle)
[DVD] ............................................................................. E45
Normal Repeat Playback............................................... E46
Designated Range Repeat Playback (A-B Repeat)....... E46
Random Playback [CD] [MP3] ....................................... E46
Programmed Playback [CD] [MP3]................................ E47
Selecting Subtitle Language [DVD] ............................... E48
Selecting Audio Soundtrack Language
(Multi-Language) [DVD] ................................................. E48
Karaoke Playback [DVD] ............................................... E48
Selecting On-Screen Information .................................. E49
Marking Desired Scenes [DVD] [CD]............................. E49
MP3 CD OPERATION......................................................... E50
MP3 CD Information...................................................... E50
MP3 CD Playback ......................................................... E50
Stopping Playback......................................................... E51
Pause ............................................................................ E51
File Skip......................................................................... E51
Programmed Playback .................................................. E51
Random Palyback ......................................................... E51
Repeat Playback ........................................................... E51
TVGuardian OPERATION ................................................... E52
Before Setting................................................................ E52
Set the TVG MODE to On Mode
(TOLERANT, MODERATE, STRICT) ............................ E52
DVD SPEAKER MUTE Setting...................................... E53
CC (Closed Caption) DISPLAY Setting
with TVG MODE is ON Mode ........................................ E53
CC (Closed Caption) DISPLAY Setting
with TVG MODE is OFF Mode ...................................... E53
INITIAL SETTINGS............................................................. E54
Setting Language .......................................................... E54
Setting OSD Language ................................................. E54
Seting Picture ................................................................ E55
Seting Sound................................................................. E55
Setting Parental ............................................................. E56
To Change the Parental Level ....................................... E56
LISTENING TO THE RADIO ............................................... E57
Automatic/Manual Tuning .............................................. E57
To Preset Stations ......................................................... E57
Listening to Preset Stations........................................... E58
TROUBLESHOOTING GUIDE............................................ E59
MAINTENANCE .................................................................. E60
LANGUAGE CODE LIST .................................................... E61
SPECIFICATIONS............................................................... E62
WARRANTY........................................................................ E63
-E5-
ACCESSORIES
Handling the unit
When shipping the unit
The original shipping carton and packing materials come in
handy. For maximum protection, re-pack the unit as it was
originally packaged at the factory.
When setting up the unit
The picture and sound of a nearby TV, VCR, or radio may be
distorted during playback. In this case, position the unit away
from the TV, VCR, or radio, or turn off the unit after removing the
disc.
To keep the surface clean
Do not use volatile liquids, such as insecticide spray, near the
unit. Do not leave rubber or plastic products in contact with the
unit for a long period of time. They will leave marks on the
surface.
Cleaning the unit
To clean the cabinet
Usea soft,dry cloth.Ifthesurfacesare extremelydirty, usea soft
cloth lightly moistened with a mild detergent solution. Do not use
strong solvents such as alcohol,
benzine, or thinner, as these might damage the surface
of the unit.
Remote control
AM loop antenna
FM indoor antenna lead wire
Video cable
75 ohm coaxial cable
Subwoofer cable
Length: Approx. 23 feet (7 meters)
(Black)
Front right speaker cable
Length: Approx. 23 feet (7 meters)
(Black and Red)
Front left speaker cable
Length: Approx. 23 feet (7 meters)
(Black and Blue)
Front center speaker cable
Length: Approx. 23 feet (7 meters)
(Black and Green)
Surround right speaker cable
Length: Approx. 23 feet (7 meters)
(Black and Orange)
Surround left speaker cable
Length: Approx. 23 feet (7 meters)
(Black and Gray)
PRECAUTIONS
CAUTION:
Placing the unit in a well ventilated area is strongly
recommended.
Do not place any object on the top of the unit.
Do not block ventilation holes.
The cabinet of the unit warms up when it is used for a long time,
but it is not a malfunction.
WHAT TO DO IF...
If the operation of the unit or display is not normal, even
though the appropriate buttons have been pressed.
Note:
If the unit still does not operate correctly, please contact your
nearest Sanyo Authorized Service Facility.
To obtain a clear picture
TheDVD/VCR isa high-tech,precisiondevice. Ifthe opticalpick-
up lens and disc drive parts are dirty or worn, the picture quality
will be poor.
Regular inspection and maintenance are recommended after
every 1,000 hours of use. (This depends on the operating
environment.)
For details, please contact your nearest dealer.

-E6-
VIDEO IN L
-
AUDIO IN
-
R
/ON
VOLUME
MINI
MAX
EJECT
REC
CHANNEL
AM/FM
VCR/DVD
PRESET
+
-
OPEN/CLOSE
STOP PLAY
VCR DVD
11121318 15 141617 10
1 2 83 4 5 6 79
789
31 2
5
14
11
13
10 6
4
12
1. Power button (z/ON)
2. Cassette Loading Slot
3. VCR indicator
4. DVD indicator
5. VCR/DVD mode selector button
6. AM/FM button
1. Dolby Digital indicator
2. Dolby Pro Logic indicator
3. DTS indicator
4. AM/FM indicators
5. AM/PM indicator (AM is not displayed)
6. Kilohertz/Megahertz indicators
7. Message or number indicators
(Title, chapter, track, playing time or other information)
8. Pause indicator
9. Video tape indicator (VCR)
10. Track indicator (CD)
11. REC indicator (VCR)
12. Timer recording indicator (VCR)
13. VCR indicator (VCR)
14. Play indicator
“DTS” and “DTS Digital Out” are trademarks of Digital Theater
Systems, Inc. Manufactured under license from Dolby Laboratories.
“Dolby”, “Pro Logic” and the double-D symbol are trademarks of
Dolby Laboratories.
7. d/c(PRESET +/–) buttons
8. Disc tray
9. OPEN/CLOSE button (q)
10. Volume control (VOLUME)
11. Play button (a)
12. Stop button (n)
13. FL display
14. Remote sensor (IR)
15. EJECT button (q)
16. CHANNEL +/– buttons
17. REC button (m)
18. AUDIO (L/R)/VIDEO IN jacks
Rear Panel
1. DVD S-Video output jack (S-VIDEO)
2. DVD Component video output jacks (COMPONENT)
3. Video/Audio output jacks (VIDEO/AUDIO)
4. Powered subwoofer output jack
5. AM/FM antenna terminals
6. Channel selector switch (3CH/4CH)
7. RF IN jack
8. RF OUT jack
3CH 4CH
S-VIDEO
COMPONENT
VIDEO
AM LOOP
AUDIO AUDIO OUT
(6–CHANNEL)
L
R
IN
VHF/UHF
ANT.
( )
OUT
TV
( )
Y
P
B
P
R
DVD OUTPUT
DVD/VCR OUTPUT
FM 75Ω
123 4 56
7
8
Front Panel
CONTROLS
FL Display

-E7-
1. POWER button
2. VCR button
3. DVD button
4. OPEN/CLOSE button
5. Number and other function buttons
These buttons are used as number buttons and as function
buttons of each name.
•When using as a number button, press the appropriate
button directly.
•When using as a function button of each name, press
the appropriate button while holding the [SHIFT] button
down.
Number buttons (1–9, 0)
ANGLE button
ZOOM button
JUMP button
TOP MENU button
AUDIO button
PLAY MODE button
A-B REPEAT button
SUBTITLE button
MARKER button
DVD MENU button
6. RETURN button
7. AM/FM button
8. VCR control buttons
AUDIO OUT button
INPUT button
TIMER REC button
ZERO RETURN button
COUNTER RESET button
CLOCK/COUNTER button
REC/OTR button
TAPE SPEED button
TV/VCR button
9. CLEAR/CANCEL button
10. SETUP/MENU button
11. Directional arrow buttons (4, a, 5, b)
12. SURROUND button
13. abutton (PLAY)
14. nbutton (STOP)
15. f/ebuttons
Tuning buttons (– TUNE +)
16. SLOW button
17. ATR button
18. TV control buttons
POWER button (TV POWER)
INPUT select button (TV/VIDEO)
Channel scanning buttons (– TV CH +)
Volume buttons (– TV VOLUME +)
19. d/cbuttons
Preset tuning buttons (– PRESET +)
20. kbutton (PAUSE)
21. BASS BOOST button
22. ENTER button
23. SOUND button
24. VOLUME buttons (– VOLUME +)
25. DISPLAY button
26. SHIFT button
2 3
4
7
5
8
9
1011
1213
1415
17
16
1
26
24 23
25
22 21
20
19 18
6
REMOTE CONTROL
Controls

-E8-
Need help? Call
1-800-813-3435
Inserting Batteries
Note:
Remove the batteries if the remote control is not to be used for a
month or more. Batteries left in the unit may leak and cause
damage.
IMPORTANT NOTE:
SPENT OR DISCHARGED BATTERIES MUST BE
RECYCLEDORDISPOSEDOFPROPERLYINCOMPLIANCE
WITH ALL APPLICABLE LAWS.
FOR DETAILED INFORMATION, CONTACT YOUR LOCAL
COUNTY SOLID WASTE AUTHORITY.
Remote Control Range
Two “AA”batteries
(not supplied)
12
VIDEO IN L
-
AUDIO IN
-
R
/ON
VOLUME
MINI
MAX
EJECT
REC
CHANNEL
AM/FM
VCR/DVD
PRESET
+
-
OPEN/CLOSE
STOP PLAY
Within approx.
16 feet (5 meters)
Remote sensor
30°30°
To Set the Remote Control Code for TV
This remote control can operate the basic functions of TVs made
by the manufacturers listed below.
To enter the remote control code for your brand of TV, follow the
steps below.
1. In the chart below, find the code corresponding to your brand
of TV .
2. While holding down [(TV CONTROL) POWER], enter the 2-
digit code using the number buttons [0–9], then release [(TV
CONTROL) POWER].
•The remote control is now set to operate your TV.
TV brands Code
ADMIRAL 05, 10, 13
EMERSON 17
FISHER 03
GE 07
GOLD STAR 01
HITACHI 02
JVC 15
MAGNAVOX 08
MATSUSHITA 12, 18
MITSUBISHI 14
PANASONIC 12, 18
QUASAR 12, 18
RCA 06
SAMSUNG 16
SANYO 03
SHARP 00, 13
SONY 11
TECHNOL ACE 05
TOSHIBA 04
ZENITH 09, 10
Notes:
•Onlyremote-controlledTVscanbe operatedusingthisremote
control.(Referto yourTVinstructionmanual formoredetails.)
•Theremaybesomeolder TVmodelsthat cannotbeoperated
with this remote control. If this is the case, use the original
remote control supplied with the TV.
IMPORTANT NOTE:
If the batteries in the remote control are changed, the code
settings for the TV must be re-entered.
Write your code number below for future reference.
TV:
(TV CONTROL)
POWER

-E9-
Note:
Do not connect the power cord to a 120 V AC 60 Hz outlet
until all connections have been made.
TV Antenna Connections
If you are using an antenna system, follow these instructions. If
you are a cable (CATV) subscriber, skip ahead to page E12 for
the proper connections.
The DVD/VCR must be connected “between” the antenna and
the TV. First, disconnect the antenna from the TV and connect it
to the DVD/VCR. Then connect the DVD/VCR to the TV. Below
are 3 common methods of connecting an antenna system to a
DVD/VCR. Find the type of antenna system you are using and
follow the connection diagram.
1. Combination VHF/UHF Antenna with 75 ohm Coaxial
Cable
2. Combination VHF/UHF Antenna with 300 ohm Twin Lead
(Flat) Wire
3. Separate VHF and UHF Antennas
Note:
If both VHF and UHF antennas have 300 ohm twin lead (flat)
wires, use a combiner having two 300 ohm inputs and one 75
ohm output.
Notes:
•Aclear picture will not be obtained by the DVD/VCR unless
the antenna signal is good. Connect the antenna to the DVD/
VCR properly.
•Forbetterquality recording,anindoor antennaora telescopic
antenna is not recommended. The use of an outdoor type
antenna is required.
•If you are not sure about the connection, please refer to
qualified service personnel.
300 ohm Twin Lead
(Flat) Wire
3
CH
4
CH
VIDEO
AM LOOP
AUDIO AUDIO OUT
(6–CHANNEL)
L
R
IN
VHF/UHF
ANT.
( )
OUT
TV
( )
DVD/VCR OUTPUT
FM 75Ω
DVD/VCR
Matching Transformer
300 ohm input
75 ohm output (not supplied)
VHF UHF
3
CH
4
CH
VIDEO
AM LOOP
AUDIO AUDIO OUT
(6–CHANNEL)
L
R
IN
VHF/UHF
ANT.
( )
OUT
TV
( )
DVD/VCR OUTPUT
FM 75Ω
DVD/VCR
Combiner
75/300 ohm inputs
75 ohm output (not supplied)
300 ohm Twin
Lead (Flat) Wire
75 ohm Coaxial
Cable
BASIC CONNECTIONS
75 ohm Coaxial
Cable
DVD/VCR
3
CH
4
CH
VIDEO
AM LOOP
AUDIO AUDIO OUT
(6–CHANNEL)
L
R
IN
VHF/UHF
ANT.
( )
OUT
TV
( )
DVD/VCR OUTPUT
FM 75Ω

-E10-
C
H
4
CH
O
OUT
H
ANNEL)
IN
VHF/UHF
ANT.
( )
OUT
TV
( )
UHF
VHF
75 ohm Coaxial
Cable (supplied)
3
CH
4
CH
VIDEO
AM LOOP
AUDIO AUDIO OUT
(6–CHANNEL)
L
R
IN
VHF/UHF
ANT.
( )
OUT
TV
( )
DVD/VCR OUTPUT
FM 75Ω
VHF/UHF
IN (ANT)
75 ohm Coaxial
Cable (supplied)
DVD/VCR
Splitter
75 ohm input
75/300 ohm outputs
(not supplied)
DVD/VCR
3
CH
4
CH
I
O OUT
C
HANNEL)
IN
VHF/UHF
ANT.
( )
OUT
TV
( )
UHF
VHF
75 ohm Coaxial Cable
(supplied)
Splitter
75 ohm input
300 ohm output
(not supplied)
DVD/VCR
TV
TV
TV
Need help? Call
1-800-813-3435
Audio/Video Connection
1. Connect the DVD/VCR VIDEO OUT jack on the DVD/VCR to
the video in jack on the TV using the video cable supplied.
2. Connect the Left and Right DVD/VCR AUDIO OUT jacks on
the DVD/VCR to the audio left/right in jacks on the TV using
an optional audio cables.
3
CH
4
CH
S-VIDEO
COMPONENT
VIDEO
AM LOOP
AUDIO AUDIO OUT
(6–CHANNEL)
L
R
IN
VHF/UHF
ANT.
( )
OUT
TV
( )
Y
P
B
P
R
DVD OUTPUT
DVD/VCR OUTPUT
FM 75Ω
L
R
AUDIO INPUT
VIDEO
INPUT ANTENNA
INPUT
Note
If you use this connection, set the TV’s source selector to
VIDEO.
Optional audio
cables
Video cable
(supplied)
Rear of DVD/VCR
Rear of TV
Basic TV Connections
After you have connected the antenna to the DVD/VCR, you
must connect the DVD/VCR to the TV.
Below are 3 common methods of connecting your DVD/VCR to a
TV. Find the type of TV you are using and follow the connection
diagram.
This DVD/VCR has a single 75 ohm output for connection to a
TV. If your TV has separate VHF and UHF antenna inputs
(numbers 2 and 3 below), use a splitter to connect the DVD/VCR
to the TV for VHF and UHF reception.
1. TV with single 75 ohm VHF/UHF antenna input
Note:
If a VHF or UHF antenna is used, set the TV/CATV menu option
to the “TV” mode.
2. TV with 300 ohm UHF and 75 ohm VHF antenna inputs
Note:
If a VHF or UHF antenna is used, set the TV/CATV menu option
to the “TV” mode.
3. TV with 300 ohm UHF and 300 ohm VHF antenna inputs
Note:
If a VHF or UHF antenna is used, set the TV/CATV menu option
to the “TV” mode.

-E11-
Optional, Preferred TV Connections
Note
You can ONLY watch and listen to DVD playback through
the connections shown below.
Audio/Video connection
1. Connect the VIDEO OUT jack on the DVD/VCR to the video
in jack on the TV using the video cable supplied.
2. Connect the Left and Right AUDIO OUT jacks of the DVD/
VCR to the audio left/right in jacks on the TV using an
optional audio cables.
3
CH
4
CH
S-VIDEO
COMPONENT
VIDEO
AM LOOP
AUDIO AUDIO OUT
(6–CHANNEL)
L
R
IN
VHF/UHF
ANT.
( )
OUT
TV
( )
Y
P
B
P
R
DVD OUTPUT
DVD/VCR OUTPUT
FM 75Ω
Y
Pb
Pr
COMPONENT VIDEO INPUT
LR
AUDIO INPUT
L
VIDEO
INPUT
S-VIDEO
INPUT
S-Video connection
1. Connect the S-VIDEO OUT jack on the DVD/VCR to the S-
Video in jack on the TV using the optional S-Video cable.
2. Connect the Left and Right AUDIO OUT jacks of the DVD/
VCR to the audio left/right in jacks on the TV using an
optional audio cables.
3
CH
4
CH
S-VIDEO
COMPONENT
VIDEO
AM LOOP
AUDIO AUDIO OUT
(6–CHANNEL)
L
R
IN
VHF/UHF
ANT.
( )
OUT
TV
( )
Y
P
B
P
R
DVD OUTPUT
DVD/VCR OUTPUT
FM 75Ω
Y
Pb
Pr
COMPONENT VIDEO INPUT
LR
AUDIO INPUT
L
VIDEO
INPUT
S-VIDEO
INPUT
Component Video connection
1. Connect the COMPONENT VIDEO OUT jacks on the DVD/
VCR to the corresponding in jacks on the TV using an
optional Y Pb Pr cables.
2. Connect the Left and Right AUDIO OUT jacks of the DVD/
VCR to the audio left/right in jacks on the TV using an
optional audio cables.
3
CH
4
CH
S-VIDEO
COMPONENT
VIDEO
AM LOOP
AUDIO AUDIO OUT
(6–CHANNEL)
L
R
IN
VHF/UHF
ANT.
( )
OUT
TV
( )
Y
P
B
P
R
DVD OUTPUT
DVD/VCR OUTPUT
FM 75Ω
Y
Pb
Pr
COMPONENT VIDEO INPUT
L
R
AUDIO INPUT
L
VIDEO
INPUT
S-VIDEO
INPUT
Optional audio
cables
Video cable
(supplied)
Rear of DVD/VCR
Rear of TV Optional audio
cables
Optional
S-Video cable
Rear of DVD/VCR
Rear of TV
Optional audio
cables
Optional
Y Pb Pr cables
Rear of DVD/VCR
Rear of TV

-E12-
CATV (CABLE TV) Connections
Many cable companies offer services permitting reception of
extra channels including pay or subscription channels. This
DVD/VCR has an extended tuning range and can be tuned to
most cable channels without using a cable company supplied
converter box, except for those channels which are intentionally
scrambled. If you subscribe to a special channel which is
scrambled,youmusthaveadescramblerboxforproperreception.
IMPORTANT:
Make sure the TV/CATV menu option is set to the “CATV” mode.
ThisDVD/VCR cannotreceivescrambledprogramssince itdoes
not contain a descrambler. In order to receive scrambled
programs,yourexisting descramblermustbe used.Descrambler
boxes are available from cable companies. Consult your local
cable company for more information concerning connection to
their descrambler equipment. There are many ways to connect
yourDVD/VCRtoacablesystem.Belowaresixcommonmethods
of connection.
3
CH
4
CH
VIDEO
AM LOOP
AUDIO AUDIO OUT
(6–CHANNEL)
L
R
IN
VHF/UHF
ANT.
( )
OUT
TV
( )
DVD/VCR OUTPUT
FM 75Ω
VHF/UHF
IN (ANT)
3
CH
4
CH
VIDEO
AM LOOP
AUDIO AUDIO OUT
(6–CHANNEL)
L
R
IN
VHF/UHF
ANT.
( )
OUT
TV
( )
DVD/VCR OUTPUT
FM 75Ω
VHF/UHF
IN (ANT)
3
CH
4
CH
VIDEO
AM LOOP
AUDIO AUDIO OUT
(6–CHANNEL)
L
R
IN
VHF/UHF
ANT.
( )
OUT
TV
( )
DVD/VCR OUTPUT
FM 75Ω
VHF/UHF
IN (ANT)
Allows:
•Recording of nonscrambled channels.
•Use of the programmable timer.
•Recording of one channel while watching another.
Allows:
•Recordingofchannelsthroughtheconverterbox(scrambled
and unscrambled).
•Using the programmable timer to record only the channel
selected at the converter box.
DVD/VCR
Allows:
•Recording of nonscrambled channels.
•Use of the programmable timer.
•Recording an unscrambled channel while watching any
channel selected at the converter box.
Prevents:
Recording scrambled channels.
Note:
If you are playing a tape or using the tuner built into the DVD/
VCR, the converter must be set to the video channel output of
the DVD/VCR (either 3 or 4).
Incoming Cable
TV
Converter/Descrambler
DVD/VCR
Incoming Cable
TV
Converter/
Descrambler
DVD/VCR
Incoming Cable
TV
Prevents:
• Recording one channel while watching another.
•Using the DVD/VCR tuner to select channels.
Note:
To record from converter/descrambler, DVD/VCR tuner must
be tuned to the converter output channel, usually channel 3 or
4.

-E13-
Need help? Call
1-800-813-3435
Allows:
•Recording of one channel while watching another.
•Using the programmable timer to record only the channel
selected at the converter box.
• Recording of all channels through the converter box.
Note:
Whenever a Converter/Descrambler box is placed before the
DVD/VCR, you must tune the DVD/VCR to the output of the
Converter/Descrambler box, usually channel 3 or 4.
Allows:
•Recording of nonscrambled channels.
•Recording of one channel while watching another.
•Watching premium channels through the converter while
recording nonscrambled channels.
• Using the programmable timer.
Allows:
• Recording of all channels through the converter box.
•Recording a scrambled or unscrambled channel while
watching another (scrambled or unscrambled) channel.
•Using the programmable timer to record only the channel
selected at the converter box.
3
CH
4
CH
VIDEO
AM LOOP
AUDIO AUDIO OUT
(6–CHANNEL)
L
R
IN
VHF/UHF
ANT.
( )
OUT
TV
( )
DVD/VCR OUTPUT
FM 75Ω
VHF/UHF
IN (ANT)
A
B
3
CH
4
CH
VIDEO
AM LOOP
AUDIO AUDIO OUT
(6–CHANNEL)
L
R
IN
VHF/UHF
ANT.
( )
OUT
TV
( )
DVD/VCR OUTPUT
FM 75Ω
VHF/UHF
IN (ANT)
A
B
A/B Switch
Converter/Descrambler
DVD/VCR
Incoming Cable
TV
A/B Switch
Converter/
Descrambler
DVD/VCR
Incoming Cable
TV
Converter/Descrambler
3
CH
4
CH
VIDEO
AM LOOP
AUDIO AUDIO OUT
(6–CHANNEL)
L
R
IN
VHF/UHF
ANT.
( )
OUT
TV
( )
DVD/VCR OUTPUT
FM 75Ω
VHF/UHF
IN (ANT)
A
B
A/B Switch
Converter/
Descrambler
DVD/VCR
Incoming Cable
TV
Splitter
Prevents:
•Watching scrambled channels while recording
another channel.
•Using the DVD/VCR tuner to select channels.
Splitter
Prevents:
Recording scrambled channels.
Prevents:
Using the DVD/VCR tuner to select channels.
Splitter

-E14-
Speaker Connections
To achieve proper stereo reproduction, connect the speaker
wires without shorting to adjacent wires as shown below.
Note:
Do not connect the power cord to a 120 V AC 60 Hz outlet
until all connections have been made.
Speaker Wire Color Use
Black and Red Front right speaker
Black and Blue Front left speaker
Black and Green Center speaker
Black and Orange Surround right speaker
Black and Gray Surround left speaker
AC120V 60HZ
SPEAKERS
(6Ω)
L
RFRONT
CENTER
L
RSURROUND
Center speaker
RedBlack
+
-
Front left speaker
RedBlack
+
-
Front right speaker
RedBlack
+
-
Surround right speaker
RedBlack
+
-
Surround left speaker
RedBlack
+
-
Subwoofer
(Powered Subwoofer)
Rear Panel
3CH 4CH
VIDEO
AM LOOP
AUDIO AUDIO OUT
(6–CHANNEL)
IN
VHF/UHF
ANT.
( )
OUT
TV
( )
DVD/VCR OUTPUT
FM 75Ω
L
R
Black Red Black Black
Black Black
Blue Green
Orange Gray
AUDIO INPUT
(6-CHANNEL)

-E15-
Need help? Call
1-800-813-3435
Speaker Placement
The supplied speakers have built-in magnetic stray field
compensation.Theymaybeplacedcloseto aTVwithoutaffecting
the color purity.
Thefivespeakers are all thesame and can beused for Front left,
Center, Front right, Surround left, and Surround right speakers.
The front, center, and surround speakers should be placed at
approximately the same distance from the listening position.
Place the front left and right speakers either side of the TV.
Place the center speaker directly above the TV.
Placethesurround speakerseithersides ofthelistening position,
orslightly totherear, approximately2 feet–3feet3 inches(60 cm
– 1 meter) higher than ear level.
The subwoofer can be placed near the front speaker and not too
far from the TV.
Front left speaker
Surround left speaker
Subwoofer
Place it near the Front speaker.
Center speaker
Frontrightspeaker
Surround right speaker
Example: To hang the speaker on a wall Example: To mount the speaker with a stand
Approximately 3/32 inch
(2.5 mm)
Round head screw
(not supplied)
Stand (not supplied)
Machine screw
(not supplied)
Built-in nut for 3/16 machine
screw
Note: Be careful of dropping the speaker system, it might cause damage or serious injuries.
120°
30°30°
Center speaker
Front left speaker Front right speaker
Surround left
speaker
Subwoofer
Surround right
speaker
Notes:
• The angles in the diagram are approximate.
• Please refer to “Changing the Delay Time” on page E20.

-E16-
Need help? Call
1-800-813-3435
FM/AM Antenna Connections
FM antenna
The FM indoor antenna lead wire is sufficient to receive most
local FM broadcasts and should be connected to the rear FM
75Ωterminal.Extendtheantennaleadwireas straightaspossible
and, while listening to the sound from the system, secure it in a
position where the best FM reception is found.
In fringe areas, or where reception is distorted or noisy, an FM
outdoor antenna (not supplied) should be connected instead of
the FM indoor antenna lead wire. The terminals will accept 75-
ohm coaxial cable.
AM antenna
The AM loop antenna is sufficient to
receive most local AM broadcasts.
Assemble the loop antenna.
Unwindtheantennawires,thenconnect
them to the AM LOOP terminals. Place
the loop antenna in a position which
yields the best AM reception, or attach
it to a wall or other surface as shown.
Note:
To minimize noise...
•Keep the speaker wires, power cord and all other system
connection cables away from the loop antenna.
•Do not place the antenna close to a TV or speaker.
Note to CATV system installer:
This reminder is provided to call the CATV system installer’s
attentiontoSection820-40oftheNECwhichprovidesguidelines
for proper grounding and, in particular, specifies that the cable
ground shall be connected to the grounding system of the
building, as close to the point of cable entry as practical.
Power Supply
(Main Unit and Powered Subwoofer)
Connect the power cord to a 120 V AC 60 Hz outlet. This unit is
equipped with a polarized plug. If you have difficulty inserting the
plug, turn it over and reinsert it. If the unit will not be used for a
long time, disconnect the AC plug from the AC outlet.
The Powered Subwoofer will automatically turn on when the
DVD/VCR is turned on.
The POWER indicator lights on the subwoofer.
Notes:
•Before plugging the power cord into an AC outlet, make sure
that all the connections have been made.
•The main unit is not disconnected from the AC power unless
the power cord is unplugged from the AC outlet.
12
1
2
3
S-VIDEO
COMPONENT
VIDEO
AM LOOP
AUDIO AUDIO OUT
(6–CHANNEL)
IN
VHF/UHF
ANT.
( )
OUT
DVD OUTPUT
DVD/VCR OUTPUT
FM 75Ω
( )
TV
L
R
Y
P
B
P
R
Ground
AM LOOP
FM 75Ω
CAUTION:
When installing an outdoor antenna, follow the installation
instructions in the attached “IMPORTANT SAFETY
INSTRUCTIONS”.
Screws (not supplied)
FM outdoor antenna
(not supplied)
Antenna discharge unit (not supplied)
AM loop antenna
FM indoor
antenna lead
wire
75-ohm coaxial cable
(not supplied)
Rear panel

-E17-
Common Operation
VIDEO IN L
-
AUDIO IN
-
R
/ON
VOLUME
MINI
MAX
EJECT
REC
CHANNEL
AM/FM
VCR/DVD
PRESET
+
-
OPEN/CLOSE
STOP PLAY
PLAY aAM/FM
qOPEN/CLOSE
VOLUME
z/ON
Turning the power on and off
Press [z/ON] to turn the power on.
(After connecting the power cord, when you press [z/ON] for the
first time, the volume-reset feature automatically sets the initial
volume level.)
When the power cord is connected to the AC outlet, the unit will
respond to commands from the remote control.
To turn the power off, press [z/ON] again.
Selecting the source
Press [VCR] to select the “VCR” function.
Press [DVD] to select the “DVD” function.
Press [AM/FM] to select the “Tuner” function.
Press[INPUT]repeatedlyto selecttheexternalsource connected
to AUDIO/VIDEO IN jacks on the front panel or original source.
•Whenthesource selectionischanged tothe“Tuner” function,
disc and tape playback automatically stops.
VCR
–VOLUME+
BASS BOOST
DVD
4
5
OPEN/
CLOSE
AM/FM
INPUT
SOUND
a
Adjusting the volume
Rotate [VOLUME] (or press [VOLUME] + or – on the remote
control). The volume level appears on the display (Vol 0 ~ Vol
40).
Adjusting the bass, treble and speaker level
1. Press [SOUND] then press [ENTER] repeatedly to select the
desired sound mode.
Each time [ENTER] is pressed, the sound mode changes as
follows:
BA(Bass) vTR(Treble) vFL(Front leftspeaker)vC
(Center speaker) vFR (Front right speaker) vSR
(Surroundright speaker) vSL(Surroundleft speaker) v
SU (Subwoofer) vBA (Bass)…
2. Press “4” or “5” to adjust the sound level.
Bass/ Treble: “+5”–“–5”.
Front left speaker/Front right speaker: “0”–“–10”.
Center speaker/Surround left speaker/Surround left speaker/
Subwoofer: “+10”–“–10”.
3. Repeat steps 1 and 2 for another sound mode.
•You can also use the menu screen to adjust the speaker
level. See “Adjusting the Speaker and Subwoofer level” on
page E19.
Bass boost system
Press [BASS BOOST] to switch the bass boost effect On and
Off.
BA ON vBA OFF vBA ON...
BEFORE OPERATION

-E18-
Need help? Call
1-800-813-3435
Selecting Surround Mode
Press [SURROUND] to select the surround mode.
Each time the button is pressed, the surround mode changes as
follows:
AUTO vSurr (Surround) vHALL vLIVE v2ch v
AUTO ...
Notes:
•DVD video disc with DTS may not work correctly. You can
see the picture on the TV screen, but there is no sound.
•There is no Dolby Surround effect when monaural program
material is used.
•When receiving weak FM broadcasts, set it to “2ch”. The
sound quality may improve.
Function FL display Description
DVD/CD AUTO The unit selects the surround mode automatically depending on the disc.
Dolby Digital (not encoded with Dolby Surround Sound)
“sD” appears on the FL display.
Dolby Digital is a discrete 5.1 channel surround system, developed for cinema use. But, not all Dolby
Digital sources are recorded with 6 channel.
Some sources marked Dolby Digital may be recorded in Dolby Surround, a 2 channel system.
Dolby Digital (encoded with Dolby Surround Sound)
“sD” and “sPL” appear on the FL display.
The surround mode is set to Dolby Pro Logic mode.
Dolby Pro Logic is a decoding system that was developed to enhance the soundtracks of theatrical
motion pictures with Dolby Surround. All speakers sound, but the surround left and right speakers are
monophonic sound.
Other (PCM, CD, MP3, etc.)
The surround mode is set to 2.1 channel (Front left and right speakers, and Subwoofer).
Surr When using a disc with Dolby Digital 3 channel – 5.1 channel, it is set to Dolby Digital sound mode.
When using an MP3 CD, it is set to matrix-surround mode (not Dolby Pro Logic).
Other discs are set to Dolby Pro Logic mode.
HALL ????????
LIVE ????????
2ch The surround mode is set to 2.1 channel (Front left and right speakers, and Subwoofer).
TV AUTO It is set to 2.1 channel (Front left and right speakers, and Subwoofer).
VIDEO
FM TUNER Surr All speakers work, but it is set to the matrix-surround mode (not Dolby Pro Logic).
If a monaural source is used, it is set to 3.1 channel (Front left and right, Center speaker, and
Subwoofer).
2ch It is set to 2.1 channel (Front left and right speakers, and Subwoofer).
SURROUND
AM TUNER

-E19-
Need help? Call
1-800-813-3435
Adjusting the Speaker Volume Balance
This unit is set to the standard level before shipping from the
factory. You may not need adjustment.
But, depending on the size of the room and the placement of the
speakers, you may need a fine adjustment.
In this case, follow the steps below. Please use the remote
control at the listening point.
1. Press [SETUP/MENU].
The “Menu” screen appears on the TV screen.
2. Press [5] to select “SPEAKER SETUP”.
3. Press [ENTER].
The Speaker Setup screen appears.
4. Press [ENTER].
The Volume Adjust screen appears.
5. Press [4] or [5] to select “TEST TONE”.
6. Press [ENTER].
7. The test tone will be heard from each speaker for 2 seconds
in the following order.
TV screen FL display Speaker
F-L FL Front left Speaker
CENTER C Center Speaker
F-R FR Front right Speaker
SURR.R SR Surround right Speaker
SURR.L SL Surround left Speaker
8. Press [VOLUME] + or – until the test tone is at a comfortable
level.
9. Ifthetest tone levelis not thesame from eachspeaker,press
[4] or [5] to adjust it while the speaker is activating.
F-R/F-R: “0”–“–10”
CENTER/SURR vR/SURR vL: “+10”–“–10”
10.Repeat steps 8 to 9 for other settings.
11.Press [SETUP/MENU] repeatedly to close the screen.
Adjusting the Speaker and Subwoofer Level
1. Press [SETUP/MENU].
The “Menu” screen appears on the TV screen.
2. Press [5] to select “SPEAKER SETUP”.
3. Press [ENTER].
The Speaker Setup screen appears.
4. Press [ENTER].
The Volume Adjust screen appears.
5. Press [4] or [5] to select “TRIM”.
6. Press [ENTER].
7. Press [ENTER] repeatedly to select the desired speaker.
Each time the button is pressed, the selected speaker and
tone level flash.
8. Press [4] or [5] to adjust the level as desired.
F-L/F-R: “0”–“–10”
CENTER/SURR vR/SURR vL/SUBWOOFER: “+10”–
“–10”
Note: No test tone.
9. Repeat steps 9 to 10 for other settings.
10.Press [SETUP/MENU] repeatedly to close the screen.
Note:
If no adjustment are made, the original display returns after
approximately 60 seconds.
4, 5
2, 5, 9
1, 11
ENTER
3, 4, 6
8
1, 10
ENTER
3, 4, 6, 7
4, 5
2, 5, 8
Table of contents
Other Sanyo Home Theater System manuals

Sanyo
Sanyo DCS-TS750 User manual

Sanyo
Sanyo DC-TS765KR User manual

Sanyo
Sanyo DWM-3900 User manual

Sanyo
Sanyo DCS-AVD8501 User manual

Sanyo
Sanyo DC-TS750 User manual

Sanyo
Sanyo DC-PT100 User manual

Sanyo
Sanyo DC-TS780 User manual

Sanyo
Sanyo DWM-4500 User manual

Sanyo
Sanyo DWM-2500 User manual

Sanyo
Sanyo HTD-5201 User manual

Sanyo
Sanyo DC-TS760 User manual

Sanyo
Sanyo DVR-HT120 User manual

Sanyo
Sanyo DWM-2500 User manual

Sanyo
Sanyo DC-AVD8501 User manual

Sanyo
Sanyo DC-DVD888 User manual

Sanyo
Sanyo DWM-3500 User manual

Sanyo
Sanyo DWM-4500 User manual

Sanyo
Sanyo DC-DAV821 User manual

Sanyo
Sanyo DC-TS750 User manual

Sanyo
Sanyo DC-PT100XE User manual