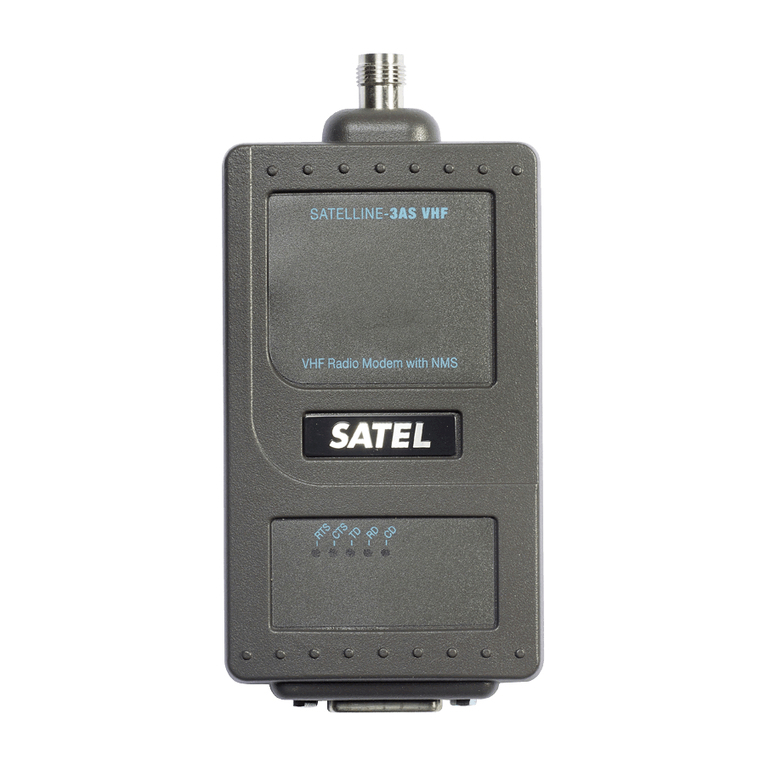
Satel SATEL-3AS-125 User manual

SATELLINE-3AS
User Guide, Version 2.3
1
IMPORTANT NOTICE
All rights to this manual are owned solely by SATEL OY (referred to in this user guide as SATEL).
All rights reserved. The copying of this manual (without the written permission from the owner)
by printing, copying, recording or by any other means, or the full or partial translation of the
manual to any other language, including all programming languages, using any electrical,
mechanical, magnetic, optical, manual or other methods or devices is forbidden.
SATEL reserves the right to change the technical specifications or functions of its products, or to
discontinue the manufacture of any of its products or to discontinue the support of any of its
products, without any written announcement and urges its customers to ensure, that the
information at their disposal is valid.
SATEL software and programs are delivered ”as is”. The manufacturer does not grant any kind
of warranty including guarantees on suitability and applicability to a certain application. Under
no circumstances is the manufacturer or the developer of a program responsible for any
possible damages caused by the use of a program. The names of the programs as well as all
copyrights relating to the programs are the sole property of SATEL. Any transfer, licensing to a
third party, leasing, renting, transportation, copying, editing, translating, modifying into another
programming language or reverse engineering for any intent is forbidden without the written
consent of SATEL.
SATEL PRODUCTS HAVE NOT BEEN DESIGNED, INTENDED NOR INSPECTED TO BE USED
IN ANY LIFE SUPPORT RELATED DEVICE OR SYSTEM RELATED FUNCTION NOR AS A PART
OF ANY OTHER CRITICAL SYSTEM AND ARE GRANTED NO FUNCTIONAL WARRANTY IF
THEY ARE USED IN ANY OF THE APPLICATIONS MENTIONED.
Salo, FINLAND 2002

SATELLINE-3AS
User Guide, Version 2.3
2
RESTRICTIONS ON USE
SATELLINE-3AS(d) radio modems have been designed to operate on frequency ranges, the exact
use of which differs from one region and/or country to another. The user of a radio modem
must take care that the said device is not operated without the permission of the local authorities
on frequencies other than those specifically reserved and intended for use without a specific
permit. For this reason, the notice mark has been attached to the radio modem.
The model SATELLINE-3AS(d) 869 MHz is designed to operate on the licence free frequency
band of 869.400 – 869.650 MHz according to recommendation CEPT/ERC/REC 70-03. This
recommendation has been drawn up by the European Radiocommunications Committee (ERC)
under CEPT. The transmit/receive duty cycle of the individual unit is limited to 10% on this band,
and a single transmission period must not exceed 36 s. In addition, the maximum allowed
radiated output power is 500 mWERP.
WARNING! Users of SATELLINE-3AS (d) radio modem in North America should be aware, that
due to the allocation of the frequency band 406.0 – 406.1 MHz for government use only, the
use of radio modem on this frequency band without a proper permit is strictly forbidden.

SATELLINE-3AS
User Guide, Version 2.3
3
WARRANTY AND SAFETY INSTRUCTIONS
Read these safety instructions carefully before using the product:
· Warranty will be void, if the product is used in any way, that is in contradiction with the
instructions given in this manual, or if the radio modem housing has been opened or
tampered with.
· The radio modem is only to be operated at frequencies allocated by local authorities, and
without exceeding the given maximum allowed output power ratings. SATEL and its
distributors are not responsible, if any products manufactured by it are used in unlawful
ways.
· The devices mentioned in this manual are to be used only according to the instructions
described in this manual. Faultless and safe operation of the devices can be guaranteed only
if the transport, storage, operation and handling of the devices is appropriate. This also
applies to the maintenance of the products.
· To prevent damage both the radio modem and any terminal devices must always be
switched OFF before connecting or disconnecting the serial connection cable. It should be
ascertained that different devices used have the same ground potential. Before connecting
any power cables the output voltage of the power supply should be checked.

SATELLINE-3AS
User Guide, Version 2.3
4
TABLE OF CONTENTS
IMPORTANT NOTICE ............................................................................................. 1
RESTRICTIONS ON USE ......................................................................................... 2
WARRANTY AND SAFETY INSTRUCTIONS ............................................................. 3
TABLE OF CONTENTS ............................................................................................ 4
INTRODUCTION .................................................................................................... 9
1 SATELLINE-3AS(D)/869 MHZ/EPIC RADIO DATA MODEMS....................... 11
1.1 SATELLINE-3AS(d) Technical specifications (380...470 MHz).................... 11
1.2 SATELLINE-3AS(d) Technical specifications (869 MHz) ............................. 12
1.3 SATELLINE-3AS(d) Epic Technical specifications (400...470 MHz) ............ 13
1.4 Basic configuration and installation......................................................... 14
2 SERIAL INTERFACE ..................................................................................... 16
2.1 D15 connector ........................................................................................... 17
2.2 RS-232 interface........................................................................................ 18
2.3 RS-422 interface........................................................................................ 19
2.4 RS-485 interface........................................................................................ 20
2.5 Termination of RS422/485 lines................................................................ 20
3 RF INTERFACE ............................................................................................ 21
3.1 Transmitter ................................................................................................ 21
3.2 Receiver ..................................................................................................... 22
3.2.1 RSSI-signal........................................................................................................ 23
3.3 Priority RX/TX ............................................................................................ 23
3.4 Error correction ......................................................................................... 24
3.5 Error checking ........................................................................................... 24

SATELLINE-3AS
User Guide, Version 2.3
5
3.6 Dual Band version .................................................................................... 25
3.7 Dual Channel function .............................................................................. 25
4 USER INTERFACE........................................................................................ 27
4.1 LED-indicators ........................................................................................... 27
4.2 Programming Mode .................................................................................. 27
4.2.1 Changing the settings ........................................................................................ 28
4.2.2 Restoring factory settings .................................................................................... 29
4.3 Display and push buttons (SATELLINE-3ASd (Epic)) ................................. 29
5 TRANSPARENT DATA TRANSMISSION....................................................... 31
5.1 Serial interface, data format .................................................................... 31
5.2 Handshake lines ....................................................................................... 32
5.2.1 CTS-line ........................................................................................................... 32
5.2.2 CD-line ............................................................................................................ 32
5.2.3 RTS-line............................................................................................................ 33
5.3 Timing and delays during data transmission........................................... 33
5.3.1 Data buffering in the radio data modem.............................................................. 33
5.3.2 Optional start delay in transmit mode.................................................................. 34
5.4 Tests ........................................................................................................ 34
6 REPEATER MODE AND ADDRESSING......................................................... 36
6.1 Repeater.................................................................................................... 36
6.2 Addressing ................................................................................................ 37
6.2.1 Connection between two points .......................................................................... 39
6.2.2 System of one base station and several substations ............................................... 39
6.3 Using repeaters and addresses in the same system................................ 40
6.3.1 System with several repeaters.............................................................................. 40
6.3.2 Repeater chain using address pairs ..................................................................... 41
6.3.3 Repeater chain using dual addressing.................................................................. 42
6.3.4 Redundant repeater chain .................................................................................. 42
7 MESSAGE ROUTING .................................................................................. 44
7.1 Introduction to Message Routing .............................................................. 44
7.1.1 Features of Message Routing .............................................................................. 45
7.1.2 Limitations of Message Routing........................................................................... 45
7.1.3 Getting started with Message Routing .................................................................. 45

SATELLINE-3AS
User Guide, Version 2.3
6
7.1.4 Saterm 3 and the configuration of the Message Routing........................................ 46
7.1.5 Manual configuration of the Message Routing...................................................... 46
7.1.6 Configuration of the protocol in Message Routing ................................................ 47
7.2 Operating modes of Message Routing ..................................................... 48
7.3 Detailed description of Message Routing................................................. 49
7.3.1 Source Mode Routing ........................................................................................ 49
7.3.2 Virtual Mode Routing ......................................................................................... 50
7.3.3 Overhop function in Source Mode Routing .......................................................... 51
7.3.4 Special protocols............................................................................................... 52
7.3.5 Network ID ....................................................................................................... 52
8 DIVERSITY RECEIVER (SATELLINE-3AS EPIC ONLY).................................... 53
8.1 Multipath fading ....................................................................................... 53
8.2 Antenna installation ................................................................................. 54
9 SETTINGS................................................................................................... 55
9.1 Changing parameters using a terminal device........................................ 55
9.1.1 Changing frequency (active radio channel frequency)............................................ 56
9.1.2 Changing radio settings (transmitter output power and receiver sensitivity)............... 57
9.1.3 Changing addressing settings (primary and secondary RX- and TX-addresses).......... 59
9.1.4 Changing serial port settings (Port 1 and Port 2)................................................... 61
9.1.5 Modification of handshaking functions................................................................. 64
9.1.6 Special functions ............................................................................................... 65
9.1.7 Modification of routing....................................................................................... 66
9.1.8 Activating tests .................................................................................................. 70
9.1.9 Restoring factory settings .................................................................................... 70
9.1.10 Saving modified settings into the permanent memory ............................................ 70
9.2 Changing parameters using the LCD-display .......................................... 71
9.2.1 Changing frequency (frequency of the active radio channel) .................................. 72
9.2.2 Changing radio settings (transmitter power and receiver sensitivity)......................... 74
9.2.3 Changing addressing......................................................................................... 75
9.2.4 Changing serial port settings (Port 1 and Port 2)................................................... 76
9.2.5 Modification of handshaking functions................................................................. 77
9.2.6 Selecting special functions.................................................................................. 78
9.2.7 Activating tests .................................................................................................. 78
9.2.8 Restoring factory settings .................................................................................... 79
9.2.9 Adjusting the contrast of the LCD-display ............................................................. 79
9.2.10 Saving modified values into the internal memory .................................................. 80
9.3 Changing parameters using the SL-COMMANDS..................................... 80
9.3.1 Frequency......................................................................................................... 81
9.3.2 Addressing........................................................................................................ 81
9.3.3 Radio parameters .............................................................................................. 82
SATELLINE-3AS
User Guide, Version 2.3
7
9.3.4 Other functions ................................................................................................. 82
9.3.5 SATELLINE-2ASx/2ASxE compatible SL-commands ............................................... 82
10 INSTALLATION........................................................................................... 84
10.1 Installation of a Radio Data Modem ....................................................... 84
10.2 Connection cables .................................................................................... 85
10.2.1 RS-232 wiring ................................................................................................... 85
10.2.2 RS-422 wiring ................................................................................................... 87
10.2.3 RS-485 wiring ................................................................................................... 88
10.2.4 Fuse................................................................................................................. 89
10.2.5 Power supply..................................................................................................... 89
10.3 Antenna installation ................................................................................ 90
10.3.1 Hand-held equipment ........................................................................................ 90
10.3.2 Mobile equipment ............................................................................................. 90
10.3.3 Base stations ..................................................................................................... 90
10.3.4 General antenna installation instructions............................................................... 91
11 DESIGNING SYSTEMS ................................................................................ 94
11.1 Factors affecting the quality and distance of the radio connection ....... 94
11.2 Radio field strength ................................................................................. 95
11.3 Remarks concerning the 869 MHz frequency band ................................ 95
12 CHECK LIST ................................................................................................ 96
13 ACCESSORIES ............................................................................................. 97
13.1 RS-232 cables and adapters.................................................................... 97
13.2 RS-485/422 cables and adapters ............................................................ 97
13.3 RF-cables .................................................................................................. 97
13.4 Antennas .................................................................................................. 98
13.5 Filters and lightning protectors ............................................................... 98
13.6 Power supplies ......................................................................................... 98
13.7 Batteries ................................................................................................... 98
13.8 Installation and enclosures...................................................................... 98
14 APPENDIX A .............................................................................................. 99

SATELLINE-3AS
User Guide, Version 2.3
8
15 APPENDIX B............................................................................................. 100
15.1 Functional delays ................................................................................... 100
15.2 Transmission related delays .................................................................. 100
15.2.1 Transmission delays when using a 12.5 kHz radio channel .................................. 101
15.2.2 Transmission delays using a 25 kHz radio channel ............................................. 103

SATELLINE-3AS
User Guide, Version 2.3
9
INTRODUCTION
SATEL OY is a Finnish electronics and Telecommunications Company specialising in the design
and manufacture of wireless data communication products. SATEL designs, manufactures and
sells radio modems intended for use in applications ranging from data transfer to alarm relay
systems. End users of SATEL products include both public organisations and private individuals.
SATEL is the leading European manufacturer of radio modems. SATEL radio modems have been
certified in most European countries and also in many non-European countries.
Both the amount of data transferred, and the size of local area networks is increasing constantly.
SATEL has addressed these market requirements by introducing the SATELLINE-3AS radio
modem range. The SATELLINE-3AS can offer speeds of up to 19.2 kbps and has a selectable
serial interface of between. 300 … 38 400 bps.
In addition to increased data transfer speed, SATELLINE-3AS also offers many other new
features. These include built-in support for RS-422 and RS-485 interfaces as well as the
standard RS-232 interface.
The SATELLINE-3ASd and SATELLINE-3ASd Epic models include a built-in LCD display, offering
the user both new features and increased flexibility. No longer do you have to rely on access to
a PC or terminal device to check or alter the configuration of the unit, now this can be achieved
by viewing the LCD-display and using the four (4) push buttons. The display is also a useful tool
in testing the radio connection between radio modems.
SATELLINE-3AS facilitates the construction of large radio networks using the built-in Message
Routing function, which is both fully transparent to the user and can be used with most system
protocols.
SATELLINE-3AS also offers option of error correction, utilising the FEC-method (Forward Error
Correction). FEC can be used to minimise errors caused by noisy channels.
SATELLINE-3AS radio modem operates in one of the 4 basic modes of operation: Data Transfer
Mode,Programming Mode, Test Mode or Standby Mode .
Primary characteristics of SATELLINE-3AS family are listed on the following page:

SATELLINE-3AS
User Guide, Version 2.3
10
· SATELLINE-3AS radio modem has a top data transfer speed of 19.2 kbps, selectable
channel spacing, either 25 kHz or 12.5 kHz (defined at the time of ordering).
· SATELLINE-3AS radio modem is compatible with standard RS-232 or RS-422 and RS-485
serial interfaces.
· SATELLINE-3AS has a unique routing function, which simplifies the construction of networks.
· SATELLINE-3AS radio modem software is easily updated directly through the serial interface
of a PC.
· SATELLINE-3AS radio modem software contains an optional error correction routine (FEC)
which can improve the reliability of the radio interface .
· SATELLINE-3ASd radio modem has a built-in LCD-display, for re-configuration of the
modem without the need for an external terminal device (typically a PC).
· SATELLINE-3AS(d) Epic models offer two additional features, which enable considerably
longer distances between radio modems to be achieved:
· 10W transmit power
· a diversity receiver

SATELLINE-3AS
User Guide, Version 2.3
11
1 SATELLINE-3AS(d)/869 MHz/Epic RADIO DATA MODEMS
1.1 SATELLINE-3AS(d) Technical specifications (380...470 MHz)
SATELLINE-3AS(d) (380…470 MHz) comply with the following international standards: ETS 300
113 and EN 300 220-1 (radio requirements) and ETS 300 279 and ETS 300 683 (EMC-
requirements).
RADIO TRANSCEIVER
Frequency Range
Channel Spacing
Number of Channels
Frequency Stability
Type of Emission
Communication Mode
380...470 MHz
12.5 kHz/25 kHz
160 / 80 or (2 x 160 / 2 x 80) *Note 1
< ± 1.5 kHz
F1D
Half-Duplex
RADIO TRANSMITTER
Carrier Power
Carrier Power Stability
Adjacent Channel Power
Spurious Radiation’s
10 mW...1 W / 50 W
+ 2 dB / - 3 dB
according to EN 300 220-1/ETS 300 113
RADIO RECEIVER
Sensitivity
Common Channel Rejection
Adjacent Channel Selectivity
Intermodulation Attenuation
Spurious Radiation’s
- 116... –110 dBm (BER < 10 E-3) *Note 2
> - 12 dB
> 60 dB @ 12,5 kHz, > 70 dB @ 25 kHz
> 65 dB
< 2 nW
MODEM
Interface
Interface Connector
Data Speed of Serial Interface
Data Speed of Radio Interface
Data format
RS-232 or RS-485, RS-422
D15, female
300 – 38400 bps
19200 bps (25 kHz channel)
9600 bps (12.5 kHz channel)
Asynchronous RS-232 or RS-422 or RS-485
GENERAL
Operating Voltage
Power Consumption (average)
Operating Temperature Range
Antenna Connector
Housing
Size H x W x D
Installation Plate
Weight
+ 9 ...+ 30 VDC
1.7 VA (Receive)
5.5 VA (Transmit)
0.05 VA (in Standby Mode)
-25 °C...+55 °C
TNC, 50 W, female
Aluminum enclosure
137 x 67 x 29 mm
130 x 63 x 1 mm
250 g
*Note 1: The Dual Band version operates on two separate 2 MHz wide frequency bands.
*Note 2: Depending on Receiver settings, see Chapters 3.2, 9.1.2 and 9.2.2.

SATELLINE-3AS
User Guide, Version 2.3
12
1.2 SATELLINE-3AS(d) Technical specifications (869 MHz)
SATELLINE-3AS(d) (869 MHz) comply with the following international standards: EN 300 220-1
(radio requirements) and ETS 300 683 (EMC-requirements).
RADIO TRANSCEIVER
Frequency Range
Channel Spacing
Number of Channels
Frequency Stability
Type of Emission
Communication Mode
869.400 ... 869.650 MHz
25 kHz
10
< ± 2.5 kHz
F1D
Half-Duplex
RADIO TRANSMITTER
Carrier Power
Carrier Power Stability
Adjacent Channel Power
Spurious Radiation’s
10 mW...500 mW / 50 W
+ 2 dB / - 3 dB
according to EN 300 220-1
RADIO RECEIVER
Sensitivity
Common Channel Rejection
Adjacent Channel Selectivity
Intermodulation Attenuation
Spurious Radiation’s
-110... -108 dBm (BER < 10 E-3) *
> - 12 dB
> 60 dB
> 60 dB
< 2 nW
MODEM
Interface
Interface Connector
Data speed of RS-Interface
Data speed of Radio Interface
Data format
RS-232 or RS-485, RS-422
D15, female
300 – 38400 bps
19200 bps (25 kHz channel)
Asynchronous RS-232 or RS-422 or RS-485
GENERAL
Operating Voltage
Power Consumption (average)
Operating Temperature Range
Antenna Connector
Housing
Size H x W x D
Installation Plate
Weight
+ 9 ...+ 30 VDC
1.7 VA (Receive)
4.0 VA (Transmit)
0.05 VA (in Standby Mode)
-25 °C...+55 °C
TNC, 50 W, female
Aluminum enclosure
137 x 67 x 29 mm
130 x 63 x 1 mm
250 g
* Depending on Receiver settings, see Chapters 3.2, 9.1.2 and 9.2.2.

SATELLINE-3AS
User Guide, Version 2.3
13
1.3 SATELLINE-3AS(d) Epic Technical specifications (400...470 MHz)
SATELLINE-3AS(d) Epic (400…470 MHz) complies with the following international standards:
ETS 300 113 (radio requirements) and ETS 300 279 (EMC-requirements).
RADIO TRANSCEIVER
Frequency Range
Channel Spacing
Number of Channels
Frequency Stability
Type of Emission
Communication Mode
400...470 MHz
12.5 kHz/25 kHz
160 / 80
< ± 1.5 kHz
F1D
Half-Duplex
RADIO TRANSMITTER
Carrier Power
Carrier Power Stability
Adjacent Channel Power
Spurious Radiation’s
1W...10 W / 50 W
+ 2 dB / - 3 dB
according to ETS 300 113
RADIO RECEIVER
Sensitivity
Common Channel Rejection
Adjacent Channel Selectivity
Intermodulation Attenuation
Spurious Radiation’s
Diversity
- 116... -110 dBm (BER < 10 E-3) *
> - 12 dB
> 60 dB @ 12.5 kHz, > 70 dB @ 25 kHz
> 65 dB
< 2 nW
Positional diversity
MODEM
Interface
Interface Connector
Data Speed of Serial Interface
Data Speed of Radio Interface
Data format
RS-232 or RS-485, RS-422
D15, female
300 – 38400 bps
19200 bps (25 kHz channel)
9600 bps (12.5 kHz channel)
Asynchronous RS-232 or RS-422 or RS-485
GENERAL
Operating Voltage
Power Consumption (average)
Operating Temperature Range
Antenna Connector
Housing
Size H x W x D
Weight
+11,8...+30 VDC
3 VA (Receive)
25 VA (Transmit)
0.1 VA (in Standby Mode)
-25 °C...+55 °C
TNC, 50 W, female
Aluminum enclosure
151 x 123 x 29 mm
550 g (without additional cooling parts)
* Depending on Receiver settings, see Chapters 3.2, 9.1.2 and 9.2.2.

SATELLINE-3AS
User Guide, Version 2.3
14
1.4 Basic configuration and installation
The radio modem is shipped with the following default settings (unless otherwise specifically
ordered):
FIXED SETTINGS DEFINED AT THE TIME OF ORDER
Radio Frequency Range In accordance with Customer Order and taking into account the regulations
set by the local authorities, between 380–470 MHz or 869.5 MHz
Channel Spacing 12.5 kHz or 25 kHz apart from the 869 MHz which must be 25 kHz
Serial Interface Type RS-232 or RS-422 and RS-485
ADJUSTABLE SETTINGS
Radio Settings 500 mW / -112 dBm (25 kHz) or -114 dBm (12.5 kHz) apart from the Epic
which ranges from 1W to 10W
Addressing RX Address OFF / TX Address OFF
Serial Port 1 ON / 19200 / 8 bit data / None / 1 stop bit for 12.5 kHz the default data
speed is 9600bps
Serial Port 2 OFF / 19200 / 8 bit data / None / 1 stop bit for 12.5 kHz the default data
speed is 9600bps
Handshaking CTS Clear to send / CD RSSI-threshold / RTS Ignored
Additional settings Error Correction OFF / Error check OFF / Repeater OFF / SL-Commands
OFF/ Priority TX
Routing OFF
Tests OFF
Message Routing OFF
The power cable (+Vband GND) must be connected to a power supply with a proper output
voltage and with a minimum output current of 1 A (with the SATELLINE-3AS Epic the required
output current of the power supply is 5A). The DTR–pin of the serial line connector must also be
connected to a positive voltage. Detailed installation instructions can be found in Chapter 10.
When creating a test connection, you can either use the SaTerm 3 terminal program, (available
for free from authorised SATEL dealers or directly from SATEL Customer Support) or
HyperTerminal (which is included in most the Windows™ based operating system packages), or
almost any other terminal program. Basic settings for the serial port of the host computer, when
using a terminal program to communicate with SATEL radio modems, are as follows: ”COM1,
19200 bps, 8-bit data, none parity, 1 stop bit”. If the serial port designated as COM1 in the
host computer is reserved, any other free serial port in the host computer can be used (with the
settings listed).
If the DTR-pin is not connected, the radio modem will remain in STAND-BY mode and will
therefore not send or receive any data.
Note: If you want to change the settings of a radio modem using the Programming Mode o
f
the radio modem with the help of an external terminal, the data speed of the terminal must
be 9600 bps.

SATELLINE-3AS
User Guide, Version 2.3
15
Basic connection between a radio modem and the serial port COM1 (RS-232) of a PC is
depicted in the schematic below.
When using the SATELLINE-3AS , the operating voltage can be connected to either pin 14 or
15, and the power supply ground to either pin 7 or 8. Fuse size is 630 mA (slow).
When using the SATELLINE-3AS Epic model, the operating voltage must be connected to pins
14 AND 15, and the power supply ground to pins 7 AND 8, due to a larger current
consumption. Fuse size is 4A (slow).
3
2
5
TD
RD
SGND
9-PIN D-CONN.
2
3
7
TD
RD
SGND
25-PIN D-CONN.
TD
RD
SGND
11
RADIO MODEM
9
7
1
14,15
7, 8
DTR
+Vb
GND
Fuse
3AS: 630 mA slow
3AS Epic: 4 A slow
+Vb
GND

SATELLINE-3AS
User Guide, Version 2.3
16
2 SERIAL INTERFACE
The radio modem is referred to as DCE (Data Communication Equipment) whereas the PC is
referred to as DTE (Data Terminal Equipment). SATELLINE-3AS radio modem includes a 15-pin
‘D’-type female connector, which contains all the connections required to establish
communication between the radio modem, acting as the DCE, and the PC, acting as the DTE.
All EMC-requirements set forth by authorities have been taken into account in the design of the
radio modem. The radio modem user is thereby not required to take any special actions
regarding EMC-shielding (of the radio modem).
The radio modem contains two separate serial ports, which are designated P
P
ort 1 and P
P
ort 2.
Only one port at a time can be used for communication.
Port 1 complies always with the RS-232 standard.
Port 2 can comply either with the RS-232 or RS-422 and RS-485 standards. RS-422 and RS-485
differ only in the external connections. The interface type (RS-232 or RS-485/422) of P
P
ort 2 is
fixed at the factory at the time of manufacture according to the customer order. It is not possible
to change the interface type of port 2 afterwards.
NOTE!
WHEN THE MODE-PIN (PIN 12 OF THE D-CONNECTOR) IS CONNECTED TO
GROUND, THE RADIO MODEM IS IN THE PROGRAMMING MODE AND P
P
ort 1 (PINS
7,9,11) IS THEN IN USE! If you normally use P
P
ort 2 for data transmission, the serial cable
must be changed to a suitable type when switching over to the configuration mode.

SATELLINE-3AS
User Guide, Version 2.3
17
2.1 D15 connector
D-15 female connector in the radio modem
Direction I
I
Nis from DTE (Data Terminal Equipment) to the radio modem.
Direction O
O
UT is from the radio modem to the DTE.
PORT AND TYPE PIN DIRECTION NAME EXPLANATION
PORT1, both models 6 OUT CTS *
9 OUT RD1 Receive data (Port1)
11 IN TD1 Transmit data (Port1)
13 IN RTS *
PORT2 RS-232 model 2 OUT CD *
3 OUT RD2 Receive data (Port2)
4 IN TD2 Transmit data (Port2)
5 OUT RSSI *
PORT2 RS-422/485 model 2 OUT A’ Receive data positive
3 OUT B’ Receive data negative
4 IN A Transmit data positive
5 IN B Transmit data negative
COMMON PINS 1 IN DTR ON (Vb) / STANDBY (NC)
10 OUT DSR
12 IN MODE DATA (NC) / SETUP (GND)
7, 8 - GND Power Ground
14, 15 - VbOperating Voltage
*) Optional connections do not need to be connected in normal use.
*) Handshake signal connections remain the same irrespective of the port used (Port 1 or Port 2).
NC = Not Connected.

SATELLINE-3AS
User Guide, Version 2.3
18
Description of pins:
· RD = R
R
eceive D
D
ata. Output of the data received from the radio modem to the DTE.
· TD = T
T
ransmit D
D
ata. Input of the data to be transmitted from the DTE to the radio modem.
· CTS = C
C
lear T
T
oS
S
end. See Chapter 5.2.1.
· CD = C
C
arrier D
D
etect. See Chapter 5.2.2.
· RTS = R
R
equest T
T
oS
S
end. See Chapter 5.2.3
· DTR = D
D
ata T
T
erminal R
R
eady. Terminal in operation. When the DTR-line is connected to a
positive voltage (e.g. to the operating voltage, Vb), the radio modem is ON, if not, the radio
modem is in the Standby Mode.
· DSR = D
D
ata S
S
et R
R
eady. Indicates that the radio modem is switched ON.
· RSSI = R
R
eceived S
S
ignal S
S
trength I
I
ndicator. Indicates the strength of the received signal. Can
be used to approximately determine the received signal strength. See Chapter 3.2.1.
· MODE = operational mode. When the MODE-line is connected to ground (GND), the radio
modem enters the Programming Mode which is used to change the settings of the radio
modem (i.e. configuration, set-up). If the MODE-line is not connected, the radio modem will
enter the Data Transfer Mode, in which data can be transmitted and received. The
Programming Mode is used only when installing a radio modem and changing the
operational parameters of a network. Normally the radio modem is always in the Data
Transfer Mode. See Chapter 4.2.
· GND = both the negative pole of the operating voltage and the signal ground.
· Vb= positive pole of the operating voltage.
2.2 RS-232 interface
RS-232 standard defines the method of serial data transfer between a computer and its
peripherals. The definition includes both the interface type and signal levels. Most computers
and peripherals contain one or more RS-232 type serial ports. The RS-232 standard uses
transmission lines, in which each single signal line level is referenced, to a common ground
level. RS-232 has been designed to be used in serial transfer of data, in situations where the
distance between communicating equipment is less than 15 m. The otherwise useful RS-232
standard is applied in a multitude of slightly differing ways, (e.g. different pin configurations) and
for this reason different computers and peripherals are not necessarily directly compatible with
each other (see also Chapter 10.2.1 for more information on RS-232 wiring).

SATELLINE-3AS
User Guide, Version 2.3
19
2.3 RS-422 interface
RS-422 standard defines a serial data transfer method, which is very similar to the RS-232
standard. In RS-422 however, the signal lines are balanced (or differential) transmission lines. A
balanced (or differential) transmission line is formed by using two signal wires together to convey
each single signal. Because the state of the signal is defined by the mutual voltage difference
(hence the name differential), any common mode disturbances induced into the lines will cancel
out. The effect of different signals moving in the same cable will also be smaller than in the case
of the RS-232. Transmission distance can be considerably longer than when using RS-232 type
of connection, and distances of 1 km are possible. (See also Chapter 10.2.2 for more
information on RS-422 wiring).
As an example, let’s examine the TX-signal: TX-signal will be transmitted using two lines (A and
B). A logical ”1” corresponds to a situation, where the voltage on line A is greater than the
voltage on line B. Correspondingly a logical ”0” corresponds to a situation, where the voltage
on line A is smaller than the voltage on line B.
RT120 W
RT
RT120 WR
T
BB'
AA'
B' B
A' A
Radio modem Cable Terminal
Cable

SATELLINE-3AS
User Guide, Version 2.3
20
2.4 RS-485 interface
RS-485 is an extension of the RS-422 standard and enables the connection of more than two
devices on to the same bus. Communication is half-duplex, so there is only one cable pair,
compared to two when using the RS-422. The RS-485 standard defines the electrical
characteristics of the connections in such a way as to prevent possible data contention states as
well as cable shorts etc. from harming the devices themselves. (See also Chapter 10.2.3 for
more information on RS-485 wiring).
2.5 Termination of RS422/485 lines
Each differential pair of wires is a transmission line. A transmission line must be terminated
properly to prevent, or at least minimise, harmful reflections formed between the transmitting
and receiving end of the transmission line. A common method of terminating an RS-485 type of
transmission line is to connect a so-called termination resistor, between the wires and at both
ends of the transmission line. Even when there are more than two devices on the same
transmission line, the termination resistors are needed only at the ends of the transmission line.
The termination resistor must be selected so that its resistance matches the characteristic
impedance of the transmission line as close as possible (typical values range from 100 to 120
W). When using an RS-422 type of connection the termination resistor is connected only at each
of the receiving ends. Termination resistors are particularly important when using long
transmission lines and/or high data transfer speeds.
RT120 W
Radio modem Cable Terminal
Cable
RT120 W
R
T
B
A
B'
A'
T
R
B'
A'
B
A
This manual suits for next models
2
Table of contents
Other Satel Radio Modem manuals

Satel
Satel SATELLINE-EASy User manual

Satel
Satel M2M User manual

Satel
Satel SATELLINE-3AS VHF YM5000 User manual

Satel
Satel Proof-TR489 User manual

Satel
Satel SATELLINE-3ASd Epic Pro 35W User manual

Satel
Satel SATELLINE-4Pro User manual

Satel
Satel SATELLINE-EASy Pro 35W User manual

Satel
Satel SATEL-EASy+ YM6015 User manual

Satel
Satel SATELLINE-3AS VHF YM5000 User manual

Satel
Satel Compact-4BT User manual