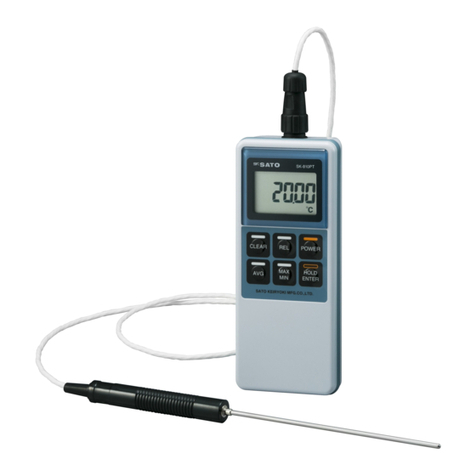
SATO SK-270WP User manual

Instruction Manual
Waterproof Digital Thermometer
Model SK-270WP
No. 8078-00 with a hole for wall-mount type
No. 8078-20 without a hole for wall-mount type
S.01E


2
Thank you for purchasing the SK-270WP Waterproof Digital Thermometer.
- This product is designed to measure temperature connecting to a dedicated probe. Do not use it for
other purposes.
- Read this manual thoroughly before using the thermometer. Keep the manual in a safe place for future
references whenever necessary.
Warning
The SK-270WP thermometer is not explosion-proof. Never use it in an atmosphere containing
flammable gases.
Beware of explosion!
There is a risk of explosion. Take extreme care.
Whenever you have questions, contact us or the dealer from which the unit was purchased.
1. Notes on Use
Be sure to observe the following precautions in order to use this unit correctly.
- Do not use this unit as a clinical thermometer.
- Do not drop this unit or apply impact to it. This unit is a precision instrument.
- Never disassemble or modify this unit. Doing so may result in failure.
- Do not use this unit in water.
- Do not use this unit in a place exposed to direct sunlight or near heating equipment. Doing so may
result in deformation of the casing or failure.
- Do not use this unit in an environment where electrical noise is generated. Doing so may result in
unstable display or larger errors.
- Do not forcibly pull, bend, or bundle the sensor cord. Placing a heavy object on the sensor cord,
heating or scratching the cord may also damage it.
- If this unit is not to be used for a long time, always remove the batteries from the unit. Otherwise, the
batteries may leak fluid, resulting in failure.
- If the unit becomes dirty, wipe it with a tightly wrung cloth that has been dipped in warm water with
neutral detergent. Do not wash this unit it in water.
- Be sure to use this unit within the specified measurement range. Using the unit outside the specified
measurement range will result in failure or damage.
- The penetration type probe has a sharp pointed end so that it can penetrate into the measuring object;
as this pointed end could cause accidental injuries, handle the probe with due care.

3
- Do not use sodium hypochlorite at metallic parts such as probe connector. The sodium hypochlorite is
effective for disinfecting norovirus, however it corrodes metals. If it adheres to the unit, completely wipe
it off with a wet cloth.
** For repair or calibration, contact us or the dealer from which the unit was purchased.
2. Overview
The SK-270WP is waterproof digital thermometer to which a dedicated thermistor sensor probe can be
connected. Optional probes can be interchangeably connected with main unit.
3. What in the box?
After unpacking, please check the box contents. If you find any item missing, please contact us or the
dealer you purchased.
The following items are included in the box.
* Waterproof digital thermometer
□Main unit 1 pc.
□AAA size alkali battery 2 pcs.
□Instruction manual 1 pc.
□Vinyl cover 1 pc.
□Neck strap 1 pc.
* S270WP series probes
□Temperature probe 1 pc.
□Test result 1 pc.
□Instruction manual 1 pc.
□Vinyl pouch 1 pc.

4
4. Features
- Various display function
Maximum (MAX) and minimum (MIN) temperature can be displayed and measured value can be held
(HOLD).
- HACCP function
Heating temperature and countdown of heating time settings are possible. When the setting time
elapses, buzzer sounds and LED lights.
- Waterproof function
When connecting the main unit and the probe, it conforms to “Protection level IP67 in JIS C 0920”
and can be washed with running water. NB. This model is not suitable for use under water.
- Impact resistance
The outer protection rubber of the case reduces the impact caused by the fall
- Display of serial number and calibration date.
The serial number of the unit and the calibration date are indicated in the display section. You can
easily check the calibration date of the last time.
- Interchangeability of optional probes.
Optional probes can be interchangeably used with a main unit.

5
5. Names of Section
■Front view ■Rear view
(No. 8078-22 does not have the hole for wall-mount)
5-1. Display section
①Displays the measured value or error message
②: Shows whenAuto power-off function is being set
③: Shows when the buzzer function is set
④HOLD : Lights while measured value is being held
⑤Low battery mark : Blinks when battery power is insufficient.
⑥MAX/MIN : Lights while the maximum / minimum measured value is being displayed
⑦: Lights the mark and set number in the HACCP mode
⑧HACCP Temp. : Displays preset temperature in the HACCP mode
⑨HACCP Time : Displays set period in the HACCP mode
Hole for wall-mount
SK-270WP
Display section
Key operation
section
Connecter for
probe
Lid of battery
compartment
Hook for
neck strap
Protection rubber

6
5-2. Key operation section
①POWER key
- Press this key to turn the main unit on. Press the key again to turn it off.
②MODE key
- Use this key to ensure the setting value. In the HACCP mode, press this key to select mode.
③HACCP key
- Use this key to make a shift between to HACCP mode and measurement mode
④MAX/MIN key
- Use this key to display the maximum value and minimum value and clear the maximum value
and minimum value. In the setting mode, use this key to add set value
⑤HOLD key
- Press this key to hold (freeze) measured value. In the setting mode, press this key to subtract
set value.
6. How to Use
6-1. Loading Batteries
Set or replace the batteries with the following procedure.
(1) Rotate the screw on the battery lid on the back of the
main unit counterclockwise using a blade screwdriver
or a coin until it comes free and then remove the lid.
* Be careful not to be missing the rubber packing that is
in the groove of the battery compartment.
* If the body is wet, remove the battery lid after wiping off
the moisture in order to prevent water invasion into the
battery compartment.
* The screw does not come off the lid. Pulling it by force will cause breakage.
(2) Load the batteries so that each positive or negative terminal faces the correct direction as shown
in the battery compartment.
(3) Reinstall the battery lid after confirming that the rubber packing is properly in the groove and close
the lid in the reverse order of the removal procedure.
①
②
③
④
⑤

7
Cautions
⚫Firmly attach the battery lid putting the rubber packing in the groove and secure the screw.
Otherwise, waterproofness will not be guaranteed.
⚫The replacement batteries must be new and of the same type. Mixed use of different types or
new and old batteries could cause an explosion or leakage.
⚫Do not dispose of used batteries in a fire. Doing so could cause the batteries to explode,
resulting in injuries or burns.
⚫Keep the batteries out of the reach of children. If a child accidentally swallows a battery, contact
a doctor immediately.
⚫For environmental protection, dispose of used batteries in compliance with local rules and
regulations.
⚫This thermometer has a sealed structure. Rechargeable batteries must not be used. Gas
could be generated in the battery, resulting in an explosion or fire.
6-2. Putting Vinyl Cover onto the Thermometer
The unit comes with a vinyl cover to keep it clean, and to protect the unit from damage if dropped.
(1) Open the mouth of the vinyl cover and place the unit in it so that the side with a slit comes to the
back of the unit.
(2) Pass the connector and the wall-mount hook of the unit through the hole on the upper surface of the
vinyl cover, and then insert the strap at the end of the cover into the slit to close the cover.
Note: Static electricity could build up under the vinyl cover, resulting in unstable readings. If this
happens, remove the vinyl cover before using the unit.
6-3. Install the neck strap
Install the neck strap as shown in the following figures.
(1) Run the string through the hook
(2) Pass the strap through the ring string.
6-4. Connecting the Temperature Probe
(1) While the unit is turned off, insert the probe connector into the unit by aligning the convex part of the
probe connector with the concave part of the connector on the unit.
(2) Turn the nut of the probe connector clockwise to secure the connector.

8
(3) To disconnect the probe, turn the nut counterclockwise to remove it. Then pull the probe connector
straight out.
Important: To protect the temperature probe, make sure that the unit is turned off before installing or
removing the probe.
Cautions
⚫Never forcefully rotate or pull the connector to avoid the causes of trouble.
⚫The inside of the probe connector is not waterproof. When removing or connecting the probe
from the main body, don’t do with wet hands and in places subject to water.
6-5. How to measure temperature
(1) Connect the probe to the main unit and turn the power ON.
After all characters are lit in the display section, serial number of the unit and the calibration date are
indicated. Then measured value is indicated (temperature measurement mode).
NB. * If the probe is disconnected when power is turned on, error message “Er2”will be displayed.
* Factory default setting of the calibration date is “- - - -“When you require us to calibrate or
repair the unit, the calibration date will be indicated after the calibration or repair is done at our
factory.
(2) Insert the sensing stem into the object to be measured.
To measure temperature precisely, insert the sensing stem to the depth of about 15 times as deep
as the diameter of stem (ex. deeper than 45 mm in the 3mm dia. probe) by reason that the sensor
will be less affected by the open air around the sensing stem.
(3) After the measurement, press the POWER key again to turn the power will OFF.
SK-270WP

9
Cautions
- Be careful not to burn yourself when measuring high temperature.
- If you need to measure both objects having a large difference (high and low temperatures), do not
continuously carry on both measurements. Return the temperature of the temperature sensor (probe)
to the normal temperature once and then start next measurement. Otherwise, the temperature
sensor deterioration will be accelerated
- A sudden change of the ambient temperature of the unit may adversely affect the measurement
accuracy. For the accurate measurement, start the measurement after leaving the unit in the ambient
temperature.
6-6. How to mount the unit on a wall (No. 8078-22 does not have the hole for wall-mount)
After fitting the screw on a wall or a column, mount the unit by using the hole for mount.
NB: Shake the unit lightly to the left and right to check the unit does not fall.
Do not strongly pull the unit mounted on a wall. If so, the hook may come off from the wall.
7. Functions
7-1. Operation procedure
The following operations are performed by key operation
Second
setting
Minute
setting
Arbitrary
Temp.
setting
90°C
Temp.
setting
Second
setting
Minute
setting
Minute
setting
Second
setting
75°C
Temp.
setting
②Setting mode
③MAX/MIN display mode
Min value
display
Max value
display
①
Temperature
measurement
④HACCP mode
HACCP 3
Arbitrary
temp.
HACCP 2
90°C
HACCP 1
75°C
HOLD
display
Power OFF
HOLD
HACCP
MAX
MIN
POWER
MODE
MODE
Buzzer
ON/OFF
setting

10
①Temperature measurement mode: measures temperature
②Setting mode: performs in HACCP function, the temperature value setting countdown time setting
and buzzer setting,
③Max/Min. display mode: Max. and Min. values are indicated after the power is ON.
④HACCP mode: puts the Timer in action following the temperature and time to be set in the setting
mode.
7-2. HOLD Function
Use this function for easier reading if the temperature changes too frequently during measurement.
①Press the HOLD key once to hold (freeze) the measured value in a measurement. HOLD will show in
display section and the measure value is being hold,
②Press the HOLD key again to release the Hold function. HOLD will dis appear and it returns to the
normal measurement mode.
7-3. MAX/MIN Function
The maximum and minimum measured values are kept after the power is ON.
①Press the MAX/MIN key once. “MAX”lights and the highest temperature value is indicated.
②Press the MAX/MIN key again. “MIN”lights and to the lowest temperature value is indicated.
③Press the MAX/MIN key again. “MIN”goes out and switch back to the real-time display.
④Under the temperature measurement mode or the MAX/MIN display mode, if MAX/MIN key is
pressed twice or more, “°C”blinks three times and the maximum and minimum values are cleared.
When the power is turned off, the
maximum and minimum values
are also cleared
7-4. Auto Power-off Function
The power will be turned off automatically if the unit is not operated for approx. 60 minutes. This function
conserves battery power if you forget to turn the power off.
①Turn the power off and keep pressing the POWER key while pressing HOLD key. Then the power is
turned on and the auto power-off function has been activated and is indicated in the display
section.
NB. Even if the power is turned off, theAuto-power off function is still active.
②To release the Auto Power-off Function, keep pressing the
POWER key while pressing HOLD key under the power is
turned off. Then the power of the unit turns on and the Auto
Power-off Function has been released. At that time, mark
is not displayed.

11
7-5. HACCP function
This function notifies you when the temperature and the heating time set for the object being
measured are reached, by sounding the buzzer and/or turning on the LED.
It is useful, for example, when controlling the heating time of food.
Setting
Temperature, time and buzzer ON/OFF that are controlled in the HACCP mode can be set.
For details of the mode transition, refer to "Operation procedure"
The default settings of temperature and time are as follows.
Temperature
Time
HACCP1
75°C
1 min.
HACCP2
90°C
1 min.
HACCP3
100°C
1 min.
To change the preset figures, refer to the following procedure.
①While in the temperature measurement mode, press the MODE key once. The unit enters the
HACCP1 temperature setting. The initial value for temperature (°C) is set to "75". To change
the preset temperature, use the MAX/MIN key to increase the value or the HOLD key to
decrease the value.
After setting the temperature, press the MODE key.
②Next, set the time.
The initial value for minutes is set to "1". If no change is necessary, press the MODE key twice
while in the minutes setting. The unit enters the HACCP2 temperature setting.
To set the minutes, use the MAX/MIN key to increase
the value or the HOLD key to decrease the value.
After setting the minutes, press the MODE key to
proceed to setting the seconds. Set the seconds in the
same manner as the minutes.
③The initial value for temperature (°C) of HACCP2 is set to "90". If the change is necessary, set
the temperature and time for HACCP2 using the same procedure as for HACCP1. When the
setting for HACCP2 is complete, the unit enters the HACCP3 setting.
-N

12
④The initial value for temperature (°C) of HACCP3 is set to "100". If the change is necessary,
set the temperature and time as desired.
If HACCP3 is not to be used, press the MODE key three times. The unit enters the buzzer
setting.
⑤Set the buzzer to ON or OFF.
Use the MAX/MIN or HOLD key to set the buzzer, and then press the MODE key to confirm.
The unit returns to the temperature measurement mode.
Operation
①Press and hold the HACCP key for at least two seconds to enter the HACCP1 mode.
while in the temperature measurement mode.
At this point, each time the MODE key is pressed, the
HACCP mode is switched between HACCP 2 and
HACCP 3. Select the mode to be used.
②Perform temperature measurement.
When the temperature reaches the set point, the timer starts counting down. When the time
reaches the set point, the LED turns on and the buzzer starts sounding if it has been set to ON.
To turn off the LED and/or the buzzer, press the HACCP key. The timer is reset to its value
before the countdown started.
Note: - If the temperature falls below the set point during countdown, the count is
automatically reset to its value before the countdown started.
- The LED and buzzer are automatically turned off after one minute, without pressing
the HACCP key. Then, the timer starts flashing and continues to flash until the HACCP
key is pressed.
③To return to the temperature measurement mode from the HACCP mode, press and hold the
HACCP key for at least two seconds.

13
8. Warnings for low battery
When the batteries are exhausted, mark will blink. Place the batteries with new ones.
Otherwise, measured value may display incorrectly.
9. Error Message
If an error occurs, one of the error codes below will be shown on the temperature display section.
Error code
Causes
Remedy
Measured value exceeds the Hi or Lo
value.
Bring the value within the measuring range.
Measured value is higher than display
range
Measured value is lower than display
range
Internal processing is abnormal
. Remove batteries. Then load batteries again
after leave it for a while
. Replace the batteries to new ones
A sensor signal is abnormal.
Turn the power off once. Connect the probe
securely and turn the power on.
Probe is not connected or probe is
failure.
This error code is displayed when power is
turned on without connecting the probe.
Connect the probe.
. If the error code is displayed although the
probe has been connected, stop using it and
contact us or the dealer.
If the problem still persists, please contact us or the store where you purchased this product.

14
10. Specifications
Cat. No.
No. 8078-00
No. 8078-20
Model
Waterproof Digital Thermometer SK-270WP
Hole for wall-mount
〇
×
Display range
-50.0 to 300.0°C
(Measuring range is different depending on the probes connected)
DisplayAccuracy
When operation ambient is 0 to 40°C
± (0.1 + 1 digit) at -40.0 to 200.0°C
± 5 digit at other than above
When operation ambient is -10 to 0.1°C, 40.1 to 60°C
± (0.2 + 1 digit) at -40.0 to 200.0°C
± 10 digit at other than above
Resolution
0.1°C
Sampling time
About 0.5 to 1 sec.
(When the temperature changes a lot, the sampling time is 0.5 sec.
and when it is calm, it automatically changes to 1 sec.)
Grade of protection from water
Conforming to JIS C0920 Protection IP 67 rated
(when the probe is connected to the unit)
Operation ambient
-10 to 60°C, less than 80%rh (no condensing)
Storage ambient
-10 to 60°C (no condensing)
Operational Functions
HOLD, MIN. MAX, HACCP (Temp./Time), Buzzer,
Low battery mark, Auto-Power-Off
Power requirements
3VDC (“AAA” size alkali battery x 2 pcs.)
Battery life
About 1000 hours continuous (without buzzer function)
About 500 hours continuous (with buzzer function)
(Using alkali batteries in normal measurement)
Materials
PC resin
Dimensions
70(W) 171(H) 40(D) mm
Weight
Approx. 155g (including batteries)
Standard Accessories
S270WP-01 standard probe,AAAsize alkaline battery x 2 pcs
vinyl cover, neck strap, instruction manual
•All specifications and appearance subject to change with or without notice for improvement
purpose.
•No. 8078-01 and No. 8078-22 are without probe type. S270WP-01 is not attached.

3-4, Kanda-kajicho, Chiyoda-ku, Tokyo 101-0045 Japan
URL: http://www.sksato.co.jp/english/
This manual suits for next models
2
Other SATO Thermometer manuals

