manuals.online logo
Brands
  1. Home
  2. •
  3. Brands
  4. •
  5. Savic
  6. •
  7. Pet Care Product
  8. •
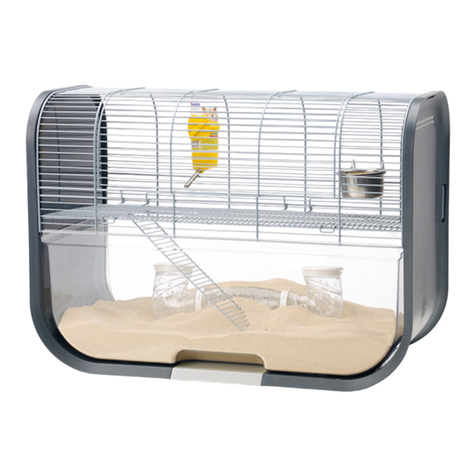
  9. Savic Hamster Plaza User manual

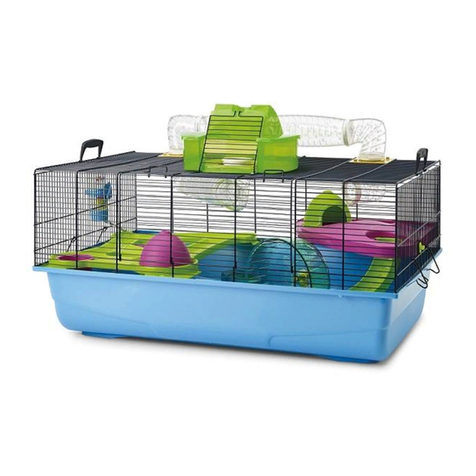
Savic Hamster Plaza User manual

Other Savic Pet Care Product manuals

Savic DOG BARRIER User manual

Savic

Savic DOG BARRIER User manual

Savic Zeno 3 Empire User manual

Savic

Savic Zeno 3 Empire User manual

Savic Hamster Heaven User manual

Savic

Savic Hamster Heaven User manual

Savic SUITE ROYALE User manual

Savic

Savic SUITE ROYALE User manual

Savic Zeno 4 User manual

Savic

Savic Zeno 4 User manual

Savic SUITE ROYALE User manual

Savic

Savic SUITE ROYALE User manual

Savic Primo 60 Open Empire User manual

Savic

Savic Primo 60 Open Empire User manual

Savic Volcano User manual

Savic

Savic Volcano User manual

Savic Dog Park de luxe User manual

Savic

Savic Dog Park de luxe User manual

Savic Splash Giant User manual

Savic

Savic Splash Giant User manual

Savic Primo 60 Empire User manual

Savic

Savic Primo 60 Empire User manual

Savic Spelos Xl Metro User manual

Savic

Savic Spelos Xl Metro User manual

Savic Suite Royale XL User manual

Savic

Savic Suite Royale XL User manual

Savic Hamster Plaza User manual

Savic

Savic Hamster Plaza User manual

Savic Zeno 3 Empire User manual

Savic

Savic Zeno 3 Empire User manual

Savic Access basic User manual

Savic

Savic Access basic User manual

Savic HAMSTER HEAVEN METRO User manual

Savic

Savic HAMSTER HEAVEN METRO User manual

Savic Gite 1 User manual

Savic

Savic Gite 1 User manual

Savic Ruffy 2 User manual

Savic

Savic Ruffy 2 User manual

Savic DOG BARRIER User manual

Savic

Savic DOG BARRIER User manual

Savic Lugano User manual

Savic

Savic Lugano User manual

Savic Dog Residence User manual

Savic

Savic Dog Residence User manual

Savic GENEVA User manual

Savic

Savic GENEVA User manual

Savic Tasmania 120 User manual

Savic

Savic Tasmania 120 User manual

Popular Pet Care Product manuals by other brands

PitPat PP02 user manual

PitPat

PitPat PP02 user manual

Schwinn Rascal owner's manual

Schwinn

Schwinn Rascal owner's manual

K&H Small Animal quick start guide

K&H

K&H Small Animal quick start guide

SHOR-LINE 006.3230.00 Product guide

SHOR-LINE

SHOR-LINE 006.3230.00 Product guide

Petsafe Stubborn Dog Receiver Collar operating guide

Petsafe

Petsafe Stubborn Dog Receiver Collar operating guide

juwel Rio 240 instruction manual

juwel

juwel Rio 240 instruction manual

Datamars OMNI MAX user manual

Datamars

Datamars OMNI MAX user manual

Trixie 24444 instructions

Trixie

Trixie 24444 instructions

Roverpet 30DDPP Assembly instructions

Roverpet

Roverpet 30DDPP Assembly instructions

SportDOG SD-105S-C manual

SportDOG

SportDOG SD-105S-C manual

Staywell 400 Series Magnetic user guide

Staywell

Staywell 400 Series Magnetic user guide

Dogtek Sonic Birdhouse user guide

Dogtek

Dogtek Sonic Birdhouse user guide

Togfit Deluxe Trigger Lock Door Gate Instructions for use

Togfit

Togfit Deluxe Trigger Lock Door Gate Instructions for use

Girafus 227PA user manual

Girafus

Girafus 227PA user manual

ubbink KoiFeeder Solar operating instructions

ubbink

ubbink KoiFeeder Solar operating instructions

Petsafe ST-100 operating guide

Petsafe

Petsafe ST-100 operating guide

CADOCA Deuba 106911 instructions

CADOCA

CADOCA Deuba 106911 instructions

Dogtra RR Deluxe owner's manual

Dogtra

Dogtra RR Deluxe owner's manual

manuals.online logo
manuals.online logoBrands
  • About & Mission
  • Contact us
  • Privacy Policy
  • Terms and Conditions

Copyright 2025 Manuals.Online. All Rights Reserved.

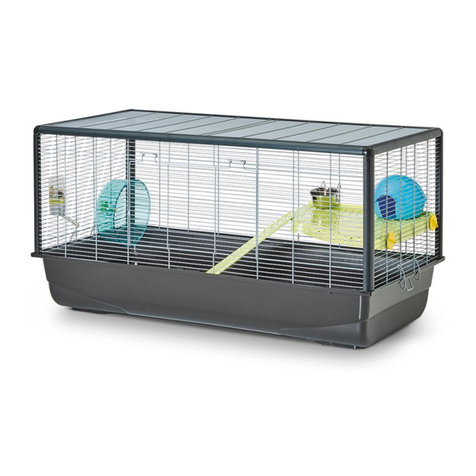
Hamster Plaza
Assembly instructions
Montage-instructies - Instructions de montage - Montageanleitung -
Instrucciones de montaje - Istruzioni di montaggio - Návod k
sestavení - Instrukcja montażu -   
Made in Belgium
A 1 cage bottom (T010240 or T010239)
B 1 platform (T010315)
C+ D 4 fixings for platform (T010378)
E 1 ladder (T010318)
F 4 side profiles (951192)
G 4 corner pieces (T010429)
H 1 wheel (A0186)
I 1 stainless steel feeding bowl (951014)
J 1 drinking bottle + holder (A0161)
K 1 mall animal hideaway (A0159)
L 2 side panels (WKZ5077 or WKZ5078)
M 1 front panel with door (WKV5077 or WKV5078)
N 1 back panel (WKA5077 or WKA5078)
O 1 roof panel (WKB5077 or WKB5078)
EN Check list
Before you start assembling your cage, please
check if you have all the components. If any part is
missing or damaged, do not use your cage.
IT Lista di controllo
Prima di iniziare ad assemblare la gabbia, verificare
che siano presenti tutti i componenti. Se un
componente manca o è danneggiato, non utilizzare
la gabbia.
A 1 fondo di gabbia (T010240 o T010239)
B 1 piattaforma (T010315)
C+ D 4 fissaggi per la piattaforma (T010378)
E 1 scala (T010318)
F 4 profili laterali (951192)
G 4 pezzi d’angolo (T010429)
H 1 ruota (A0186)
I 1 ciotola in acciaio inox (951014)
J 1 abbeveratoio+ supporto (A0161)
K 1 casetta per roditori (A0159)
L 2 pannelli laterali (WKZ5077 o WKZ5078)
M 1 pannello frontale con porta (WKV5077 o WKV5078)
N 1 pannello posteriore (WKA5077 o WKA5078)
O 1 pannello del tetto (WKB5077 o WKB5078)
ES Lista de control
Antes de empezar a montar la jaula, compruebe
que dispone de todos los componentes. Si falta
alguna pieza o está dañada, no utilice la jaula.
A 1 fondo de jaula (T010240 o T010239)
B 1 plataforma (T010315)
C+ D 4 fijaciones para plataforma (T010378)
E 1 escalera (T010318)
F 4 perfiles laterales (951192)
G 4 pieza de esquina (T010429)
H 1 rueda (A0186)
I 1 comedero de acero inoxidable (951014)
J 1 bebedero + soporte (A0161)
K 1 casa para roedores (A0159)
L 2 paneles laterales (WKZ5077 o WKZ5078)
M 1 panel frontal con puerta (WKV5077 o WKV5078)
N 1 panel trasero (WKA5077 o WKA5078)
O 1 panel de techo (WKB5077 o WKB5078)
FR Liste de contrôle
Avant de commencer à assembler votre cage,
vérifiez que vous disposez de tous les éléments
nécessaires. Si une pièce est manquante ou
endommagée, n’utilisez pas votre cage.
A 1 bac de cage (T010240 ou T010239)
B 1 plateforme (T010315)
C+ D 4 fixations pour plateforme (T010378)
E 1 échelle (T010318)
F 4 profilés latéraux (951192)
G 4 pièces d’angle (T010429)
H 1 roue (A0186)
I 1 mangeoire en acier inoxydable (951014)
J 1 biberon + support (A0161)
K 1 maisonette pour rongeur (A0159)
L 2 panneaux latéraux (WKZ5077 ou WKZ5078)
M 1 panneau avant avec porte (WKV5077 ou WKV5078)
N 1 panneau arrière (WKA5077 ou WKA5078)
O 1 panneau de toit (WKB5077 ou WKB5078)
NL Checklist
Voordat u uw kooi in elkaar zet, moet u controleren
of u alle onderdelen heeft. Als een onderdeel
ontbreekt of beschadigd is, gebruik uw kooi dan
niet.
A 1 bodem kooi (T010240 of T010239)
B 1 eiland (T010315)
C+ D 4 bevestigingen voor eiland (T010378)
E 1 ladder (T010318)
F 4 zijprofielen (951192)
G 4 hoekstukken (T010429)
H 1 Wiel (A0186)
I 1 roestvrije voederbak (951014)
J 1 drinkfles + houder (A0161)
K 1 knaagdierhuisje (A0159)
L 2 zijpanelen (WKZ5077 of WKZ5078)
M 1 voorpaneel met deur (WKV5077 of WKV5078)
N 1 achterpaneel (WKA5077 of WKA5078)
O 1 dakpaneel (WKB5077 of WKB5078)
DE Checkliste
Bevor Sie mit dem Zusammenbau Ihres Käfigs
beginnen, überprüfen Sie bitte, ob Sie alle Teile
haben. Wenn ein Teil fehlt oder beschädigt ist,
dürfen Sie den Käfig nicht verwenden.
A 1 Käfigboden (T010240 oder T010239)
B 1 Plattform (T010315)
C+ D 4 Befestigungen für Plattform (T010378)
E 1 Leiter (T010318)
F 4 Seitenprofile (951192)
G 4 Eckstücke (T010429)
H 1 Laufrad (A0186)
I 1 Edelstahl-Futterschale (951014)
J 1 Trinkflasche + Halter (A0161)
K 1 Nagerhaus (A0159)
L 2 Seitenteile (WKZ5077 oder WKZ5078)
M 1 Frontplatte mit Tür (WKV5077 oder WKV5078)
N 1 Rückwand (WKA5077 oder WKA5078)
O 1 Dachplatte (WKB5077 oder WKB5078)
PL Lista kontrolna
Zanim zaczniesz składać klatkę, sprawdź czy masz
wszystkie elementy. Jeśli brakuje jakiejkolwiek
części lub jest ona uszkodzona, nie używaj klatki.
A 1 spód klatki (T010240 lub T010239)
B 1 platforma klatki (T010315)
C+ D 4 mocowania platformy (T010378)
E 1 drabinka (T010318)
F 4 profile boczne (951192)
G 4 elementy narożne (T010429)
H 1 kołowrotek (A0186)
I 1 miska do karmienia ze stali nierdzewnej (951014)
J 1 butelka do picia + uchwyt (A0161)
K 1 domek dla gryzoni (A0159)
L 2 panele boczne (WKZ5077 lub WKZ5078)
M 1 panel przedni z drzwiczkami (WKV5077 lub WKV5078)
N 1 panel tylny (WKA5077 lub WKA5078)
O 1 panel dachowy (WKB5077 lub WKB5078)
CZ Obsah balení
Než začnete klec sestavovat, zkontrolujte, zda máte
všechny komponenty. Pokud některý díl chybí
nebo je poškozený, klec nepoužívejte.
A 1 dno klece (T010240 nebo T010239)
B 1 plošina klece (T010315)
C+ D 4 upevňovací prvky pro patro (T010378)
E 1 ebřík (T010318)
F 4 boční profily (951192)
G 4 rohové díly (T010429)
H 1 běhací kolečko (A0186)
I 1 nerezová miska na krmení (951014)
J 1 láhev na pití + držák (A0161)
K 1 domek pro hlodavce (A0159)
L 2 boční panely (WKZ5077 nebo WKZ5078)
M 1 přední panel s dvířky (WKV5077 nebo WKV5078)
N 1 zadní panel (WKA5077 nebo WKA5078)
O 1 střešní panel (WKB5077 nebo WKB5078)
RU Контрольный список
     ,
,      . 
-    ,
  .
A 1   (T010240  T010239)
B 1  (T010315)
C+ D 4    (T010378)
E 1  (T010318)
F 4   (951192)
G 4   (T010429)
H 1  (A0186)
I 1      
(951014)
J 1    +  (A0161)
K 1     (A0159)
L 2   (WKZ5077  WKZ5078)
M 1     (WKV5077 
WKV5078)
N 1   (WKA5077  WKA5078)
O 1   (WKB5077  WKB5078)
B
E
A
D
C
M
N
O
L
L
J K G
I H F
1A
G
1B
1C
F
2A 2B
F
L
EN Make sure that the vertical wires of the back panel and the closure of the side panel are facing outwards.
NL Zorg ervoor dat de verticale draden van het achterpaneel en de sluiting van het zijpaneel naar buiten zijn gericht.
FR Veillez à ce que les fils verticaux du panneau arrière et la fermeture du panneau latéral soient orientés vers l’extérieur.
DE Achten Sie darauf, dass die vertikalen Drähte der Rückwand und der Verschluss der Seitenwand nach außen zeigen.
ES Asegúrese de que los cables verticales del panel trasero y el cierre del panel lateral están orientados hacia el exterior.
IT Assicurarsi che i fili verticali del pannello posteriore e la chiusura del pannello laterale siano rivolti verso l’esterno.
CZ Ujistěte se, že svislé vodiče zadního panelu a uzávěr bočního panelu směřují ven.
PL Upewnij się, że pionowe przewody panelu tylnego i zamknięcia panelu bocznego są skierowane na zewnątrz.
RU ,           .
3A 3B
N
EN Slide the second side panel (L) into the final profile. Make sure the closure of the side panel is facing outwards.
NL Schuif het tweede zijpaneel (L) in het laatste profiel. Zorg ervoor dat de sluiting van het zijpaneel naar buiten is gericht.
FR Faites glisser le deuxième panneau latéral (L) dans le profilé final. Veillez à ce que la fermeture du panneau latéral soit
orientée vers l’extérieur.
DE Schieben Sie das zweite Seitenteil (L) in das endgültige Profil. Vergewissern Sie sich, dass der Verschluss des Seitenteils
nach außen gerichtet ist.
ES Deslice el segundo panel lateral (L) en el perfil final. Asegúrese de que el cierre del panel lateral quede hacia fuera.
IT Far scorrere il secondo pannello laterale (L) nel profilo finale. Assicurarsi che la chiusura del pannello laterale sia rivolta verso
l’esterno.
CZ Zasuňte druhý boční panel (L) do konečného profilu. Ujistěte se, že uzávěr bočního panelu směřuje ven.
PL Wsuń drugi panel boczny (L) do profilu końcowego. Upewnij się, że zamknięcie panelu bocznego jest skierowane na
zewnątrz.
RU     (L)   . ,     
.
4A 4B
5
EN Insert 4 x d in the platform (B). Place the platform in the corner of the side and back panel. Do not tighten the screws (C) too
strongly.
NL Steek 4 x D in het plateau (B). Plaats het plateau in de hoek van het zij- en achterpaneel. Draai de schroeven (C) niet te hard
aan.
FR Insérer 4 x D dans la plateforme (B). Placer la plateforme dans l’angle du panneau latéral et du panneau arrière. Ne pas trop
serrer les vis (C).
DE Stecken Sie 4 x D in die Plattform (B). Setzen Sie die Plattform in die Ecke der Seiten- und Rückwand. Ziehen Sie die
Schrauben (C) nicht zu fest an.
ES Inserte 4 x D en la plataforma (B). Coloque la plataforma en la esquina del panel lateral y posterior. No apriete demasiado los
tornillos (C).
IT Inserire 4 x D nella piattaforma (B). Posizionare la piattaforma nell’angolo del pannello laterale e posteriore. Non stringere
troppo le viti (C).
CZ Vložte 4 x D do plošiny (B). Umístěte plošinu do rohu bočního a zadního panelu. Šrouby (C) neutahujte příliš silně.
PL Włóż 4 x D do platformy (B). Umieść platformę w rogu panelu bocznego i tylnego. Nie dokręcaj śrub (C) zbyt mocno.
RU  4 x D   (B).        .    (C)
 .
6A 6B
6C 6D
D
B
C
e
m
7A 7B
8
9A 9B
H+I J+K
EN Place the roof panel (o) on top. Make sure that the thick horizontal wires of the front, back and side panels are well
assembled in the roof panel. (see detail).
NL Plaats het dakpaneel (O) erop. Zorg ervoor dat de dikke horizontale draden van de voor-, achter- en zijpanelen goed in het
dakpaneel zitten. (zie detail).
FR Placez le panneau de toit (O) sur le dessus. Assurez-vous que les fils horizontaux épais des panneaux avant, arrière et
latéraux sont bien assemblés dans le panneau de toit. (voir détail).
DE Legen Sie die Dachplatte (O) auf. Vergewissern Sie sich, dass die dicken horizontalen Drähte der vorderen, hinteren und
seitlichen Platten gut in der Dachplatte befestigt sind. (siehe Detail).
ES Coloque el panel del techo (O) encima. Asegúrese de que los alambres horizontales gruesos de los paneles delantero,
trasero y laterales estén bien ensamblados en el panel del techo. (ver detalle).
IT Posizionare il pannello del tetto (O) sulla parte superiore. Assicurarsi che i fili orizzontali spessi dei pannelli anteriore,
posteriore e laterale siano ben assemblati nel pannello del tetto. (vedi dettaglio).
CZ Umístěte na něj střešní panel (O). Ujistěte se, že jsou silné vodorovné dráty předního, zadního a bočních panelů dobře
upevněny ve střešním panelu. (viz detail).
PL Umieść panel dachowy (O) na górze. Upewnij się, że grube poziome przewody panelu przedniego, tylnego i bocznych są
dobrze zamontowane w panelu dachowym. (patrz szczegóły).
RU     (O). ,     ,   
     . (. ).
o
10A 10B
10C
www.savic.be
Ringlaan 10 • 8501 Heule • Belgium
EN To avoid leakage, always fill the bottle 100%.
NL Om lekken te vermijden, vul de fles altijd 100%.
FR Afin d’éviter des fuites, toujours remplir la bouteille 100%.
DE Um Tropfen zu vermeiden, Tränke immer 100% füllen.
ES Para evitar gotas, siempre llenar la botella 100%.
IT Per evitare perdite, riempire sempre la bottiglia al 100%.
CZ Abyste zabránili úniku, naplňte láhev vždy na 100 %.
PL Aby uniknąć wycieków, należy zawsze napełniać butelkę w 100%.
RU        100 %.
EN Rince spout with hot water before first use.
NL Voor eerste gebruik, buisje reinigen met warm water.
FR Avant premier usage, rincer la pipette à l’eau chaude.
DE Vor erster Verwendung, Röhrchen spülen mit heissem Wasser.
ES Antes de usarlo, limpiar el tubito con agua caliente.
IT Prima del primo utilizzo, sciacquare il beccuccio con acqua calda..
CZ Před prvním použitím vypláchněte hubici horkou vodou.
PL Przed pierwszym użyciem przepłukać wylewkę gorącą wodą.
RU       .
EN Finally, fix the closures of the side panels well to the base. Your cage is now ready for use.
NL Ten slotte maak je de sluitingen van de zijpanelen goed vast aan de bodem. Je kooi is nu klaar voor gebruik.
FR Enfin, fixez bien les fermetures des panneaux latéraux à la base. Votre cage est maintenant prête à l’emploi.
DE Zum Schluss befestigen Sie die Verschlüsse der Seitenwände gut am Boden. Ihr Käfig ist nun einsatzbereit.
ES Por último, fije bien los cierres de los paneles laterales a la base. Su jaula ya está lista para ser utilizada.
IT Infine, fissare bene le chiusure dei pannelli laterali alla base. La gabbia è ora pronta per l’uso.
CZ Nakonec dobře připevněte uzávěry bočních panelů k základně. Klec je nyní připravena k použití.
PL Na koniec dobrze przymocuj zamknięcia paneli bocznych do podstawy. Klatka jest teraz gotowa do użycia.
RU ,       .      .
11A 11B