Thank you for purchasing this light fitting. Please read the instructions carefully before use to ensure safe and satisfactory
operation of this product. Please retain these instructions for future reference.
Warning
This is a Class 1 product and must be earthed..
Please read these instructions carefully before
commencing any work.
This unit must be fitted by a competent and qualified
electrician.
InstallinaccordancewithIEEWiringregulationsand
current Building Regulations.
To prevent electrocution switch off at mains supply
before installing or maintaining this fitting. Ensure other
persons cannot restore the electrical supply without your
knowledge.
This light fitting should be connected to a fused circuit.
If replacing an existing fitting, make a careful note of the
connections.
This product is not suitable for dimming.
Wasteelectricalproductsshouldnotbedisposedofwith
household waste. Please recycle where facilities exist.
Check with your local authority or retailer for recycling
advice.
These products should not be fitted to PIR circuits or short
duration timed switches.
Specification
Layout
• Themainssupplycablemusthaveaminimumcrosssectionalareaof1.0mm²
• Thisproductmustbemountedoutofarmsreach
Wiring - Non-Maintained
Check that...
• You have correctly identified the wires
• The connections are tight
• No loose strands have been left out of the connection
block.
Voltage: 240V ~ 50Hz
Lamp:2x3WLEDHiPower-6000K/400lm
IP rating: 20
Duration:3hours(180minutes)
Operating Temperature : -5˚C to 50˚C
Maximum Operating Humidity : 10-90%
Change over Time: Approximately 1s
Battery Specification: 3.6V 4500mAh Ni-Cad
Battery Charge Time: 24 hours
Having correctly identified the wiring from your existing light fitting, pull the wire through the hole and connect to the
connection block inside the product in the following way:
• Thisunitworksinnon-maintainedmode.Thelightwill
normally be off and charging. In the event of a power
failure, the light will switch on automatically.
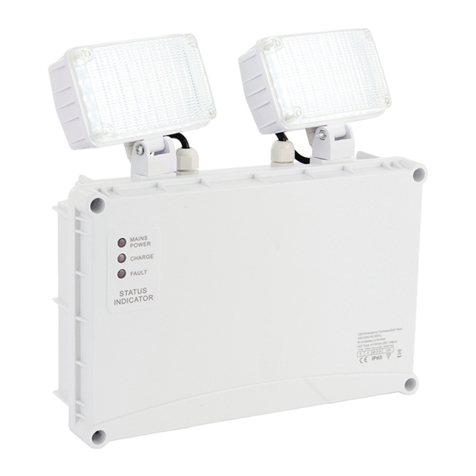
• Theproducthasthefollowingindicatorlights:-
- TOP: GREEN LIGHT - Mains Supply Normal
-MIDDLE:YELLOWLIGHT-Fault
- BOTTOM: GREEN LIGHT - Charging
•Theproductcarriesoutthefollowingautotests
- Initial: 30s function test is automatically run 20 hours
after mains power supplied to fitting. 3hr duration test
is automatically run after a further 4 hours
- Monthly: 30s test - power failure simulation: -
Green power indicator blinks.
- Half-Yearly: 1 hour duration test - power failure
simulation: - Green power indicator flashes.
- Yearly: 3 hour duration test - power failure simulation: -
Green power indicator flashes.
• Thisproductisfittedwithafaultalarm.Ifthebatteryfails,
the alarm will sound every minute and the Yellow light
willflash.IftheLEDfails,thealarmwillsoundevery30s
and the yellow light will flash.
• Itispossibletotesttheproductmanually,byfollowing
these steps:-
1. Press the "Test" button for 1s. Green light will be off and
Emergency mode will run for 1s.
2. Press the test button for 3s. Green light will be blinking
and Function Test run for 30s.
3. Press the test button for 5s. Green light will be flashing
and run duration test.
4. Press the test button again for 5s to interrupt duration
test.
5.Pressthetestbuttonfor10s.All3LEDlightswillflash3
times and the fitting will be reset.
Operation & Testing
Existing fittings must be completely removed before
installation of a new product. Before removing the existing
fitting, carefully note the position of each set of wires.
•Therearetwokeyhole-shapedholesinthebackofthe
product. Measure the distance between these and then
markthepositionofthefixingholesonthewall.Drill
the holes, taking care to avoid damaging any concealed
wiring or pipes.
•Fitthesuppliedwallplugsandscrews.Makesurethe
screws are protruding slightly from the wall - the same
distance for both screws so the product hangs level.
•Undothescrewunderneaththefrontpanelandsetaside
for refitting later. Carefully lift the front panel away from
the product - take care not to disconnect the PCB that is
attached to the underside of the front panel.
•Therearecableentrypointsoneachsideoftheproduct.
Knock out the preferred side. Fit a grommet to the hole
to prevent cable damage.
•Pullthecablethroughthecableentryholeandwireas
detailed overleaf.
Installation
•PlugthebatteryconnectorintothePCB.
•Refitthefrontpanelwithscrewsetasideearlier.
• Place the keyhole-shaped holes on the back of the
product over the screws to hang the product in place.
•Adjustthedirectionoftheheadstoilluminatethedesired
area.
•Replacefuseorcircuitbreakerandswitchon.Yourlight
is now ready for use.
Commissioning
PERMANENT LIVE
NEUTRAL
EARTH (GREEN/YELLOW)
NEUTRAL TERMINAL
LIVE TERMINAL
EARTH TERMINAL
SUPPLYLIGHT FITTING


