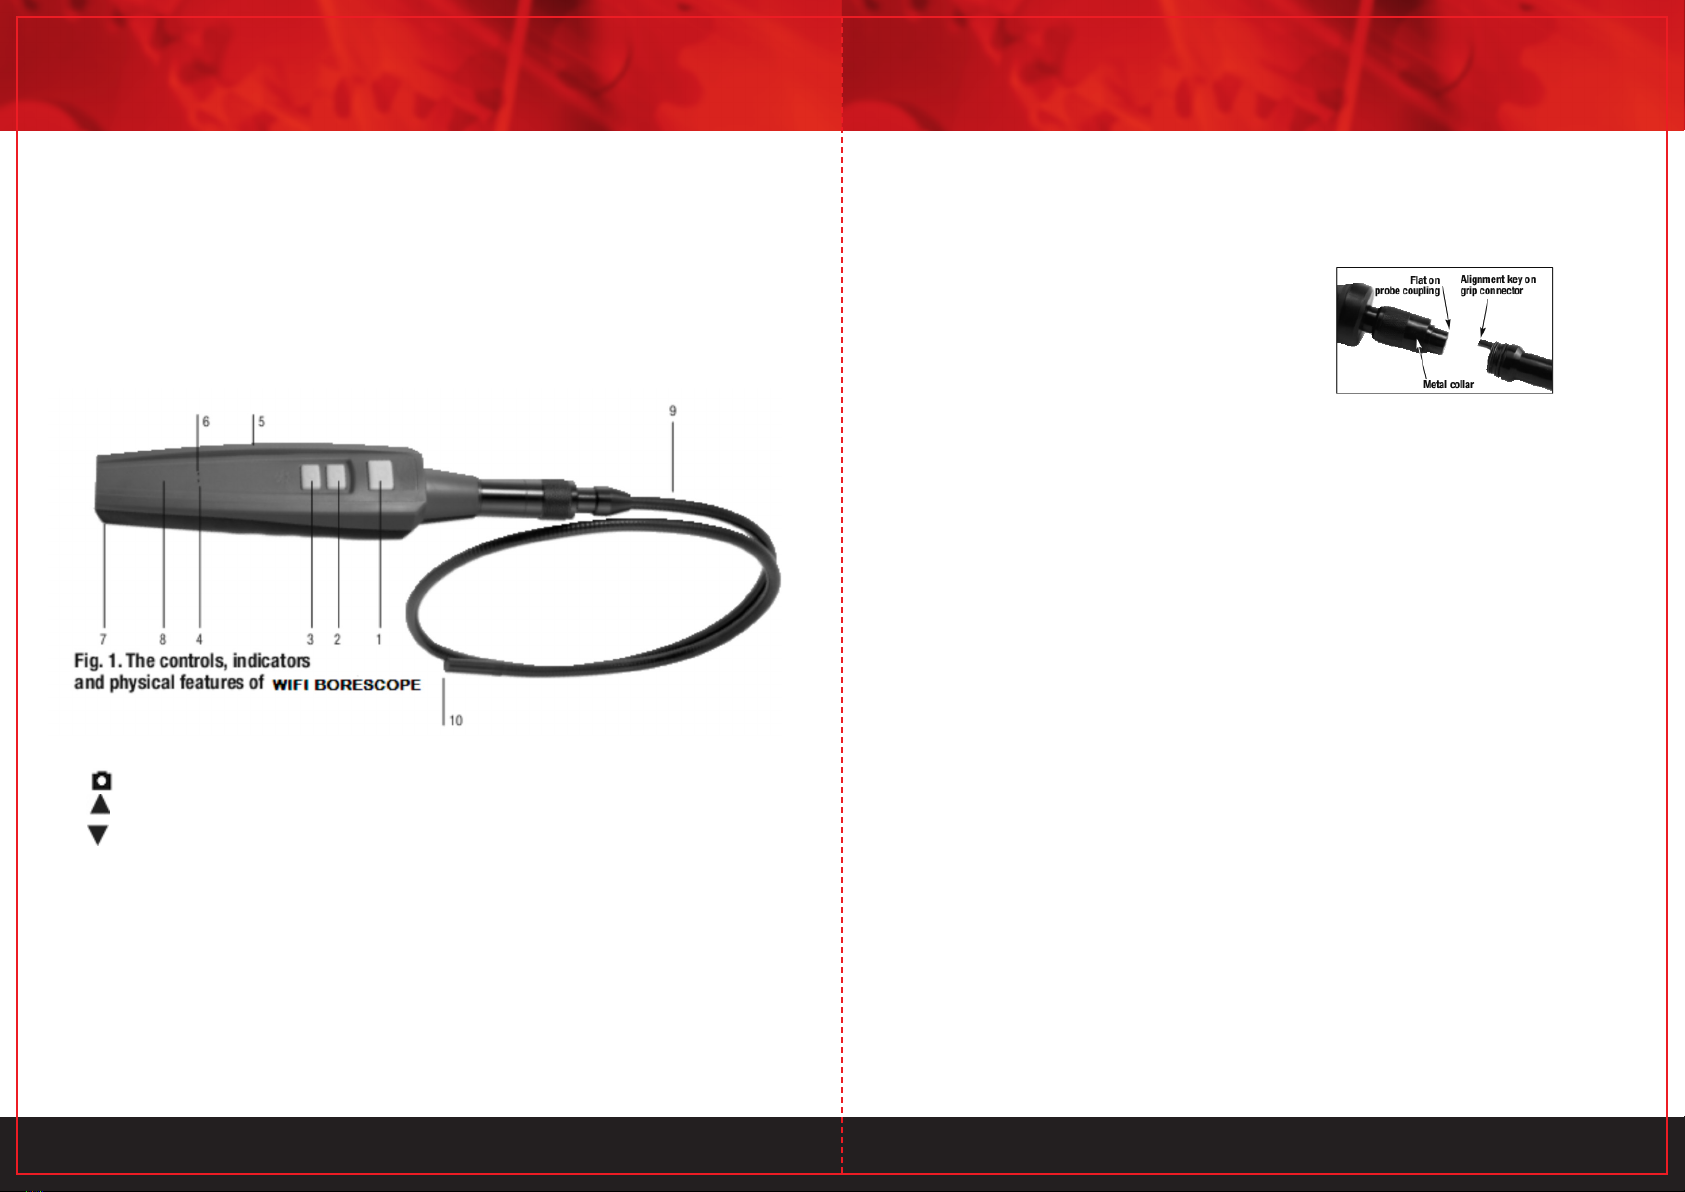
5 6
5. Locate icons among your apps and touch it. The screen above will appear, with live video
in the center.
MANIPULATING LIVE VIDEO AND CAPTURING AND VIEWING PHOTOS
AND VIDEO CLIPS
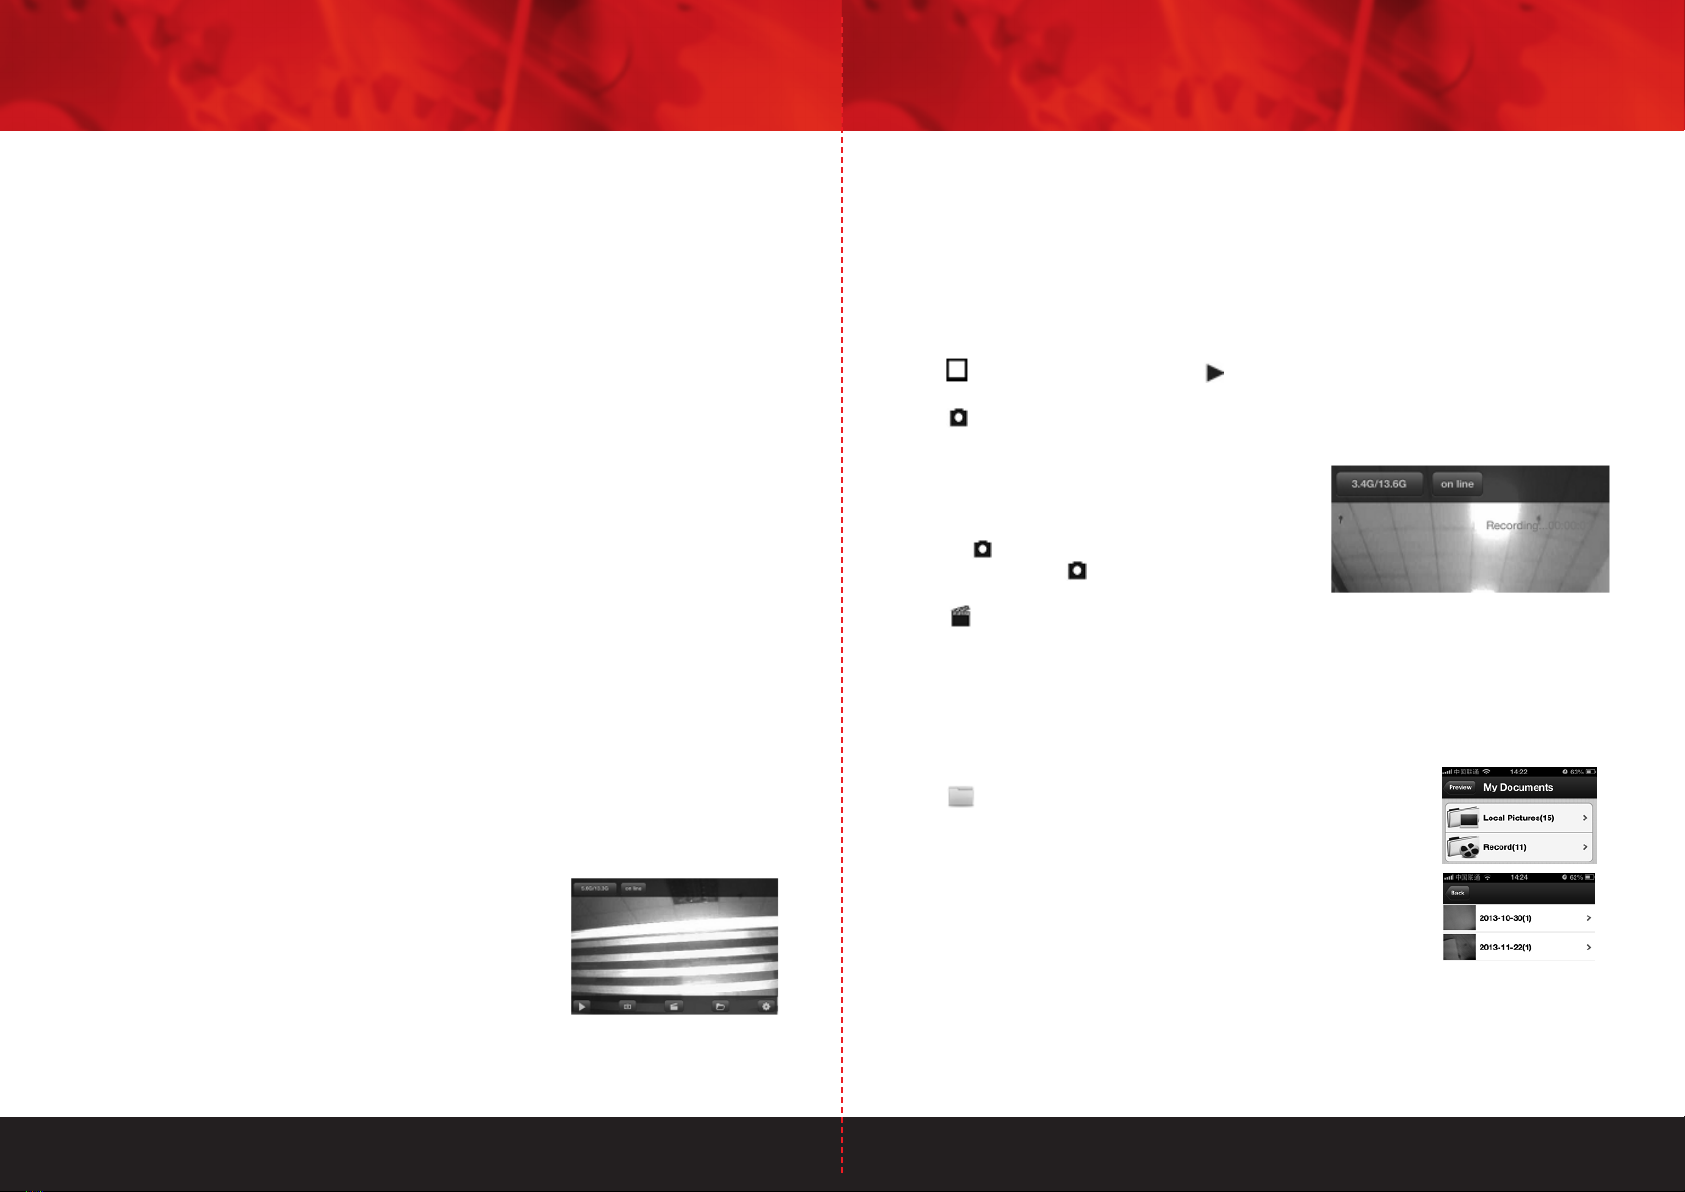
As the photo at the bottom of the previous page shows, there are five soft buttons at the
bottom of the live video screen of the WIFI Inspection Camera iOS app:
• The
button (which alternates with ) pauses and resumes play of live video captured
by the camera-tipped probe.
• The button takes a photo of the field of view. Pressing the button creates and stores a
.jpeg file representing the photo in a dated subfolder of the app’s MyDocuments folder. The
phrase, “take picture success”, appears on the
bottom of the screen to confirm that a picture was
taken.
Another way to take a photo of the field of view is to
press the button on the grip. It functions in exactly
the same way as the button on the app.
• The button starts and stops recording a
Video clip of the field of view (unless the screen is
showing paused live video). Pressing the button to start a video: 1) Begins storing an .mp4
file in a dated subfolder of the app’s My Documents folder; 2) Starts a running on-screen
clock indicating the length of the clip recorded so far (see screen shot above right).
Pressing the button to stop a video: 1) completes creation and storage of the .mp4 file; 2)
and causes the on-screen clock to disappear.
• The
button provides access to the app’s My Documents
folder of saved media (photos and video clips). As the screen shot
at right shows, the folder contains two subfolders, one for photos
(Local Pictures) and the other for video clips (Record). Each of those
subfolders contains multiple date-stamped sub-subfolders, one for
each day on which a picture or video clip was captured. Within each
dated subfolder, you can preview the pictures and video clips you
have captured. Touching the Preview soft button resumes display of
live probe video.
The Back soft button at the upper left of the app screen makes it easy to go “up one level”
in the storage hierarchy to the directory of time-stamped sub-subfolders of photos and
Doing so will return you to the landing page of the WIFI Inspection Camera app and
automatically begin its downloading and installation.
To download the free Android app that enables WIFI Inspection Camera:
1. Make sure your mobile device is connected to the Internet.
2. Touch the Google Play Store icon on your device and enter “Videoscope” in the Search
box at the top of the store’s home page.
3. On the Apps screen that appears next, touch the row describing WIFI Inspection Camera.
4. On the WIFI Inspection Camera app landing page that appears next, touch the INSTALL
button at upper right.
5. On the App permissions screen that appears next screen, touch the ACCEPT soft button
at the bottom right of the screen to begin downloading and installation of the app.
Download and installation of the 4.22 MByte app normally takes less than one minute.
Installation is complete when the blue progress bar reaches 100%.
To activate the Videoscope 3 or Videoscope app and begin displaying inspection video on
your Apple iOS or Android device, you must disconnect from the Internet and establish
connectivity between your device and WIFI Inspection Camera’s local WiFi network by
following the Operating Instructions for your platform in the next section (Apple iOS) or
section after that (Android).
OPERATING INSTRUCTIONS—APPLE iOS PLATFORM
VIEWING LIVE VIDEO
Turn on by moving the ON/OFF switch on the left side of the grip (Fig. 1, Callout 5)
to the left. The Power on LED on the top of the grip will glow solid red—unless the batteries
are low on voltage, in which case the LED will flash red. If the LED flashes red, change the
batteries by following the instructions.
Once the Power on LED begins glowing solid red, wait up to 30 seconds while WIFI Inspection
Camera prepares to generate an ad hoc WiFi hotspot (without Internet connectivity). Then:
1. Power on your Smartphone or tablet and touch the Settings button.
2. Touch the left side of the Wi-Fi row to enter the Wi-Fi Settings screen. WIFI Inspection
Camera’s hotspot should appear in the CHOOSE A NETWORK section under the name
CAMXXXX (where X may be random number).
3. Touch this row to connect to WIFI Inspection Camera’s local
WiFi hotspot.Be aware that while you are connected to this
hotspot, your device will not have Internet connectivity.
The first time you try to connect to the hot spot, you may be
prompted to enter the app’s password (the default password
is 123456789). Thereafter, you will not be asked for a
password; the Videoscope 3 row will already have a check
mark.
4. Touch the button on your iOS device to exit the Wi-Fi Settings screen.