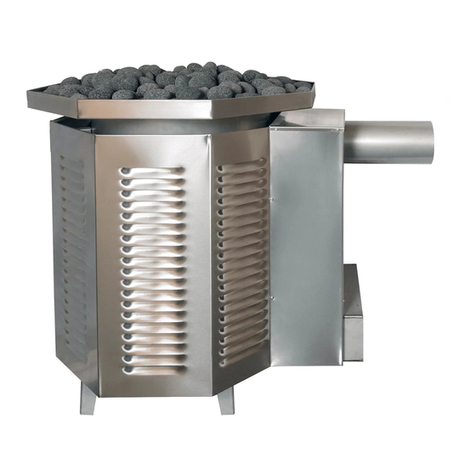
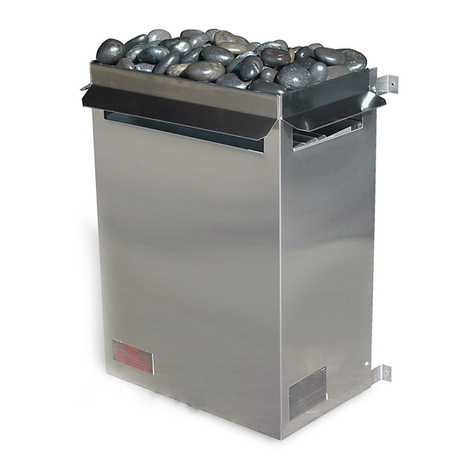
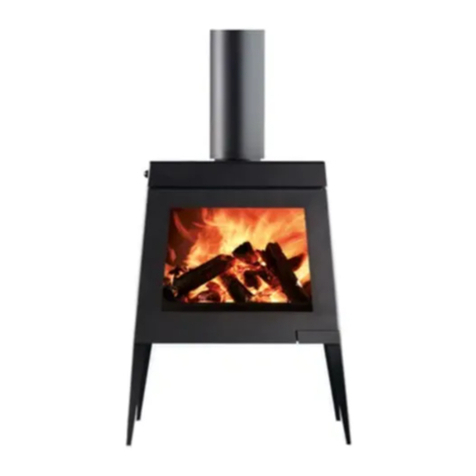
scandia 30240 User manual

*Heater must be installed by a licensed electrician*
Heater must be installed according to local codes.
Plastic must be removed from shell before operating heater.
Sauna door must always open outward.
Sauna door can never include a lock.
Do not install more than one heater in a room.
Sauna Room Venting Guidelines
Sauna room should be vented according to manufacturers
specifications or Scandia sauna room specification found in
the Scandia sauna installation instructions. Improper ventila-
tion is dangerous for the sauna users health. The inlet vent
should be below the heater or near the base of the heater.
Outlet vent can be just below the top bench on the opposite
side, near the opposite side of the heater or you may under-
cut the sauna door. When the door is under cut you should
have between 3/4” to 1” between the finished floor and the
bottom of the door.
Sauna Room General Guidelines
The sauna should be constructed of clear western red cedar.
Plastic must be removed from shell before operating heater.
Do not treat or varnish the sauna wood.
Fill the heater only with Scandia high-density rocks
Check and clean rocks and rock tray twice a year.
The warning signs and sauna usage plaque must be displayed.
Sauna room sizing is based on standard 7 foot ceilings.
Only use an aroma-stone when using fragrances
Do not touch the heater while in operation
Do not cover the heater
Never hose down the sauna
Never leave children unattended
Sauna bathing is not suitable for those with health problems.
Consult a doctor before using
ULTRA SAUNA HEATER INSTALLATION
BEFORE YOU START HEATER SIZING
YOUR HEATER SHOULD INCLUDE
Controls
Main Heater Unit
High Density Sauna Rocks
Installation Instructions
Warranty / Registration Card
Warning Sign

Sauna Heater and Guard Rail Placement Guide
A
J
To
Ceiling
(H-7ft)
C
To
wall
or guard
rail
G
I
D
H
H
C
L
B
F
Plastic must be removed
from shell before operating
Line feeds/ground from
Control box to Heater
Heater
Control
Box
Line Feeds/Ground
From Breaker
Recommended Installation
Locations
*Note: controls to be located
outside of sauna
E
ChassisSmallMediumLarge
Description3KW‐4.5KW6.0KW‐9.0KW12KW‐18KW
AWidthOfHeaterShell16"16"26"
BWalltoFaceofHeater103/4"14"18"
CSideofHeatertoWall(Min.)5"5"8"
DHeightofHeaterShell231/4"283/4"29"
EWalltoInsideofGuard(Min.)17"16"21"
FLowertoUpperMounting21"221/2"28"
GF.F.toBottomMount11"14"103/4"
HHeaterCentertoWall(Min.)13"13"22"
IF.F.toBottomofHeater10"10"10"
JTopofHeatertoCeiling(7ft.)45"40"39"
*Heater must be installed by
a licensed electrician*
For additional information, technical
assistance or trouble shooting please
visit: www.scandiamfg.com

F Control Wiring—60 Minute Timer
L1T1
F Controls (60 min ute timer
version ) 240V S ingle Phase
P owe r Feed W i res
Pow er to L1 and L2
T2 L2
H eater Element Line
T2 t o heater
elem ents
High -Limit Line
Timer to High-Limit
on Base of Heat er
High Limit
Heater
Elem ents
Heater Controls
Series Watts Volts Amps Phase Mas Room Size Circuit Breaker Wires from control to heater
30 3000 240 / 208 12.5 / 14.4 1 20 sq ft 20 3 qty #14 ga
45 4500 240 / 208 18.8 / 21.7 130sqft 30 3 qty #10 ga
60 6000 240 / 208 25 / 28.9 142sqft30/40 3 qty #10 ga
F Controls (60 minute timer) 3000 Watts to 6000 Watts Heaters
Single-phase only 240/208 Volts
Timer
Thermostat
Series Watts Volts Amps Phase Mas Room Size Circuit Breaker Wires from control to heater
30 3000 240 / 208 12.5 / 14.4 1 20 sq ft 20 3 qty #14 ga
45 4500 240 / 208 18.8 / 21.7 130sqft 30 3 qty #10 ga
60 6000 240 / 208 25 / 28.9 142sqft30/40 3 qty #10 ga
Commercial Installations – Most commercial facilities with 24 hour timers place the control panel in a service
room near the sauna or the electrical room . When the room is not near the sauna the thermostat can be
placed near the room separate from the control box . Other configurations include placing the control box near
the sauna buthaving the the controls placed behind the cover (see fig 1).For conduit and wire size , type and
quantities see specific heater wire diagram charts .
Residential Installations – Place the controlbox on the side of the door that opens , approximately 12" from
the door opening and 52" from the bottom (see fig. 1) . For conduit and wire size , type and quantities see
specific heater wire diagram charts .
Control Box Location
52"
12"
52"
12"
Door opens
on the right
Door opens
ontheleft
Place Controls on
latch side of the door.
*Heater must be installed by
a licensed electrician*
4"
8"
3
"
10 1/2"
6"
0
15
45
30
Control Cover
Plate Control Box
22ga Brushed
Aluminum I8 ga Galvanized
Paint-loc Steel
F Control Rough-In Dimensions

H Controls (for T-Model Heaters) 3000 W atts to 6000 W atts Heaters
Single-phase only 240/208 Volts
L1T1
H Controls (thermostat on heater )
240V Single phase
Power Feed W ires
Pow er to L1 and L 2
T2
L2
H eater Elem ent Line
T2 t o heater
element s
H igh -Limit Line
Timer to H igh -Limit
on Base of H eater
H igh Limit
H eater
Element s
Heater Controls
Timer
Thermostat
Place Controls on
latch side of the door.
*Heater must be installed by
a licensed electrician*
H Control Wiring—60 Minute Timer
Commercial Installations – Most commercial facilities with 24 hour timers place the control panel in a service
room near the sauna or the electrical room . When the room is not near the sauna the thermostat can be
placed near the room separate from the control box . Other configurations include placing the control box near
the sauna buthaving the the controls placed behind the cover (see fig 1).For conduit and wire size , type and
quantities see specific heater wire diagram charts .
Residential Installations – Place the controlbox on the side of the door that opens , approximately 12" from
the door opening and 52" from the bottom (see fig. 1) . For conduit and wire size , type and quantities see
specific heater wire diagram charts .
Control Box Location
52"
12"
52"
12"
Door opens
on the right
Door opens
ontheleft
H Controls (for T-Model Heaters) 3000 W atts to 6000 W atts Heaters
Series Watts Volts Amps Phase Mas Room Size Circuit Breaker Wires from control to heater
30 3000 240 / 208 12.5 / 14.4 1 20 sq ft 20 3 qty #14 ga
45 4500 240 / 208 18.8 / 21.7 130sqft 30 3 qty #10 ga
60 6000 240 / 208 25 / 28.9 142sqft30/40 3 qty #10 ga
4"
8"
3
"
10 1/2"
6"
0
15
45
30
Control Cover
Plate Control Box
22ga Brushed
Aluminum I8 ga Galvanized
Paint-loc Steel
F Control Rough-In Dimensions
4"
8"
3
"
0
15
45
30
22ga Brushed
Aluminum
6"
Control Cover
Plate Control Box
4”

B Controls (60 minute timer) 7500 Watts to 9000 Watts Heate rs
Single-phase only 240/208 Volts. For T-Model Heaters
Series Watts Volts Amps Phase Mas Room Size Circuit Breaker Wires from control to heater
75 7500 240 / 208 31.3 / 36.1 1 56 sq ft 40 3 qty #8 ga - 2 qty #14
90 9000 240 / 208 37.5 / 43.3 1 80 sq ft 50 3 qty #8 ga - 2 qty #14
Ground
SIngle Phase
Powe r Feed
Contactor
Conta ctor
1 2
Control Box Sauna Heater
High Limit
Switch
Ground
Terminal
Scandia elec tricheaters
are UL listed
12
Element1 Element 2
4
2
13
1 2
T-stat
To contactor
coils
To
contactor
coils
Timer
B Control Wiring—60 Minute Timer-Single Phase
Commercial Installations – Most commercial facilities with 24 hour timersplace the control panel in a service
room near the sauna or the electrical room .When the room is not near the sauna the thermostat can be
placed near the room separate from the control box . Other configurations include placing the control box near
the sauna buthaving the the controls placed behind the cover (see fig 1).For conduit and wire size , type and
quantities see specific heater wire diagram charts .
Residential Installations – Place the controlbox on the side of the door that opens , approximately 12" from
the door opening and 52" from the bottom (see fig. 1) . For conduit and wire size , type and quantities see
specific heater wire diagram charts .
Control Box Location
52"
12"
52"
12"
Door opens
on the right
Door opens
ontheleft
*Heater must be installed by
a licensed electrician*
Place Controls on
latch side of the door.
A/B Control Rough -In Dimensions
8 ¼”
12 ¼”
4"
14 ¼”
9 ¾”
0
1545
30
Control Cover Plate Control Box
22 ga Brushed Aluminum I8 ga Galvanized
Paint -loc Steel
* NOTE: rough-in ½” extra on box dimensions

Ground
SIngle Phase
PowerFeed
Contactor
Contactor
1 2
Control Box Sauna Heater
High Limit
Switch
Ground
Terminal
Scandia electric heaters
are UL listed
12
Element 1 Element2
4
2
1
3
1 2
Timer
T-stat
To contactor
coils
To
co ntactor
coils
A Controls (60 minute timer) 7500 Watts to 9000 W atts Heaters
Single-phase only 240/208 Volts
Series W atts Volts Am ps Phase Mas Room Size Circuit Breaker Wires from control to heater
75 7500 240 / 208 31.3 / 36.1 1 56 sq ft 40 3 qty #8 ga - 2 qty #14
90 9000 240 / 208 37.5 / 43.3 1 80 sq ft 50 3 qty #8 ga - 2 qty #14
A Controls (60 minute timer) 7500 Watts to 9000 Watts Heaters
Single-phase only 240/208 Volts
A Control Wiring—60 Minute Timer-Single Phase
Commercial Installations – Most commercial facilities with 24 hour timersplace the control panel in a service
room near the sauna or the electrical room .When the room is not near the sauna the thermostat can be
placed near the room separate from the control box . Other configurations include placing the control box near
the sauna buthaving the the controls placed behind the cover (see fig 1).For conduit and wire size , type and
quantities see specific heater wire diagram charts .
Residential Installations – Place the controlbox on the side of the door that opens , approximately 12" from
the door opening and 52" from the bottom (see fig. 1) . For conduit and wire size , type and quantities see
specific heater wire diagram charts .
Control Box Location
52"
12"
52"
12"
Door opens
on the right
Door opens
ontheleft
*Heater must be installed by
a licensed electrician*
Place Controls on
latch side of the door.
A/B Control Rough -In Dimensions
8 ¼”
12 ¼”
4"
14 ¼”
9 ¾”
0
1545
30
Control Cover Plate Control Box
22 ga Brushed Aluminum I8 ga Galvanized
Paint -loc Steel
* NOTE: rough-in ½” extra on box dimensions

Ground
SIngle Phase
Power Feed
Contactor
Contactor
1 2
Control Box Sauna Heater
High Limit
Sw itch
Ground
Terminal
Scandia electric heaters
are UL listed
12
Element1 Element 2
4
2
13
1 2
24 HR Timer
T-stat To contactor
coils
Tocontactor
coils
A2-2 4 Co ntrols 75 00 W a tts to 90 00 W atts He a te rs
Single-phase only 240/208 Volts
A2-24 Control Wiring- 24 Hour Timer—Single Phase
Commercial Installations – Most commercial facilities with 24 hour timersplace the control panel in a service
room near the sauna or the electrical room .When the room is not near the sauna the thermostat can be
placed near the room separate from the control box . Other configurations include placing the control box near
the sauna buthaving the the controls placed behind the cover (see fig 1).For conduit and wire size , type and
quantities see specific heater wire diagram charts .
Residential Installations – Place the controlbox on the side of the door that opens , approximately 12" from
the door opening and 52" from the bottom (see fig. 1) . For conduit and wire size , type and quantities see
specific heater wire diagram charts .
Control Box Location
52"
12"
52"
12"
Door opens
on the right
Door opens
ontheleft
*Heater must be installed by
a licensed electrician*
Place Controls on
latch side of the door.
A/B Control Rough -In Dimensions
8 ¼”
12 ¼”
4"
14 ¼”
9 ¾”
0
1545
30
Control Cover Plate Control Box
22 ga Brushed Aluminum I8 ga Galvanized
Paint -loc Steel
* NOTE: rough-in ½” extra on box dimensions
A2-24 Controls 7500 Watts to 9000 Watts Heaters
Single-phase only 240/208 Volts
Series Watts Volts Amps Phase Mas Room Size Circuit Breaker Wires from control to heater
75 7500 240 / 208 31.3 / 36.1 1 56 sq ft 40 3 qty #8 ga - 2 qty #14
90 9000 240 / 208 37.5 / 43.3 1 80 sq ft 50 3 qty #8 ga - 2 qty #14

A3 Control Wiring— 60 Minute Timer—Three Phase
Commercial Installations – Most commercial facilities with 24 hour timersplace the control panel in a service
room near the sauna or the electrical room .When the room is not near the sauna the thermostat can be
placed near the room separate from the control box . Other configurations include placing the control box near
the sauna buthaving the the controls placed behind the cover (see fig 1).For conduit and wire size , type and
quantities see specific heater wire diagram charts .
Residential Installations – Place the controlbox on the side of the door that opens , approximately 12" from
the door opening and 52" from the bottom (see fig. 1) . For conduit and wire size , type and quantities see
specific heater wire diagram charts .
Control Box Location
52"
12"
52"
12"
Door opens
on the right
Door opens
ontheleft
*Heater must be installed by
a licensed electrician*
Place Controls on
latch side of the door.
A/B Control Rough -In Dimensions
8 ¼”
12 ¼”
4"
14 ¼”
9 ¾”
0
1545
30
Control Cover Plate Control Box
22 ga Brushed Aluminum I8 ga Galvanized
Paint -loc Steel
* NOTE: rough-in ½” extra on box dimensions
Series Watts Volts Amps Phase MasRoomSize CircuitBreaker SupplyWires(incl ground) Wiresfromcontrol to heater
90-3 9000 240 / 208 21.7 / 25 380sqft 60 4 qty #8 ga 4qty#8ga - 2qty #14
120-3 12000 240 / 208 29 / 33.4 3 120 sq ft 40 4 qty #8 ga 4qty#8ga - 2qty #14
A3 Co ntrols (60 minute time r) 9000 Wa tts to 120 00 W a tts He a ters
Three-phase only 240/208 Volts
Gr ou nd
Th re e Ph ase
Power Feed
Contactor
Contactor
1 2 3
Control Box Sauna Heater
High Limit
Switch
Gro und
Ter m inal
Scandia electric heaters
are UL l isted
123
To High
Lim it
Element 1 Element 2
Ele ment 3
54
2
136
1 2
To
contactor
coils
To
con tactor
coils
Timer
T-stat

A3-24 Control Wiring—24 Hour Timer-Three Phase
Commercial Installations – Most commercial facilities with 24 hour timersplace the control panel in a service
room near the sauna or the electrical room .When the room is not near the sauna the thermostat can be
placed near the room separate from the control box . Other configurations include placing the control box near
the sauna buthaving the the controls placed behind the cover (see fig 1).For conduit and wire size , type and
quantities see specific heater wire diagram charts .
Residential Installations – Place the controlbox on the side of the door that opens , approximately 12" from
the door opening and 52" from the bottom (see fig. 1) . For conduit and wire size , type and quantities see
specific heater wire diagram charts .
Control Box Location
52"
12"
52"
12"
Door opens
on the right
Door opens
ontheleft
*Heater must be installed by
a licensed electrician*
Place Controls on
latch side of the door.
A/B Control Rough -In Dimensions
8 ¼”
12 ¼”
4"
14 ¼”
9 ¾”
0
1545
30
Control Cover Plate Control Box
22 ga Brushed Aluminum I8 ga Galvanized
Paint -loc Steel
* NOTE: rough-in ½” extra on box dimensions
Ground
Three Phase
Power Feed
Contactor
Contactor
1 2 3
1 2
Control Box Sauna Heater
High Limit
Switch
Ground
Terminal
Scandia electric heaters
are UL listed
123
To High
Limit
Element 1 Element 2 Element 3
54
2
136
24 Hour
Controls
A3-24 Controls 7500 Watts to 12000 Watts Heaters Three-phase only 240/208 Volts 24 Hour Timer
Series Watts Volts Amps Phase MasRoomSize CircuitBreake
r
SupplyWires(incl ground) Wiresfromcontrol to heater
90-3 9000 240 / 208 21.7 / 25 380sqft 60 4 qty#8 ga 4qty#8ga - 2qty#14
120-3 12000 240 / 208 29 / 33.4 3 120 sq ft 40 4 qty#8 ga 4qty#8ga - 2qty#14

Ground
ThreePhase
Power Feed
To Elements
Contactor
Contactor
Contactor
Contactor
1 2 3 4 5 6
T1 T2
L2
L1
1 2
Control Box
123 456
Sauna Heater
Element 1 Element 2 Element 3
654
321
To High
Limit
ToHigh
Limit
High Lim it
Switch
Ground
Terminal
Fu se
Assemblies
Scandia electric heaters
are U L listed
To contactor
co ils
To contactor
co ils
E2 Control Wiring—60 Minute Timer-Three Phase
Commercial Installations – Most commercial facilities with 24 hour timersplace the control panel in a service
room near the sauna or the electrical room .When the room is not near the sauna the thermostat can be
placed near the room separate from the control box . Other configurations include placing the control box near
the sauna buthaving the the controls placed behind the cover (see fig 1).For conduit and wire size , type and
quantities see specific heater wire diagram charts .
Residential Installations – Place the controlbox on the side of the door that opens , approximately 12" from
the door opening and 52" from the bottom (see fig. 1) . For conduit and wire size , type and quantities see
specific heater wire diagram charts .
Control Box Location
52"
12"
52"
12"
Door opens
on the right
Door opens
ontheleft
*Heater must be installed by
a licensed electrician*
Place Controls on
latch side of the door.
15 ½”
13 ¼”
0
1545
30
Control Cover Plate Control Box
22 ga Brushed Aluminum I8 ga Galvanized
Paint -loc Steel
E/E24 Control Rough -In Dimensions
* NOTE: rough-in ½” extra on box dimensions
12 ¼”
14"
4"
Series Watts Volts Amps Phase Mas Room Size Circuit Breaker Supply Wires (incl ground) Wires from control to heater
120 12000 240 / 208 50 /57.7 1 120 sq ft 60/70 (240V, 3qty #6) 208V, 3qty #4) 7 qty #10 ga - 2 qty #14
150 15000 240 / 208 62.5 / 72.2 1 180 sq ft 70/90 (240V, 3qty #4) 208V, 3qty #2) 7 qty #10 ga - 2 qty #14
150-3 15000 240 / 208 36.2 / 41.7 3 180 sq ft 50 (240V, 4qty #8) 208V, 4qty #6) 7 qty #10 ga - 2 qty #14
180 18000 240 / 208 75 / 86.6 1 240 sq ft 90/100 3qty #2 7 qty #10 ga - 2 qty #14
180-3 18000 240 / 208 43.4 / 50 3 240 sq ft 60 4qty #6 7 qty #10 ga - 2 qty #14

E2 Control Wiring 60 Minute Timer-Single Phase
*Heater must be installed by
a licensed electrician*
Place Controls on
latch side of the door.
Commercial Installations – Most commercial facilities with 24 hour timersplace the control panel in a service
room near the sauna or the electrical room .When the room is not near the sauna the thermostat can be
placed near the room separate from the control box . Other configurations include placing the control box near
the sauna buthaving the the controls placed behind the cover (see fig 1).For conduit and wire size , type and
quantities see specific heater wire diagram charts .
Residential Installations – Place the controlbox on the side of the door that opens , approximately 12" from
the door opening and 52" from the bottom (see fig. 1) . For conduit and wire size , type and quantities see
specific heater wire diagram charts .
Control Box Location
52"
12"
52"
12"
Door opens
on the right
Door opens
ontheleft
15 ½”
13 ¼”
0
1545
30
Control Cover Plate Control Box
22 ga Brushed Aluminum I8 ga Galvanized
Paint -loc Steel
E/E24 Control Rough -In Dimensions
* NOTE: rough-in ½” extra on box dimensions
12 ¼”
14"
4"
Ground
Single Phase
To E lements
Contactor
Contactor
Contactor
Contactor
1 2 3 4 5 6
T1 T2
L2L1
1 2
Control Box
123 456
Sauna Heater
Element 1 Element 2 Element 3
654
321
To High
Limit
To H igh
Limit
H igh Limit
Switch
Ground
Terminal
Fuse
Assemblies
Scandia electric heaters
are UL listed
To contactor
coils
To contactor
coils
E2 Control for Scandia/Vico 12KW ,15KW and 18KW Heater
208V and 240V (Single Phase Configuration)
Series Watts Volts Amps Phase Mas Room Size Circuit Breaker Supply Wires (incl ground) Wires from control to heater
120 12000 240 / 208 50 /57.7 1 120 sq ft 60/70 (240V, 3qty #6) 208V, 3qty #4) 7 qty #10 ga - 2 qty #14
150 15000 240 / 208 62.5 / 72.2 1 180 sq ft 70/90 (240V, 3qty #4) 208V, 3qty #2) 7 qty #10 ga - 2 qty #14
150-3 15000 240 / 208 36.2 / 41.7 3 180 sq ft 50 (240V, 4qty #8) 208V, 4qty #6) 7 qty #10 ga - 2 qty #14
180 18000 240 / 208 75 / 86.6 1 240 sq ft 90/100 3qty #2 7 qty #10 ga - 2 qty #14
180-3 18000 240 / 208 43.4 / 50 3 240 sq ft 60 4qty #6 7 qty #10 ga - 2 qty #14

Ground
Three Phase
PowerFeed
ToElements
Contactor
Contactor
Contactor
Contactor
1 2 3 4 5 6
1 2
ControlBox
123 456
Sauna Heater
Element 1 Element 2 Element 3
654
321
To High
Limit
To High
Limit
High Limit
Switch
Ground
Terminal
Fuse
Assemblies
Scandia electric heaters
are UL listed
E2-24 Control Wiring—24 Hour Timer-Three Phase
Commercial Installations – Most commercial facilities with 24 hour timersplace the control panel in a service
room near the sauna or the electrical room .When the room is not near the sauna the thermostat can be
placed near the room separate from the control box . Other configurations include placing the control box near
the sauna buthaving the the controls placed behind the cover (see fig 1).For conduit and wire size , type and
quantities see specific heater wire diagram charts .
Residential Installations – Place the controlbox on the side of the door that opens , approximately 12" from
the door opening and 52" from the bottom (see fig. 1) . For conduit and wire size , type and quantities see
specific heater wire diagram charts .
Control Box Location
52"
12"
52"
12"
Door opens
on the right
Door opens
ontheleft
*Heater must be installed by
a licensed electrician*
Place Controls on
latch side of the door.
15 ½”
13 ¼”
0
1545
30
Control Cover Plate Control Box
22 ga Brushed Aluminum I8 ga Galvanized
Paint -loc Steel
E/E24 Control Rough -In Dimensions
* NOTE: rough-in ½” extra on box dimensions
12 ¼”
14"
4"
Series Watts Volts Amps Phase Mas Room Size Circuit Breaker Supply Wires (incl ground) Wires from control to heater
150 15000 240 / 208 62.5 / 72.2 1 180 sq ft 70/90 (240V, 3qty #4) 208V, 3qty #2) 7 qty #10 ga - 2 qty #14
150-3 15000 240 / 208 36.2 / 41.7 3 180 sq ft 50 (240V, 4qty #8) 208V, 4qty #6) 7 qty #10 ga - 2 qty #14
180 18000 240 / 208 75 / 86.6 1 240 sq ft 90/100 3qty #2 7 qty #10 ga - 2 qty #14
180-3 18000 240 / 208 43.4 / 50 3 240 sq ft 60 4qty #6 7 qty #10 ga - 2 qty #14

E2-24 Control Wiring—24 Hour Timer-Single Phase
Commercial Installations – Most commercial facilities with 24 hour timersplace the control panel in a service
room near the sauna or the electrical room .When the room is not near the sauna the thermostat can be
placed near the room separate from the control box . Other configurations include placing the control box near
the sauna buthaving the the controls placed behind the cover (see fig 1).For conduit and wire size , type and
quantities see specific heater wire diagram charts .
Residential Installations – Place the controlbox on the side of the door that opens , approximately 12" from
the door opening and 52" from the bottom (see fig. 1) . For conduit and wire size , type and quantities see
specific heater wire diagram charts .
Control Box Location
52"
12"
52"
12"
Door opens
on the right
Door opens
ontheleft
*Heater must be installed by
a licensed electrician*
Place Controls on
latch side of the door.
15 ½”
13 ¼”
0
1545
30
Control Cover Plate Control Box
22 ga Brushed Aluminum I8 ga Galvanized
Paint -loc Steel
E/E24 Control Rough -In Dimensions
* NOTE: rough-in ½” extra on box dimensions
12 ¼”
14"
4"
Ground
Single Phase
Power Feed
To Elements
Contactor
C o ntact or
Contactor
Contactor
1 2 3 4 5 6
1 2
Control Box
123 4 56
S aun a H eater
Element 1 E lem ent 2
Element 3
65
4
32
1
To H igh
Limit
T o H igh
Lim it
High Limit
Switch
Ground
Te rmina l
Fuse
Assemblies
Scandia electric heaters
are U L listed
Series Watts Volts Amps Phase Mas Room Size Circuit Breaker Supply Wires (incl ground) Wires from control to heater
150 15000 240 / 208 62.5 / 72.2 1 180 sq ft 70/90 (240V, 3qty #4) 208V, 3qty #2) 7 qty #10 ga - 2 qty #14
150-3 15000 240 / 208 36.2 / 41.7 3 180 sq ft 50 (240V, 4qty #8) 208V, 4qty #6) 7 qty #10 ga - 2 qty #14
180 18000 240 / 208 75 / 86.6 1 240 sq ft 90/100 3qty #2 7 qty #10 ga - 2 qty #14
180-3 18000 240 / 208 43.4 / 50 3 240 sq ft 60 4qty #6 7 qty #10 ga - 2 qty #14

A Control Wiring—60 Minute Timer-Single Phase
Commercial Installations – Most commercial facilities with 24 hour timersplace the control panel in a service
room near the sauna or the electrical room .When the room is not near the sauna the thermostat can be
placed near the room separate from the control box . Other configurations include placing the control box near
the sauna buthaving the the controls placed behind the cover (see fig 1).For conduit and wire size , type and
quantities see specific heater wire diagram charts .
Residential Installations – Place the controlbox on the side of the door that opens , approximately 12" from
the door opening and 52" from the bottom (see fig. 1) . For conduit and wire size , type and quantities see
specific heater wire diagram charts .
Control Box Location
52"
12"
52"
12"
Door opens
on the right
Door opens
ontheleft
*Heater must be installed by
a licensed electrician*
Place Controls on
latch side of the door.
A/B Control Rough -In Dimensions
8 ¼”
12 ¼”
4"
14 ¼”
9 ¾”
0
1545
30
Control Cover Plate Control Box
22 ga Brushed Aluminum I8 ga Galvanized
Paint -loc Steel
* NOTE: rough-in ½” extra on box dimensions
FC controls (6000W) 208V single phase
Ground
Three Phase
Power Feed
Contactor
1 2
Control Box Sauna Heater
Ground
Terminal
Scandia electric heaters
are UL listed
Element 1 Element 2
4
2
13
1 2
1 2
To Hi-limit on
heater
1 2
Thermostat
Timer
High Limit
Switch
Heater Phase Volts Amps Phase Maxroomsize CircuitBreaker WiresfromControl/Heater
6kw single 208/240 28.9 1 40 3qty#8‐2qty#14

Line feeds/ground from
Control box to H eater
Heater
Control
Box
Line Feeds /Ground
From Breaker
Thermostat
Sensor Bulb
Warning
Signs
*Note: controls
to be located
outside of sauna
Standard Heater/Control Configuration
Line feeds/ground from
Control box to Heater
Heater
Controls
behind cover
(24 hour
timer)
Line Feeds /Ground
From Breaker
IMPORTANT NOTES:
- Heater must be installed by a licensed electrician .
- Heater must be installed inside the sauna room and mounted one foot from the floor .
- Controls must be installed outside of the sauna room .
- Thermostat capillary sensor bulb must be located inside the sauna room (horizontal position ) approx . 10 inches
from ceiling.
- All wiring must comply with Local and State ordinances : all wiring into the sauna room must be rated for at least
90 degrees Celsius (194 deg Farenhiet ).
- Standard sauna ceiling height is 7 feet.
- Consult all local codes before installation.
- Warning signs must be installed at eye level on door and above heater .
- Door must always swing outward.
- Air intake vent must be installed below heater and an air exhaust vent should be installed .
- Thermostat should be placed behind cover and out of control of guests /members. Setting should be no higher
than 180 degrees farenheit (85 Celcius)
Option #1
Controls near door
Controls
(24 hour
timer)
Line Feeds/Ground
From Breaker
Line feeds/ground from
Control box to Heater
Option #2
Controls in remote location
Commercial Heater Configuration
*Note: controls
to be located
outside of sauna
For additional information, technical
assistance or trouble shooting please
visit: www.scandiamfg.com
This manual suits for next models
23
Table of contents
Other scandia Heater manuals
Popular Heater manuals by other brands

Verine
Verine Marcello NBFP00RP Installation, user and servicing instructions

Frost Fighter
Frost Fighter IDH200QR OIL Installation, operation & maintenance instructions

Timberk
Timberk TFH T20MDR instruction manual

Lasko
Lasko 5812 Important instructions & operating manual

Toolland
Toolland TC78020 user manual

Adp
Adp SEP-100 installation instructions