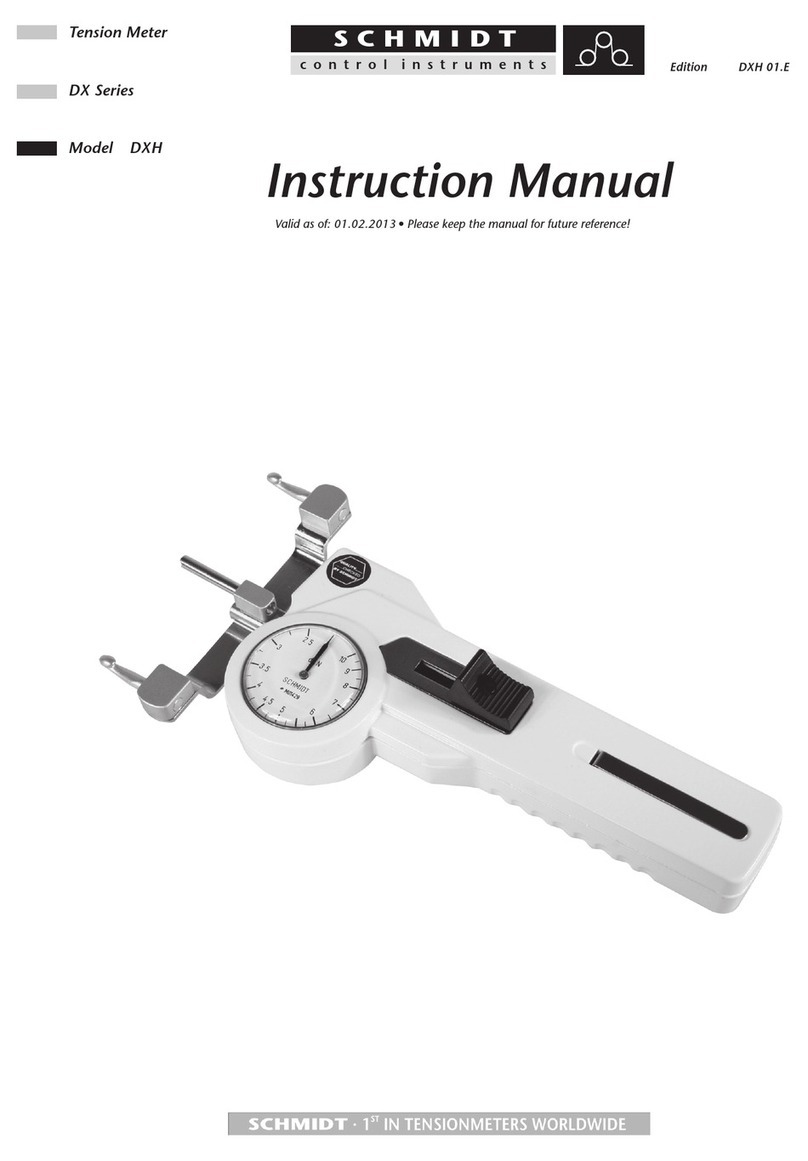
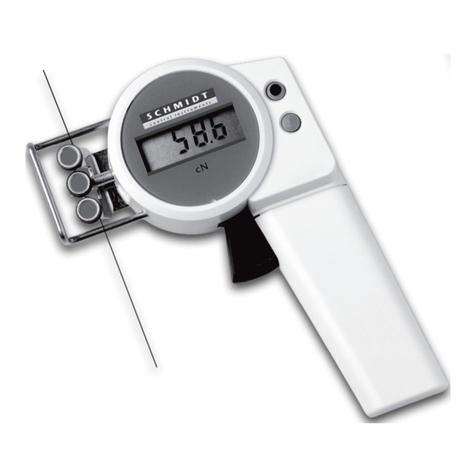
Schmidt FRTS Series User manual

1
Texture Analyzer
FRTS Series
Thank you for your purchase.
Proper operation of the machine is essential to its safe function. Read these instructions
thoroughly before using the machine. After you have finished reading the manual, keep it
always at hand for ready reference. If a questionable point is found, please contact the
dealer that you have purchased it from.
Instruction Manual
Hans Schmidt & Co GmbH
84464 Waldkraiburg Germany Fax: int. + 49 / (0)8638 / 4825 Internet: http://www.hans-schmidt.com

Instruction manual FRTS series FRTS201803E
2
Index
Texture Analysis ・・・・・・・・・・・・・・・・・・・・・・・・・・・・・・・・・・・・・・・・・・・・・・・・・・・・・・・・・・・・・・・・・・・・・・
P3
Texture Profile ・・・・・・・・・・・・・・・・・・・・・・・・・・・・・・・・・・・・・・・・・・・・・・・・・・・・・・・・・・・・・・・・・・・・・・・・
P4
1. Safety Notes ・・・・・・・・・・・・・・・・・・・・・・・・・・・・・・・・・・・・・・・・・・・・・・・・・・・・・・・・・・・・・・・・・・・・・・
P5
2. What is Inside・・・・・・・・・・・・・・・・・・・・・・・・・・・・・・・・・・・・・・・・・・・・・・・・・・・・・・・・・・・・・・・・・・・・・・
P8
3. Names and Functions・・・・・・・・・・・・・・・・・・・・・・・・・・・・・・・・・・・・・・・・・・・・・・・・・・・・・・・・・・・・・・・・
P10
4. Preparation・・・・・・・・・・・・・・・・・・・・・・・・・・・・・・・・・・・・・・・・・・・・・・・・・・・・・・・・・・・・・・・・・・・・・・・・
P12
Body/Controller・・・・・・・・・・・・・・・・・・・・・・・・・・・・・・・・・・・・・・・・・・・・・・・・・・・・・・・・・・・・・・・・・・
P12
Software ・・・・・・・・・・・・・・・・・・・・・・・・・・・・・・・・・・・・・・・・・・・・・・・・・・・・・・・・・・・・・・・・・・・・・・
P17
5. Switch ON FRTS ・・・・・・・・・・・・・・・・・・・・・・・・・・・・・・・・・・・・・・・・・・・・・・・・・・・・・・・・・・・・・・・・・・
P19
6. Main Menu ・・・・・・・・・・・・・・・・・・・・・・・・・・・・・・・・・・・・・・・・・・・・・・・・・・・・・・・・・・・・・・・・・・・・・・・
P20
7. How to Select a Mode ・・・・・・・・・・・・・・・・・・・・・・・・・・・・・・・・・・・・・・・・・・・・・・・・・・・・・・・・・・・・・・
P21
8. Food/Standard Mode・・・・・・・・・・・・・・・・・・・・・・・・・・・・・・・・・・・・・・・・・・・・・・・・・・・・・・・・・・・・・・・・
P23
Food Mode ・・・・・・・・・・・・・・・・・・・・・・・・・・・・・・・・・・・・・・・・・・・・・・・・・・・・・・・・・・・・・・・・・・・・・
P23
Measuring Example 1. Shearing test of boiled noodle・・・・・・・・・・・・・・・・・・・・・・・・・・・・・・・・・
P25
Measuring Example 2. Viscosity test of cooked rice・・・・・・・・・・・・・・・・・・・・・・・・・・・・・・・・・・
P26
Standard Mode ・・・・・・・・・・・・・・・・・・・・・・・・・・・・・・・・・・・・・・・・・・・・・・・・・・・・・・・・・・・・・・・・・・
P27
List of Selectable Conditions ・・・・・・・・・・・・・・・・・・・・・・・・・・・・・・・・・・・・・・・・・・・・・・・・・・・
P28
Food for person having difficulty in swallowing・・・・・・・・・・・・・・・・・・・・・・・・・・・・・・・・・・・
P29
Universal Design food ・・・・・・・・・・・・・・・・・・・・・・・・・・・・・・・・・・・・・・・・・・・・・・・・・・・・・・
P33
JIS K6530 Animal glues and gelatins・・・・・・・・・・・・・・・・・・・・・・・・・・・・・・・・・・・・・・・・・・・
P36
ISO 16305 Butter ・・・・・・・・・・・・・・・・・・・・・・・・・・・・・・・・・・・・・・・・・・・・・・・・・・・・・・・・・・
P37
ISO 9665 Animal gules ・・・・・・・・・・・・・・・・・・・・・・・・・・・・・・・・・・・・・・・・・・・・・・・・・・・・・
P38
Former JAS Special packaging for kamaboko and similar・・・・・・・・・・・・・・・・・・・・・・・・・・
P39
9. Manual Mode ・・・・・・・・・・・・・・・・・・・・・・・・・・・・・・・・・・・・・・・・・・・・・・・・・・・・・・・・・・・・・・・・・・・・・
P40
10. Programmable Mode・・・・・・・・・・・・・・・・・・・・・・・・・・・・・・・・・・・・・・・・・・・・・・・・・・・・・・・・・・・・・・・・・
P44
11. Common Screens ・・・・・・・・・・・・・・・・・・・・・・・・・・・・・・・・・・・・・・・・・・・・・・・・・・・・・・・・・・・・・・・・・・
P55
12. Favorite (Add to/Recall/Delete) ・・・・・・・・・・・・・・・・・・・・・・・・・・・・・・・・・・・・・・・・・・・・・・・・・・・・・・
P59
13. USB Drive Data ・・・・・・・・・・・・・・・・・・・・・・・・・・・・・・・・・・・・・・・・・・・・・・・・・・・・・・・・・・・・・・・・・・・・
P62
14. Force Distribution Graph ・・・・・・・・・・・・・・・・・・・・・・・・・・・・・・・・・・・・・・・・・・・・・・・・・・・・・・・・・・・・
P63
15. Save and Check Data in USB flash Drive ・・・・・・・・・・・・・・・・・・・・・・・・・・・・・・・・・・・・・・・・・・・・・・・
P66
16. Default Settings ・・・・・・・・・・・・・・・・・・・・・・・・・・・・・・・・・・・・・・・・・・・・・・・・・・・・・・・・・・・・・・・・・・・
P67
17. Specifications ・・・・・・・・・・・・・・・・・・・・・・・・・・・・・・・・・・・・・・・・・・・・・・・・・・・・・・・・・・・・・・・・・・・・・・
P70
18. Dimensions ・・・・・・・・・・・・・・・・・・・・・・・・・・・・・・・・・・・・・・・・・・・・・・・・・・・・・・・・・・・・・・・・・・・・・・・・
P71
19. Software Operating Environment ・・・・・・・・・・・・・・・・・・・・・・・・・・・・・・・・・・・・・・・・・・・・・・・・・・・・・・
P72
20. Calibration and Warranty ・・・・・・・・・・・・・・・・・・・・・・・・・・・・・・・・・・・・・・・・・・・・・・・・・・・・・・・・・・・・・
P72

Instruction manual FRTS series FRTS201803E
3
Texture Analysis
This texture analyzer can digitalize texture such as firmness, viscosity, and more, allowing for
data management. It offers a wide range of measuring methods to fit your measurement
needs. It shows you the instructions to set up, thus, you only have to follow it. You will
finish measurement before you knew it.
Bend break(OP)
Puncture
Shear
Viscosity
Compression
Break

Instruction manual FRTS series FRTS201803E
4
Texture Profile
Texture Profile Analysis (TPA) is a method to analyze texture by a combination of several
parameters. This texture analyzer can handle complicated analysis requiring TPA on
[Texture Profile Analysis] in “Programmable mode”or on a test complying with “Food for
person having difficulty in swallowing.”This analyzer adopts Szczesniak’s profile.
Characteristics determined by texture profile
Characteristic
Mark
Description
表現
Hardness
(N/m2)
H
Maximum force to push a sample
Soft, Hard
Viscosity
(N/m2)
C
Maximum force of stickiness
Dry, Sticky
Cohesiveness
A2/A1
Parameter for pieces of food in a mouth to
join together into a mass ready for swallowing
Cohesiveness
Adhesiveness
(J/m3)
A3
Tendency for a material(food) to peel from a
throat or other parts in a mouth
Sticky
Springiness
T2/T1
Deformation amount or ratio of 1st to 2nd.
"T" indicates deformation amount of a
material(food)
Elastic, Not elastic
Gumminess
(N/m2)
H×A2/A1
Energy required to break down a semi-solid
food to a state ready for swallowing
Gummy-like
Fracturability
(N/m2)※
B
The drop "B" is determined as the
Fracturability.
Crunchness
Chewiness
(N/m2)※
H×A2/A1×T2/T1
Tendency for solid food to be crushed with
teeth
Chewy
※You need an PC and the accessory software to analyze the characteristics above except Hardness and
Viscosity.
Force
Time
H
A3
T1
A2
C
T2
A1
B

Instruction manual FRTS series FRTS201803E
5
1.Safety Notes
Keep it in mind that the danger and its extent by mishandling below.
Danger
This indicates the condition that may lead to malfunction or
damage and even that can cause injury or death if this
analyzer is used in a manner not specified by IMADA.
Warning
This indicates the condition that may lead to malfunction or
damage and even that possibly can cause injury or death if
the analyzer is used in a manor not specified by IMADA.
Caution
This indicates the condition that may lead to equipment
malfunction or damage if the analyzer is used in a manor not
specified by IMADA..
Wear eye, face, and body protection, and cover the analyzer especially when measuring
fragile samples that have the potential to scatter liquid, fragments, and chemicals under
force.
The analyzer has a moving table. Exercise great caution while measuring or whenever
the table is moving. Never place your fingers or a part of your body inside the column.
Take sufficient safety measurement in use.
Do NOT use it under the explosive environment since the analyzer has not been designed
for explosion-proof construction.
☞
Danger

Instruction manual FRTS series FRTS201803E
6
1.Safety Notes
This texture analyzer has been designed for indoor use only. Ensure that its connector
part is kept away from water.
Do not use the analyzer for any purposes except texture analysis (force mesurement).
Ensure that the analyzer’s capacity is NOT exceeded. Applying a force greater than its
capacity can damage the internal sensor.
The analyzer is equipped with the overload preventing function to protect sensor from
overload, however, we do NOT guarantee the complete prevention.
Do NOT disassemble or modify the analyzer and accessories.
The analyzer is precision equipment. Handle with care.
Do NOT disassemble or modify the analyzer and accessories.
Use IMADA’s services of inspection and repair when the analyzer breaks down.
Storage Notes
Keep away the analyzer from oil, dust, high temperature, and high humidity.
Do NOT apply load or impact to the attachments even its power is OFF..
Use a soft and clean cloth to wipe the analyzer without using organic solvent such as
thinner.
Accuracy Notes
This analyzer should get inspected or calibrated periodically to maintain the accuracy.
We recommend that it gets calibrated once a year. Contact the dealer that you have
purchased it from or IMADA to calibrate it.
Use the analyzer within the specified range of temperature to achieve greater accuracy.
Do NOT disassemble or modify the analyzer and accessories.
Vibration Notes
Put the analyzer on a stabilized place to reduce the influence of the vibration since the
vibration influences to the measurement and the operation using Start Trigger function. .
Warning
Caution

Instruction manual FRTS series FRTS201803E
7
1.Safety Notes
Overload Notes
Note this analyzer’s capacity before use and ensure that the capacity is not exceeded.
Otherwise, the internal load cell would be damaged. An overload can occur whether it is
powered ON or OFF.
Do NOT apply torsion/torque force to the sensor, which lead to breakdown.
~How to Release~
Switch OFF the analyzer, and loosen the probe knob to reduce load to the sensor.
Switch ON the analyzer again.
Contact us when you still see the screen above even after you switch ON it again since it
is highly likely to be broken.
Emergency Button Notes
Press the emergency button to stop an operation.
~How to Release~
Switch OFF the power first, and turn the button to left and pull it up.
Switch ON to use it again.

Instruction manual FRTS series FRTS201803E
8
2.What is Inside
Main parts
Accessories(Attachments)
○Probe shaft
50mm : FR-JS-50
100mm : FR-JS-100
60°
○Body
○Controller
○Disk probe
FR-HA-20J (5N/50N)
FR-HA-20S (100N)
○Sphere probe
FR-SR-20S
SR20
20
30
○Tension Knob
FR-HN
○Conical probe
FR-ES-60-20J (5N/50N)
FR-ES-60-20J (100N)
○Wedge probe
FR-KS-2030-60J (5N/50N)
FR-KS-2030-60J (100N)
φ20
50 / 100
φ20
60°
60°

Instruction manual FRTS series FRTS201803E
9
2.What is Inside
Accessories for the main part
○Tray ○Table ○Probe knob ○Table knob
Accessories for the controller
○Hanging pin ○Plate
○M3 Knurled screws (2pcs) ○M4 Wing screws (2pcs) ○Size AA batteries (2pcs)
Others
○Power cable ○USB cable ○USB flash drive ○Spare hues
○Software CD-ROM Force Recorder Professional (FRTS Ver.)
○Warranty card ○Inspection certificate ○Instruction manual (This paper)

Instruction manual FRTS series FRTS201803E
10
3.Names and Functions
Body
FRTS body
This is the main body. It has connectors and an on/off switch on its back.
Place it on a flat place like a table.
Emergency button
You can press the button to stop its operation in emergency.
To avoid danger, always be ready to press it.
Sensor box
This part has a sensor built-in.
Attachment
(Probe and
Probe shaft)
They are necessary components to perform test, sensing force.
The shaft has a screw-on top, therefore, you can replace probes as required.
Probe knob
Loosening this knob, you can move the probe and the shaft up and down.
Table
You can put your test sample on this table.
You can remove the table and wash it. We offer a few kinds of optional tables.
Table knob
You can attach the table using this knob.
Tray
The tray is made of stainless. When your test sample falls or overflows from
the table, the tray receives it.
Holes to attach the
controller
Use the holes and an accessory plate to mount a controller on the body.
Probe knob
Attachment
(Probe and Probe shaft)
Emergency button
FRTS body
Table
Table knob
Holes to attach the
controller
Sensor box
Table

Instruction manual FRTS series FRTS201803E
11
3.Names and Functions
Controller
Connector of the controller
You can combine the controller and the body using this connector.
FRTS body has its connector on its back.
Touch screen
Control/Display part
The controller has a touch screen, so simply follow the
instructions on the screen by touching it for setup.
START/STOP button
Press this button to start a test.
Press it to stop the operation while testing.
It lights a green lamp when it is ready for testing, and it blinks while
testing.
Table Down/Up button
(Blue arrow button)
You can manually move the table down/up using these buttons.
They light in blue when they are ready.
The table moves in the arrow’s direction while you press it.
Connector of the
controller
START/STOP button
Table
Down/Up button
(Blue arrow button)
Touch screen
Control/Display part

Instruction manual FRTS series FRTS201803E
12
4.Preparation (Body/Controller)
4-1. Place the body.
Place the body on a flat table.
4-2. Insert the AA batteries into the controller.
Open a cover on its back, and insert the supplied AA batteries.
4-3. Connect the controller to the body.
Plug the connector of the controller in
the back of the body.
4-4. Connect the power cable.
Plug the power cable in the back of body.
Plug the opposite side of the cable in an outlet.
Caution
Pay attention to the direction, and insert it appropriately.
Danger
・You must use only the power cable supplied with this FRTS.
If you do not use the supplied one, FRTS could be broken or ignite.
・We recommend that you plug the power cable directly in an outlet without
using power strips since other electric device may influence FRTS.
・The power cable has a ground (an earth) wire, so connect it to the outlet to
prevent breakdown or electric shock due to leakage. Do NOT connect it
to any water taps, gas pipes, telephones, and lightning rods, otherwise, it
causes overcurrent or fire.
Caution
Pay attention to the direction, and insert them appropriately
following the instruction.

Instruction manual FRTS series FRTS201803E
13
4.Preparation (Body/Controller)
4-5. Connect the USB flash drive
Insert the accessory USB flash into the right side of the controller, paying attention to
its direction.
※You can perform measurement without the USB flash drive,
however, in this case, you cannot save the
measured result.
4-6. Mount the table.
Mount the table on the arm using table knob.
4-7. Place the tray.
Place the tray on the bottom of the body.

Instruction manual FRTS series FRTS201803E
14
4.Preparation (Body/Controller)
4-8. Mount the probe knob.
Mount the probe knob on the sensor box, and
tighten a screw temporarily.
4-9. Mount an attachment.
Combine a desired attachment with the probe shaft.
※Change attachments as required.
Insert the probe shaft slowly from the underside of
the sensor box.
Now turn the probe knob fully to fix the probe shaft.
Do not tighten it too much, otherwise,
the sensor would be broken.
Cautions
・Probe knob is directly linked with the sensor, thus, tighten it
gently to prevent an overload (sensor breakdown).
Caution
To prevent an overload (sensor breakdown)…
・Do NOT pull/push the attachment whether it is
powered ON or OFF.
・Do not insert the probe shaft forcefully.
Tighten it fully.

Instruction manual FRTS series FRTS201803E
15
4.Preparation (Body/Controller)
4-10. How to use the controller
How to use 1
Mount it on the body.
How to use 2 How to use 3
Place it on the table. Hold it by hand.
How to mount it on the body
Mount the plate using two pieces of the M3
knurl screws.
Adjusting the angle, mount the controller using
two pieces of the wing screws.

Instruction manual FRTS series FRTS201803E
16
4.Preparation (Body/Controller)
4-11. How to store the controller
You can hang the controller on the right side of the body when you do not use it.
Attach the pin on the right side of the body, and hang the controller.
Hanging pin

Instruction manual FRTS series FRTS201803E
17
4.Preparation (Software)
4-12. STEP1. Installing FRTS series Driver
You need to install FRTS series device driver prior to software (Force Recorder) installation.
Install the driver
Firstly, install the FRTS device driver to computer.
Turn on the FRTS and connect it with computer using the attached USB cable.
The driver can be installed from 'FRTS_Driver_Installer.exe' in [Driver] folder found in software CD-ROM.
Has the driver been properly installed…?
Check the driver Install following the instruction below.
Turn on FRTS series, and connect it to the computer using USB cable. Start [Device Manager] and unfold [Ports (COM&LPT)]
group. [IMADA FRTS Series] should be found if the driver has been successfully installed.

Instruction manual FRTS series FRTS201803E
18
4.Preparation (Software)
4-13. Installing Force Recorder
Once the driver has been installed successfully,
install Force Recorder Professional (FRTS Ver.).
Open ‘English’ in ‘Software’ folder on the
CD-ROM and start Setup.exe.
①Click [Next] to start setup wizard.
②Please read through the software license agreement. If
the terms are agreed, click [Next] to continue.
③Input product key, which is found on the CD-ROM case.
④Click on [Install] to start installing.
⑤Setup is completed. Click [Finish] to exit.
Installing Microsoft .Net Framework
Force Recorder operates on Microsoft .NET Framework 4.6.
If .NET Framework 4.6 is not installed, Open the folder
[DotNetFramework] - [English] in software CD-ROM and
install .NET Framework 4.6.
Starting Force Recorder
Connect FRTS Series to computer using the supplied USB
cable. Turn on FRTS series.
Go to Windows [Start] - [All Programs] - [IMADA] - [Force
Recorder Professional FRTS Ver.] to start Force Recorder.
Further details on operation are available from [HELP] in
[HELP] menu on the main window of Force Recorder.

Texture Analyzer FRTS Manual FRTS201702E
19
5.Switch on FRTS
Connect the controller to the body, and press the ON/OFF switch on the back to turn on
the power.
Following the instructions on touch screen, Press to move the table to the
bottom.
After the table has reached the bottom, it shows you Main menu below.
Caution
・Soon after pressing the button, the table starts to
move to the bottom, so be careful not to catch your
finger or anything in.

Texture Analyzer FRTS Manual FRTS201702E
20
6.Main Menu
Display
Contents
Reference
①Food/Standard
mode
≪Select from Food List (Food Mode)≫
A wide range of food are listed. You only have to
select the desired food (or the most similar one), and
follow the instructions appeared on the screen.
≪Select from Standards (Standard Mode)≫
Some representative standards are listed. You only
have to select the desired standard, and follow the
instructions appeared on the screen.
Page 23
②Manual Mode
You can manually move the table down/up while
pressing the blue arrow button.
Page 40
③Programmable Mode
You can set measuring conditions such as
displacement, test speed, test cycles by yourself.
You can select once or twice in test cycles.
You can perform Texture Profile Analysis (TPA) on
this mode.
Page 44
④Favorite
You can add maximum 6 testing conditions to
“Favorite” to recall them quickly.
Page 59
⑤USB Drive Data
You can check the data saved in the USB flash drive.
Page 62
⑥Default Settings
It is common setting menu.
You can switch ON/OFF in some functions such as
auto save (into the USB flash drive), test completion
buzzer, etc.
Page 67
②
⑤
⑥
③
④
①
Table of contents
Other Schmidt Measuring Instrument manuals

Schmidt
Schmidt FS Series User manual

Schmidt
Schmidt ZE Series User manual

Schmidt
Schmidt DW-U User manual

Schmidt
Schmidt Q-10 User manual

Schmidt
Schmidt DHT-2 User manual

Schmidt
Schmidt DHT-3 User manual

Schmidt
Schmidt ZED User manual

Schmidt
Schmidt KXE-50 User manual

Schmidt
Schmidt SS 20.515 User manual

Schmidt
Schmidt SC Series User manual

Schmidt
Schmidt HTG Series User manual

Schmidt
Schmidt D-2005 Series User manual

Schmidt
Schmidt ETB User manual

Schmidt
Schmidt ET Series User manual

Schmidt
Schmidt FG Series User manual

Schmidt
Schmidt DX Series User manual

Schmidt
Schmidt FS Series User manual

Schmidt
Schmidt PT-100 User manual

Schmidt
Schmidt Z Series User manual

Schmidt
Schmidt HP Series User manual