Using
a
Phillipsscrewdriver,attach
the
mountingbracket
to
the
right
side
ofthe
handlebar
(Fig.
5).If
necessary,
to
achieve
a
snug
fit,
place
a
rubbershimbetween
the
bracket
andthe
nandlebar
(Fig,
6).To
adjust
the
position
ofthe
computer:
Use
a
smallPhillipsscrewdriver.Loosen
the
screws.Adjust,
and
then
retighten
the
screws
to
secure
the
bracket.Toattach
the
computer
tothe
mountingbracket:Slide
the
unitonto
the
Bracket
until
it
snapsfirmlyintoposition(Fig.7).Toremove
the
computer
from
the
mountingbracket:Wrapyourforefinger
around
the
front
ofthe
mountingbracket.Press
the
release
jutton.
Push
the
computerforward
with
your
thumb.
Fig.
5
Mounting
BracketSensorwiringWheelSizeInput
Fig.
7
Route
the
sensorwire
upthe
front
fork,
using
cable
ties
to
secure
itatthe
bottom
and
top.Wiremust
not
hang
loosely,
but
must
have
enoughslack
to
allow
the
frontwheel
and
handlebars
to
turnwithoutputting
too
muchtension
onthe
sensorwire.
Too
muchtensioncouldloosen
the
wire
from
the
computer
and
interruptinput
tothe
computer.
However,
be
certain
that
there
isnottoo
much
slack
and
that
the
wiredoes
not
interferewith
:ree
movement
or
spinning
ofthe
front
wheel.
Route
the
remainingwire
around
the
front
brake
cable
andthe
handlebar.Excesswireshould
be
carefullylooped
and
secured
tothe
stemwithcableties.
AutoStart
/
Stop
To
preserve
batteries,
the
cyclecomputerwillautomatically
switch
offifthe
unit
is
left
unused
for
over
5
minutes.Display
will
reappearwith
a
press
on
eitherbutton
or
inputfrom
the
sensor.
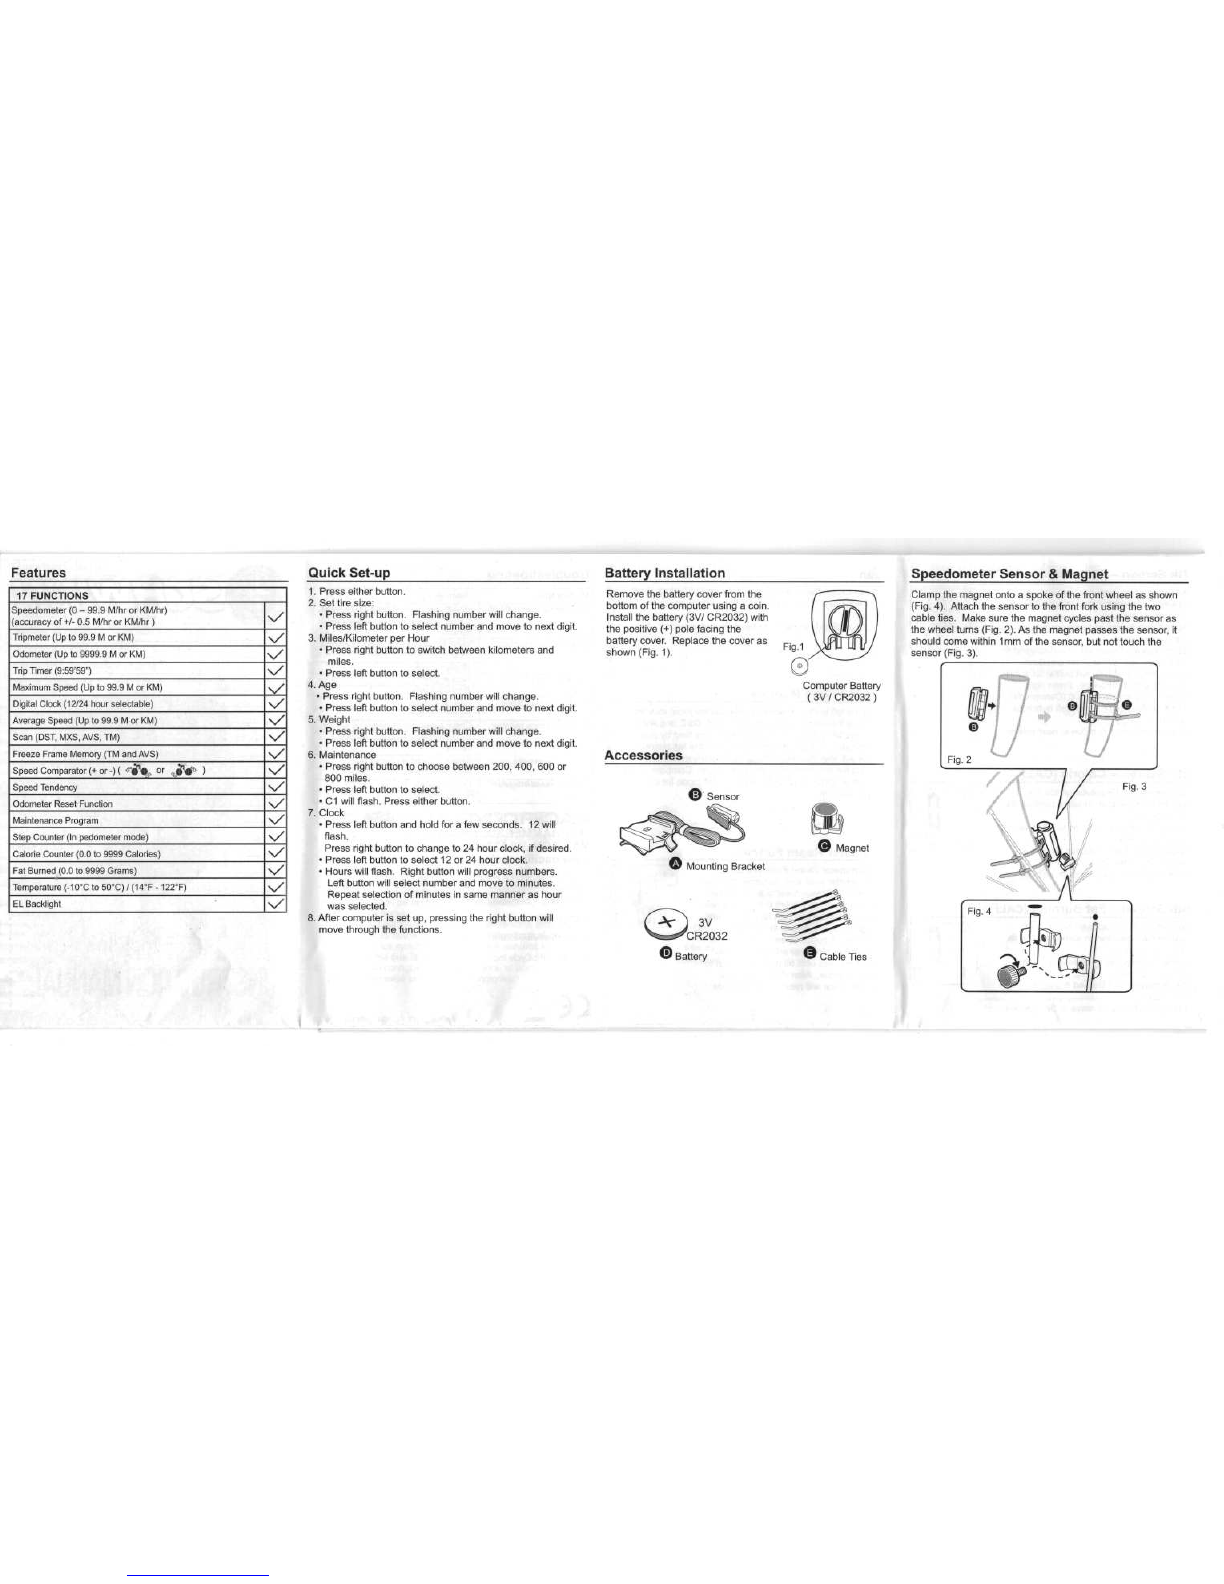
To
setthe
wheelsize
or
after
replacement
ofthe
battery,
press
and
hold
bothbuttons
fora few
seconds.
The
unitwillswitch
to
WheelSizeInputMode.Multiply
the
wheeldiameter
(d)in
millimeters
by
3.1416
to
determine
the
wheel
factor
[C].
To
input
wheel
factorinto
the
computer,press
the
rightbutton
to
progress
the
digit
and
press
the
leftbutton
to
select
the
digit
(hold
the
rightbutton
for
fast
advance).
Press
the
left
buttonagain
for
mile/kilometerselection.(Note:
removing
the
battery
will
erase
wheelsize.)
For
yourconvenience,
youmay
refer
tothe
wheel
chartbelow
for
yourcorrectwheel
factor.
Distancetraveled
in
millimeters
with
one
wheelrevolution
IV
Me/Kilometer
Selection
Press
the
rightbutton
to
choosebetweenMile
(M)and
Kilometer(KM).Press
the
leftbutton
to
make
the
selection.
After
thisselection,
the
computer
will
switch
to
speedometer
mode
andis
ready
for
use.