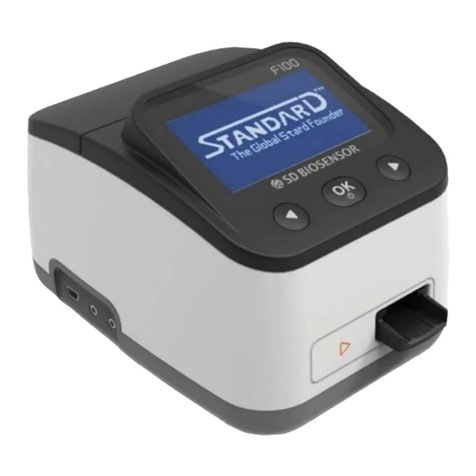
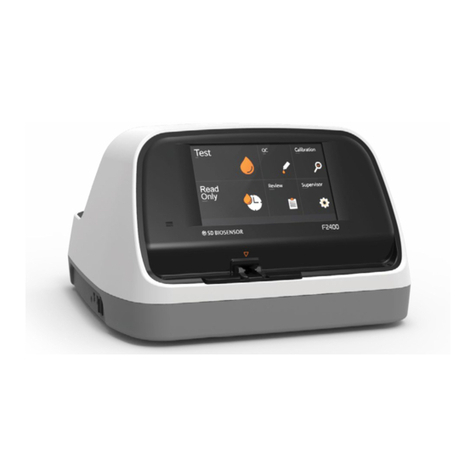
SD Biosensor MultiCare 03MA10 User manual

3
ALL-ROUND MAU Test Device
This User Instruction Guide contains all the information needed to use the analyzer
and keep it ready to operate. Please read this User Instruction Guide carefully
before using the analyzer. Familiarize yourself with the required preparations and
the measurement procedure before performing the rst measurement. Also read
the package insert of the test kits to be used for the planned test.
Thank you for your purchase of MultiCare analyzer!

4
The packaging materials, labels and instruction for use for MultiCare
Analyzer may contain the following symbols or abbreviations which are
listed below with their meaning:
Symbols
Crossed out wheeled bin: To discard it separately from other
household waste
Caution, consult accompanying documents
Consult instructions for use
In vitro diagnostic medical device
This system is intended to use outside the body (in vitro diagnostic
use).
Manufacturer
Reference number
Date of manufacture:
To indicate the date of manufacture for this analyzer
Serial number for this analyzer.
Batch code:
To indicate the lot number for this system
To indicate the temperature limitations in which the transport
package has to be kept and handled
Use by / Expiry date
Contains Sufcient for <n> Tests
This product fullls the requirements of Directive 98/79/EC on in vitro
diagnostic medical devices.

5
CONTENTS
CHAPTER 1. UNDERSTANDING YOUR NEW ANALYZER....................6
1. Intended Use...................................................................................................6
2. Test Principle....................................................................................................6
3. Before You Start Testing...................................................................................7
4. MultiCare Analyzer...................................................................................7
5. Power Supply.................................................................................................11
6. Components..................................................................................................11
CHAPTER 2. TESTING THE MultiCare ANALYZER...............12
1. Operating the Analyzer...................................................................................12
2. Preparing a Measurement.............................................................................20
3. Performing a Test.........................................................................................21
CHAPTER 3. USING THE ANALYZER MEMORY.................................23
1. Memory Map..................................................................................................23
2. Displaying Stored Measured Values.................................................................24
3. Delete Data Stored in Memory.........................................................................24
CHAPTER 4. PRINTING AND DATA TRANSFER.................................25
1. Printing...........................................................................................................25
2. Data Transfer................................................................................................26
3. Data transfer via Bluetooth............................................................................26
CHAPTER 5. CONTROL TEST...........................................................28
CHAPTER 6. CHECK STRIP TEST.......................................................30
CHAPTER 7. MAINTENANCE AND TROUBLESHOOTING.................32
1. Cleaning and Disinfection................................................................................32
2. Maintenance, Testing and Transportation.........................................................33
CHAPTER 8. SCREEN MESSAGES AND TROUBLESHOOTING........34
1. Warning Messages..........................................................................................34
2. Error Messages...............................................................................................34
CHAPTER 9. WARNINGS, PRECAUTIONS AND LIMITATIONS..........37
CHAPTER 10. PRODUCT TECHNICAL INFORMATION......................38
1. Specications..................................................................................................38
2. Electromagnetic Compatibility..........................................................................38
RETURN.................................................................................................38
DISPOSAL.............................................................................................38

6
CHAPTER 1.
Understanding Your New Analyzer
1. Intended Use
The MultiCare System is a reectometry immunoassay instrument for the
quantitative measurement in human blood, urine and other specimens. This
system is for in vitro diagnostic use and professional use in hospital and
clinic.
2. Test Principle
The MultiCare System is based on a reectometry and immunoassay
technology. MultiCare Analyzer is a reectometry scanning instrument to be
used in conjunction with the various MultiCare Test Kits which are based
on antigen-antibody reaction. MultiCare Analyzer uses the optic sensor
to measure the reected light from the membrane of the test panel as the
quantity source.
The specimen from human should be processed for the preparation using the
components of the MultiCare Test Kit. When applying the sample mixture to
the test panel, the complex will be formed on the membrane as the result of
the antigen-antibody reaction. The intensity of the reected light is scanned
and converted into an electric signal which is proportional to the intensity
of reected light produced on the membrane. The MultiCare Analyzer can
calculate the concentration of the analyte in the clinical specimen based
on a pre-programmed calibration and display the test result on the screen.
Membrane
Capture antibody
Antigen
Blue Latex Detector antibody

7
3. Before You Start Testing
CAUTION
Carefully read and follow the instructions in all labeling material related
with the MultiCare System. It is very important to follow the instructions
in order to prevent an inaccurate result or improper treatment.
Samples
The sample type of the MultiCare System is different according to the
specic parameter you want to measure. Please refer to each test kit insert.
Operating Conditions
To ensure proper function of the MultiCare System, observe the following
guidelines:
• MultiCare System is only for in-vitro diagnositc use.
• Place the analyzer on a level surface.
• Strong electromagnetic elds may impair the function of the analyzer.
Do not use the analyzer close to sources of strong electromagnetic
radiation.
• The analyzer’s air vents must be free for air to ow. (Do not cover the
air vents.)
• If the analyzer causes a sudden malfunction, unplug the AC adapter
from the outlet.
4. MultiCare Analyzer
Model Name MultiCare Analyzer
Check Strip SDB MultiCare Check Strip
Power
Battery: Four Batteries (1.5 V, AA type)
AC Adapter: Input - AC100-240V, 50/60Hz
(Voltage tolerance ±10%)
Output - 5V/2A
Power Consumption Max 2W
Over Voltage
Category II
Pollution Degree II
Reference Number
03MA10
03MA20 Bluetooth function

8
Overview of MultiCare Analyzer
A
B
C
D
E
F
H
I
G
JKL M

9
A. Left Button Use it when reviewing the memory or searching the
setting value in the setting mode
B. SET/PRT Button Press to set the analyzer or print the test result
C. Right Button Use it when reviewing the memory or searching the
setting value in the setting mode
D. Enter Button Press to go to the next step in the setting mode
E. Start/Eject Button Press to start a measurement or quit a measurement
and eject the test panel
F. Test Panel Slot Part for inserting a test panel into an analyzer
G. LCD Display Shows test results, messages, and test results
stored in memory
H. Battery
compartment lid
Provides access to the battery compartment
(4 AA 1.5V alkaline batteries)
I. Code-chip slot Location for inserting a code chip
J.
Barcode reader port
Connect to external barcode reader
(If you have a SD BIOSENSOR Barcode Reader)
K. USB cable Port
Connect a PC with a USB cable for the
communication
(Download test results to a PC)
L. Printer port Print test results to external thermal printer
(If you have a STANDARDTM Thermal Printer)
M. AC Jack port Connect power supply adapter 5V/2A.

10
Display of MultiCare Analyzer
The symbols in the display have the following meanings:
Indicate the parameter
HbA1c : HbA1c
CRP : CRP
U-ALB : U-Albumin
Lipid : Lipid Prole
Unit of the glycated
hemoglobin
Indicate the code Indicate the setting mode
Processing Indicates the beep sound
Communication with a PC Printing
Indicate pressing the start
button
Indicate the operating
temperature is out of the
range.
Unit of a test result for all
parameter Indicate the time format
Capacity of batteries Indicate the connection
with adapter
Display;
ID number
Date
Temperature
Estimated average glucose
Control Test
Display;
Test result
Hi/Lo message
Setting value
Code number
Index number
Counting the testing time
Display;
Time
Estimated average
glucose value
Indicate the sample type
WB: whole blood
S/P: Serum/Plasma
Indicate the clinical
specimen

11
5. Power Supply
A 5V/2A AC power adapter or 4 AA alkaline batteries can be used. The
analyzer saves battery power by automatically turning off after 1 minute
without inserting a test panel or from non-use.
When the batteries are dead or the connection between the analyzer and
adapter is failed, the analyzer can still retain the test results stored in the
memory and the setting values except date and time. They will be maintained
until your analyzer turns back on.
When the analyzer turns itself off, all test results obtained so far remain in the
memory. With a set of fresh batteries, you will normally be able to perform at
least 200 measurements. When the battery warning is displayed for the rst
time, approximately 10 measurements can still be performed. In this case,
replace the batteries as soon as possible.
Please respect the environment and dispose of used batteries according to
your local regulations and laws.
CAUTION
If the MultiCare Analyzer is not connected with the AC adapter or does
not have the batteries, the set time of the analyzer will stop. After sup-
plying the power with the AC adapter or batteries, a user should set the
actual time according to the setting steps.
6. Components
Check Strip
This is for checking the malfunction of the optic sensor in the analyzer.

12
CHAPTER 2.
Testing the MultiCare Analyzer
1. Operating the Analyzer
Before using the analyzer for the rst time, perform the following steps:
STEP 1. Insert four batteries or connect the AC adapter jack.
STEP 1-1. Insert four batteries
1) Ensure the analyzer is switched off and turn it over.
2) Open the battery compartment lid by slightly pressing the tab towards
the center of the analyzer.
3) Lift the lid upwards to remove it from the analyzer.
4) Insert four batteries into the compartment. Please note the orientation
of the “+” (battery head) and “–” terminals (at end). Use only alkaline
batteries (1.5 V, AA).
NOTE
• If you think the display screen does not appear for long
enough, you can hold down the Enter button (the next time
you switch on the analyzer). The display screen is shown
during the time while the button is pressed.
• After inserting or replacing batteries, conrm that the time
and date are set correctly. If they are not, reset the analyzer
before testing.
NOTE
Always replace all four batteries at the same time, because
the different capacities of batteries cause the analyzer to
malfunction. Do not use rechargeable batteries.
5) Close the battery compartment lid.
6) Turn the analyzer on to test the functionality of the new batteries.
7) Check that the display is functioning correctly to prevent misinterpretations
due to defective display elements.
STEP 1-2. Connect AC Adapter Jack
1) AC adapter is not provided with MultiCare. Power supply adapter
5V/2A must be used.
2) Connect the AC adapter jack to the AC jack port in the back of the analyzer.

13
STEP 2. Set the Analyzer.
The following table provides an overview of the available settings.
Stage Setting Option
1 Beep On, Off
2 Year YYYY
3 Date Format m-d, d-m
4 Date (Month & Day) mm-dd, dd-mm
5 Time Format 12h, 24h
6 Time Hour &Minute
7 Auto Printing On, Off
8Printing Page P-1, P-2
9 HbA1c Unit NGSP, IFCC, mono-S, JDS
10 eAG Unit mg/dL, mmol/L
11 Lipid Unit mg/dL, mmol/L
12 Bluetooth with PC * On, Off
13 Bluetooth with Printer * On, Off
14 Re-pairing with Printer * On, Off
*Only for 03MA20 (Bluetooth supported model)
Stage 0. Entering Set Mode
1) Press the SET/PRT button (on the top side of the analyzer) for three
seconds to enter the setting mode after turning an analyzer on or at the
standby state. If you want to leave the setting mode (this is only possible
if a date and time setting is made), press the SET/PRT button shortly.
2) If the displayed setting is done, you can continue directly to the next
step by pressing the Enter button.
3) Press the left () or right () button to change the currently ashing
setting. You can press the left () or right () button as much as you
need(or keep pressing it) to reach the desired setting(value).
4) Press the Enter button again to conrm (store) the current setting and
go to the next step. You can only move forward through the setting
mode. Moving backwards is not possible. Corrections can only
be made by repeating the settings. The setting procedure can be
terminated at any time by pressing the SET/PRT button. The settings
made up to that point will be stored.

14
Stage 1. Setting - Beep
In the rst stage, you set the Beep function.
1) If you enter the setting mode, the rst step of the setting mode, Beep
will appear.
2) Set the beep on or off by pressing either the left () or right () button
and then select the preferred feature by pressing the Enter button. If you
select the beep on feature, a ‘beep’ sound will be made at the same
time; otherwise, if you select the beep off feature, no sound will be made.
Stage 2. Setting – Year
In the second stage, you set the Year in the Date & Time setting.
After setting Beep, the display for setting the Year will appear. Set the correct
year by pressing the left () or right () button and then select the correct
year by pressing the Enter button.
Stage 3. Setting – Date Format
In the third stage, you set the Date Format.
The analyzer can display the month and day in either Month-Day (m-d)
format or Day-Month (d-m) format. Set the preferred format by pressing
either the left () or right () button and select by pressing the Enter button.

15
Stage 4. Setting – Date
In the fourth stage, you set the Date in Date or Month.
After setting the Date Format, set the correct month or day by pressing
either the left () or right () button and select by pressing the Enter button.
Stage 5. Setting – Time Format
In the fth stage, you set the Time Format in the Date & Time setting.
The analyzer can display the time in either 12h format or 24h format. Set
the preferred format on the display by pressing either the left () or right ()
button and select by pressing the Enter button.
Stage 6. Setting – Time
In the sixth stage, you set the Time, the current hour and minutes.
Set the hour and minute by pressing either the left () or right () button and
select by pressing the Enter button.
1) 12h Format
Sub-step 1) Set AM or PM
Sub-step 2) Set hour (1 to 12)
Sub-step 3) Set the minute (1 to 59)

16
2) 24h Format
Sub-step 1) Set the hour (1 to 24)
Sub-step 2) Set the minute (1 to 59).
Stage 7. Setting – Auto Printing
In the seventh stage, you set the Auto Printing function. Following the Time
setting, the display for the Auto Printing function will appear. Set the Auto
Printing function, ‘On’ or ‘Off’ by pressing either the left () or right ()
button and then select the preferred feature by pressing the Enter button.
NOTE
The Auto Printing function is for printing the result right after
testing.
Stage 8. Setting – Printed Sheets
In the eighth stage, you set the printed sheets. After the Auto Printing
function setting, the display for setting the printed sheets will appear. Set the
preferred feature by pressing the left () or right () button. And then, select
the function by pressing the Enter button.

17
NOTE
If you select the ‘P-1’, you can get only one sheet including
the test result. If you select the ‘P-2’, you can get two sheets
including the test result.
Stage 9. Setting – HbA1c Unit
In the ninth stage, you set the unit of the test results for the HbA1c.
Set the preferred unit by pressing either the left () or right () button and
select by pressing the Enter button.
Stage 10 Setting – eAG Unit
In the tenth stage, you set the unit of the estimated average of the blood
glucose. Set the preferred unit by pressing either the left () or right () button
and select by pressing the Enter button.
Stage 11 Setting – Lipid unit
In the eleventh stage, you set the unit of test results for the Lipid.
Set the preferred unit by pressing either the left () or right () button and
select by pressing the Enter button.

18
NOTE
If you have the MultiCare Analyzer (03MA10, standard model)
the analyzer will display a test panel standby state automatically.
The below setting stages are for the MultiCare Analyzer (03MA20,
bluetooth supported model) for the Bluetooth function.
Stage 12. Setting – Bluetooth with PC
In the twelfth stage, you can set the Bluetooth communication with your
PC or smartphone. If the analyzer is paired with the PC or smartphone, the
test results are transferred automatically via Bluetooth. After the setting of
lipid unit, the Bluetooth setting will appear on the screen. Select it on or off
by pressing the left () or right () button, and then save it by pressing the
Enter button.
Stage 13. Setting – Bluetooth with Printer
In the thirteenth stage, you can set the Bluetooth communication with a
printer. After setting the Bluetooth with a PC, the Bluetooth and printer icons
will appear on the screen. Select ON or OFF by pressing the left () or right
() button, and then save it by pressing the Enter button.
NOTE
If you set both auto-printing and Bluetooth with printer to
ON, you can get the test results printed automatically via the
Bluetooth communication.

19
Stage 14. Setting – Repairing the Printer
In the fourteenth stage, you can set the analyzer to be automatically paired
with the previous paired printer, whenever the printer is near the analyzer.
After the Bluetooth with printer setting, the repairing setting will appear on
the screen.Select ON or OFF by pressing the left () or right () button, and
then save it by pressing the Enter button. If you select it ON, the analyzer
search another printer near the analyzer when not searching the previous
paired printer. If you select it OFF, the analyzer does not search another
printer and complete the printing.
STEP 3. Insert a Code Chip
Coding
The code chip is included in the test kit package. The code chip provides the
analyzer with important information on the production-specic properties of
each test kit in order to measure your results accurately. Before you use your
analyzer with a new test kit for the rst time, you should check that the code
number between the analyzer and test kit are the same.
Code Setting
1) Make sure the analyzer is turned off. Remove the old code chip if one
is installed.
2) Insert a new code chip until it snaps into place.
3) Turn the analyzer ON and insert the test panel. The code number will appear
and this number must match the code number provided on the test kit box. If
it does not, repeat steps 1 and 2 above.
ex) Inserting test panel after inserting the code chip for HbA1c

20
CAUTION
• Do not forget to insert the code chip that is supplied with
each test kit box.
• Each code chip belongs to one particular test kit box.
Store the test kit together with the code chip in the box.
2. Preparing a Measurement
Materials required for testing
• MultiCare Analyzer
• Sample Collection tool
• MultiCare Test Kit
CAUTION
Use only MultiCare Test Kits. Using other test kits with this
analyzer can cause inaccurate results.
Precaution
[ALWAYS]
• Read the appropriate test kit insert.
• Place the analyzer on a level surface.
• Keep the surrounding test site area tidy and clean.
• Make sure that all display elements are displayed.
[NEVER]
• Never touch or remove the inserted test panel during an actual
measurement.
• Never subject the analyzer to sudden movements during a
measurement.
• Never store the analyzer under humid or damp conditions without
suitable protection.
• Never use test kits beyond the expiration printed on test kit.
• Never reuse the test kit applied either clinical specimen or control
solution.
CAUTION
Not following these precautions can lead to inaccurate results.

21
3. Performing a Test
Prepare a test kit for the required measurement. Check the expiry date and
Code number of the test kit. Always use test kits before their expiry date has
passed. All clinical specimens must be at room temperature before beginning
the assay.
1) Insert the test panel into the MultiCare analyzer.
When the test panel reaches the correct position, panel is automatically
inserted deeper to the analyzer. If the test panel is inserted appropriately,
the sample and start button icon displays. This is sample waiting state.
2) Collect the sample and place the sample into the buffer tube. And then
mix the sample to push and release the bulb gently at the top of the
spoit more than 7-8 times.
OR
7-8
Times

22
3) Collect all the mixture from the buffer tube completely and then apply
the mixture into the test panel.
Empty
4) Press the start button. The result will be displayed on the screen in 3
or 5 minutes.
5) When the test is done, pull out the used test panel. The analyzer shuts
off automatically after you remove the test panel.
CAUTION
Discard the used test kits in proper container, according to
your standard laboratory procedure.
This manual suits for next models
1
Table of contents
Other SD Biosensor Measuring Instrument manuals