Seac Q5 User manual

Q5
Q5
www.seacsub.com
ISTRUZIONI - INSTRUCTIONS
INSTRUCTIONS - INSTRUCCIONES
ANLEITUNG
Torcia Subacquea
Dive Torch
Torche de plongée
Foco de buceo
Tauchlampe

2
Italiano................................................................... 3
English................................................................... 10
Français ................................................................ 17
Espanol ................................................................ 24
Deutsch ................................................................ 31

3
Q5
Congratulazioni
Grazie per aver scelto un prodotto tecnologicamente avanzato SEAC.
I processi di lavorazione, le materie prime utilizzate e la cura dei particolari
rendono tutti i prodotti SEAC aidabili sia dal punto di vista della qualità
che di durata nel tempo. La continua crescita tecnologica della SEAC ore
costantemente garanzia di continua innovazione.
Buon divertimento con i prodotti SEAC...
Introduzione
Le torce subacquee SEAC sono frutto di una ricerca avanzata in
collaborazione con esperti del settore.
I Led ad alta eicienza luminosa e l’ergonomia del prodotto rendono le torce
SEAC ideali per ogni tipo di immersione e in qualsiasi condizione.

4
AVVERTENZE GENERALI
ATTENZIONE
Prima di utilizzare la torcia siate sicuri di aver letto completamente
questo manuale.
ATTENZIONE! Non puntare la torcia verso i propri occhi o verso gli
occhi di altre persone, sia fuori dall’acqua che in immersione.
ATTENZIONE! Assicurarsi di togliere le batterie dalla torcia durante il
trasporto in aereo ed in caso di lunga inattività del prodotto.
ATTENZIONE! Durante la fase della sostituzione delle batterie,
ricordarsi di rispettare la polarità delle stesse.
ATTENZIONE! Utilizzare sempre batterie di ottima qualità del tipo
Alcalino Manganese.
ATTENZIONE! Non lasciare mai le batterie inserite se la torcia rimane
inutilizzata per un lungo periodo.
ATTENZIONE! Nei periodi di non utilizzo della torcia, tenere
leggermente svitata la ghiera oblò onde evitare il bloccaggio della ghiera
stessa.
ATTENZIONE! Non disperdere le batterie nell’ambiente dopo l’uso.
• Non tenere accesa la torcia fuori dall’acqua.
• Non puntare mai la luce negli occhi propri od altrui, sia durante
l’immersione che all’esterno.
• Non svitare la ghiera oblò della torcia in immersione o quando è bagnata.
• Non tenere la torcia vicino a fonti di calore.
• Utilizzare sempre ricambi originali per eventuali operazioni di ordinaria e
straordinaria manutenzione.
• Le batterie non sono fornite assieme alla torcia ma devono essere
acquistate separatamente.
• Non utilizzate batterie con dierente stato di carica.

5
Q5
CARATTERISTICHE TECNICHE
Q5
Potenza LED 3 x 3 W= total 9W
Lumens 700
Temperatura colore (°Kelvin) 6500-6800°K
Tipo di LED Cree XPG2 S3
Numero di LED 3
Fascio luminoso 10°
Tipo di batterie AA (LR6)
Numero di batterie 8
Lente PC
Guarnizioni Doppio O-ring
Materiale O-Ring NBR
Peso in aria
(batterie comprese) 452 g
Lunghezza 183 mm
Diametro testa 63 mm
Interruttore Interuttore magnetico a slitta
Durata luce Max potenza: 6 ore
Funzioni Potenza 100%
Potenza 30%
Max. profondità 100m
L’autonomia riportata è indicativa poiché dipende dalla qualità delle batterie
usate – si consiglia l’utilizzo di batterie alcaline di ottima qualità. E’ possibile
usare batterie ricaricabili da 1.2 V comunemente in commercio. Con l’uso
di batterie ricaricabili non si garantisce l’autonomia e la potenza luminosa
dichiarate nella scheda tecnica.

6
INSERIMENTO BATTERIE
• Svitare in senso antiorario la ghiera oblò della torcia.
• Inserire le batterie seguendo le indicazioni di polarità (+ o -).
• Estrarre il corpo illuminante
• Inserire le batterie seguendo le indicazioni di polarità (+ o -).
• Lubrificare le O-ring di tenuta con un velo di grasso al silicone.
• Re-inserire il corpo illuminante. Questo pezzo ha una posizione di
inserimento, indicata da una scanalatura longitudinale, che deve
corrispondere ad una tacca all’interno del corpo torcia (vedi immagine
Picture 1)
• Avvitare la ghiera oblò in senso orario.
• Verificare l’accensione della torcia tramite l’apposito interruttore.
ATTENZIONE
Rispettare tassativamente le indicazioni di polarità durante l’inserimento
delle batterie!
ATTENZIONE
In caso di errato posizionamento delle batterie (inversione di polarità) si
genera un corto circuito provocando un danno irreversibile con pericolo
di esplosione della torcia.
INTERRUTTORE
La Vostra torcia ha un interruttore magnetico a slitta a due funzioni: potenza
luminosa 100% e potenza ridotta (30% della potenza massima).

7
Q5
INSERIMENTO E DISINSERIMENTO SICURA
La torcia dispone di un semplice ma eiciente sistema di sicura, pensato per
evitare l’accensione accidentale della torcia. Per inserire la sicura inserire
il perno in dotazione, agganciato allo strap, fino in fondo nell’apposita
fessura posta alla base dell’interruttore; questo bloccherà il funzionamento
dello stesso. Per disinserire la sicura estrarre completamente il perno
dall’alloggiamento nel pulsante.
MODALITÀ DI CONTROLLO PRIMA DELL'IMMERSIONE
• Se non utilizzata recentemente, verificare lo stato della batteria della torcia
procedendo ad una verifica dell’accensione.
• Controllare la perfetta chiusura del corpo.
• Appena giunti in acqua verificare che non vi sia presenza continua di
bolle che fuoriescono dal corpo della torcia.
LIMITI DI IMPIEGO
• La profondità massima operativa è di 100 m.
• A causa delle alte temperature raggiunte dalla torcia durante l’uso
fuori dall’acqua, si consiglia l’uso della stessa solo ed esclusivamente in
ambiente subacqueo.
MANUTENZIONE E TRASPORTO
È importante attenersi alle seguenti istruzioni:
• Trasportare sempre la torcia all'interno di una borsa che lo protegga da
eventuali urti.
• Quando non si utilizza la torcia assicurarsi sempre di aver inserito la sicura
al fine evitare accensioni accidentali, che potrebbero essere la causa di
incendi. Per lunghi trasporti in bagagliai o stive è buona norma estrarre
sempre le batterie dalla torcia. Questa condizione potrebbe essere

8
considerata obbligatoria da talune compagnie, in caso di trasposto aereo.
• Evitare prolungate esposizioni ai raggi solari.
• Alla fine di ogni immersione (mare, lago o piscina) sciacquare sempre con
acqua dolce ed asciugare.
• Verificare lo stato delle guarnizioni di tenuta (O-ring) ogni volta che si è
proceduto all’apertura del corpo.
• Pulire e lubrificare le parti interessate all’apertura con grasso siliconico.
• Evitare di pulire la torcia con prodotti contenenti tensioattivi aggressivi
(tipo sgrassatori) o solventi per non danneggiare il prodotto e le guarnizioni
di tenuta.
• Si consiglia di far ispezionare annualmente il prodotto da un centro
autorizzato SEAC.
ALLAGAMENTO
In caso di entrata d’acqua nella torcia si consiglia d’aprire la stessa, togliere
le batterie e sciacquare immediatamente le parti interne con acqua dolce,
asciugare poi con uno panno e con un phon ad aria tiepida prestando
particolare attenzione alle parti meccaniche. Asportare l’eventuale ossido
formatosi sulle parti metalliche e procedere ad una prova di funzionalità.
Se la quantità di acqua penetrata all’interno della torcia è consistente
e se vi è rimasta per molto tempo si consiglia di aprire la stessa e
sciacquare immediatamente le parti interne con acqua dolce, in questo
caso suggeriamo di rivolgersi immediatamente ad un centro riparazioni
competente o di rivolgersi al negozio SEAC più vicino.
CONDIZIONI DI GARANZIA
SEAC garantisce il prodotto per due anni dal momento dell’acquisto.
Si consiglia vivamente di conservare lo scontrino fiscale comprovante la
data di acquisto.
La garanzia non include le normali parti di comune consumo o usura quali:
• O-ring, batterie.
• La presente garanzia non copre danni dovuti a:
• Urti meccanici.
• Utilizzo in acque eccessivamente clorate o inquinate.
• Prolungata esposizione a intense fonti di calore superiori a 70 °C.

9
Q5
La garanzia decade se:
L’attrezzatura è stata utilizzata in maniera impropria, eludendo quanto
riportato nelle istruzioni per l’uso.
• Il proprietario ha apportato modifiche o manomissioni e/o ha
personalmente eseguito riparazioni, o se tali interventi sono stati eettuati
da personale non autorizzato.
SEAC declina ogni responsabilità relativa a danni causati all'utilizzatore
da un uso improprio delle attrezzature. Altrettanto dicasi per danni diretti
o indiretti di qualsiasi natura causati a persone o cose dovuti ad eventuali
periodi di inutilizzo del prodotto o da un uso scorretto dello stesso.
ATTENZIONE
Non disperdere le batterie né la torcia nell’ambiente a fine vita del
prodotto.
Smaltire il prodotto in uno degli appositi punti di raccolta.
Lo smaltimento di apparecchiature elettriche ed elettroniche nell’Unione
Europea deve seguire la Direttiva dell’Unione Europea 2002/967CE.

10
Congratulations
Thanks for having chosen a technologically advanced product from SEAC.
The manufacturing processes, raw materials used, and attention to detail
all make SEAC products reliable both in terms of quality and durability over
time. SEAC's on-going technological expansion consistently guarantees
continual innovation.
Enjoy yourself with SEAC products!
Introduction
SEAC dive torches are the result of advanced research in collaboration with
experts in the field.
The high-eiciency LEDs and the ergonomics of the product make SEAC
torches ideal for any type of dive and under any conditions.

11
Q5
GENERAL WARNINGS
WARNING
Before using the torch, make sure you have read this manual in its
entirety.
WARNING! Never point the torch into your eyes or the eyes of other
people, either on dry land or during the dive.
WARNING! Be sure to remove the batteries from the torch when
transporting by air and for extended periods of disuse.
WARNING! Always be sure to check the polarity of the batteries when
replacing them.
WARNING! Always use top quality alkaline manganese batteries.
WARNING! Never leave the batteries in the torch if it will not be used
for an extended period.
WARNING! When the torch is not being used, unscrew the lens ring nut
slightly to prevent the nut from becoming stuck in place.
WARNING! Do not discard the batteries in the environment after use.
• Do not keep the torch switched on out of the water.
• Never aim the light into your own eyes or those of others, either during the
dive or out of the water.
• Do not remove the lens ring nut during the dive or when the torch is wet.
• Never hold the torch near sources of heat.
• Always use original spare parts when conducting any regular or
supplementary maintenance.
• Batteries are not supplied with the torch. They must be purchased
separately.
• Do not use batteries with dierent charge levels.

12
TECHNICAL CHARACTERISTICS
Q5
LED power 3 x 3 W= total 9W
Lumens 700
Color temperature (° Kelvin) 6500-6800°K
LED Type Cree XPG2 S3
Number of LEDs 3
Light beam 10°
Type of batteries AA (LR6)
Number of batteries 8
Lens PC
Seals Double O-ring
O-ring material NBR
Weight in air (including
batteries) 452 g
Length 183 mm
Head diameter 63 mm
Switch Sliding magnetic switch
Burn time Max power: 6 hours
Modes Power 100%
Power 30%
Max. depth 100m
The burntime shown is approximate because it depends on the quality of the
batteries used. We recommend using excellent quality alkaline batteries. 1.2
V rechargeable batteries commonly found on the market can also be used. If
rechargeable batteries are used, the burntime and light output shown on the
technical sheet are not guaranteed.

13
Q5
INSERTING BATTERIES
• Twist the torch lens ring nut counter-clockwise.
• Insert the batteries making sure to match the polarity (+ or -).
• Pull out the lighting unit.
• Insert the batteries making sure to match the polarity (+ or -).
• Grease the sealing O-rings with a layer of silicone grease.
• Reinsert the lighting unit. This piece has an insertion position indicated by
a lengthwise groove, which must match up with a notch inside the body of
the torch (see image in Picture 1).
• Tighten the lens ring nut clockwise.
• Check that the torch switches on using the switch.
WARNING
Strictly follow the polarity markings when inserting the batteries!
WARNING
If the batteries are inserted incorrectly (inverted polarity), a short circuit
will be created, causing irreversible damage and a risk that the torch
could explode.
SWITCH
Your torch has a sliding magnetic switch with two positions: 100% light
output and low power setting (30% of maximum power).

14
ENGAGING OR DISENGAGING THE SAFETY
The torch features a simple but eective safety system, designed to avoid
switching on the torch accidentally. To engage the safety, insert the pin
provided (it's attached to the strap) and push it all the way into the slot at
the bottom of the switch; this will prevent it from operating. To disengage the
safety, pull the pin all the way out of the housing in the button.
PRE-DIVE INSPECTION
• If your torch has not been used recently, check the condition of the
batteries by ensuring that it switches on.
• Check that the body is fully closed.
• As soon as you enter the water, check that no bubbles emerge from the
body of the torch.
USAGE RESTRICTIONS
• The maximum operating depth is 100 m.
• Because of the high temperatures that arise in the torch when used out of
the water, we recommend that you use it exclusively underwater.
MAINTENANCE AND TRANSPORT
It is important to abide by the following instructions:
• Always transport the torch in a bag that will protect it from any blows.
• When you aren't using the torch, always make sure you have fully inserted
the safety in order to prevent the torch from switching on accidentally,
which could cause fires. For extended transport in the trunk or hold, it's
good practice to always remove the batteries from the torch. This provision
may be mandatory with certain airlines.
• Avoid prolonged exposure to the sun.

15
Q5
• After a dive (sea, lake, or pool), always rinse with fresh water and dry.
• Check the condition of the gaskets (O-rings) every time you open the body
of the torch.
• Clean and grease the parts involved in opening the torch with silicone
grease.
• Do not clean the torch with products that contain aggressive surfactants
(such as degreasers) or solvents to avoid damaging the product of sealing
gaskets.
• It is advisable to have your product inspected annually by an authorised
SEAC center.
FLOODING
If water gets into the torch, open the body, remove the batteries, and
immediately rinse the internal parts in fresh water. Then dry everything
with a cloth and a hair dryer using warm air, paying close attention to the
mechanical parts. Remove any oxide that may have formed on the metal
parts and conduct an operations test.
If a significant quantity of water has entered the torch and has remained
there for a long period, open the torch body and immediately rinse the
internal parts in fresh water. In this event we suggest that you immediately
contact a competent repair center or contact the closest SEAC shop.
WARRANTY CONDITIONS
SEAC guarantees the product two years from the time of purchase.
SEAC strongly recommends that you keep your sales receipt as evidence of
your date of purchase.
The warranty does not include parts subject to normal wear and tear:
• O-ring, batteries.
• This warranty does not cover damage resulting from:
• Mechanical blows.
• Use in excessively chlorinated or polluted water.
• Prolonged exposure to intense sources of heat above 70 °C.

16
The warranty will be forfeited if:
• The equipment is used improperly, failing to comply with the instructions.
• The owner makes changes to or tampers with the product, or has
personally conducted repairs, or if these procedures were conducted by
unauthorized personnel.
SEAC declines all responsibility for damage caused to the user resulting
from improper use of equipment. The same is true of direct or indirect
damage of any kind caused to people or things resulting from any
periods of disuse of the product or incorrect use of the same.
WARNING
Do not dispose of the batteries or the torch in the environment at the
end of its life cycle.
Dispose of the product at a special collection point.
Disposal of electrical and electronic equipment in the European Union
must comply with European Union Directive 2002/967CE.

17
Q5
Félicitations
Merci d'avoir choisi la technologie avancée des produits SEAC.
Les procédés de fabrication, les matières premières utilisées et le souci
du détail font toute la fiabilité des produits SEAC aussi bien en termes
de qualité que de résistance à l'usure du temps. Le développement
technologique constant de SEAC garantit de manière systématique une
recherche continue de l'innovation.
Passez d'agréables moments avec les produits SEAC!
Introduction
Les torches de plongée SEAC sont le fruit de recherches avancées en
partenariat avec les experts de ce domaine.
Les LED de haute eicacité et l'ergonomie du produit rendent les torches
SEAC parfaites pour tout type de plongée.

18
AVERTISSEMENTS GÉNÉRAUX
AVERTISSEMENT
Avant d'utiliser la torche, assurez-vous d'avoir lu ce manuel dans son
intégralité.
ATTENTION! Ne dirigez jamais le faisceau de lumière vers vos yeux ou
ceux d'autrui, que vous soyez sous l'eau ou sur la terre ferme.
ATTENTION! N'oubliez pas de retirer les piles lorsque vous transportez
la torche par avion, ou lors de longues périodes sans utilisation.
ATTENTION! Assurez-vous de vérifier la polarité des piles lorsque vous
les remplacez.
ATTENTION! Utilisez des piles alcalines au dioxyde de manganèse de
haute qualité.
ATTENTION! Ne laissez jamais les piles dans la torche si elle ne doit
pas être utilisée pendant une longue durée.
ATTENTION! Lorsque vous n'utilisez pas votre torche, dévissez
légèrement la bague de serrage du verre pour éviter qu'elle se bloque.
ATTENTION! Ne jetez pas les piles usagées dans la nature après
utilisation.
• Ne laissez pas la torche allumée hors de l'eau.
• Ne dirigez jamais la lumière vers vos yeux ou vers les yeux d'autres
personnes, que ce soit au cours de la plongée ou hors de l'eau.
• Ne retirez pas la bague de serrage du verre durant la plongée où lorsque
la torche est humide.
• Ne tenez jamais la torche à proximité de sources de chaleur.
• Utilisez toujours des pièces détachées d'origines lorsque vous eectuez
des opérations d'entretien, de routine ou complémentaires.
• Les piles ne sont pas fournies avec la torche. Elles doivent être achetées
séparément.
• N'utilisez pas de piles chargées à diérents niveaux.

19
Q5
CARACTÉRISTIQUES TECHNIQUES
Q5
Puissance LED 3 x 3 W= total 9W
Lumens 700
Couleur de température
(° Kelvin) 6500 à 6800°K
Type de LED Cree XPG2 S3
Nombre de LED 3
Faisceau 10°
Type de piles AA (LR6)
Nombre de piles 8
Vitre PC
Joints d’étanchéité Double joint torique
Matériau du joint torique NBR
Poids dans l'air (avec les
batteries) 452 g
Longueur 183 mm
Diamètre de la tête 63 mm
Interrupteur Interrupteur coulissant magnétique
Autonomie Puissance maxi: 6heures
Modes Puissance 100%
Puissance 30%
Profondeur maximale 100m
L'autonomie d'éclairage est approximative du fait qu'elle dépend de la qualité
des piles utilisées. Nous recommandons l'utilisation de piles alcalines
d'excellente qualité. Il est aussi possible d'utiliser les piles rechargeables de
1,2V de la même dimension qu'on trouve facilement dans le commerce. Si
des piles rechargeables sont utilisées, la durée d'éclairage et la puissance
lumineuse qui sont indiquées sur la fiche technique ne sont pas garanties.

20
INSERTION DES PILES
• Dévissez la bague de serrage de la vitre de la torche en tournant dans le
sens inverse des aiguilles d'une montre.
• Insérez les piles en vérifiant que la polarité (+ ou -) est bien conforme.
• Sortez l'unité d'éclairage.
• Insérez les piles en vérifiant que la polarité (+ ou -) est bien conforme.
• Lubrifiez les joints toriques avec une couche de graisse silicone.
• Insérez de nouveau l'unité d'éclairage. Cette pièce possède une position
d'insertion indiquée par une rainure sur sa longueur, qui doit s'aligner sur
un cran situé à l'intérieur du corps de la torche (voir l'image1).
• Vissez la bague du verre dans le sens des aiguilles d'une montre.
• Vérifiez que la torche s'allume en appuyant sur l'interrupteur.
AVERTISSEMENT
Respectez strictement le marquage de polarité lorsque vous insérez
les piles!
AVERTISSEMENT
Si les piles ne sont pas insérées correctement (polarité inversée), un
court-circuit va se produire, provoquant des dommages irréversibles et
un risque d'explosion de la torche.
INTERRUPTEUR
Votre torche dispose d'un interrupteur magnétique avec deux positions:
lumière à 100% et puissance réduite (30% de la puissance maximale)
Table of contents
Languages:
Other Seac Flashlight manuals
Popular Flashlight manuals by other brands

Ozito
Ozito PXTLS-900 instruction manual
Lighthouse
Lighthouse elite L/HEMINI200R manual
Cateye
Cateye AMPP200 manual
Armytek Optoelectronics
Armytek Optoelectronics Predator Cree XP-G2 R5 user manual

Hinton Equipment
Hinton Equipment Flametech Lite Assembly and operating instructions
PROF
PROF KGS02 Installation and operating manual

Fotodiox
Fotodiox SkyFiller Series user manual

Western Enterprises
Western Enterprises Hotspotter WB-100 Professional Series Assembly, Testing & Operating Instructions
Elcometer
Elcometer 260 operating instructions
ESAB
ESAB PT-38 instruction manual
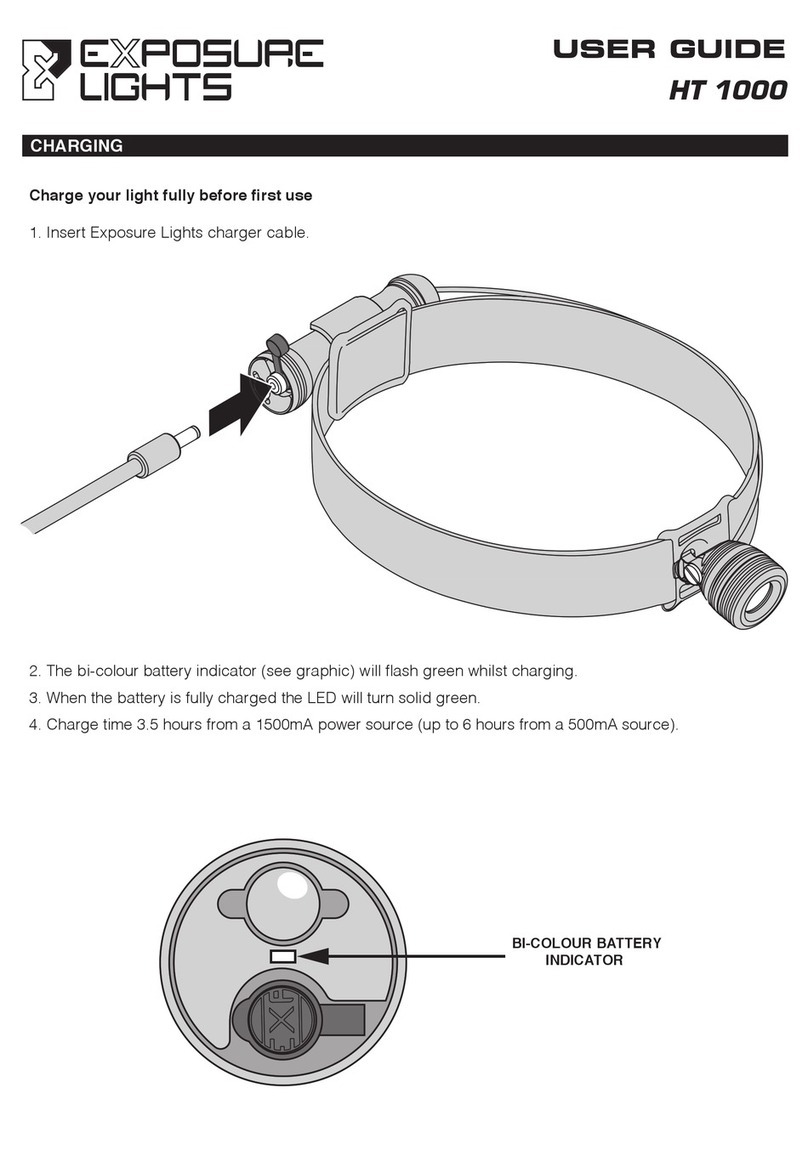
Exposure Lights
Exposure Lights HT 1000 user guide
SATA
SATA 05232 quick start guide


