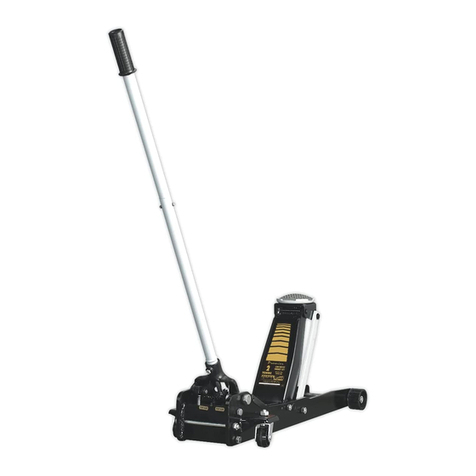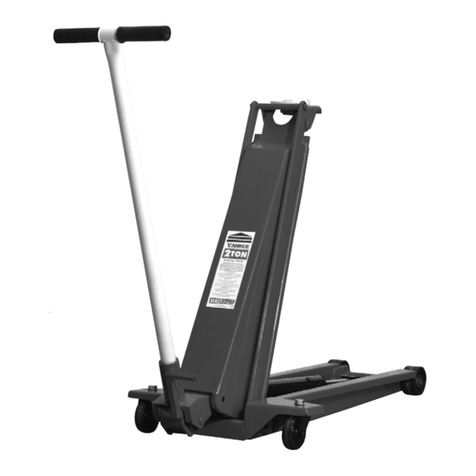
6.1.2. Connecttheairsupplytotheconnector(g.5.B).
6.1.3. Set the handle to the required angle using the handle release lever shown in (fig.5.A). Pull the lever upwards towards the main handle.
Move the handle to the required position and release the lever to lock it into position.
6.2. Purging the System
Beforeusingthejack,purgethehydrauliccircuitinordertoeliminateanypossibleairthatmayhaveenteredthesystemduring
transit.
6.2.1. Push the control lever (fig.4) to the ‘down’ (fig.4.A) position and hold it there for several seconds. Release the lever to the centre ‘hold’
position.
6.2.2. Now push the lever to the ‘up’ position(fig.4.B) and hold it there until the jack is fully extended. Push the lever to the ‘down’ (fig.4.A)
position and watch the jack as it retracts. The lowering movement should be smooth and without irregular stops.
6.2.3. Repeat the raising and lowering cycle until the movement is smooth. Once this has been achieved this indicates that all air has been
expelled.
6.3. Using the Jack
WARNING! ensure you have read and understood the safety instructions in section 1 before commencing work.
Position the jack under the vehicle manufacturer’s recommended jacking point (see vehicle handbook).
Note:Usetheextensionpins(g.5.D)togetthejackclosertothejackingpointbeforeengagingthejack.Seespecicationfor
capacity when using the extension pins.
6.3.1. Whilst holding the main jack handle, lifting is achieved by pushing the controllevertothe‘up’position(g.4.B).
6.3.2. When the vehicle has reached the desired height release the control lever which will automatically return to the middle hold position
stoppinganyfurtherairow,holdingthejackattheheighttowhichithasbeenraised.
6.3.3. Place axle stands correctly in position and ensure section 1 safety instructions are strictly applied before performing any task.
6.4. Lowering the Jack
6.4.1. Ensure there are no persons or obstruction beneath the vehicle before lowering, and remove any axle stands.
6.4.2. Whilst holding the main jack handle lowering is achieved by pushing the control lever to down position (fig.4.A), the jack will
lower in a controlled manner.
6.4.3. Once completely lowered releasing the control lever will return to the middle hold position. Remove the jack from under the vehicle.
If you have finished using the jack, turn the air pressure supply off and disconnect from the air line and store the jack and air line
accordingly.
7. MAINTENANCE
IMPORTANT: Only fully qualified personnel should attempt maintenance or repair.
WARNING! Disconnect jack from air supply before changing parts, servicing or performing any maintenance.
7.1. When the jack is not in use, the piston must be in the lowest position to minimise corrosion.
7.2. Keep the jack clean and lubricate all moving parts with air tool oil on a regular basis.
7.3. Tocheckoillevel,lowerjackfully.Removethellerplug(seeg.6forYAJ301org.7forothermodels).Theoilsurfaceshouldbe
levelwiththeindicatorinsidethellerhole,forYAJ301itshouldbelevelwiththebottomofthellerhole.Topuptheoillevelif
necessarybutdonotoverllasthejackwillbecomeinoperative.Ifinadvertentlyoverlledtheexcessoilshouldbepouredoff.After
topping up or pouring off excess oil it may become necessary to purge air from the unit. See section 6.2.
WARNING! DO NOTusebrakeuid,oranyuidotherthanhydraulicjackuidasthismaycauseseriousdamagetothejackandwill
invalidate the warranty!
7.4. Ensuretheairlterlocatedintheairvalveisclean.
7.5. Should the piston not rise and the oil level is correct, this may indicate a problem with air seeping into the hydraulic valve passage.
Purge any air from the system. See 6.2
7.6. Conrmthatthepistoncanrisetothehighestposition.
7.7. Beforeeachusecheckforbroken,cracked,bent,orlooseparts;anyvisibledamagetowelds,piston,pump,saddle,airconnector,
levers, frame and all parts including nuts, bolts, pins and other fasteners. If any suspect item is found, remove jack from service and
takenecessaryactiontoxtheproblem.DO NOT use the jack if believed to have been subjected to abnormal load or shock. Inspect
and take appropriate action.
7.8. After a year of extensive use, the oil should be replaced in order to extend the life of the jack. To drain the oil, remove
g.4 g.5
Original Language Version
© Jack Sealey Limited YAJ301.V2, YAJ10-25LR, YAJ15-30LE, YAJ20-60LR, YAJ10-40LELR.V2| Issue 1 01/09/17
