manuals.online logo
Brands
  1. Home
  2. •
  3. Brands
  4. •
  5. Sealey
  6. •
  7. Lighting Equipment
  8. •
  9. Sealey ML20 User manual

Sealey ML20 User manual

INSTRUCTIONS FOR:
WOBBLE LIGHTS
MODELS: ML20 & ML40
Thank you for purchasing a Sealey Product. Manufactured to a high standard this product will, if used according to these instructions
and properly maintained, give you years of trouble free performance.
IMPORTANT: PLEASE READ THESE INSTRUCTIONS CAREFULLY. NOTE THE SAFE OPERATIONAL
REQUIREMENTS, WARNINGS AND CAUTIONS. USE THIS PRODUCT CORRECTLY AND WITH CARE FOR THE
PURPOSE FOR WHICH IT IS INTENDED. FAILURE TO DO SO MAY CAUSE DAMAGE AND/OR PERSONAL INJURY
AND WILL INVALIDATE THE WARRANTY. PLEASE KEEP INSTRUCTIONS SAFE FOR FUTURE USE.
NOTE: It is our policy to continually improve products and as such we reserve the right to alter data, specifications and component
parts without prior notice. IMPORTANT: No liability is accepted for incorrect use of this equipment. WARRANTY: Guarantee is 12
months from purchase date, proof of which will be required for any claim. INFORMATION: For a copy of our latest catalogue and
promotions call us on 01284 757525 and leave your full name and address, including postcode.
01284 757500 E-mail: sales@sealey.co.uk
Web: www.sealey.co.uk
01284 703534
Sole UK Distributor, Sealey Group, Bury St. Edmunds, Suffolk.
1.1 ELECTRICAL SAFETY
!WARNING! It is the responsibility of the owner and the operator to read, understand and comply with the following:
You must check all electrical products, before use, to ensure that they are safe. You must inspect power cables, plugs,
sockets and any other connectors for wear or damage. You must ensure that the risk of electric shock is minimised by
the installation of appropriate safety devices. A Residual Current Circuit Breaker (RCCB) should be incorporated in the main
distribution board. We also recommend that a Residual Current Device (RCD) is used. It is particularly important to use an
RCD with portable products that are plugged into a supply which is not protected by an RCCB. If in any doubt consult a
qualified electrician. You may obtain a Residual Current Device by contacting your Sealey dealer.
You must also read and understand the following instructions concerning electrical safety.
1.1.1 The Electricity at Work Act 1989 requires that all portable electrical appliances, if used on business premises, are tested by
a qualified electrician, using a Portable Appliance Tester (PAT), at least once a year.
1.1.2 The Health & Safety at Work Act 1974 makes owners of electrical appliances responsible for the safe condition of those
appliances and the safety of the appliance operators. If in any doubt about electrical safety, contact a qualified electrician.
1.1.3 Ensure that the insulation on all cables and on the appliance is safe before connecting it to the power supply. See 1.1.1 and
1.1.2 and use a Portable Appliance Tester.
1.1.4 Ensure that cables are always protected against short circuit and overload.
1.1.5 Regularly inspect power supply cables and plugs for wear or damage and check all connections to ensure that none is
loose.
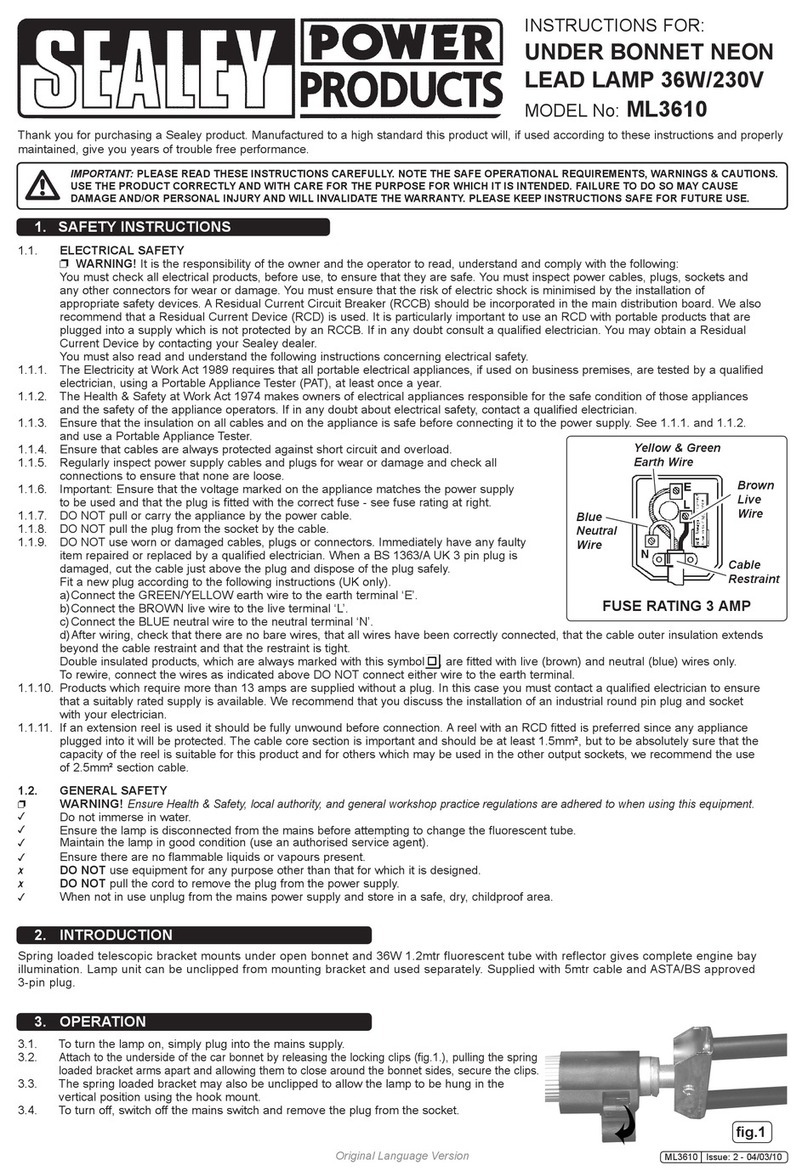
1.1.6 Important: Ensure that the voltage marked on the appliance matches the power
supply to be used and that the plug is fitted with the correct fuse - see fuse rating
at right.
1.1.7 DO NOT pull or carry the appliance by the power cable.
1.1.8 DO NOT pull the plug from the socket by the cable.
1.1.9 DO NOT use worn or damaged cables, plugs or connectors. Immediately have
any faulty item repaired or replaced by a qualified electrician. When a BS 1363/A
UK 3 pin plug is damaged, cut the cable just above the plug and dispose of the
plug safely.
Fit a new plug according to the following instructions (UK only).
a) Connect the GREEN/YELLOW earth wire to the earth terminal ‘E’.
b) Connect the BROWN live wire to the live terminal ‘L’.
c) Connect the BLUE neutral wire to the neutral terminal ‘N’.
d) After wiring, check that there are no bare wires, that all wires have been correctly connected, that the cable outer
insulation extends beyond the cable restraint and that the restraint is tight. Double insulated products, which are always
marked with this symbol , are fitted with live (brown) and neutral (blue) wires only. To rewire, connect the wires as
indicated above - DO NOT connect either wire to the earth terminal.
1.1.10 Products which require more than 13 amps are supplied without a plug. In this case you must contact a qualified electrician
to ensure that a suitably rated supply is available. We recommend that you discuss the installation of an industrial round pin
plug and socket with your electrician.
1.1.11 If an extension reel is used it should be fully unwound before connection. A reel with an RCD fitted is preferred since any
appliance plugged into it will be protected. The cable core section is important and should be at least 1.5mm², but to be
absolutely sure that the capacity of the reel is suitable for this product and for others which may be used in the other output
sockets, we recommend the use of 2.5mm² section cable.
1.2 GENERAL SAFETY
!WARNING! Disconnect lamp from mains power before changing tube or performing any maintenance.
"Replace or repair damaged parts. Use genuine Sealey parts only. Unauthorised parts may be dangerous and will invalidate
the warranty.
"Maintain the lamp in good condition.
#DO NOT use the lamp if damaged.
#DO NOT use lamp close to paint fumes, solvents or other flammable liquids or flammable waste, such as wipes or cleaning rags.
#DO NOT fit a fluorescent tube other than the recommended replacement (see parts list for part numbers).
"When not in use switch off the lamp and remove plug from power supply.
FUSE RATING 3 AMP
Blue
Neutral
Wire
Yellow & Green
Earth Wire
Cable
Restraint
Brown
Live
Wire
ML20-ML40 - 1 - 060605
PARTS LIST FOR:
WOBBLE LIGHTS
MODELS: ML20 & ML40
1. SAFETY INSTRUCTIONS
- ML20
ITEM PART NO. DESCRIPTION
01. MLT18 FLUORESCENT TUBE
02. MLT18.C PLASTIC TUBE
03. ML20.BASE BASE HOUSING FOR ML20/ML40
04 ML20.ASSY BASE ASSEMBLY UNIT FOR ML20/40
- ML20B BATTERY
- ML20C CHARGER
- ML40
ITEM PART NO. DESCRIPTION
01. MLT36 FLUORESCENT TUBE
02. MLT36.C PLASTIC TUBE
03. ML20.BASE BASE HOUSING FOR ML20/ML40
04 ML20.ASSY BASE ASSEMBLY UNIT FOR ML20/40
- ML20B BATTERY
- ML20C CHARGER
Issue: . . . . . . . . . . .2
Issue Date: .18/08/06
Signed by Mark Sweetman
Declaration of Conformity We, the sole distributor in the UK, declare that the products listed here are
in conformity with the following standards and directives. The construction files for these products are held by the
manufacturer and may be inspected, by a national authority, upon request to Jack Sealey Ltd.
For Jack Sealey Ltd. Sole distributor in the UK of Sealey Power Products.
WOBBLE LIGHTS
MODELS: ML20-ML40
73/23/EEC Low Voltage Directive
89/336/EEC EMC Directive
93/68/EEC Marking Directive
6th June 2005
!WARNING! Ensure the light is correctly charged before initial use.
#DO NOT allow children to use the light.
#DO NOT use if the battery or the light casing is damaged.
"When not in use store the light in a safe, dry, childproof location.
1.3 BATTERY SAFETY INSTRUCTIONS
!WARNING! Powered by a sealed lead-acid battery which can be dangerous if not handled with care.
"Charge battery prior to first use. The battery pack will have been shipped in a low charge state. Minimum
initial charge time 24 hours.
#DO NOT charge battery when room temperature is below 10OC (50OF) or above 40OC (104OF).
#DO NOT attempt to recharge the battery by means of an engine generator or a DC power source.
# DO NOT short-circuit the battery by linking both terminals with a metal object.
#DO NOT store the battery (or light) in locations where the temperature may exceed 40OC (104OF) such as
outside sheds, above heaters, or metal buildings in summer.
!WARNING! Dispose of spent battery correctly and in accordance with local regulations as it contains acid.
DANGER! DO NOT attempt to dismantle the battery pack. For safety and environmental reasons DO NOT
discard in domestic waste or by burning. ONLY discard or recycle according to local waste authority
regulations.
!WARNING! DO NOT allow a leaking battery to come into contact with your skin. If you come into contact
with battery fluid take immediate action:
a) Skin contact: Wash immediately with soap and water.
b) Eye contact: Flush eye immediately with cool, clean running water for at least 15 minutes and seek
immediate professional medical attention.
Fluorescent tube flexibly mounted in base, producing knock-resistant
lamps. 12V Light unit for electrical safety, powered by lead acid
battery in base. Up to ten hours continuous use from a fully charged
battery. Fitted with a 12V 3A cigarette lighter outlet. Splash-proof
construction with non-slip base and extending carry-handle. Base
will accept 18 or 36W light units. Supplied with mains battery
charger.
4.1 CHARGING THE UNIT
4.1.1 Insert the charger lead plug into the inlet socket (fig 1.A).
4.1.2 Plug charger into mains socket and switch on.
4.1.3 The red LED (fig 1.B) will light up indicating a current is
present.
4.1.4 Charge for approximately 24 hours.
#DO NOT attempt to use the light while it is connected to
the charger.
4.2 USING THE LANTERN
4.2.1 To operate the lantern simply flip the power switch
(fig 1.D) either on or off (I/O).
4.3 EMERGENCY LIGHTING
4.3.1 While the unit is plugged into the mains the light will be
disabled, however, if a power cut occurs the light will
illuminate, acting as a temporary emergency light (the
power switch needs to be in the “ON” position).
4.4 DC OUTLET
4.4.1 The DC outlet (fig C) can be used as a charge source to
charge items such as mobile phones.
!WARNING! Before replacing the fluorescent tube or performing any
maintenance the unit must be switched off and not connected to the
charger.
!WARNING! Do not turn the unit on with the transparent cover removed or
with the tubes removed.
5.1 CHANGING THE FLUORESCENT TUBE
IMPORTANT! Replacement tube must be the same type and rating as the
original tube supplied.
Use Sealey replacement tube (see parts list for part numbers).
5.1.1 Remove the rubber cap located at the top of the tube assembly (fig 2.A).
5.1.2 Turn the inner cap in an anti-clockwise direction and lift to remove (fig 2.B).
5.1.3 The fluorescent tube will now slide straight out of the tube assembly
(fig 2.C). Replace the tube.
5.1.4 Refit the inner cap, making sure the connector lines up with the terminal
situated on the tube assembly and place the rubber cap back on the top.
5.1.5 Ensure that the tubes and caps are correctly installed and seated before
turning on.
5.2 CLEANING
5.2.1 Clean the unit with a damp cloth and a mild soapy solution.
Do not use solvents or abrasive cleaners.
2. INTRODUCTION & SPECIFICATIONS
4. OPERATION
3. ASSEMBLY
5. MAINTENANCE
Model No: . . . . . . . . . . . . . . . . . . . . . . . . . . .ML20
Tube: . . . . . . . . . . . . . . . . . . . . . . . . . . . . . . .18W
Tube Length: . . . . . . . . . . . . . . . . . . . . . . .600mm
Battery: . . . . . . . . . . . . . . . . . . . . . . . . . .12V 12Ah
Operating Time (max.): . . . . . . . . . . . . . . . . .10hrs
Overall Height: . . . . . . . . . . . . . . . . . . . . . .800mm
Model No: . . . . . . . . . . . . . . . . . . . . . . . . . . .ML40
Tube: . . . . . . . . . . . . . . . . . . . . . . . . . . . . . . .36W
Tube Length: . . . . . . . . . . . . . . . . . . . . . . .1200mm
Battery: . . . . . . . . . . . . . . . . . . . . . . . . . .12V 12Ah
Operating Time (max.): . . . . . . . . . . . . . . . . .6.5hrs
Overall Height: . . . . . . . . . . . . . . . . . . . . .1380mm
Fig 2
ML20
Fig 1
3.1 ASSEMBLY
3.1.1 To assemble the wobble light, remove the product from its
boxes carefully.
3.1.2 Screw the plastic tube into the base. To assist its progress, a
little vaseline or WD40 can be used on the plastic threads. Do
not allow any lubricant to coat the connector pins at the
base of the tube.
ML20-ML40 - 1 - 060605
This manual suits for next models

1

Other Sealey Lighting Equipment manuals

Sealey LED042 User manual

Sealey

Sealey LED042 User manual

Sealey LED450UV User manual

Sealey

Sealey LED450UV User manual

Sealey MLB80MB User manual

Sealey

Sealey MLB80MB User manual

Sealey LED2105G User manual

Sealey

Sealey LED2105G User manual

Sealey LED307.V2 User manual

Sealey

Sealey LED307.V2 User manual

Sealey HT02LED User manual

Sealey

Sealey HT02LED User manual

Sealey CRM2305 User manual

Sealey

Sealey CRM2305 User manual

Sealey LED1001.V2 User manual

Sealey

Sealey LED1001.V2 User manual

Sealey LED042 User manual

Sealey

Sealey LED042 User manual

Sealey ML3610 User manual

Sealey

Sealey ML3610 User manual

Sealey ML60GP User manual

Sealey

Sealey ML60GP User manual

Sealey LED3603 Series User manual

Sealey

Sealey LED3603 Series User manual

Sealey LED3006 User manual

Sealey

Sealey LED3006 User manual

Sealey ES300A User manual

Sealey

Sealey ES300A User manual

Sealey ML18/36.V3 Firmware update

Sealey

Sealey ML18/36.V3 Firmware update

Sealey LED035.V2 User manual

Sealey

Sealey LED035.V2 User manual

Sealey LED175 User manual

Sealey

Sealey LED175 User manual

Sealey SJBEX200.V2 User manual

Sealey

Sealey SJBEX200.V2 User manual

Sealey LED180 User manual

Sealey

Sealey LED180 User manual

Sealey LED318R User manual

Sealey

Sealey LED318R User manual

Sealey LED176 User manual

Sealey

Sealey LED176 User manual

Sealey LED360EU User manual

Sealey

Sealey LED360EU User manual

Sealey LED3603 Series User manual

Sealey

Sealey LED3603 Series User manual

Sealey LED3604G User manual

Sealey

Sealey LED3604G User manual

Popular Lighting Equipment manuals by other brands

Hafele LOOX 833.74.708 Mounting/Programming Instructions

Hafele

Hafele LOOX 833.74.708 Mounting/Programming Instructions

Renkforce 1361119 operating instructions

Renkforce

Renkforce 1361119 operating instructions

Chauvet CH-750 user guide

Chauvet

Chauvet CH-750 user guide

Lightolier LSBW-16 Specification sheet

Lightolier

Lightolier LSBW-16 Specification sheet

Clevetronics L10 LUBPRO Series Installation & maintenance instructions

Clevetronics

Clevetronics L10 LUBPRO Series Installation & maintenance instructions

Tronix 136-024 quick start guide

Tronix

Tronix 136-024 quick start guide

Robe XT Series user manual

Robe

Robe XT Series user manual

Saxby Lighting 13889 instruction manual

Saxby Lighting

Saxby Lighting 13889 instruction manual

Zero88 ORB operating manual

Zero88

Zero88 ORB operating manual

GigaTera SUFA-A user guide

GigaTera

GigaTera SUFA-A user guide

pro one WLAFL1500LMR instruction manual

pro one

pro one WLAFL1500LMR instruction manual

Titanium TT-TRK-84D quick start guide

Titanium

Titanium TT-TRK-84D quick start guide

Chauvet Intimidator COLOR LED Features & specification

Chauvet

Chauvet Intimidator COLOR LED Features & specification

Maintronic Casambi CRD400 INS manual

Maintronic

Maintronic Casambi CRD400 INS manual

Testrite Visual Charisma SEG 3D Lit XS Series manual

Testrite Visual

Testrite Visual Charisma SEG 3D Lit XS Series manual

Lightolier QVB2SPGOS2FT specification

Lightolier

Lightolier QVB2SPGOS2FT specification

Planet Lighting HLS SNAP Wiring Installation Guide

Planet Lighting

Planet Lighting HLS SNAP Wiring Installation Guide

Brightline ZELo Assembly instructions

Brightline

Brightline ZELo Assembly instructions

manuals.online logo
manuals.online logoBrands
  • About & Mission
  • Contact us
  • Privacy Policy
  • Terms and Conditions

Copyright 2025 Manuals.Online. All Rights Reserved.