manuals.online logo
Brands
  1. Home
  2. •
  3. Brands
  4. •
  5. Sealey
  6. •
  7. Patio Heater
  8. •
  9. Sealey EPH2100 User manual

Sealey EPH2100 User manual

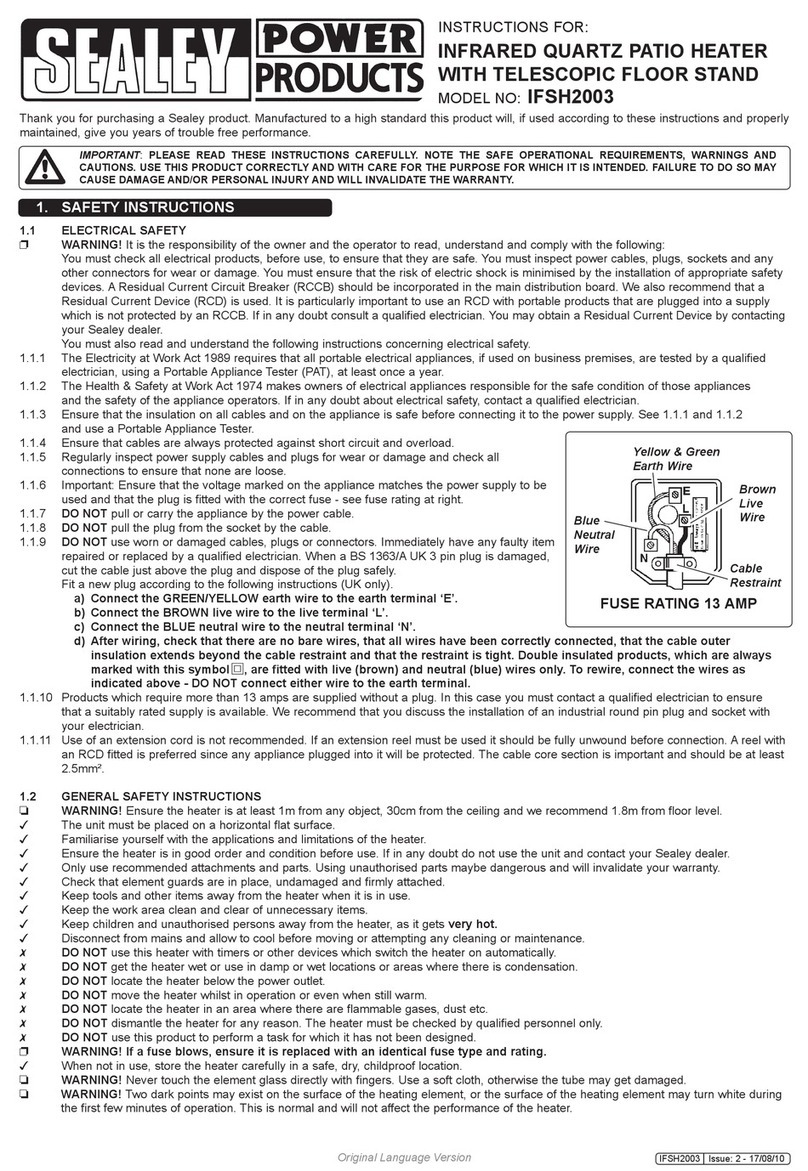
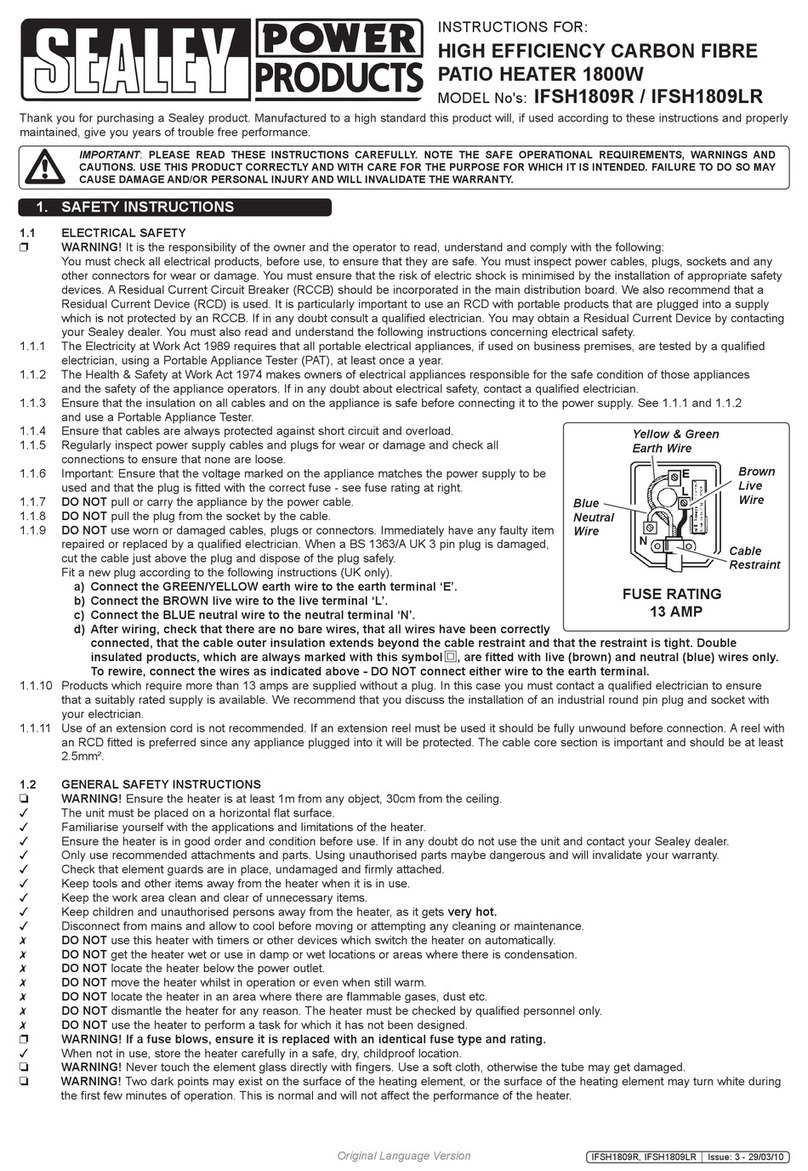
1.1 ELECTRICAL SAFETY
WARNING! It is the responsibility of the owner and the operator to read, understand and comply with
the following:
You must check all electrical products, before use, to ensure that they are safe. You must inspect power
cables, plugs, sockets and any other connectors for wear or damage. You must ensure that the risk of
electric shock is minimised by the installation of appropriate safety devices. A Residual Current Circuit
Breaker (RCCB) should be incorporated in the main distribution board. We also recommend that a
Residual Current Device (RCD) is used. It is particularly important to use an RCD with portable products
that are plugged into a supply which is not protected by an RCCB. If in any doubt consult a qualified
electrician.
You may obtain a Residual Current Device by contacting your Sealey dealer.
You must also read and understand the following instructions
concerning electrical safety.
1.1.1 The Electricity at Work Act 1989 requires that all portable electrical
appliances, if used on business premises, are tested by a qualified
electrician, using a Portable Appliance Tester (PAT), at least once a
year.
1.1.2 The Health & Safety at Work Act 1974 makes owners of electrical
appliances responsible for the safe condition of those appliances
and the safety of the appliance operators. If in any doubt about
electrical safety, contact a qualified electrician.
1.1.3 Ensure that the insulation on all cables and on the appliance is safe
before connecting it to the power supply. See 1.1.1 and 1.1.2 and use a
Portable Appliance Tester.
1.1.4 Ensure that cables are always protected against short circuit and overload.
1.1.5 Regularly inspect power supply cables and plugs for wear or damage and check all connections to
ensure that none is loose.
1.1.6 Important: Ensure that the voltage marked on the appliance matches the power supply to be used and
that the plug is fitted with the correct fuse - see fuse rating at right.
1.1.7 DO NOT pull or carry the appliance by the power cable.
1.1.8 DO NOT pull the plug from the socket by the cable.
1.1.9 DO NOT use worn or damaged cables, plugs or connectors. Immediately have any faulty item
repaired or replaced by a qualified electrician. When a BS 1363/A UK 3 pin plug is damaged,
cut the cable just above the plug and dispose of the plug safely.
Fit a new plug according to the following instructions (UK only).
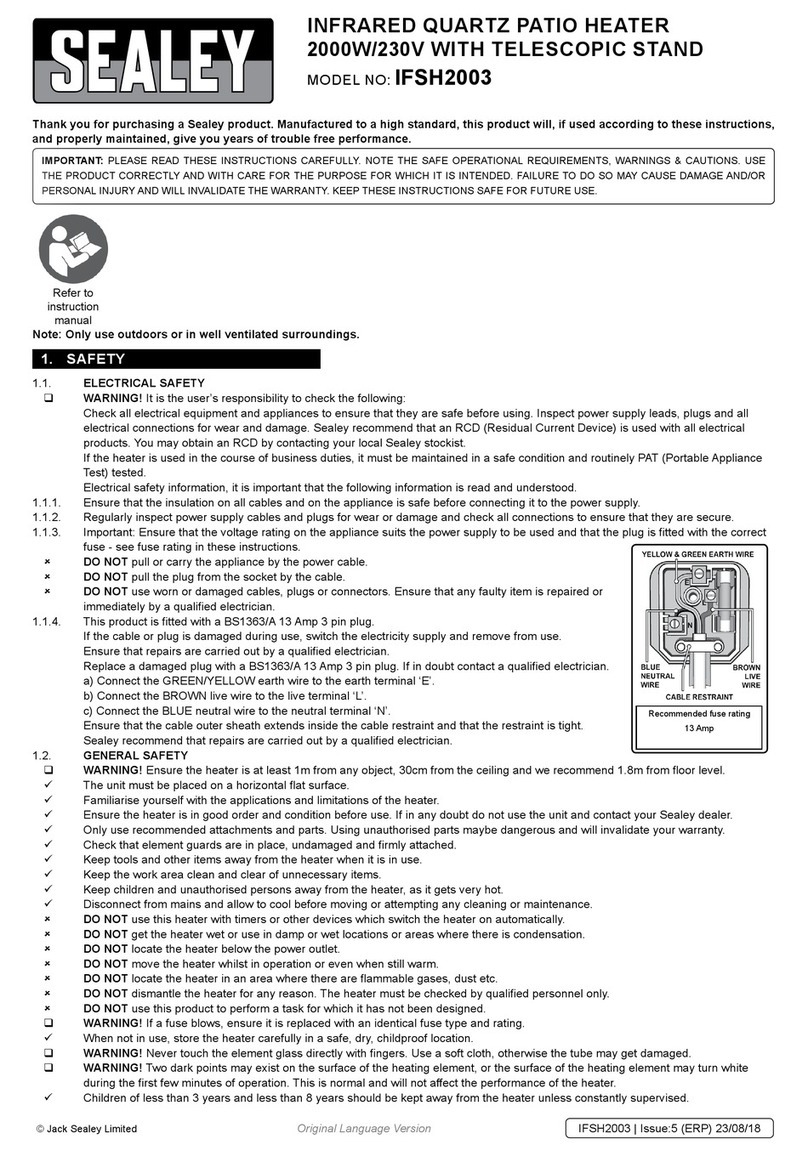
a) Connect the GREEN/YELLOW earth wire to the earth terminal ‘E’.
b) Connect the BROWN live wire to the live terminal ‘L’.
c) Connect the BLUE neutral wire to the neutral terminal ‘N’.
d) After wiring, check that there are no bare wires, that all wires have been
correctly connected, that the cable outer insulation extends beyond the cable restraint and that
the restraint is tight. Double insulated products, which are always marked with this symbol , are
fitted with live (brown) and neutral (blue) wires only. To rewire, connect the wires as indicated
above - DO NOT connect either wire to the earth terminal.
1.1.10 Products which require more than 13 amps are supplied without a plug. In this case you must contact a
qualified electrician to ensure that a suitably rated supply is available. We recommend that you discuss
the installation of an industrial round pin plug and socket with your electrician.
1.1.11 If an extension reel is used it should be fully unwound before connection. A reel with an RCD fitted is
preferred since any appliance plugged into it will be protected. The cable core section is important and
should be at least 1.5mm², but to be absolutely sure that the capacity of the reel is suitable for this
product and for others which may be used in the other output sockets, we recommend the use of 2.5mm²
section cable.
FUSE RATING 13 AMP
Blue
Neutral
Wire
Yellow & Green
Earth Wire
Cable
Restraint
Brown
Live
Wire
1. SAFETY INSTRUCTIONS
INSTRUCTIONS FOR:
HALOGEN PATIO HEATER 2100W/230V
MODELS: EPH2100
Thank you for purchasing a Sealey product. Manufactured to a high standard this product will, if used according to these instruc-
tions and properly maintained, give you years of trouble free performance.
IMPORTANT: PLEASE READ THESE INSTRUCTIONS CAREFULLY. NOTE THE SAFE OPERATIONAL
REQUIREMENTS, WARNINGS, AND CAUTIONS. USE THIS PRODUCT CORRECTLY, AND WITH CARE FOR THE
PURPOSE FOR WHICH IT IS INTENDED. FAILURE TO DO SO MAY CAUSE DAMAGE AND/OR PERSONAL
INJURY AND WILL INVALIDATE THE WARRANTY.
Original Language Version EPH2100 Issue: 1 - 26/07/10
3. ASSEMBLY INSTRUCTIONS
1.2 GENERAL SAFETY INSTRUCTIONS
Familiarise yourself with the applications and limitations of the heater.
Ensure the heater is in good order and condition before use. If in any doubt do not use the heater and
contact a qualified electrician.
Only use recommended parts. To use unauthorised items may be dangerous and will invalidate your
warranty.
Check that element guards are in place, undamaged and firmly attached.
Site the heater at least 1m from any walls, obstructions or objects that may be affected by heat and
30cm minimum clearance from the ceiling.
Site the heater on a horizontal, flat and stable surface.
 Disconnect from mains before moving or attempting any cleaning or maintenance.
 DO NOT use near bath tubs, wash areas or swimming pools.
 DO NOT use where gas, petrol, paint or other flammable goods are stored.
 DO NOT position immediately above or below an electrical socket.
 DO NOT leave turned on and unattended.
 DO NOT wind the power chord around the heater.
 DO NOT move the heater whilst in operation.
 DO NOT touch the heater elements, even when cold.
DO NOT disassemble the heater for any reason. The heater must be checked by qualified personnel
only.
DO NOT use in the rain, although heater is shower proof it should not be used when raining or in
wet conditions.
DO NOT use this product to perform a task for which it has not been designed.
 WARNING! If a fuse blows, ensure it is replaced with an identical fuse type and rating.
When not in use, store the heater carefully in a safe, dry, childproof location.
WARNING: The warnings, cautions and instructions discussed in this instruction manual cannot
cover all possible conditions and situations that may occur. It must be understood that common
sense and caution are factors which cannot be built into this product, but must be applied by the
operator.
3.1 Thread cable through base and into the base
tube. Pull through approx. 2mtr of cable.
3.2 Fix the base tube to the base using the 3 x
M6 bolts.
2. INTRODUCTION & SPECIFICATIONS
Stylish design made from aluminium with weighted base to help prevent toppling. Three settings from 900W to
2100W give controlled heat output. Produces a pleasant relaxing heat and is ideal for use in open workshops,
boat yards, forecourts, gardens and terraces. The heater element is situated approximately 2mtr off the ground
and the aluminium shade directs the heat downwards and outwards. For extra safety a tip switch is incorporated
to cut power should unit be accidentally knocked over. Supplied with 5mtr cable and BS approved 3-pin plug.
Power Settings: 900/1200/2100W
Supply: 230V 50Hz 13A
Height: 2100mm
Cable Length: 5mtr
Weight: 15kg
Original Language Version EPH2100 Issue: 1 - 26/07/10
3.3 Slide the domed cover over the base pillar. 3.4 Fit a connecting tube into the base tube and
secure with 3 x allan bolts.
3.5 Fit another tube and secure to connecting
tube using 3 x allan bolts. Keep passing the
cable through the tubes. Repeat this
process for the last tube.
3.6 Use assistance to support the heater head unit
and connect the feed cable, a simple push fit.
3.7 Lower the head into position, aligning the two
screw holes in the head with those on the tube.
3.8 Using two cross head screws secure head unit.
3.9 Carefully lay heater on its side. Fix the cable to
the base using the two plastic cable clamps.
3.10 Shows secured cable.
Original Language Version EPH2100 Issue: 1 - 26/07/10
4. OPERATING INSTRUCTIONS
5. MAINTENANCE
4.1 OPERATION
NOTE! Observe safety warnings in section 1 before connecting this heater to the mains.
4.1.1 Ensure the two “ON” and “OFF” switches are both in the “OFF” position (white dots on switches in the
raised position).
4.1.2 Insert the plug into the supply socket and switch on. (We recommend that a Residual Current Device
(RCD) is used.
4.1.3 To switch on, press the switches (fig.1).
Low Setting .........Select switch with one white dot (900W).
Medium Setting ......Select the switch with two white dots (1200W).
High Setting.........Select both switches together (2100W).
4.1.4 When not in use, turn heater off and disconnect from the mains supply,
store in a safe dry childproof location.
fig.1
Ensure heater is disconnected from the mains before performing any maintenance.
Clean the surface of the heater with a damp cloth only.
Any maintenance or repairs including replacing the halogen tube should only be
carried out by an authorised service centre.
NOTE: It is our policy to continually improve products and as such we reserve the right to alter data, specifications and component parts without prior notice.
IMPORTANT: No liability is accepted for incorrect use of this product.
WARRANTY: Guarantee is 12 months from purchase date, proof of which will be required for any claim.
INFORMATION: For a copy of our latest catalogue and promotions call us on 01284 757525 and leave your full name and address, including postcode.
01284 757500
01284 703534
sales@sealey.co.uk
Sole UK Distributor, Sealey Group,
Kempson Way, Suffolk Business Park,
Bury St. Edmunds, Suffolk,
IP32 7AR
www.sealey.co.uk
Web
email
Original Language Version EPH2100 Issue: 1 - 26/07/10

Other Sealey Patio Heater manuals

Sealey IFSH1809R User manual

Sealey

Sealey IFSH1809R User manual

Sealey IFSH2003 User manual

Sealey

Sealey IFSH2003 User manual

Sealey IFSH2003 User manual

Sealey

Sealey IFSH2003 User manual

Sealey IFSH2003 User manual

Sealey

Sealey IFSH2003 User manual

Popular Patio Heater manuals by other brands

EvenGlo GA201M Installation operation & maintenance

EvenGlo

EvenGlo GA201M Installation operation & maintenance

EAST OAK TPH22001 owner's manual

EAST OAK

EAST OAK TPH22001 owner's manual

Blooboost 545150011 manual

Blooboost

Blooboost 545150011 manual

Dancover Borneo HE94010 user manual

Dancover

Dancover Borneo HE94010 user manual

Hortus Golden Tube ZHQ1580-WM-RM-DT instructions

Hortus

Hortus Golden Tube ZHQ1580-WM-RM-DT instructions

Paramount Fitness L10-SS-P owner's manual

Paramount Fitness

Paramount Fitness L10-SS-P owner's manual

Lakeview Fleur-de-lis manual

Lakeview

Lakeview Fleur-de-lis manual

Coleman 5066 Assembly and instruction manual

Coleman

Coleman 5066 Assembly and instruction manual

Yunca Gas MEZZO Operations, maintenance & warranty information

Yunca Gas

Yunca Gas MEZZO Operations, maintenance & warranty information

Dyna-Glo DGPH202SS owner's manual

Dyna-Glo

Dyna-Glo DGPH202SS owner's manual

VonHaus 2522011 instruction manual

VonHaus

VonHaus 2522011 instruction manual

Goldair GGOH300 operating instructions

Goldair

Goldair GGOH300 operating instructions

Luxor 2650 instruction manual

Luxor

Luxor 2650 instruction manual

Winmore WMHR005G2-200Y Safety instructions and operation manual

Winmore

Winmore WMHR005G2-200Y Safety instructions and operation manual

Provida Varme MATRIX Safety instructions and operation manual

Provida Varme

Provida Varme MATRIX Safety instructions and operation manual

Zanussi ZTPTH1 MANUAL & SAFETY INSTRUCTIONS

Zanussi

Zanussi ZTPTH1 MANUAL & SAFETY INSTRUCTIONS

Nexgrill T-007 Installation, operation and maintenance instructions

Nexgrill

Nexgrill T-007 Installation, operation and maintenance instructions

Bernzomatic PH3250S owner's manual

Bernzomatic

Bernzomatic PH3250S owner's manual

manuals.online logo
manuals.online logoBrands
  • About & Mission
  • Contact us
  • Privacy Policy
  • Terms and Conditions

Copyright 2025 Manuals.Online. All Rights Reserved.