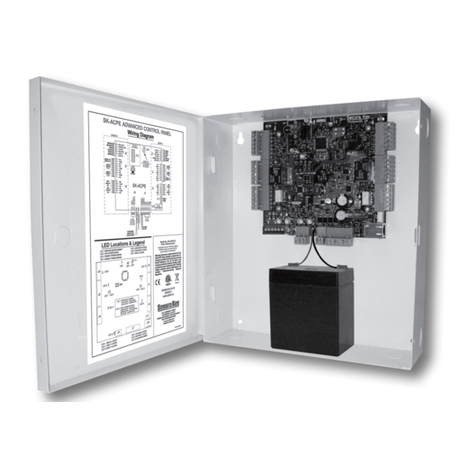
Securakey SK-ACP User manual

QUICK START GUIDE
SK-ACP Advanced Control Panel with SK-NETTM Software
Here are some basic guidelines to help you get started setting up your first SK-NET™system. If you would like to start
entering your card users database before the readers are installed, refer to step 10.
1. Making a Site Plan:
For a multi-reader system you should start by making a simple diagram of the job site, so that you will be able to identify
each control panel during the initial system setup.
1. Label each control panel where it is to be installed.
2. List the serial number and physical location of each control panel on the diagram to identify where each card
reader is located so it can be named during the initial setup.
2. Installation of the SK-ACP and card readers: (Section 2.0 User Manual)
The Control Panels are networked on a two twisted-pair cable, using RS-485 communications. Each control panel connects
to the network using a two-twisted pair cable which connects to the RS485 bus, located on the control panel. WARNING: Do
not connect the wiring to the control panel, or make connections to the PC with the control panel power turned on.
1. Install all the control panels and readers at each location, according to your site plan.
2. After each control panel has been completely installed, turn on the power. The LED will flash red and green (if
not, push the reset button). Place a user card or tag near either of the readers to set the facility code. Repeat
for all panels.
3. Installing the Software: (Section 1.3 User Manual)
SK-NET™ software is provided on a CD-ROM. From Windows®start menu:
1. Select Run, and enter (CD-ROM drive letter):\setup.exe, to start the installation program. Follow the
instructions during the set-up.
2. When the installation is complete, drag acopy of the program icon to the Windows®desktop, and double click
on the SK-NET™ icon to start the program.
NOTE: SK-NETTM Software is located on our web page (www.securakey.com). It can be downloaded at no
charge, just follow the instructions at our website.
4. Configure The Primary Location: (Section 2.4 User Manual)
A location is a single contiguous network of readers connected to a single PC Com Port.
1. Click on the Explorer (icon with the Globe).
2. Right click on ‘This Location’ (the default name). (You may change this name by selecting ‘rename’).
3. Select Properties, and enter the proper settings:
4. If you are using the ‘Reader Gateway’ (RS232 port) or a modem, enter the following settings:
(If you are not using the ‘Reader Gateway’ (RS232 port) or a modem, skip to #5.)
a) Com Port: select Com Port number to which the card readers or modem is connected.
b) Baud Rate: 9600 (reader default).
c) Auto Login: check this box (recommended) if you want to download all transactions to the
transaction database as soon as you connect to the location.
d) Reader Gateway: check the box if the PC is connected to the RS232 Com Port of a reader.
e) Local Connect: check the box if you are not using a modem.
f) Modem Phone #: enter phone number if you are using a modem.
5. If you are using a RS485 to RS232 converter for a direct connection to the reader’s 485 Com Port, enter
the following settings:
a) Com Port: select Com Port number to which the converter is connected.
b) Baud Rate: leave set at the default of 38400.
c) Auto Login: check this box (recommended) if you want to download all transactions to the
transaction database as soon as you connect to the location.
d) Reader Gateway: Do Not check the box.
e) Local Connect: Check the box.
f) Modem Phone: cannot enter the phone number.
6. Click the connect button to connect to the location. You will get the message ‘There are no readers in
location, to login, scan for readers now?’. Select Yes. The software will now give you a list of ‘New Read-
ers Found’. Click on OK and let the software backup all the readers settings. When asked ‘ Do you wish to
Login to all readers at this time?’, select Yes (if all the readers are not found, repeat this step).

5. Enter Reader Names: (Section 2.6 User Manual)
After you find all the systems readers, you will want to give each one a name so you can identify them.
1. Click on the "+" sign next to ‘All readers’, this will show you an icon for each reader.
2. Right click on one of the readers, and select properties.
3. Click on the Utilities Tab, verify the serial number and use the site plan to determine the reader ID.
4. Click on the Settings Tab, then the Edit button. Locate the field ‘Reader ID’ and enter the name for the reader.
Now click on the send button to send the name to the reader. Repeat for all readers
6. Create Access Groups: (Section 2.8 User Manual)
Anaccess groupdescribes agroup ofcardholders havingaccess toa specifiedlist ofreaders duringa specifiedTime Zone.
1. Right click on the Location, and select ‘New’, then ‘Access Group’ from the pull down menu.
2. Assign a Name for the Access Group which will best describe its function, along with a defined Time Zone from
1 to 15. To define Time Zones, refer to step 8.
7. Assign each card reader to an Access Group: (Section 2.9 User Manual)
1. Select a reader, left click and hold the mouse button down. Drag the reader over the top of the Access Group
and release the button. Repeat until all desired readers are in that Access Group. Click on the "+" sign next
to the Access Group to verify all the desired readers are there.
8. Defining Time Zones: (Section 2.7 User Manual)
There are 15 Time Zones in the SK-ACP. Time Zone 0 is always void, and Time Zone 1 is always valid. All the rest of
the Time Zones can be defined. You may edit the Time Zones to fit your specific needs. To edit a Time Zone, click on
the Time Clock Icon.
1. Select a Time Zone (2-15), and set the timed sections to green to allow access and red to deny access. The
button to the right of each row will make the entire day either red or green. This menu also allows you to set
antipassback and date restrictions. Press “Send” after setting up the Time Zone.
9. Block Loading Cards:
If you wish to allow users to be able to use the system before the user data base has been created, you may use the block
load feature. The block load feature allows you to put a range of cards into a selected access group. For each card in
the block, a user data base record is created that has only the card number and the access group. You can later edit these
records to add the user name and other user data.
1. Select the User Manager (Icon with two faces).
2. From the “Users” pull down menu, select “Add User Block”.
3. Enter the beginning and ending card numbers and select the Access Group.
4. Click on the “Send” button to send the card numbers to the card readers.
10. Entering Card Users: (Section 2.10 User Manual)
You have the option to enter your card users into the User Manager before control panel and card readers are installed.
However, you will have to later edit the user records to assign users to the newly created Access Groups. Therefore it is
a good idea to create the Access Groups (even if they do not as yet have readers in them, so that you can assign users
to them while entering the user).
1. Select the User Manager (Icon with two faces).
2. Click on the “+” button (User Detail Screen).
3. Enter all the card user information, including the Access Group.
4. Click the “3” button to save the information, in the card user database.
5. Repeat steps a, b, c, d until all card users have been entered.
6. Click on the “Send” button to send the card numbers to the card readers (if readers have been installed).
11. Test your programming:
Take a card and use it on each reader. Try using a card in the Master Users
group and then one from each other User Group. Look in the transaction
database (icon with the Magnifier Glass) to verify that each card is granted
or denied access correctly. 20447 Nordhoff Street• Chatsworth, CA 91311
phone 818-882-0020 • fax 818-882-7052
TOLL FREE (877) TOUCHCARD (877-868-2422)
E-mail: mail@securakey.com
Web site: www.securakey.com
5026
Table of contents
Other Securakey Control Panel manuals
Popular Control Panel manuals by other brands
Bosch
Bosch Solution 6+6 Wireless AE Quick reference guide

NAPCO
NAPCO Magnum Alert 2600 Operating & installation instructions

Kracht
Kracht SD 1 manual

Siemens
Siemens FIREFINDER-XLS Installation, operation and maintenance manual

Ampac
Ampac ZoneSense Plus Installation, commissioning & operation
ETC
ETC QuickTouch+ Mk2 installation manual
