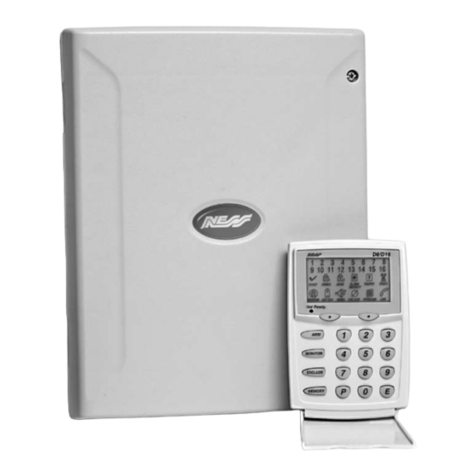
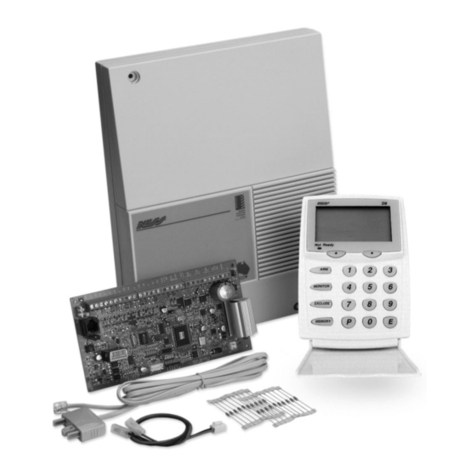
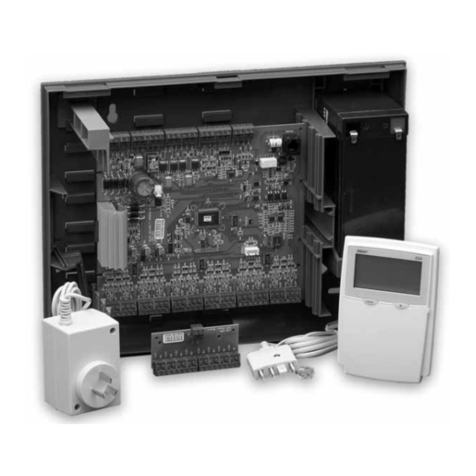
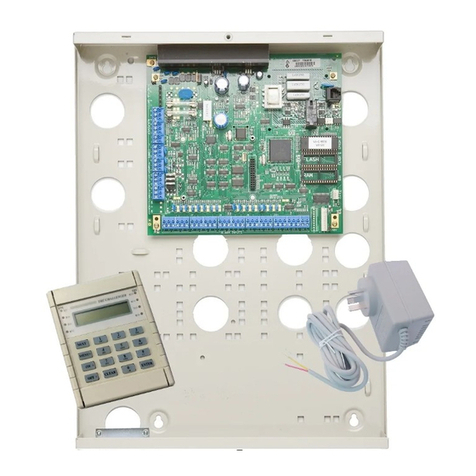
Ness D16x C-Bus Enabled Assembly instructions

NESS D16x C-Bus™ Enabled
ALARM CONTROL PANEL
INSTALLATION & PROGRAMMING MANUAL
FOR D16x C-BUS OPTIONS
REVISION 1

2NESS D16x C-BUS ENABLED CONTROL PANEL – PROGRAMMING MANUAL
NESS D16x C-BUS ENABLED CONTROL PANEL – PROGRAMMING MANUAL
FEATURING
• Ness D16x is a Fully Approved C-Bus Product
• Full Compatibility with Clipsal C-Bus commands
• Featuring 16 easily programmable C-Bus Events
• Multiple D16x events can operate C-Bus devices
Unsealed zones
End of exit delay
Alarm condition
Armed or Disarmed state
• C-Bus devices can arm the D16x
NESS D16x C-Bus Enabled
ALARM CONTROL PANEL
This manual covers the C-Bus programming options of the
D16x panel. For full D16x programming information see the
Ness X Series Installation Manual (Part No. 890-007).
CONTROL PANEL FEATURES
• 8 or 16 alarm zones.
• Supports up to 3 remote LCD or LED
keypads.
• 56 user codes can be programmed to
operate by keypad PIN, radio key or
access card.
• Optional Ness Radio Interface for fully
integrated wireless security.
• Programmable 2 Area partitioning can
split the panel into two independent areas
plus a common area.
• Monitor Mode allows partial arming, (eg,
permieter security overnight).
• Day Mode feature allows daytime
monitoring of fire doors, coolrooms etc.
• Temporary Day Zone feature allows easy
enabling/disabling of Day Mode.
• Keypad Panic feature.
• Keypad Duress feature.
• Two button arming feature.
• Fire Alarm feature with different siren
tones.
• Highly flexible zone to output mapping.
• Onboard Vibration Sensor Analyser
with programmable sensitivity. Use with
Nessensor vibration sensors.
• Siren chirp and strobe flash on arming
with radio key.
• Quiet chirps option on arm/disarm by
radio key.
• True Dynamic Battery Test actively tests
the battery under load every hour.
• 4 programmable auxiliary outputs.
• Automatic reset fuses.
• Programmable siren/reset lockout.
• 30 event memory from keypad.
• Standard defaults to suit most
applications.
• Easy programming by keypad or
NessComms software.
• All programming data is permanently
stored in a non-volatile memory.
• All inputs and outputs are heavily
protected against lightning and high
voltage supply transients.
• Optional output expander.
DIALLER
• Full remote upload/download by PC and
modem using NessComms software.
• Remote control of outputs via telephone.
• Contact ID Format - Two 14 digit phone
numbers plus one “follow me” number.
• Audible format feature.
• Phone line monitoring (activates output).
• Dialler ‘Listen in’ option for installers.
• Auto Test calls.
• Pulse or DTMF dialling.
•True dial tone detection.
• Hex programmable client codes.
It is recommended that the C-Bus connection
and configuration is performed by an installer
who has attended a C-Bus Training Course.
C-BUS TRAFFIC CONSIDERATIONS
It is possible to configure the panel to send C-Bus commands
each time a zone is unsealed (triggered), even when the unit
is disarmed.
Use this facility with caution - particularly with passive
infrared detectors (PIRs) since the normal operation of some
security devices may flood the C-Bus network with excessive
communication.
Every time a PIR is triggered the D16x will put out a command
on the C-Bus network via the C-Bus Interface.
Excessive C-Bus traffic will affect the performance of the
C-Bus network. This does not completely negate this type of
set up, however it must be limited in its implementation.
For example a PIR in an entry foyer could be used if the event
was limited to the panel being armed, being when it pulses
on a courtesy light or triggers a “welcome home scene”. This
would not give any consideration for it being night or day
without a logical device eg. Colour Touch or Pascal Logic
Unit, residing on the network.

NESS D16x C-BUS ENABLED CONTROL PANEL – PROGRAMMING MANUAL
3
NESS D16x C-BUS ENABLED CONTROL PANEL – PROGRAMMING MANUAL
C-BUS INTERFACE INSTALLATION
3 Pin plug from C-Bus Interface
plugs into the SERIAL socket on
the D16x board.
C-Bus Interface fits in this left
hand slide rail position in the
D16x housing.
RED wire from the C-Bus
Interface connects to any +12V
terminal on the D16x board.
C-Bus Positive (Blue + Orange)
C-Bus Negative (Blue & White + Orange & White)
NETWORK BURDEN JUMPER
This jumper is supplied in the OFF position
and can be enabled if the C-Bus Network
Burden is required. (Further information is
available from Clipsal).
NESS C-BUS INTERFACE
4 Wire Loom for connection to D16x board.
C-Bus Negative: blue & white + orange & white
C-Bus Positive: blue + orange
Remote OFF: brown + brown & white
Remote ON: green + green & white
Remote On/Off is not used by the Ness C-Bus Interface
C-BUS WIRING
Note that the Ness C-Bus interface does not require all the C-Bus wire pairs.

4NESS D16x C-BUS ENABLED CONTROL PANEL – PROGRAMMING MANUAL
NESS D16x C-BUS ENABLED CONTROL PANEL – PROGRAMMING MANUAL
OPTION DESCRIPTION DEFAULT YOUR SETTING
P150E 1E C-BUS ENABLE OFF
P75E 15E C-BUS FAILURE DIALLER REPORT OFF
P167E C-BUS ARM APPLICATION ADDRESS 56
P168E C-BUS ARM AREA 1 GROUP ADDRESS 255 (disabled)
P169E C-BUS ARM AREA 2 GROUP ADDRESS 255 (disabled)
P170E C-BUS ARM AREA 1 & AREA 2 GROUP
ADDRESS 255 (disabled)
P150E 1E C-BUS ENABLE
PROGRAM MODE LEVEL
Installer, Remote by PC.
FACTORY DEFAULT
OFF (disabled)
NOTES
C-Bus operates in normal operating
mode only. C-bus messages are
disabled if the D16x is in User or
Installer program mode.
This option enables the D16x C-Bus option.
PROGRAMMING SEQUENCE:
Press P150E 1E to toggle the option ON or OFF.
OFF: C-Bus is disabled.
ON: C-Bus is enabled.
P75E 15E C-BUS FAILURE DIALLER REPORT
PROGRAM MODE LEVEL
Installer, Remote by PC.
FACTORY DEFAULT
OFF (disabled)
NOTES
This option enables the reporting by dialler of a "C-Bus Failure" message. If messages
between the D16x and the C-Bus have stopped for any reason, the D16x will attempt to
reconnect and then report a "C-Bus Failure" message if reconnection fails.
Press P75E 15E to toggle the option ON or OFF.
OFF: C-Bus failure Dialler report is disabled.
ON: C-Bus failure Dialler report is enabled.

NESS D16x C-BUS ENABLED CONTROL PANEL – PROGRAMMING MANUAL
5
NESS D16x C-BUS ENABLED CONTROL PANEL – PROGRAMMING MANUAL
ARMING WITH C-BUS LIGHTING-LIKE APPLICATION "ON" COMMAND
Options P167E-P170E allow any combination of D16x Area 1 or Area 2 to be armed using a lighting application
ON command. These Program options set the C-Bus Application Address and the Group Address of the Lighting
Application. When an ON command is received from these addresses, the different Area combinations will arm.
P167E C-BUS ARM APPLICATION ADDRESS
PROGRAM MODE LEVEL
Installer, Remote by PC.
FACTORY DEFAULT
56 (default lighting application)
NOTES
See P168E to P170E to set the Group
address needed to arm Areas.
This sets the application address for the C-Bus ON commands that can ARM the panel.
The Application Address has the range of 48 to 95 ($30 to $5F).
Enter a 2 digit number within this range to program the option.
PROGRAMMING SEQUENCE:
Press P167E xxE (xx = 48 to 95)
P168E C-BUS ARM AREA 1 GROUP ADDRESS
PROGRAM MODE LEVEL
Installer, Remote by PC.
FACTORY DEFAULT
255 (no address)
NOTES
1. Area 1 will only arm if zones have
been assigned to it. See option P45E in
the D16x Installation Manual.
2. The shortcut Area 1 arming option
P62E 5E must be ON.
This sets the Group address for the C-Bus ON command that can ARM Area 1 of the panel.
Enter a 3 digit number between 0 to 255 to set the address. An address of 255 will turn OFF
the option.
The P167E Application Address may also have to be set if the default application is not being
used.
PROGRAMMING SEQUENCE:
Press P168E xxxE (xxx = 000 to 255)
P169E C-BUS ARM AREA 2 GROUP ADDRESS
PROGRAM MODE LEVEL
Installer, Remote by PC.
FACTORY DEFAULT
255 (no address)
NOTES
1. Area 2 will only arm if zones have
been assigned to it. See option P46E in
the D16x Installation Manual.
2. The shortcut Area 2 arming option
P62E 6E must be ON.
This sets the Group address for the C-Bus ON command that can ARM Area 2 of the panel.
Enter a 3 digit number between 0 to 255 to set the address. An address of 255 will turn OFF
the option.
The P167E Application Address may also have to be set if the default application is not being
used.
PROGRAMMING SEQUENCE:
Press P169E xxxE (xxx = 000 to 255)
P170E C-BUS ARM AREA 1 & AREA 2 GROUP ADDRESS
PROGRAM MODE LEVEL
Installer, Remote by PC.
FACTORY DEFAULT
255 (no address)
NOTES
1. Area1 & Area 2 will only arm if
zones have been assigned to them.
See option P45E & P46E in the D16x
Installation Manual.
2. The shortcut Area 1 & Area 2 arming
options P62E 5E & 6E must be ON.
3. This arms using the C-Bus User
Code (User 56), which must be set up
to allow Area 1 and/or Area 2 arming.
This sets the Group address for the C-Bus ON command that can ARM Area 1 and/or Area 2
of the panel. Enter a 3 digit number between 0 to 255 to set the address. An address of 255
will turn OFF the option.
The P167E Application Address may also have to be set if the default application is not being
used.
PROGRAMMING SEQUENCE:
Press P170E xxxE (xxx = 000 to 255)
To program User Code 56 for Area1 & Area2 arming.
In installer program mode, press P256E EXCLUDE E 1E 2E

6NESS D16x C-BUS ENABLED CONTROL PANEL – PROGRAMMING MANUAL
NESS D16x C-BUS ENABLED CONTROL PANEL – PROGRAMMING MANUAL
iii GROUP ADDRESS in Decimal Format (ie. identity group address, identity trigger
group, identity variable number). 000-255
aaa VALUE or Action Selector depending on the setting of A.
Seconds or minutes (000-255) or percent (000-100) where relevant.
* Applications marked with an asterix* do not require a value.
DIGITS DESCRIPTION
xxx PROGRAMMING OPTION P151E TO P166E (Output Events 1 to 16).
ee D16x EVENT.
01-16 Zone 1-16 unsealed, irrespective of panel armed or disarmed.
41-56 Zone 1-16 unsealed & panel Armed AREA 1 or AREA 2.
71-86 Zone 1-16 unsealed & panel FULLY Disarmed.
96 End of exit delay.
97 Alarm.
98 Panel Disarmed.
99 Panel Armed.
A APPLICATION IDENTITY.
1 Lighting Application.
2 Trigger Control Application.
3 Enable Control Application.
ff FUNCTION (For more information, see the relevant application document from
Clipsal)
A=1
(LIGHTING APPLICATION)
A=2
(TRIGGER
CONTROL)
A=3
(ENABLE CONTROL)
00 OFF* TRIGGER MIN* N/A
15 ON* TRIGGER MAX* N/A
16 Pulse ON for aaa seconds N/A N/A
17 Pulse OFF for aaa seconds N/A N/A
18 Pulse ON for aaa minutes N/A N/A
19 Pulse OFF for aaa minutes N/A N/A
20 Ramp instantaneous to aaa % Triggers action aaa Sets network variable aaa
21 4 sec ramps light to aaa% N/A N/A
22 8 sec ramps light to aaa% N/A N/A
23 12 sec ramps light to aaa% N/A N/A
24 20 sec ramps light to aaa% N/A N/A
25 30 sec ramps light to aaa% N/A N/A
26 40 sec ramps light to aaa% N/A N/A
27 1 min ramps light to aaa% N/A N/A
28 1.5 min ramps light to aaa% N/A N/A
29 2 min ramps light to aaa% N/A N/A
30 3 min ramps light to aaa% N/A N/A
31 5 min ramps light to aaa% N/A N/A
32 7 min ramps light to aaa% N/A N/A
33 10 min ramps light to aaa% N/A N/A
34 15 min ramps light to aaa% N/A N/A
35 17 min ramps light to aaa% N/A N/A
PROGRAMMING VARIABLES
DESCRIPTION
PxxxE The D16x option number
of the 16 available Output
Events.
(P151E to P166E).
ee The D16x EVENT which will
trigger a C-Bus event.
A The APPLICATION
IDENTITY of the device
being controlled.
(i.e, Lighting Control,
Trigger Control or Enable
Control).
ff FUNCTION (i.e, what the
C-Bus devices will do).
iii The C-Bus GROUP
ADDRESS number for the
devices being controlled.
aaa VALUE. (Such as seconds,
minutes or percent where
relevant).
P151E – P166E C-BUS OUTPUT EVENTS
PROGRAM MODE LEVEL
Installer, Remote by PC.
FACTORY DEFAULT
no events
NOTES
Allowed digits are 0 to 9.
The number of digits is either 8 or 11
depending on whether the value [aaa]
is used - relevant to a particular control
message.
The D16x can be programmed to send up to 16 C-Bus control messages when different
D16x events occur.
These program options set the D16x event to the required C-Bus function output.
PROGRAMMING SEQUENCE: PxxxE eeAffiii[aaa] E

NESS D16x C-BUS ENABLED CONTROL PANEL – PROGRAMMING MANUAL
7
NESS D16x C-BUS ENABLED CONTROL PANEL – PROGRAMMING MANUAL
C-BUS OUTPUT EVENTS
EXAMPLE 1
For example, if you wanted to program Output Event 1 to
turn on a light (ie, Group 001) for 10 minutes when zone 1 is
unsealed and the D16x is disarmed.
In installer program mode, press:
P151E 71 1 18 001 010 E
P151E is the PROGRAMMING OPTION for Output Event 1.
71 is the EVENT number for "Zone 1 unsealed when the
panel is disarmed."
1 is the APPLICATION IDENTITY for a lighting application.
18 is the FUNCTION number to pulse ON a light for
aaa minutes.
001 is the GROUP ADDRESS in this example.
010 is the VALUE. In this case 10 minutes.
Press E to finish. 3 Beeps will be heard.
C-BUS OUTPUT EVENTS
EXAMPLE 2
For example, if you wanted to program Output Event 2 to do a
20 second ramp of a light to 90% when the D16x is disarmed.
In installer program mode, press:
P152E 98 1 24 001 090 E
P152E is the PROGRAMMING OPTION for Output Event 2.
98 is the EVENT number for "Panel disarmed."
1 is the APPLICATION IDENTITY for a lighting application.
24 is the FUNCTION number to "20 sec ramp a light".
001 is the GROUP ADDRESS in this example.
090 is the VALUE. In this case 90%.
Press E to finish. 3 Beeps will be heard.
INSTALLER'S PROGRAMMING RECORD
NOTES
Output
Event No. xxx ee A ff iii aaa
Option No.
Event
Identity
Function
Group
Address
Value
1 P151E
2 P152E
3 P153E
4 P154E
5 P155E
6 P156E
7 P157E
8 P158E
9 P159E
10 P160E
11 P161E
12 P162E
13 P163E
14 P164E
15 P165E
16 P166E

D16x C-BUS ENABLED CONTROL PANEL
PROGRAMMING MANUAL Revision 1 (Sep2005).
Document Part Number: 890-344
For products:
106-009 D16x C-Bus Enabled Control Panel
COPYRIGHT NOTICE
All rights reserved. No part of this publication may be reproduced, transmitted or
stored in a retrieval system in any form or by any means, electronic, mechanical,
photocopying, recording, or otherwise, without the prior written permission of Ness.
Ness reserves the right to make changes to features and specifications at any
time without prior notification in the interest of ongoing product development and
improvement.
© 2005 Ness Security Products Pty Ltd ABN 28 069 984 372
“Ness Security Products - proudly designed and made in Australia”
www.ness.com.au
HEAD OFFICE:
Ness Security Products Pty Ltd
ABN 28 069 984 372
4 / 167 Prospect Hwy
Seven Hills NSW 2147 Australia
Ph +61 2 8825 9222
Admin Fax +61 2 9838 8508
SYDNEY
4 / 167 Prospect Highway
Seven Hills NSW 2147
Ph 02 8825 9222
Fax 02 9674 2520
MELBOURNE
24 Terracotta Drive
Blackburn VIC 3130
Ph 03 9875 6400
Fax 03 9875 6422
BRISBANE
Unit 3, 471 Lytton Road
Morningside QLD 4170
Ph 07 3399 4910
Fax 07 3217 9711
PERTH
Unit 1, 567 Newcastle Street
West Perth WA 6005
Ph 08 9328 2511
Fax 08 9227 7073
ADELAIDE
13 Weaver Street
Edwardstown SA 5039
Ph: 08 8277 7255
Fax: 08 8276 3028
Table of contents
Other Ness Control Panel manuals
