Seko TDS Series User manual

TDS – Timed Dosing System
Instruciton manual TDS series Code 0000136687 rev. 1.1 1
INSTRUCION MANUAL
TDS SERIES
TDS DD-230 or 115 TDS DD-Battery
TDS DA-230 or 115
Contents
1 Getting started………………………………………………………..…. Page 2
2 Installation…………………………………………………………………. Page 4
3 TDS-DA (Analog clock) - Set-Up & Operation…………………………. Page 6
4 TDS-DD (Digital clock) - Set-Up & Operation…………………………. Page 8
5 Maintenance & Accessories …..………………………………………… Page 10
6 Troubleshooting …………………………………………………………… Page 12
7 Contacting SEKO .………………………………………………………… Page 12

TDS – Timed Dosing System
Instruciton manual TDS series Code 0000136687 rev. 1.1 2
1 GETTING STARTED
Thank you for buying this Seko product.
Seko’s TDS systems are high quality products suitable for many applications requiring timed dosing. The
simplicity of the programming process makes this system easy to use.
1.1 Welcome
The TDS is a metering system with timed operation and a peristaltic pump. The pump is controlled by a
programmable analog or digital clock.
Please review this manual carefully. Pay particular attention to warnings and precautions. Always
follow good safety procedures, including the use of proper clothing, eye and face protection.
Please be sure to read this manual and select operating mode before installation.
1.2 What’s in the box?
Before you start, check that your box contains the following items:
•TDS system
•PVC ¼” OD tube 6 ft (2 m.)
•Poly ¼” OD tube 6 ft (2 m.)
•Mounting bracket.
•Anchors and screws.
•PVC suction filter and metal suction filter.
•Pool valve kit.
•Instruction manual.
1.3 Technical features
TDS DA
•Power supply available: 115 or 230Vac
•Consumption: 5 W
•Flow rate: 0.8 oz/min (1.5 l/h)
•Back Pressure: 22 PSI (1.5 bar)
•Protection of the System: The gasketed enclosure on the TDS is highly water resistant and the
electronics are further protected within the enclosure.
•Dimensions:H 8” ½ x W 6” ½ x D 4” ½
•Weight: 2 lbs (0.9 Kg).
TDS DD
•Power supply available: 115 or 230Vac or 12VDC (with 8 batteries “C” type)
•Consumption: 8 W
•Flow rate: 0.8 oz/min (1.5 l/h)
•Back Pressure: 22 PSI (1.5 bar)
•Protection of the System: The gasketed enclosure on the TDS is highly water resistant and the
electronics are further protected within the enclosure
•Dimensions:H 8” ½ x W 6” ½ x D 4” ½
•Weight: 2 lbs (0.9 Kg).

TDS – Timed Dosing System
Instruciton manual TDS series Code 0000136687 rev. 1.1 3
1.4 Warnings
Read this manual carefully before installation and before starting up the TDS system.
Check the model of the equipment bought, when using the installation and programming settings
indicated in this manual.
For all connections refer to the topographical diagram for the control circuit given in this manual.
WARNING: Always follow the necessary safety procedures, including the use of adequate
protection for the eyes, face, hands, and clothing.
WARNING: When installing or carrying out maintenance on this equipment, always disconnect it
from the power supply.
Seko is constantly striving to improve all its products, and we therefore reserve the right to make
changes at any time without notice.
Failure to abide by the indications given in this manual may result in damage to people or
property, or compromise or damage the equipment itself.
1.5 Material required during installation
An installation kit is available (see Maintenance & Accessories).

TDS – Timed Dosing System
Instruciton manual TDS series Code 0000136687 rev. 1.1 4
2 INSTALLATION
Check all applicable plumbing and electrical codes before proceeding with the installation. This will help to
ensure that the system is installed in safe and suitable manner.
CAUTION: Do not mount the unit in the direct path of steam. This can short circuit and
permanently damage the unit.
WARNING: Before installing the device and before intervening in any way on the metering unit,
make sure that the power supply is disconnected.
2.1 Mounting the system
•Apply the panel unit system with the brackets and screws supplied
•Determine a suitable location for the system
•Using the bracket as a template, mark and drill holes for bolting the system to the wall
•Insert the anchors in the holes
•Bolt the bracket in place (flat side against the wall with holes on bottom) with the hardware provided
•Open the cabinet front, completely unscrew the screws at the right.

TDS – Timed Dosing System
Instruciton manual TDS series Code 0000136687 rev. 1.1 5
2.2 Plumbing
The following installation steps apply for detergent pump:
•Suction Line - Assemble the foot filter to insert in the product container. Insert the 1/4" OD PVC tube into the
coupling nut and screw into connector. (See picture 2a and 2b).
Picture 2a. Foot filter for water treatment Picture 2b. Foot filter for drain
Always use the foot filter and make sure that it reaches the bottom of the tank.
Periodically clean it from possible residues.
•Delivery Line - Attach PVC tube to delivery side of pump. Attach other end to duck check valve or injection
fitting. The following components are included:
- duck check valve in Viton:
Threads: 3/8” Standard
Drill bit size: 9/16”
- Injection fitting:
Threads: 1/8” Standard
Drill bit size: 5/16”
- Adapter
Threads: 3/8” Standard Female -1/2”Standard Male
Stainless steel
¼” OD PVC tube
Foot filter

TDS – Timed Dosing System
Instruciton manual TDS series Code 0000136687 rev. 1.1 6
1
WHITE
BROWN
52
3
BLACK
BLACK
WHITE
BLACK WHITE
BLACK
3 TDS DA (ANALOG CLOCK)
3.1 Circuit diagram
1
A. Daily Clock
B. Peristaltic Pump
C. Timer 2..18 minutes
D. Power supply
B
A
C
D

TDS – Timed Dosing System
Instruciton manual TDS series Code 0000136687 rev. 1.1 7
3.2 Set dosing Time
Set dosing time with the potentiometer (Timer) on the circuit board. (See picture below). It is necessary to set
Daily Clock to power on the circuit.
The dosing time can be adjusted from 2 to 18 minutes.
3.3 Set daily clock
Set the current time on the instrument, tour wheel on rotation mode, your reference is the position time.
Look next picture it have some tab on rotation wheel, if it press inside to set on. Every tab is 15 minutes.
The daily clock is stopped if power supply not present.
DA-230VAC DA-115VAC
TDS DA-230: 1-12 =>1-12am; 13-24=>1-12pm
Example
To set a dosing time of 30 minutes, following these steps:
1. Set the potentiometer at 15 minutes;
2. Press two jumper as show the picture.
Current time
setting Rotation
direction
Timer
1
2
1
1
1
0
9
8
7
6
5
4
3
2
1
1
2
1
1
1
0
9
8
7
6
5
4
3
2
1
PM
AM
15 minutes tab

TDS – Timed Dosing System
Instruciton manual TDS series Code 0000136687 rev. 1.1 8
4 TDS-DD (Digital lock)
4.1 Circuit diagram
B
R
O
W
N
YELLOW
WHITE
15 32
B
R
O
W
N
B
L
U
E

TDS – Timed Dosing System
Instruciton manual TDS series Code 0000136687 rev. 1.1 9
4.2 PROGRAMMING
4.2.1 Controls of the digital clock
The clock is situated on the inside of the front cover. On the front of the clock there are the following elements:
•I AUTO O: switch for selecting the operating mode, continuous (I), automatic (AUTO), system
excluded (O).
•
RUN P: selector for setting the time on the timer (), for operating the timer (RUN), for
programming the timer (P).
•Numbers from 1 to 7: series of numbers useful for programming the timer and the clock. They indicate
the day(s) of the week by means of the symbol(s) Lon the display in positions
corresponding to the numbers
•push-button “P”: to confirm the programming that has been done and go on to the next step
•push-buttons “1…7”: for selecting the programming blocks by means of the symbols Lshown on
the upper part of the display.
The sequence is cyclic, and is: 1 (Monday), 2 (Tuesday), 3 (Wednesday), 4 (Thursday), 5 (Friday), 6
(Saturday), 7 (Sunday); 1…5 (from Monday to Friday), 6…7 (Saturday and Sunday); 1…6 (from Monday to
Saturday), 1…7 (from Monday to Sunday).
•push-button “h”: for selecting the hours at the time of programming.
•push-button “m”: for selecting the minutes at the time of programming.
•push-button “¡
¡¡
¡”: SKIP push-button.
•push-button “R”: reset.

TDS – Timed Dosing System
Instruciton manual TDS series Code 0000136687 rev. 1.1 10
4.2.2 Programming the digital timer
Step 1. – Set The Current Day And Current Time
Set upper left slide switch to middle or “AUTO” position
Set upper right slide switch to the left (Clock Face Icon) position
Use the 1…7 button to scroll to the current day – 1/Monday thru 7/Sunday
Use the hour (h) and minute (m) buttons to set the current time
Step 2. – Set “Dosing Start” And “Dosing Stop” Times
Move the upper right slide switch completely to the right or “P” position
(A light bulb icon and the number 1 will appear)
Use the 1…7 button to scroll to the day or days that dosing is to occur (1 = Monday thru7 = Sunday)
Use the hour (h) and minute (m) button to set the “START DOSING” time
Press “P” button to set
(The display will now be flashing and the number 2 will appear indicating that the “STOP DOSING” time must be set)
Use the 1…7 push button to scroll to the days that dosing will occur as above
Use the hour (h) and minute (m) push button to set the “STOP DOSING” time
(NOTE: With the standard squeeze tube, the SEKO TDS will feed approximately .8oz/min.)
Press “P” button to set.
(The TDS accepts up to eight dosings per day by repeating the above instructions for program steps 3 thru 16).
If no more dosing times are to be set, move the upper right slide switch to the “RUN” position.
The intervals of operation can be overlapped, as per the following example:
One weekly cycle from 9.00-12.00 a.m. and one daily cycle on Mondays from 11.00 a.m. to 2.00 p.m. will
cause a cycle on Mondays from 9.00 a.m. to 2.00 p.m.
4.2.3 Cancelling cycles
To cancel a single cycle of activation of the system, proceed as follows:
Select the time at which the cycle is to start using the “ P ” push-button. Keep the “ P ” and ” ¡
¡¡
¡” push-
buttons both pressed until the display flashes with the time 0.00. Repeat the same operation with the time at
which the cycle is to end.
4.2.4 Skip function
This function enables activation of the programs for the next day to be avoided, by pressing the “¡
¡¡
¡” push-
button (with the right-hand switch in the “ RUN ” mode). Activation is highlighted by the appearance of the ¡
¡¡
¡
symbol on the display.
The SKIP order will start at 0.00 a.m. and end at 12.00 p.m. on the day following selection. It can only be
revoked before the day for which the SKIP function has been activated.
When the SKIP function comes into effect, the symbol disappears from the display and the time of day will
flash throughout the day. The push-button pad will be inactive for the whole SKIPPED day. Once the effect of
this command has started, it can no longer be cancelled. Do not press the “¡
¡¡
¡” push-button on the skipped
day , otherwise the SKIP command will also be extended to the next day.

TDS – Timed Dosing System
Instruciton manual TDS series Code 0000136687 rev. 1.1 11
5 MAINTENANCE AND ACCESSORIES
5.1 For TDS-DD Battery (Digital clock with batteries)
When the led in front of unit lights up the battery remaining life is about 50 hours. Replace the batteries to
avoid missed dosings.
5.2 For TDS DA (Analog clock)
•If the pump has to dose more then 15 minutes it will be necessary to set daily clock at 30 minutes and
adjust trimmer.
•Check Daily clock every week.
5.3 Replacing the squeeze tube
Make sure that on the clock the left-hand switch is on the “ O ” position (for the TDS DD) and proceed as
follows:
•Remove the snap-on cover protecting the peristaltic pump.
•Place the thumbscrew holder with the two thumbscrews in a vertical position.
•Remove the connector situated to the left of the pump from its seat and pull the pipe towards the front
panel. While the pipe is being withdrawn, follow its path by turning the thumbscrew holder in a clockwise
direction by hand until the connector to the right of the pump can also be removed.
•To re-assemble, move the thumbscrew holder with the two thumbscrews to a horizontal position.
•Push the connector to the left of the pump in as far as it will go, with the curved part towards the bottom;
•Press the pipe into its seat, following its path progressively by turning the thumbscrew holder in a clockwise
direction by hand, until the connector situated to the right of the pump has also been seated as far as it will
go.
•Put the protecting cover back into place starting with the upper edge, positioning it with the fitted edge
towards the pump and pressing it slightly on the sides until it clicks audibly shut
It will now be possible to position the left-hand switch on “ I ” or “ AUTO ” (for the TDS DD), depending on
requirements

TDS – Timed Dosing System
Instruciton manual TDS series Code 0000136687 rev. 1.1 12
6 TROUBLESHOOTING
6.1 Pump will not activate:
•Check pump output terminals for loose screws and disconnected wires.
•Check for proper voltage across motor windings.
•Check for obstruction in pump head.
6.2 Pump runs too slowly:
•Check roller block for binding.
•Check for lubrication on squeeze tube.
6.3 Loss of pump prime:
•Check pickup line for any holes or air leaks.
•Check squeeze tubing in pump for any cracks or pin holes.
•Check tubing for deterioration.
7 CONTACTING SEKO
Web site: www.sekousa.com
SEKO Italia
SEKO Asia pacific
SEKO Brasil
SEKO Deutschland
SEKO France
SEKO Iberica
SEKO Southern Africa
SEKO UK
SEKO USA
This manual suits for next models
5
Other Seko Water Pump manuals

Seko
Seko KOMPACT AMC 200 User manual
Seko
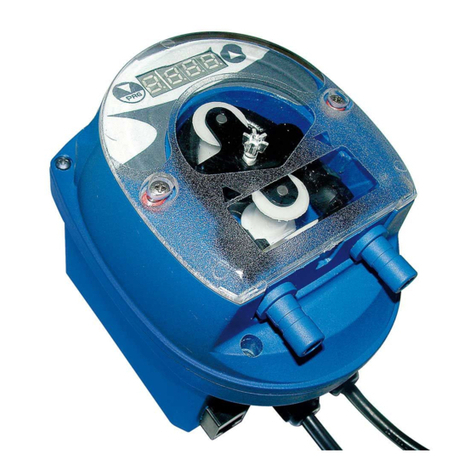
Seko OPL BASIC User manual

Seko
Seko AKTUA ATR-05S Manual

Seko
Seko SAM 5-ME User guide

Seko
Seko KRONOS 50 User manual
Seko
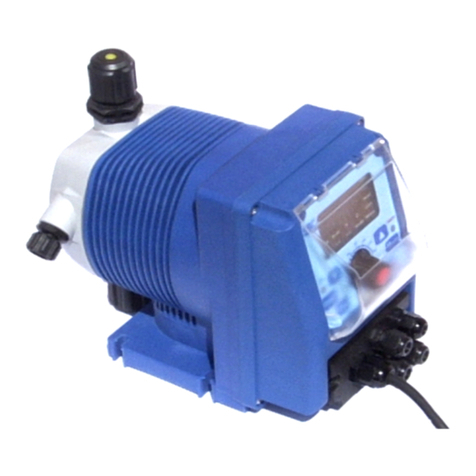
Seko Maxima MPG User manual

Seko
Seko KOMPACT AMC User manual

Seko
Seko PULV User manual

Seko
Seko TEKNA EVO TPG User manual

Seko
Seko PoolMatch pH User manual
Popular Water Pump manuals by other brands
SHIMGE
SHIMGE QX Series user manual

JOHN BLUE
JOHN BLUE PSP-3340 Installation and operation manual

Solinst
Solinst 410 operating instructions
Waters
Waters 1500-Series Operator's guide
Chemo
Chemo DT-MOBIL 400 Installation and operating instructions
Pfeiffer Vacuum
Pfeiffer Vacuum WOD 250 B operating instructions

