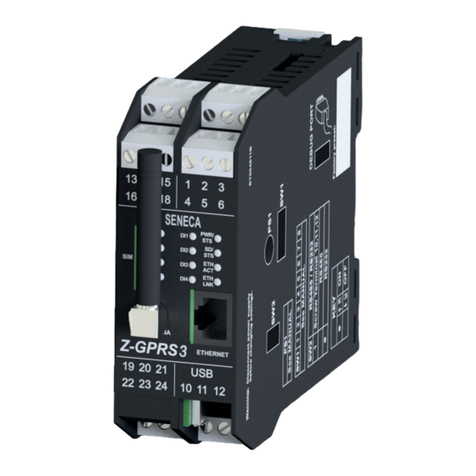
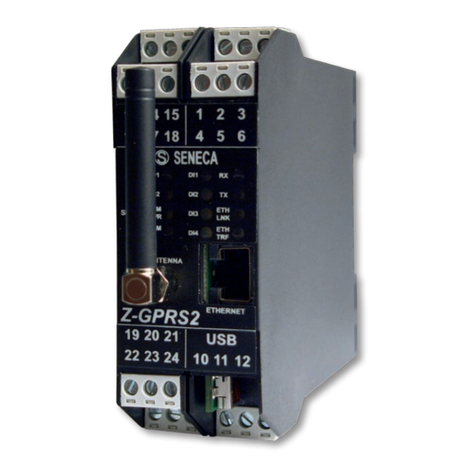
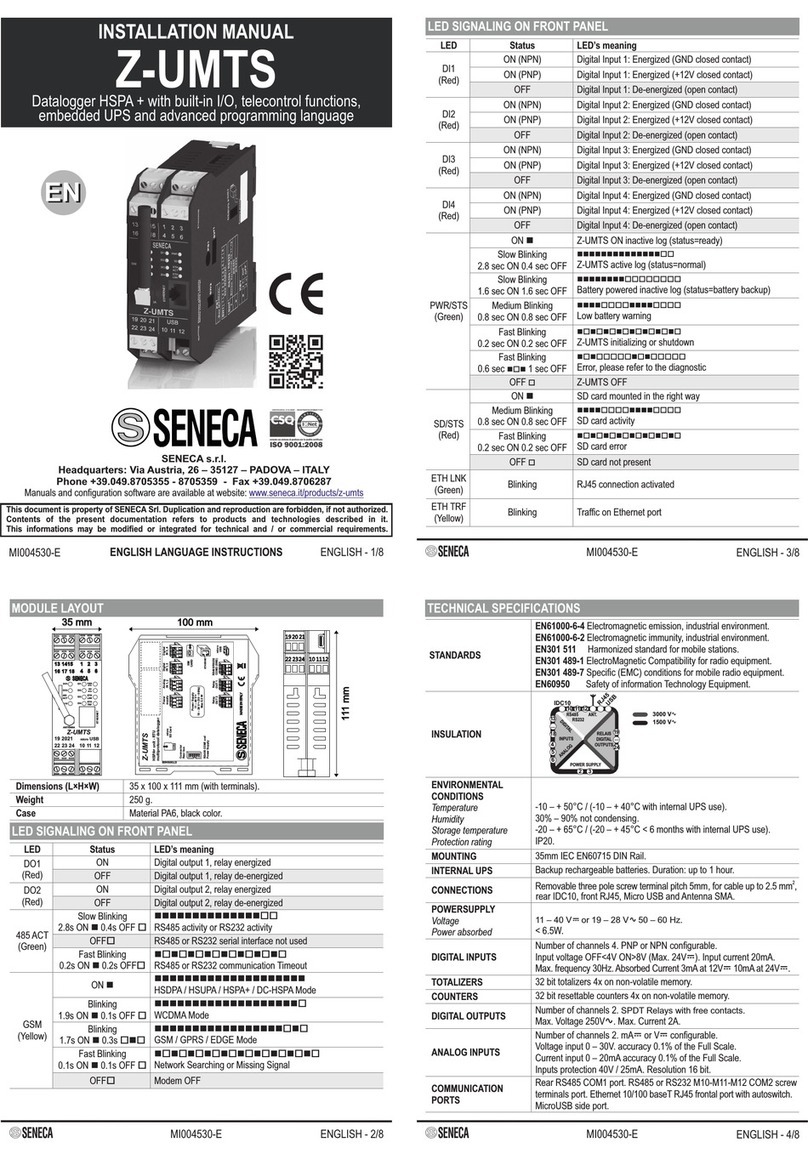
Seneca Z-GPRS3 HW2 User manual

ENGLISH - 1/8ENGLISH LANGUAGE INSTRUCTIONS
MI004402-E
This document is property of SENECA rl. Duplication and reproduction are forbidden, if not authorized.S
Contents of the present documentation refers to products and technologies described in it.
This informations may be modified or integrated for technical and / or commercial requirements.
SENECA s.r.l.
Headquarters: Via Austria, 26 – 35127 – PADOVA – ITALY
Phone +39.049.8705355 - 8705359 - Fax +39.049.8706287
Manuals and configuration software are available at website: www.seneca.it/products/z-gprs3
EN
EN
INSTALLATION MANUAL
Z-GPRS3 HW2
GSM/GPRS datalogger with built-in s,I/O
telecontrol functions and advanced programming language

ENGLISH - 2/8
t
STANDARDS
EN61000-6-4 Electromagnetic emission, industrial environment
.EN61000-6-2 Electromagnetic immunity, industrial environment.
.EN301 511 Harmonized standard for mobile stations
.EN301 489-1 ElectroMagnetic Compatibility for radio equipment
.EN301 489-7 Specific (EMC) conditions for mobile radio equipment
EN60950 Safety of information Technology Equipment.
INSULATION
ENVIRONMENTAL
CONDITIONS
Temperature
Humidity
Storage temperature
Protection rating
0 + 50°C / (-10 + 40°C with internal UPS use).––
30% – t ing.90% no condens
––-20 + 65°C / (-20 + 45°C < 6 with internal UPS use).months
IP20.
MOUNTING
35mm IEC EN60715 DIN Rail.
INTERNAL UPS
Backup rechargeable batteries, NiMH
CONNECTIONS
Removable three pole screw terminal pitch 5mm, for cable up to 2.5 mm ,
2
rear IDC10, front RJ45, Micro USB and Antenna SMA.
POWERSUPPLY
Voltage
Power absorbed
11 – 40 V or 19 – 28 V – . P. maxCC50 60 Hz < 6.5W.
If the voltage is lower than 12 V, the internal UPS battery can' t be
recharged.
DIGITAL INPUTS
Number of channels 4. PNP or NPN configurable.
Input voltage OFF<4V ON>8V (Max. 24V ). Input current 20mA.C
Max. frequency 30Hz. Absorbed Current 3mA @ 12V 10mA @ 24V .CC
TOTALIZERS
Four 32 bit totalizers on non-volatile memory.
COUNTERS
Four 32 bit resettable counters on non-volatile memory.
DIGITAL OUTPUTS
Number of channels SPDT Relays with free contacts.2.
Max. Voltage 250V . Max. Current 2A.A
ANALOG INPUTS
Number of channels 2. mA or V configurable.CC
Voltage input 0 – 30V. accuracy 0.1% of the Full Scale.
Current input 0 20mA– accuracy 0.1% of the Full Scale.
Inputs protection 40V / 25mA. Resolution 16 bit.
COMMUNICATION
PORTS
Rear RS485 COM1 port. RS485 or RS232 M10-M11-M12 COM2 screw
terminals port. Ethernet 10/100 baseT RJ45 frontal port with autoswitch.
MicroUSB side port.
TECHNICAL SPECIFICATIONS
Communication
Power
Supply
Input Output
1500 V~
30V00 ~
USB
RS485
RS485
RJ45
DI 1
DI 2
DI 3
DI 4
AI 1
AI 2
DO 1
DO 2

ENGLISH - 3/8
t
The symbol with the word!WARNING identifies conditions and actions that pose hazard(s) to
the user identifies conditions andactions that may. The symbol with the word
!CAUTION
damage the device or the equipements connected.
No warranty is guaranteed in connection with faults resulting from improper use, from modifications
or repairs carried out by Manufacturer-unauthorized personnel on the device, or if the content of this
user Manual is not followed.
WARNING: Before performing any operation is mandatory to read the full contents
of this manual. The module may only be used by qualified and skilled technicians in the
field of electric installation. Specific documentation is available for download at website:
w .seneca.it/products/z- .ww gprs3
Only the Manufacturer is authorized to repair the module or to replace damaged parts.
The product is susceptible to electrostatic discharge, take appropriate countermeasures
during any operation.
CAUTION: It is forbidden to place anything that could obstruct the ventilation slits.
.It is forbidden to install the module near heat sources
CAUTION: When you turn On the module for the first time, the device must be supplied
without any interruptions for at least 72 hours in order to charge the internal batteries.
Disposal of electrical & electronic equipment (applicable throughout the EU and other
countries with separate collection programs). found on this product or on itsThe symbol
packaging indicates that this product it must be handed over to an applicable collection point,
for the recycling of electrical and electronic equipments.
PRELIMINARY WARNINGS
The module rnalhas an inte UPS that allows it to remain turned ON even without external power
supply. To turn off the module after removing the external power supply you can press the
button PS1 on the right side of the module for at least 10 seconds. When you release the
button the PWR LED turns OFF in order to signal that the module is switched off.
MODEM
GSM / GPRS Quad-Band: 850/900/1800/1900 Mhz
Coding scheme CS-1, CS-2, CS-3, CS-4
Class 4 (2W) at GSM 850 and EGSM 900
Class 2 (1W) at DCS 1800 and PCS 190
SUPPORTED
SYSTEM PROTOCOLS
FTP client, SMTP client, (SSL)http rest (SSL), MQTT ,
ModBUS TCP server, ModBUS TCP client,
ModBUS RTU master, ModBUS RTU slave.
For more information, please refer to the User Manual.
STORAGE UNIT
microSD and microSDHC Max. 32GB.
SIM SLOT
Standard SIM 15x25 mm
PROCESSOR
ARM 32bit
OPERATING SYSTEM
Real Time Multitasking
CHARACTERISTICS
Embedded Webserver and microSD Webserver
TECHNICAL SPECIFICATIONS
MODULE SHUT DOWN PROCEDURE

ENGLISH - 4/8
t
RS485
A
RS485
B
RS485
GND
IDC10
Power supply
AC-
Power supply
AC+
B
A
Don’t turn upside down don’t force the insertionthe module and o intof the IDC10 connector the
Z-PC-DIN bus. The IDC10 connector located on the rear of the module will be inserted on a free slot
of Z-PC-DIN accessory. In the figure you can see the meaning of the various pins of the rear IDC10
connector if you want to provide the signals directly through this connector. The pictures andFig. 1 c
Fig.1 d show how to connect powersupply and RS485 COM1 port to the rear IDC10 connector.
USE OF Z-PC-DINAL ACCESSORY
Insertion on the IEC EN 60715 DIN rail:
1) Move the two hooks on the back of the module
outwards as illustrated in fig. 1b.
2) Insert the module rear IDC10 connector into a free
slot of DIN rail accessory as you can see in fig 1a.
(the insertion is one way only because the connectors
are polarized).
3) To secure the module to the IEC EN 60715 DIN rail,
tighten the two hooks on the side of the IDC10 rear
connector as shown in fig. 1a.
Removal from IEC EN 60715 DIN rail:
As shown in fig. 1b:
1) Move outwards the two hooks on the side of the
module, with the help of a screwdriver.
2) Extract the module from the IEC EN 60715 DIN rail.
INSTALLATION ON AND REMOVAL FROM IEC EN 60715 DIN RAIL
Fig. 1a
20 21
19
23 24
22 11 12
10
D4I
D3I
D2I
DI1
ETH
LNK
ETH
ACT
SD
PWR
ETHERNET
GSM
485
ACT
DO2
D1O
ANTENNA
Z-GPRS3
19 20 21
22 23 24
micro USB
10 11 12
13 14 15
16 17 18
123
456
S
SENECA
Fig. 1b
20 21
19
23 24
22 11 12
10
D4I
D3I
D2I
DI1
ETH
LNK
ETH
ACT
SD
PWR
ETHERNET
GSM
485
ACT
DO2
D1O
ANTENNA
Z-GPRS3
19 20 21
22 23 24
micro USB
10 11 12
13 14 15
16 17 18
123
456
S
SENECA

ENGLISH - 5/8
t
10 GND
11 A(+)
12 B (-)
10 GND
11 RX
12 TX
N.A.2=22
CO.2=23
N.C.2=24
N.A.1=19
CO.1=20
N.C.1=21
2
1
3
+12V at 40 mAC
Auxiliary volt.
Powersupply
Powersupply
19 28V 50 – 60 Hz– A
11 40V 6.5W– C
Warning powersupply: The upper limits must not be exceeded in order to avoid
serious damage to the module.
Power off the module, with the PS1 button, before connecting the inputs and outputs.
In order to satisfy the electromagnetic compliance requirements:
- Use shielded cables for the signals transmission;
- Connect the shield to a preferential ground for devices;
- Space the shielded cables from other cables used for power installations
(transformers, inverters, motors, induction ovens, etc...);
2POWERSUPPLY
The power supply must be connected to terminals 2 and 3.
The supply voltage must be between:
.11 and 40V (any polarity), or between 19 and 28 VCA
The power supply source must be protected from any malfunctions
of the module through appropriately sized safety fuse.
2ANALOG INPUTS
Voltage
Current active sensor (4 fili)
Current passive sensor (2 fili)
The module has two
software voltage or
current configurable
analog inputs.
For the configuration
software you can read
the user manual.
2DIGITAL INPUTS
Internal power supply NPN
Internal power supply PNP
External power supply PNP
2DIGITAL OUTPUTS
The module has two digital
outputs with free contacts.
The figures show the internal
relay contacts available.
2COM2 SERIAL PORT
RS485
SERIAL
PORT
(SW2=OFF )
RS232
SERIAL
PORT
(SW2=ON )
The module has a serial port
available to terminals 10-11-12
You can configure this port
through SW2 switch.
ELECTRICAL CONNECTIONS
5AI1
6AI2
1 12V
12V 40mAC
4GND
5AI1
6AI2
+
+
4GND
5AI1
6AI2
+
+
13 DI1
14 DI2
15 +12V
16 GND
17 DI3
18 DI4
0VC
Max 24VC
12V 20mAC
13 DI1
14 DI2
15 +12V
16 GND
17 DI3
18 DI4
13 DI1
14 DI2
15 +12V
16 GND
17 DI3
18 DI4
0VC

ENGLISH - 6/8
t
LED
Status
LED’s meaning
DO1
(Red)
ON
Digital output 1, relay energized
OFF
Digital output 1, relay de-energized
DO2
(Red)
ON
Digital output , relay energized2
OFF
Digital output , relay de-energized2
485 ACT
(Green)
Slow Blinking
2.8s ON 0.4s OFFno
nnnnnnnnnnnnnnoo
RS485 activity or RS232 activity
OFFo
RS485 or RS232 serial interface not used
Fast Blinking
0.2s ON 0.2s OFFno
nononononononono
RS485 or RS232 communication Timeout
GSM
(Yellow)
Blinking
64ms ON 3s OFFno
noooooooooooooooooooooooo
Connected to the GSM network
Blinking
64ms ON 0.8s OFF on
noooooooooooo
Searching the GSM or GPRS network
Fast Blinking
64ms ON 0.3s OFFno
nooooo
Connected to the GPRS network
OFFo
Modem is not running
LED SIGNALING ON FRONT PANEL
Dimensions (L×H×W)
35 x 102,5 x 111 mm (with terminals).
Weight
250 g.
Case
Material PA6, black color.
MODULE LAYOUT
10 mm2,510 mm2,5
35 mm
111 mm

ENGLISH - 7/8
t
LED
Status
LED’s meaning
DI1
(Red)
ON (NPN)
Digital Input 1: Energized ( closed contactGND )
ON (PNP)
Digital Input 1: Energized ( closed contact+12V )
OFF
Digital Input 1: De-energized (open contact)
DI2
(Red)
ON (NPN)
Digital Input : Energized ( closed contact2 GND )
ON (PNP)
Digital Input : Energized ( closed contact2 +12V )
OFF
Digital Input : De-energized (open contact)2
DI3
(Red)
ON (NPN)
Digital Input : Energized ( closed contact3 GND )
ON (PNP)
Digital Input : Energized ( closed contact3 +12V )
OFF
Digital Input : De-energized (open contact)3
DI4
(Red)
ON (NPN)
Digital Input : Energized ( closed contact4 GND )
ON (PNP)
Digital Input : Energized ( closed contact4 +12V )
OFF
Digital Input : De-energized (open contact)4
PWR/STS
(Green)
ON n
Z-GPRS3 ON inactive log (status=ready)
Slow Blinking
2.8 sec ON 0.4 sec OFF
nnnnnnnnnnnnnnoo
Z-GPRS3 active log (status=normal)
Slow Blinking
1.6 sec ON 1.6 sec OFF
nnnnnnnnoooooooo
Battery powered inactive log (status=battery backup)
Medium Blinking
0.8 sec ON 0.8 sec OFF
nnnnoooonnnnoooo
Low battery warning
Fast Blinking
0.2 sec ON 0.2 sec OFF
nononononononono
Z-GPRS3 initializing or shutdown
Fast Blinking
0.6 sec 1 sec OFF
non
nonooooononooooo
Error, please refer to the diagnostic
OFF o
Z-GPRS3 OFF
SD/STS
(Red)
ON n
SD card mounted in the right way
Medium Blinking
0.8 sec ON 0.8 sec OFF
nnnnoooonnnnoooo
SD card activity
Fast Blinking
0.2 sec ON 0.2 sec OFF
nononononononono
SD card error
OFF o
SD card not present
ETH LNK
(Green)
Blinking
RJ45 connection activated
ETH TRF
(Yellow)
Blinking
Traffic on Ethernet port
LED SIGNALING ON FRONT PANEL

ENGLISH - 8/8
t
Technical support
Product Informations
CONTACTS
Code
Description
Z-PC-DINAL1-35
DIN rail support with screw terminals P= 35 mm.
Z-PC-DIN1-35
DIN rail with one slot support for rear connector P= 35 mm.
EXTERNAL GSM
ANTENNA
For information on models of GSM and GPRS satellite antennas, access
the website: www.seneca.it/products/z-gprs3 to the accessories section
FD01
Photodetector for pulse counter, MAX frequency 10 Hz
ACCESSORIES
DIP-SWITCHES
SW1
All the DIP-Switches to OFF position0.
For further informations please refer to: USER MANUAL
SW2
RRSS232 or 485 configuration on terminals 10-11-12 (serial port COM2)
RS232
ON
1
RS485
OFF
0
CONFIGURATIONS
D4I
D3I
D2I
DI1
ETH
LNK
ETH
ACT
SD
PWR
ETHERNET
ANTENNA
Z-GPRS3
19 20 21
22 23 24
micro USBmicro USB
10 11 12
13 14 15
16 17 18
123
45 6
S
SENECA
ETH
USB
GSM
485
ACT
DO2
D1O
The module has a RJ45 socket on frontal panel.
The picture shows how to Insert the RJ45 connector.
.
For further information, refer to the USER MANUAL
The module has a serial USB micro port on the lower side.
The picture shows how to Insert the micro USB plug into the micro USB
.side socket. For further information, refer to the USER MANUAL
RJ45 ETHERNET AND USB CONNECTIONS
ET005284B
micro
SD Card
Connector
Rear bus
SIM
CARD
RS485C OM1 and
Power Supply
SIM
Z-GPRS3
GSM/G PRS unit
multiprotocol
Inserting the SIM
card into the rear
slot on the side of
IDC10 connector.
Inserting the MicroSD or
the microSHDC, into the
axside slot. M 32 GB.
Push-push connector
for insertion and removal.
SIM-CARD AND SD-CARD INSERTING
Table of contents
Other Seneca Data Logger manuals

Seneca
Seneca Z-UMTS User manual

Seneca
Seneca Z-GPRS2 User manual

Seneca
Seneca Z-LTE User manual

Seneca
Seneca Z-LOGGER3 User manual

Seneca
Seneca Z-LTE User manual

Seneca
Seneca Z-LTE-WW User manual

Seneca
Seneca Z-LOGGER User manual

Seneca
Seneca Z-UMTS User manual

Seneca
Seneca MyALARM2 User manual

Seneca
Seneca Z-UMTS User manual
Popular Data Logger manuals by other brands

Racelogic
Racelogic VBOX Touch Motorsport V2 user guide

Pyle
Pyle PTHDL150 user guide

Axiometrix Solutions
Axiometrix Solutions imc SPARTAN Getting started

Campbell
Campbell CR6 Series Operator's manual

Casio
Casio IT-G400 Series user guide

Kamstrup
Kamstrup READy Mini Concentrator Installation and operation guide