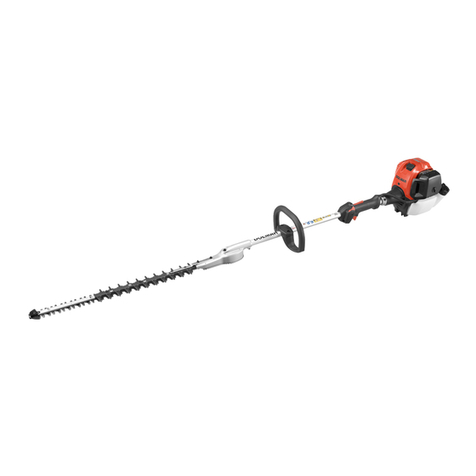
Senix HT4QL-L User manual

8458-9305008-001
4-Cycle 1.62 cu in. (26.5 cc)
Engine Gasoline Powered Hedge Trimmer
Operator’s manual
Model: HT4QL-L
For customer support, please call 1-800-261-3981 or send email to:
SAVE THIS MANUAL FOR FUTURE REFERENCE.

2WWW.SENIXTOOLS.COM
6$)(7<,17(51$7,21$/6<0%2/6
This operator’s manual describes safety and international symbols and pictographs that may appear on this product.
Read the operator’s manual for complete safety, assembly, operating and maintenance and repair information.
To reduce the risk of injury, user must read
instruction manual.
DO NOT USE E85 FUEL IN THIS UNIT
CAUTION: It has been proven that fuel
containing greater than 10% ethanol will
likely damage this engine and void the
warranty.
Always use clean, fresh unleaded fuel. Refer
to operator’s manual for the proper type of
oil.
+RWVXUIDFH'RQRWWRXFKDKRWPXIÀHURU
cylinder. You may get burned. These parts
get extremely hot from operation. They
remain hot for a short time after the unit is
turned off.
Keep all bystanders at least 50 ft. away.
DANGER!
Risk of electrocution!
Wear hand protection.
Wear non-slip safety footwear.
Failure to keep your hands away from the
blade will result in serious personal injury.
Avoid power lines, use in dry conditions
Do not expose to rain.
Indicates danger, warning or caution.
Precautions that involve your safety.
Thrown objects and loud noise can cause
severe eye injury and hearing loss. Wear
eye protection meeting current ANSI Z87.1
standards and ear protection when operating
this unit. Wear head protection when
operating this unit. Fallen objects can cause
severe head injury. Use a full face shield
when needed.
Thrown objects can ricochet and result in
personal injury or property damage.

3WWW.SENIXTOOLS.COM
7$%/(2)&217(176
SAFETY..............................................................................................3
KNOW YOUR UNIT...........................................................................6
SPECIFICATIONS*............................................................................6
UNPACKING......................................................................................7
OPERATION......................................................................................8
MAINTENANCE...............................................................................12
TROUBLESHOOTING.....................................................................15
PARTS..............................................................................................16
PARTS LIST.....................................................................................17
WARRANTY.....................................................................................18
1. Proper safety precautions must be observed. Like all
power equipment this unit must be handled carefully.
DO NOT EXPOSE YOURSELF OR OTHERS TO
DANGER. Follow these general rules. Do not permit
others to use this unit unless they are thoroughly
6$)(7<
Signals an EXTREME hazard. Failure to obey a safety
'$1*(5 symbol:,// result in serious injury or death
to yourself or to others.
Crude oil, gasoline, diesel fuel and other petroleum
products can expose you to chemicals including toluene
and benzene, which are known to the State of California
to cause cancer and birth defects or other reproductive
harm. These exposures can occur in and around oil
¿HOGVUH¿QHULHVFKHPLFDOSODQWVWUDQVSRUWDQGVWRUDJH
operations such as pipelines, marine terminals, tank
trucks and other facilities and equipment. For more
information go to:
www.P65Warnings.ca.gov/petroleum.
Signals a SERIOUS hazard. Failure to obey a safety
:$51,1* symbol &$1 result in serious injury to
yourself or to others.
Signals a MODERATE hazard. Failure to obey a safety
&$87,21 symbol 0$< result in property damage or
injury to yourself or to others.
&$/,)251,$352326,7,21
his product contains a chemical known to the state
of California to cause cancer, birth defects or other
reproductive harm.
5HDGWKHRSHUDWRU¶VPDQXDODQGIROORZDOOZDUQLQJV
DQGVDIHW\LQVWUXFWLRQV)DLOXUHWRGRVRFDQUHVXOW
LQVHULRXVLQMXU\WRWKHRSHUDWRUDQGRUE\VWDQGHUV
6$)(7<:$51,1*6
'$1*(5
:$51,1*
:$51,1*
&$87,21
:$51,1*
127( Advises you of information or instructions vital to
the operation or maintenance of the equipment.
responsible and have read, and understood the
manual and are trained in the operation of the unit.
2. Always wear safety goggles for eye protection. Dress
properly. Do not wear loose clothing or jewelry that
could become caught in moving parts of the unit.
Safe, sturdy, nonskid footwear should always be
worn. Always wear heavy, long pants, boots, gloves,
and a long-sleeve shirt. Do not wear loose clothing,
jewelry, short pants, sandals, or go barefoot. Secure
hair so it is above shoulder level. Long hair should
be tied back. It is recommended that legs and feet be
FRYHUHGWRSURWHFWIURPÀ\LQJGHEULVGXULQJRSHUDWLRQ
3. Inspect the entire unit for loose parts (nuts, bolts,
screws, etc.) and any damage before start and
operation. Repair or replace as necessary before
using the machine.
4. Modifying the unit or installing non-Senix attachments
can make your unit unsafe. Non-Senix attachments
are usually designed for universal applications.
$OWKRXJKDIWHUPDUNHWDWWDFKPHQWVPD\¿WRQ\RXU
XQLWWKH\PD\QRWPHHWIDFWRU\VSHFL¿FDWLRQVDQG
could make the unsafe. Do not remove the cutting
head shield or modify the unit in any way that would
alter its design or operation. This could make it
unsafe.Serious injury to the operator or bystanders
could result as well as damage to the machine.
5. Keep the handles free from oil and fuel.
'RQRWRSHUDWHWKHXQLWLQLQVXI¿FLHQWOLJKWLQJ
conditions.
7. Do not operate the unit when you are tired, when
your concentration is impaired and/or under the
LQÀXHQFHRIGUXJVPHGLFDWLRQRUDOFRKRO
8. Always use proper handles when trimming.
'RQRWVPRNHZKLOH¿OOLQJWDQN
11. Always store fuel in a properly marked container
that is approved by local codes and ordinances for
such usage.
12. Never remove the fuel tank cap while the engine is
running.
13. Never start or run the product inside a closed
room or building. Fumes from the exhaust contain
dangerous carbon monoxide.
14. Never attempt to make engine adjustments
while the unit is running. Always make engine
DGMXVWPHQWVZLWKWKHXQLWUHVWLQJRQDÀDWFOHDU
surface.
15. Do not use the unit if it is damaged or poorly
adjusted. Never remove the unit’s guard. Serious
injury to the operator or bystanders could result as
well as damage to the machine.
16. Keep children away. Onlookers should be kept

4WWW.SENIXTOOLS.COM
5(6,'8$/5,6.6
'DPDJHWROXQJVLIDQHIIHFWLYHGXVWPDVNLVQRW
worn.
'DPDJHWRKHDULQJLIHIIHFWLYHKHDULQJSURWHFWLRQLV
not worn.
+HDOWKGHIHFWVUHVXOWLQJIURPYLEUDWLRQHPLVVLRQLI
the unit is being used over long periods of time or not
adequately managed and properly maintained.
Even when the unit is used as prescribed it is not
possible to eliminate all residual risk factors. The
following hazards may arise in connection with the unit’s
construction and design:
:$51,1*
:$51,1*
:$51,1*
7KLVXQLWSURGXFHVDQHOHFWURPDJQHWLF¿HOGGXULQJ
RSHUDWLRQ7KLV¿HOGPD\XQGHUVRPHFLUFXPVWDQFHV
interfere with active or passive medical implants. To
reduce the risk of serious or fatal injury, we recommend
persons with medical implants to consult their physician
and the medical implant manufacturer before operating
this unit.
Inspect unit before each use. Replace damaged parts.
Check for fuel leaks. Make sure all fasteners are in
place and secure. Replace parts that are cracked,
chipped, or damaged in any way. Make sure the cutting
attachment is properly installed and securely fastened.
at a safe distance from the work area, at least 15
METERS (50 FEET) away.
17. Never leave the unit unattended while the engine is
running.
18. Uses other than those intended by the manufacturer
can result in injury to the operator or damage to the
unit and other property.
19. Do not overreach. Keep proper footing and balance
at all times. Do not use the unit while standing on a
ladder or on any other unstable footing location.
20. FOLLOW INSTRUCTIONS for assembling and
operation.
21. Do not store the unit in a closed area where fuel
YDSRUVFDQUHDFKDQRSHQÀDPHIURPKRWZDWHU
heaters, furnaces, etc. Store in a locked, well
ventilated area only.
22. Ensure safe and proper performance of your unit.
Please only use original accessories. The use of
any other accessories or attachments may cause a
potential hazard or injury to the user, damage to the
unit, and void the warranty.
23. If the unit will not be used for a long time, clean
the unit completely, especially the fuel/oil tank, its
VXUURXQGLQJVDQGWKHDLU¿OWHU
:KHQUHIXHOLQJVWRSWKHHQJLQHDQGFRQ¿UPWKDW
it is cooled down. Never refuel when the engine
is running or hot. When gasoline spills, be sure to
wipe it up completely and dispose of those materials
before starting the engine.
25. Stay clear of other workers or bystanders by at least
15 meters/50 feet.
26. Whenever approaching an operator of the unit,
FDUHIXOO\FDOOWKHLUDWWHQWLRQDQGFRQ¿UPWKDWWKH
operator stops the engine. Be careful not to startle
or distract the operator which can cause an unsafe
situation.
27. The engine should be turned off when the unit is
moved between work areas.
28. Pay attention to loosening and overheating
parts. If there is any abnormality of the unit, stop
operation immediately and check the unit carefully.
If necessary, have the unit serviced by customer
support. Never continue to operate a unit which
may be malfunctioning.
29. In start-up or during operation of the engine, never
WRXFKKRWSDUWVVXFKDVWKHPXIÀHUWKHKLJKYROWDJH
wire, or the spark plug.
$IWHUWKHHQJLQHKDVVWRSSHGWKHPXIÀHULVVWLOOKRW
Never place the unit in any places where there are
ÀDPPDEOHPDWHULDOVGU\JUDVVHWFFRPEXVWLEOH
gasses, or combustible liquids.
31. Pay special attention to operation in the rain or just
after the rain as the ground may be slippery.
32. If you slip or fall to the ground, release the throttle
lever immediately.
33. Be careful not to drop the unit or hit it against
obstacles.
34. Before proceeding to adjust or repair the unit, be
sure to stop the engine and detach the spark plug.
35. When the machine is placed in storage for a
long time, drain fuel/oil from the fuel/oil tank and
carburetor, clean the parts, and move the machine
to a safe place.
36. Make periodic inspections to ensure safe and
HI¿FLHQWRSHUDWLRQ)RUDWKRURXJKLQVSHFWLRQRI
your unit, contact customer support.
.HHSWKHXQLWDZD\IURP¿UHRUVSDUNV
38. Keep your body warm, especially the head, neck,
feet, ankles, hands, and wrists.
39. Maintain good blood circulation by performing
vigorous arm exercises during frequent work breaks
and also by not smoking.
40. Limit the hours of operation.
41. If you experience discomfort, redness and swelling
RIWKH¿QJHUVIROORZHGE\ZKLWHQLQJDQGORVVRI
feeling, consult your physician before further
exposing yourself to cold and vibration.
42. Always wear ear protection. Loud noises for long
periods can cause hearing loss, even permanent
deafness.
43. Wear no-slip heavy duty work gloves to improve
your grip on the handle. Gloves also reduce the
transmission of machine vibration to your hands.
44. Do not lay the machine on the side; otherwise the
fuel could spill out.
45. Fuel evaporation during refueling and exhaust
gases are harmful to the operator and people
around the unit.
46. Make sure that the fuel evaporation and exhaust
gases will not drift to the face of operator and keep
other people away from your working area.
47. Do not allow children or untrained individuals to use
this unit.

5WWW.SENIXTOOLS.COM
5HDGDQGXQGHUVWDQGDOOLQVWUXFWLRQV)DLOXUHWR
IROORZDOOLQVWUXFWLRQVOLVWHGEHORZPD\UHVXOWLQ
HOHFWULFVKRFN¿UHDQGRUVHULRXVSHUVRQDOLQMXU\
63(&,),&58/(6)25+('*(75,00(56
$'',7,21$/6$)(7<:$51,1*6)25
23(5$7,21
6$9(7+(6(,16758&7,216
$OZD\VGLVFRQQHFWWKHVSDUNSOXJZLUHEHIRUH
assembling, adjusting or cleaning, and before leaving
the machine unattended for any period.
,WLVUHFRPPHQGHGWKDWWKHXQH[SHULHQFHGXVHU
should have practical instruction in the use of the unit
and the protective equipment from an experienced
operator.
7KLVWRROLVQRWLQWHQGHGIRUXVHE\SHUVRQV
(including children) with reduced physical, sensory
or mental capabilities, or lack of experience and
knowledge, unless they have been given supervision
or instruction concerning use of the appliance by a
person responsible for their safety. Children should
be supervised to ensure that they do not play with the
appliance.
&KLOGUHQDQGMXYHQLOHVZLWKWKHH[FHSWLRQRI
apprentices older than 16 years and under
supervision, may not operate the product. The same
DSSOLHVIRUSHUVRQVZKRGRQRWRUGRQRWVXI¿FLHQWO\
know how to handle the product.
7KHRSHUDWLQJLQVWUXFWLRQVVKRXOGDOZD\VEHDWKDQG
3HUVRQVXQ¿WRUWLUHGPXVWQRWRSHUDWHWKHWRRO
:DLWXQWLOWKHFKDLQKDVFRPHWRDVWDQGVWLOO
completely before placing it down.
$Q\VHUYLFLQJVKRXOGEHSHUIRUPHGE\DQDXWKRUL]HG
service representative.
.HHSDOOSDUWVRIWKHERG\DZD\IURPWKHFXWWLQJ
blades when in operation. Before you start the
hedge trimmer, make sure the cutting blades are not
contacting anything.
$OZD\VKROGWKHWRRO¿UPO\ZLWKWZRKDQGV$OZD\V
hold the hedge trimmer with your right hand on the
rear handle and your left hand on the front handle.
Holding the hedge trimmer (left hand on rear handle,
right hand on front handle) may affect the balance of
the trimmer and will increase the risk of injury.
'RQRWUHPRYHFXWPDWHULDORUKROGPDWHULDOWREHFXW
when blades are moving. Make sure the switch is off
when clearing jammed material. Blades coast after
turn off.
2QO\KROGWKHWRROE\WKHLQVXODWHGJULSSLQJVXUIDFHVWR
avoid electric shock in case the cutting blades contact
hidden wiring. Cutting blades contacting a live wire
may make exposed metal parts of the power tool live
and can give the operator an electric shock.
.HHSWKHFXWWLQJEODGHVDZD\IURPDQ\FRUGVRU
extension cables. Check for foreign objects in the
hedges such as wire fences before operation.
2QO\RSHUDWHWKHKHGJHWULPPHUIURPD¿UPOHYHO
VXUIDFH¿[HGRQWKHJURXQG$OZD\VNHHSSURSHU
footing during operation. Slippery or unstable surfaces
such as ladders may cause a loss of balance or
control.
&DUU\WKHKHGJHWULPPHUE\WKHKDQGOHZLWKWKH
cutter blades stopped. Always protect the blades
with a scabbard (blade cover) when transporting or
:$51,1*
:$51,1*
:$51,1*
:$51,1*
Do not operate the unit inside a closed environment,
such as a room or building; breathing carbon monoxide
from exhaust fumes can kill.
Pour fuel outdoors where there are no sparks and
ÀDPHV6ORZO\UHPRYHWKHIXHOFDSRQO\DIWHUVWRSSLQJ
the engine. Do not smoke while fueling or mixing fuel.
Wipe spilled fuel from the unit. Move at least 3 m (10
ft) away from the fueling source and site before starting
engine.
Do not operate near electrical power lines. The unit has
not been designed to provide protection from electric
shock in the event of contact with overhead electric
lines. Consult local regulations for safe distances from
overhead electric power lines and ensure that the
operating position is safe and secure before operating
the unit.
If you use this tool incorrectly, you can suffer serious
personal injury!
storing the hedge trimmer. Carefully handling the
hedge trimmer greatly reduces the risk of accidentally
touching the sharp cutting blades.
$OZD\VZDLWXQWLOWKHFXWWLQJEODGHVKDYHFRPHWRD
complete stop before removing the battery.
.HHSWKHKDQGOHVGU\FOHDQDQGIUHHIURPJDVRLODQG
grease. Slippery handles may lead to a loss of control.
Never attempt to use an incomplete or altered tool.
7KHKHGJHWULPPHULVQRWLQWHQGHGIRUXVHE\
persons with an impaired physical, sensory or mental
FDSDFLW\RUE\SHUVRQVZLWKLQVXI¿FLHQWKHGJHWULPPHU
knowledge or experience.
)ROORZWKHLQVWUXFWLRQVIRUOXEULFDWLRQDQGEODGH
sharpening.
<RXQJSHUVRQVXQGHUWKHDJHRIDUHQRWSHUPLWWHG
to operate this device.
,QVSHFWWKHKHGJHWULPPHUWKRURXJKO\EHIRUHXVHIRU
damage. If any parts or pieces appear to be missing
or damaged, do not operate the hedge trimmer.
'RQRWRSHUDWHGXULQJDGYHUVHZHDWKHUFRQGLWLRQV
particularly during lightening and rain.
2QO\XVHSURSHUO\IXQFWLRQLQJKHGJHWULPPHUV2QO\
work with the cutting blades sharpened according to
regulations.
8VHWKLVWRRORQO\IRUWKHSXUSRVHVIRUZKLFKLWZDV
designed.

6WWW.SENIXTOOLS.COM
Engine type......................................................................................................................................Air-Cooled, 4-Cycle
Displacement...................................................................................................................................1.62 cu in. (26.5 cc)
Spark plug gap...........................................................................................................0.025 in. - 0.31 in. (0.6 - 0.8 mm)
Lubrication..................................................................................................................................................SAE 10W-30
Crankcase lubrication capacity..............................................................................................................2.01 oz. (60 ml)
Fuel Type..........................................................................................................................................Unleaded gasoline
Fuel tank capacity................................................................................................................................9.46 oz. (280 ml)
Cutting blade length............................................................................................................................22.0 in. (560 mm)
Cutting Capacity....................................................................................................................................................1 1/8''
Noise level............................................................................................................................................................103dB
Weight (fully assembled, without fuel or oil).....................................................................................11.42 lbs. (5.18 kg)
$OOVSHFL¿FDWLRQVDUHEDVHGRQWKHODWHVWSURGXFWLQIRUPDWLRQDYDLODEOHDWWKHWLPHRISULQWLQJ:HUHVHUYHWKHULJKW
to make changes at any time without notice.
.12:<28581,7
63(&,),&$7,216
On/Off
Switch
Starter Grip
Oil
Tank
Cap
Protective Cover
Throttle
Primer Bulb
Throttle Lockout
Choke Button
Fuel Tank Cap
Muffler

7WWW.SENIXTOOLS.COM
813$&.,1*
$'',1*&+(&.,1*(1*,1(2,/
813$&.,1*
,1&/8'('3$576
Carefully remove the product and any accessories from
the box. Make sure that all items listed in the packing
list are included. Inspect the product carefully to make
sure no breakage or damage occurred during shipping.
Do not discard the packing material until you have
carefully inspected and satisfactorily operated the
product. If any parts are damaged or missing, please
call 1-800-261-3981 for assistance.
Do not use this product if any parts on the packing
list are already assembled to your product when you
unpack it. Parts on this list are not assembled to the
product by the manufacturer and require customer
installation. Use of a product that may have been
improperly assembled could result in serious personal
injury.
To prevent an accidental start that could cause serious
personal injury, always disconnect the engine spark
plug wire from the spark plug when assembling parts.
Never install, remove, or adjust any attachments while
power head is running. Failure to stop the engine can
cause serious personal injury.
Do not allow familiarity with this product to make you
careless. Remember that a careless fraction of a
VHFRQGLVVXI¿FLHQWWRLQÀLFWVHULRXVLQMXU\
Always wear eye protection with side shields marked to
comply with ANSI Z87.1, along with hearing protection.
Failure to do so could result in objects being thrown into
your eyes and other possible serious injuries.
If any part of the unit is missing or damaged, do not
operate the unit until the damaged part is repaired
or replaced.
Attempting to start the engine before it has been
SURSHUO\¿OOHGZLWKOXEULFDQWZLOOUHVXOWLQHTXLSPHQW
failure not covered by the warranty.
'RQRWRYHU¿OO2YHU¿OOLQJWKHFUDQNFDVHPD\FDXVH
excessive smoke, oil loss, and engine damage.
Operation of this equipment could create sparks that
FDQVWDUW¿UHVDURXQGGU\YHJHWDWLRQ$VSDUNDUUHVWRU
may be required. The operator should contact local
¿UHDJHQFLHVIRUODZVRUUHJXODWLRQVUHODWLQJWR¿UH
prevention requirements.
'2127discard box or packing material until all parts
are examined.
(QJLQHOXEULFDQWKDVDPDMRULQÀXHQFHRQHQJLQH
performance and service life.7KLVHQJLQHLVVKLSSHG
ZLWKRXWHQJLQHOXEULFDQW
Always use a 4-cycle engine lubricant that meets or
H[FHHGVWKHUHTXLUHPHQWVIRU$3,VHUYLFHFODVVL¿FDWLRQ
SJ. SAE 30, 10W30, or 10W40 are all acceptable
lubricants to use in this product. Non- detergent or
2-stroke engine lubricants will damage the engine and
should not be used. Check lubricant level before each
use.
$''(1*,1(2,/,1,7,$/86(
1. Unscrew the oil cap from the engine and remove.
3RXUPORIRLOLQWRWKHRLO¿OOKROH5HSODFHDQG
tighten the oil cap.
&+(&.(1*,1(2,/%()25(($&+86(
6HWXQLWRQDÀDWOHYHOVXUIDFH
2. Unscrew the oil cap and remove.
/XEULFDQWOHYHOVKRXOGIDOOZLWKLQWKHWRSRIWKHRLO¿OO
hole (the top of screw thread).
,IOHYHOLVORZDGGHQJLQHOXEULFDQWXQWLOWKHÀXLGOHYHO
ULVHVWRWKHWRSRIRLO¿OOKROHWKHWRSRIVFUHZWKUHDG
127('RQRWRYHU¿OO
5. Replace and tighten the oil cap.
4XDQWLW\ ,WHP
1 Operator’s manual
1 Cutting blade protective cover
1 Spark plug wrench
1 60ml bottle of oil
:$51,1*
:$51,1*
:$51,1*
:$51,1*
:$51,1*
:$51,1*
&$87,21
&$87,21
:$51,1*
MAX

8WWW.SENIXTOOLS.COM
23(5$7,21
Do not use any attachments or accessories not
recommended by the manufacturer of this product. The
use of attachments or accessories not recommended
can result in serious personal injury.
*DVROLQHLVH[WUHPHO\ÀDPPDEOH,JQLWHGYDSRUVPD\
explode. Always stop the engine and allow it to cool
EHIRUH¿OOLQJWKHIXHOWDQN'RQRWVPRNHZKLOH¿OOLQJWKH
WDQN.HHSVSDUNVDQGRSHQÀDPHVDWDGLVWDQFHIURP
the area.
Remove the fuel cap slowly to avoid injury from fuel
spray. Never operate the unit without the fuel cap
securely in place.
Add fuel in a clean, well-ventilated outdoor area. Wipe
up any spilled fuel immediately. Avoid creating a source
of ignition for spilled fuel. Do not start the engine until
fuel vapors dissipate.
'212786(()8(/,17+,681,7 It has been
proven that fuel containing greater than 10% ethanol
will likely damage this engine and void the warranty.
Use a fuel additive, such as STA-BIL Fuel Stabilizer or
an equivalent, to inhibit corrosion and minimize gum
deposits. Add 0.8 oz. (23 ml) of fuel additive per gallon
of fuel, according to the instructions on the container.
NEVER add fuel additives directly to the unit’s fuel tank.
*DVROLQHDQGLWVYDSRUVDUHKLJKO\ÀDPPDEOHDQG
explosive. To prevent serious personal injury and
property damage, handle it with care. Keep away from
LJQLWLRQVRXUFHVDQGRSHQÀDPHVKDQGOHRXWGRRUVRQO\
3RXUIXHORXWGRRUVZKHUHWKHUHDUHQRVSDUNVRUÀDPHV
Slowly remove the fuel cap after stopping the engine.
Do not smoke while fueling. Wipe spiled fuel from unit.
Move at least 3 m (10 ft) away from the fueling source
before starting engine.
Always wear heavy, long pants, boots, gloves, and a
long-sleeve shirt. Do not wear loose clothing, jewelry,
short pants, sandals, or go barefoot.
Secure hair so it is above shoulder level.
:$51,1*
:$51,1*
:$51,1*
:$51,1*
:$51,1*
:$51,1*
:$51,1*
86,1*7+(5,*+7)8(/
'H¿QLWLRQRI%OHQGHG)XHOV
8VLQJ%OHQGHG)XHOV
86,1*)8(/$'',7,9(6
)8(/,1*7+(81,7
The use of old fuel is the most common cause of
performance problems. Use only fresh, clean unleaded
gasoline.
This unit has a four-cycle engine. '2127 mix oil with
gasoline.
Today’s fuels are often a blend of gasoline and
oxygenates such as ethanol, methanol or MTBE (ether).
Alcohol-blended fuel absorbs water.As little as 1%
water in the fuel can make fuel and oil separate, forming
acids when stored. ALWAYS use fresh fuel (less than
30 days old) with less than 10% ethanol. Dispose of old
fuel according to federal, state and local regulations.
If using a blended fuel:
Always use fresh unleaded gasoline
Use the fuel additive STA-BIL®or an equivalent
1. Remove the fuel tank cap by turning counterclockwise.
Rest the cap on a clean surface.
2. Carefully pour fuel into the tank until fuel reaches the
base of the tank spout. Avoid spillage.
3. Immediately replace fuel cap and hand tighten by
turning it clockwise. Wipe up any spilled fuel.
127( Visually inspect to see if fuel level is low. If fuel is
ORZUH¿OO ZLWKXQOHDGHGIXHOFDUHIXOO\ZLWKRXW RYHU¿OOLQJ
and tighten the fuel tank cap immediately.
Engine housing can become hot during operation.
Do not rest or place your arm, hand, or any body part
against the engine housing. Extended contact
with the engine housing can result in burns or other
injuries.
:$51,1*
7KLVXQLWKDVDF\FOHHQJLQH'RQRWPL[RLOZLWK
gasoline.
7KHXVHRIROGIXHOLVWKHPRVWFRPPRQFDXVH
of performance problems. Use only fresh, clean
unleaded gasoline (less than 30 days old). Dispose
of old fuel according to federal, state and local
regulations.
'UDLQWKHWDQNDQGUXQWKHHQJLQHGU\EHIRUHVWRULQJ
the unit.
'RQRWXVH(RU(IXHORUIXHOFRQWDLQLQJJUHDWHU
than 10% ethanol) in this product. It will damage the
unit and void the warranty.
Base of
Tank Spout

9WWW.SENIXTOOLS.COM
Always position the unit on the operator’s right side. The
use of the unit on the operator’s left side will expose the
user to hot surfaces and can result
in possible burn injury. To avoid burns from hot
surfaces, never operate unit with the bottom of the
engine above waist level.
Keep the cutting blades away from any cords or
extension cables. Check for foreign objects in the
hedges such as wire fences before operation.
Do not allow familiarity with this product to make you
careless. Remember that a careless fraction of a
VHFRQGLVVXI¿FLHQWWRLQÀLFWVHULRXVLQMXU\
Always wear eye protection with side shields marked to
comply with ANSI Z87.1, along with hearing protection.
Failure to do so could result in objects being thrown into
your eyes and other possible serious injuries.
Do not use any attachments or accessories not
recommended by the manufacturer of this product. The
use of attachments or accessories not recommended
can result in serious personal injury.
Operation of this equipment could create sparks that
FDQVWDUW¿UHVDURXQGGU\YHJHWDWLRQ$VSDUNDUUHVWRU
may be required. The operator should contact local
¿UHDJHQFLHVIRUODZVRUUHJXODWLRQVUHODWLQJWR¿UH
prevention requirements.
Operate this unit only in a well-ventilated outdoor area.
Carbon monoxide exhaust fumes can be lethal in a
FRQ¿QHGDUHD
Avoid accidentally starting the unit. To avoid serious
injury, the operator and the unit must be in a stable
position when pulling the starter rope.
Do not overwork yourself. Take regular breaks and
change working position to ensure you can concentrate
on the work and have full control over the product.
0DLQWDLQ¿UPIRRWLQJDQGEDODQFHGXULQJRSHUDWLRQ
Inspect unit before each use.
Replace damaged parts. Check for fuel leaks. Make
sure all fasteners are in place and secure.
Remember blades coast after turn off.
:$51,1* :$51,1*
:$51,1*
:$51,1*
:$51,1*
:$51,1*
:$51,1*
:$51,1*
&$87,21
&$87,21
&$87,21
35(3$5$7,21
Before each use, check the following items to ensure
safe working conditions.
3527(&7,9(&/27+,1*make sure to wear the
DSSURSULDWHFORVH¿WWLQJSURWHFWLYHFORWKLQJVXFKDV
protective pants, gloves and safety shoes. Wear a
safety helmet with integrated hearing protection and
a face guard to provide protection against recoiling
branches.
Before starting the unit, check that the trigger switches
and automatically and quickly upon release. Also check
that the cooling air vents are not obstructed and that
both the front and rear handles are clean and dry.
The unit is equipped with a two-handed safety switch.
Always hold the unit with both hands during operation.
To operate the unit, depress and hold the front safety
switch and depress the rear trigger switch. To stop unit,
release either switch and the unit will stop.

10 WWW.SENIXTOOLS.COM
6WDQGLQWKHRSHUDWLQJSRVLWLRQ6WDQGXSVWUDLJKW'R
not bend over.
.HHSIHHWDSDUWDQG¿UPO\SODQWHG
+ROGWKHVKDIWJULSZLWKWKHULJKWKDQG.HHSWKHULJKW
arm slightly bent.
+ROGWKHKDQGOHZLWKWKHOHIWKDQG.HHSWKHOHIWDUP
straight.
+ROGWKHXQLWDWZDLVWOHYHO
'RQRWRYHUUHDFK.HHSDOOSDUWVRI\RXUERG\DZD\
from the rotating cutting attachment and hot surfaces.
67$57,1*$1'67233,1*
+2/',1*7+(81,7
67237+((1*,1(
7RVWDUWDFROGHQJLQH
1. Slowly press the primer bulb 5-10 times.
127( After the 7th press, fuel should be visible in the
primer bulb. If it is not, continue to press the primer until
you see fuel in the bulb.
2. Push the choke button in to set the choke to FULL
CHOKE position.
127( Do not squeeze the throttle trigger because the
choke will be pop out automatically.
3ODFHWKHXQLWRQD¿UPOHYHOVXUIDFH3XVKGRZQRQ
the front handle to securely hold the unit in place.
4. Pull the starter grip /cord until resistance is detected.
Rapidly pull 3 to 5 times or until you hear engine turn
over or begin to start.
5. If engine does not start, release choke by squeezing
throttle trigger and the choke button pops out.
a.Engine is now in the run position.
b.Rapidly pull starter grip/cord until engine starts.
6. Allow the engine to run for 10 seconds,then squeeze
throttle to provide fuel to engine and use for intended
task.
127( The choke button is only used when starting
a cold engine. Never push the choke button in once
the engine has been turned over or run. Otherwise the
engine could be damaged.
5HVWDUWDZDUPHQJLQH
127( DO NOT push choke button in.
1. Make sure the primer bulb has fuel inside.
2. Rapidly pull starter/grip until engine starts.
3. Squeeze throttle to provide fuel to engine.
To stop the engine, depress the STOP switch to the
stop position “STOP”.
127( This Stop switch will come back to the ON
position automatically.
IF ASSISTANCE IS REQUIRED FOR THIS PRODUCT:
Do not return this product to the retail store where it
was purchased. Please call our Customer Service
Department for any issues you may have. For Help
Call: 1-800-261-3981
Primer Bulb
Choke
Throttle Control
Throttle
Lockout
On/Off Switch
(I = On / STOP = Off)
Starter Rope Grip
Handle
Throttle Control

11WWW.SENIXTOOLS.COM
1(9(5UHDFKIRURUWU\WRUHPRYHMDPPHGPDWHULDO
while the engine is running.
$/:$<6VZLWFKWKHXQLWRIIDQGGLVFRQQHFWWKHVSDUN
plug wire before clearing a jam.
$/:$<6LQVSHFWWKHEODGHVDIWHUFOHDULQJDMDPWR
make sure all jammed material has been cleared, and
to make sure blades are not damaged.
&/($5,1*-$06
75,00,1*+('*(6
If the blades get jammed by a wire or other obstruction
and can’t move, follow these important safety rules:
A hedge trimmer is primarily used to cut hedges, but
can also be used on shrubs and bushes as well. For the
best results, angle the blade of the hedge trimmer 15°
from the targeted hedge.
A string or tie can be used as a guideline in order to
create a level hedge. Position the string at the preferred
height and cut everything that protrudes past it. The unit
can be used in either direction. Use a sweeping motion
back and forth for even cuts. Avoid cutting limbs and
branches larger than 1 1/8 of an inch.
Do not force the hedge trimmer through heavy
shrubbery. If the blades
become jammed, immediately release the trigger and
shut off the unit. Disconnect the spark plug wire before
DWWHPSWLQJWRFOHDUDMDP$OZD\VEHFDUHIXORIÀ\LQJ
debris during operation. Wear gloves when trimming
thorny or prickly foliage.

12 WWW.SENIXTOOLS.COM
0$,17(1$1&(
To avoid serious personal injury, always stop the engine
and allow it to cool before cleaning or maintaining the
unit. Never perform cleaning or maintenance while
the unit is running. Disconnect the spark plug wire to
prevent the unit from starting accidentally.
Wear protective clothing and observe all safety
instructions to prevent serious personal injury.
7KHUHLVDJUHDVHQLSSOHRQWKHJHDUER[WR¿OOWKH
JHDUER[ZLWKJUHDVH8VHDJUHDVHJXQWR¿OOZLWK
grease after every 25 working hours.
Use a small brush to clean the outside of the unit. Do
not use strong detergents. Household cleaners that
contain aromatic oils such as pine and lemon, and
solvents such as kerosene, can damage plastic. Wipe
off any moisture with a soft cloth.
Correct and regular cleaning is not only important for
the safe use of this product, but also extends its life
span.
For a long lifespan, make sure that the cutting blades
are cleaned and lubricated at regular intervals in order
to ensure the best possible performance. Routinely
DSSO\DWKLQ¿OPRIOXEULFDWLQJRLO
Disconnect the spark plug wire then clamp the blade
assembly into a vise. Make sure the main body of
the hedge trimmer is adequately supported to avoid
damage.
File down the exposed cutting surface of each blade
ZLWKDQLQFKVPRRWKURXQG¿OHZLWKDGLDPHWHURI
to 7/32 of an inch. Make sure to retain the original angle
RIWKHFXWWHUWHHWKZKHQ¿OLQJ
,QRUGHUWR¿OHERWKVLGHVRIHDFKFXWWHUWRRWK\RXPD\
need to momentarily run the hedge trimmer until the
opposing side of the cutter teeth are exposed.
Do not run the hedge while it is locked into the vise.
Make sure all tools for sharpening have been removed
before connecting the spark plug wire. Disconnect the
spark plug wire and repeat the sharpening process for
the newly exposed teeth.
When servicing, use only identical replacement parts.
Use of any other parts could create a hazard or cause
product damage.
:$51,1*
:$51,1*
&/($1,1*
/8%5,&$7,21
6+$53(1,1*7+(%/$'(6
0$,17(1$1&(6&+('8/(
*($5%2;*5($6(
5(0$5.6
5(3/$&((1*,1(2,/
7KHPDLQWHQDQFHLQWHUYDOLVRQO\DUHFRPPHQGDWLRQ
for machines in ordinary operating condition.
,IWKHUHDUHDQ\DEQRUPDOVLJQVIURPWKHPDFKLQH
please do the proper inspection and maintenance
immediately.
,IDQ\WKLQJLVXQFOHDUWR\RXFRQWDFWRXUVHUYLFHWHDP
for help.
$OORWKHUUHSDLUVRUPDLQWHQDQFHZKLFKDUHQRW
mentioned here should only be done by the Senix
service team or authorized personnel.
,WHP +RXUVRI2SHUDWLRQ
Check engine oil level
Every time before
use
Check for loose/lost fasteners
Check for damage
Verify function of control elements
Check fuel level
Check for fuel/oil leaks
Engine oil replacement Every 20 hours
Lubricate blades Every 5 hours
Sharpen blades Every 20 hours
Clean air cleaner Every 20 hours.
Every 10 hours in
dusty conditions
Check spark plug Every 20 hours
Fill gearbox grease Every 25 hours
Grease Nipple
Old engine oil is considered special waste and has
to be disposed according to your local environment
protection regulation. Do not pour the oil into a garbage
can, sewer, soil etc.
The engine oil replacement is easier if engine is warm
(NOT HOT!).
:$51,1*
1. Open the oil tank cap and drain the old oil to an
approved container.
5HWXUQWKHHQJLQHWRDQXSULJKWSRVLWLRQDQGUH¿OOZLWK
lubricant following the instructions in the ADDING/
CHECKING ENGINE OIL section in this manual.
3. Clean the oil dropped on the unit if necessary.
MAX

13WWW.SENIXTOOLS.COM
&/($1$,5),/7(5
$'-867,'/(63(('
The cutting blades should never move at idle. Turn the
idle speed screw counterclockwise to reduce the idle
RPM and stop the cutting blades or contact customer
support for adjustment and discontinue use until the
repair is made. Serious personal injury could result from
the cutting blades moving at idle.
The cutting blades will move when adjusting the
idle speed. Wear all protective clothing and keep all
bystanders, children, and pets at least 50 ft. away. Make
adjustments with the unit supported by hand so that the
cutting blades do not contact the ground or any object.
Keep all parts of your body away from the cutting
EODGHVDQGPXIÀHU)DLOXUHWRIROORZWKHVHLQVWUXFWLRQV
could result in serious personal injury.
7KHDLU¿OWHUHOHPHQWVKRXOGEHFOHDQHGWRSURYLGHWKH
engine abundant clear air which aids in starting, power,
and life time of the engine.
5HLQVWDOOWKHDLU¿OWHUFRYHUE\FORVLQJWKHDLU¿OWHUFRYHU
over the button on the housing, then push the cover
until it locks securely in the place.
127(0DNHVXUHWKH¿OWHULVVHDWHGSURSHUO\LQVLGHWKH
cover. Incorrect installation will allow dirt to enter the
engine, causing rapid engine wear.
:$51,1*
:$51,1*
5HPRYHWKHDLU¿OWHUFRYHU7RUHPRYHSUHVVWKH
button on the top of the cover with thumb and gently
SXVKXSWKHFRYHUZLWKLQGH[¿QJHU
5HPRYHWKHDLU¿OWHU
,IRQO\FOHDQLQJRIWKHDLU¿OWHULVQHFHVVDU\WDNHWKH
DLU¿OWHUSDGRXWDQGFOHDQLWZLWKGU\FRPSUHVVHG
air until all dust is removed. Wear protective
goggles and mask to protect your health during this
procedure.
Tab
Retainer Cover Tab
Air Filter
Cover
Release
Button
If the engine will not idle properly:
1. Start the engine.
2. Release the throttle control and let the engine idle.
,IWKHHQJLQHVWRSVLQFUHDVHWKHLGOHVSHHG8VHD
small Phillips screwdriver to turn the idle speed screw
clockwise, 1/8 of a turn at a time, until the engine idles
smoothly.
,IWKHFXWWLQJEODGHVPRYHZKHQWKHHQJLQHLGOHV
reduce the idle speed. Turn the idle speed screw
counterclockwise, 1/8 of a turn at a time, until the
cutting blades stop moving.
Do not remove the spark plug when the engine is hot.
Do not sand blast, scrape or clean spark plug
electrodes. Grit in the engine could damage the
cylinder.
&$87,21
&$87,21
0$,17$,1,1*7+(63$5.3/8*
Spark Plug Boot
1. Stop the engine and allow it to cool. Grasp the spark
SOXJERRW¿UPO\DQGSXOOLWIURPWKHVSDUNSOXJ
2. Clean around the spark plug. Remove the spark plug
from the cylinder head with a 5/8-inch socket, turning
counterclockwise.
127( A 5/8-inch spark plug wrench is supplied with
this unit.
Primer Bulb
Idle Speed Screw
(0.025 in. - 0.31 in.)
0.60 mm - 0.80 mm

14 WWW.SENIXTOOLS.COM
Install the guide bar cover when transporting to prevent
personal injury.
Transport the unit in a horizontal position. If not
possible, transport the unit vertically with the engine
at the top. Secure the unit to prevent damage during
transport.
&$87,21
75$163257$7,21
6725$*(
1HYHUVWRUHDIXHOHGXQLWZKHUHIXPHVPD\UHDFKDQ
RSHQÀDPHRUVSDUN
$OORZWKHHQJLQHWRFRROEHIRUHVWRULQJ
/RFNXSWKHXQLWWRSUHYHQWXQDXWKRUL]HGXVHRU
damage.
6WRUHWKHXQLWLQDGU\ZHOOYHQWLODWHGDUHD
6WRUHWKHXQLWRXWRIWKHUHDFKRIFKLOGUHQ
6WRUHWKHXQLWZLWKWKHFXWWLQJEODGHVFDEEDUG
installed.
6KRUWWHUP6WRUDJHZHHNV
Store the unit in a horizontal position. If not possible,
store the unit vertically with the engine at the top.
/RQJWHUP6WRUDJH
1. Remove the fuel cap, tip the unit and drain the fuel
into an approved container. Reinstall the fuel cap.
2. Start the engine and allow it to run until it stalls.
This ensures that all fuel has been drained from the
carburetor.
3. Allow the engine to cool. Remove the spark plug
and put 5 drops of any high quality motor oil into the
cylinder. Pull the starter rope slowly to distribute the
oil. Reinstall the spark plug.
4. Thoroughly clean the unit and inspect it for any loose
or damaged parts. Repair or replace damaged parts
and tighten loose screws, nuts or bolts.
5. Store the unit in a horizontal position. If horizontal
storage is not possible, store unit vertically with
engine at top.
6. Install the cutting blade scabbard.
3UHSDULQJWKH8QLWIRU8VHDIWHU/RQJWHUP6WRUDJH
1. Remove the spark plug. Tip the unit and drain all of
the oil from the cylinder into an approved container.
Reinstall the spark plug.
2.Change the oil. Refer to Changing the Oil.
127( Do not use fuel that has been stored for more
than 30 days. Dispose of old fuel and oil according to
federal, state and local regulations.
3.Inspect the spark plug. If the spark plug is cracked,
fouled or dirty, replace it with replacement part
#AM5C or an equivalent spark plug.
4.Use a feeler gauge to set the air gap at 0.6 mm - 0.8
mm (0.025 in. - 0.31 in.)
5.Install the spark plug in the cylinder head. Tighten the
spark plug with a 5/8-inch socket, turning it clockwise
until snug.
127( If using a torque wrench, torque to
1PLQOE'RQRWRYHUWLJKWHQ
6.Reattach the spark plug boot.

15WWW.SENIXTOOLS.COM
,IIXUWKHUDVVLVWDQFHLVUHTXLUHGWDNHWKHXQLWWRDTXDOL¿HGVHUYLFHGHDOHU
7528%/(6+227,1*
352%/(0 62/87,21
7+((1*,1(:,//12767$57
The fuel tank is empty Fill the fuel tank with fresh fuel
The primer bulb was not pressed enough Press the primer bulb 10 times
The fuel is old (over 30 days) Drain the fuel tank and add fresh fuel
The spark plug is fouled Replace the spark plug
7+((1*,1(:,//127,'/(
7KHDLU¿OWHULVGLUW\ &OHDQRUUHSODFHWKHDLU¿OWHU
The fuel is old (over 30 days) Drain the fuel tank and add fresh fuel
Idle speed screw needs adjustment Turn idle speed screw clockwise to increase idle speed
7+((1*,1((0,7672208&+602.(
Too much oil in crankcase 'UDLQHQJLQHRLODQGUH¿OOZLWKFRUUHFWDPRXQWRIHQJLQH
lubricant
7+((1*,1(:,//127$&&(/(5$7(
The fuel is old (over 30 days) Drain the fuel tank and add fresh fuel
The cutting head is bound with grass Stop the engine and clean the cutting head
7KHDLU¿OWHULVGLUW\ &OHDQRUUHSODFHWKHDLU¿OWHU
7+((1*,1(/$&.632:(52567$//6
The fuel is old (over 30 days) Drain the fuel tank and add fresh fuel
7KHDLU¿OWHULVGLUW\ &OHDQRUUHSODFHWKHDLU¿OWHU
The spark plug is fouled Replace the spark plug
816$7,6)$&725<&877,1*3(5)250$1&(
Cutting blade is dull/damaged 5HSODFHRUFRQWDFWDTXDOL¿HGVHUYLFHGHDOHU
Cutting material exceeds capacity Only cut material according to the capacity of the unit
(;&(66,9(9,%5$7,2112,6(25(;+$867
Bolts/Nuts are loose Tighten
Gas/oil is incorrect (PSW\XQXVHGIXHODQGRLO5H¿OOZLWKIUHVKIXHODQGRLO

16 WWW.SENIXTOOLS.COM
3$576
1WWW.SENIXTOOLS.COM

17WWW.SENIXTOOLS.COM
3$576/,67
1R 3DUW 'HVFULSWLRQ 4W\
1 207421000003 Screw 29
2 199096000067 Starter assembly 1
3 207320100061 +H[DJRQÀDQJHQXW 1
4 201088000017 Flywheel 1
5202999001063 Oil seal 1
6201126000054 Crank case 1
7207059900215 Washer 2
8201026000354 Shaft 1
9202002000046 Gear 1
10 199123000433 Oil box cap assy 1
11 199124000194 Oil box assy' 1
12 201999001246 ,QVXODWLQJ¿OP 1
13 202017000069 vibration reduction pad 2
14 202030001576 Cover 1
15 207310100736 screw 5
16 201038000004 Bent axle 1
17 299999000365 Crankcase washer 1
18 207350100042 Pin 4
19 207390200006 Bearing 1
20 207310100610 screw 2
21 201126000057 Crank case 1
22 202999001495 Oil seal 1
23 199999001396 Oil dipstick components 1
23-1 202165000585 Fuel tank cap 1
23-2 207279900020 O-check ring 1
24 207270200006 O-check ring 1
25 201999000181 Bushing 1
26 202019000235 Connector joint 1
27 207059900192 Big washer 1
28 199999001078 Clutch assembly 1
29 207269900052 Piston pin check ring 2
30 201109000036 Piston 1
31 201999001277 Piston pin 1
32 201110000044 Piston ring 1
33 299999000244 Cylinder pad 1
34 207310100740 screw 2
35 199113000040 Muffer assembly 1
36 299999000362 0XIÀHUSDG 1
37 199999001291 Sparking plug 1
38 199999001376 Cylinder components 1
39 201999000685 Low Arm 2
40 201091000024 Tappet 2
41 207199900091 Pin roll 1
42 199037000037 Igniter 1
43 207310100734 screw 2
44 201999001212 Wind screen 1
45 299999000412 Washer 1
46 202999001788 Inlet air pipe 1
47 299999000246 Enter air washer 1
48 199064000058 Carburetor 1
49 199999001415 Air Filter Block
Component 1
49-1 202999001787 $LU¿OWHUKROGHU 1
49-2 202999001335 Choke valve board 1
49-3 201999000961 Button spring 1
49-4 202003001658 Button 1
49-5 207310100322 Flange tapping screw 2
49-6 202099000004 Slide block 1
49-7 201999000762 Spring 1
50 302000003 Tubing 0
52 207310100741 screw 2
53 299999000360 $LU¿OWHUVFUHHQ 1
54 202030001576 Cover 1
1R 3DUW 'HVFULSWLRQ 4W\
55 202094000222 pipe 1
56 207310100738 screw 6
57 207199900091 Pin roll 1
58 199999000116 Rocker assembly 2
59 299999000366 Head gasket 1
60 207310100735 screw 1
61 299999000048 Oil block 1
62 201058000226 Cylinder head 1
63 202030001559 Cover shell 1
64 202023000084 Rubber stopper 1
65 207310100744 screw 2
66 R8202-830301 Washer 4
67 202017000068 Shock pad 8
68 202024002341 Front handle 1
69 201999001199 The support tube 2
70 207320100124 Nut 10
71 201059000331 Holder 1
72 202038000007 Blade protector 1
73 201999001393 Friction pad 1
74 207310101121 Self tapping screw 1
75 201045000188 Blade 2
76 201999001241 Blade slider 10
77 207059900005 Washer 11
78 207310100739 screw 2
79 201059000254 Holder 1
80 201999001245 Blade Oil block 1
81 202030001576 Gear box Prevent hot
cover 1
82 201058000232 Gear box cover 1
83 299999000370 Felted wool 1
84 201999001211 Friction pad 2
85 201053000006 Linked rod 2
86 202999001494 Seal ring 1
87 201004000300 Passivity gear 1
88 201026000288 Jack shaft 1
89 202071000014 Oil block 1
90 201160000009 Drivendisk 1
91 201006000030 Gear box body 1
92 201999000166 Grease nozzle 1
93 207310100691 screw 3
94 207390100078 Bearing 6001Z 2
95 207340100006 Retaining ring 1
96 201004000299 Driving gear 1
97 207421000002 screw 2
98 199999001083 Stopping wire 1
99 199081000090 Power wire 1
100 202090000219 Fixing base 1
101 201999001343 The support tube 2
102 207310100313 Self tapping screw 3
103 207310100310 Self tapping screw 4
104 202024002339 Hand shank 1
105 207019900458 Torsional spring 1
106 202999001759 Control arm 1
107 202004000892 Throttle trigger 1
108 202071000028 Control Block 1
109 207019900456 Spring 1
110 207180200023 The rocker switch 1
111 202024002340 Hand shank 1
112 202009000185 Knife set 1
113 208008000041 Spanner 1
114 208008000040 Spanner 1
115 202999001666 Plastic bottles 1

18 WWW.SENIXTOOLS.COM
:$55$17<
3-year limited warranty on all Senix 4QL series gasoline powered equipment.
FOR THREE YEARS from the original date of retail purchase this Senix product is warranted against defects in
materials or workmanship on power tools. Defective product will receive free repair.*
This warranty does not cover normal wear of parts and components such as cutting chain, line or blades nor does
this warranty cover product transportation cost for warranty or service.
$Q\LPSOLHGZDUUDQW\JUDQWHGXQGHUVWDWHODZLQFOXGLQJZDUUDQWLHVRIPHUFKDQWDELOLW\RU¿WQHVVIRUDSDUWLFXODU
purpose, are limited to three years from the date of purchase on power tools and chargers and seven years on
batteries. The manufacturer is not responsible for direct, indirect, incidental or consequential damages. Some
states and provinces do not allow limitations on how long an implied warranty lasts and/or do not allow the
exclusion or limitation of incidental damages, so the above limitations and exclusions may not apply to you. This
ZDUUDQW\JLYHV\RXVSHFL¿FOHJDOULJKWVDQG\RXPD\DOVRKDYHRWKHUULJKWVZKLFKYDU\IURPVWDWHWRVWDWHRU
province to province.
The YAT USA declines any responsibility in regard to civil liability arising from abusive use or not in conformity with
proper use and maintenance of the machine as described in the operator’s manual.
YAT USA is not responsible for direct, indirect, incidental or consequential damages.
After the purchase, the manufacturer recommends proper maintenance of the machine and to read the operator’s
manual before using the machine.
*Original purchase receipt may be required for proof of purchase
For customer service contact us toll free at 1-800-261-3981 or Senixtools.com. YAT USA, Inc. 9048 E Bahia Dr,
suite 105, Scottsdale, AZ 85260
/,0,7('7+5((<($5:$55$17<
$GGLWLRQDO/LPLWDWLRQV
Warranty is subject to the following conditions:
:DUUDQW\DSSOLHVWRWKHRULJLQDOSXUFKDVHUDWUHWDLODQGLVQRWWUDQVIHUUDEOH
:DUUDQW\5HJLVWUDWLRQDWZZZVHQL[WRROVFRP
7KHWRROKDVQRWEHHQPLVXVHGDEXVHGQHJOHFWHGDOWHUHGPRGL¿HGRUUHSDLUHGE\DQ\RQHRWKHUWKDQDQ
authorized service center
2QO\JHQXLQH6HQL[DFFHVVRULHVKDYHEHHQXVHGZLWKRURQWKLVSURGXFW
7KHWRROKDVEHHQVXEMHFWHGWRQRUPDOZHDUDQGWHDU
7KHWRROKDVQRWEHHQXVHGIRUWUDGHRUSURIHVVLRQDOSXUSRVHV
7KHWRROKDVQRWEHHQXVHGIRUUHQWDOSXUSRVHV
7KLVZDUUDQW\RQO\FRYHUVGHIHFWVDULVLQJXQGHUQRUPDOXVDJHDQGGRHVQRWFRYHUDQ\PDOIXQFWLRQIDLOXUHRU
defect resulting from misuse, abuse (including overloading the product, exposure to water or rain) accidents,
neglect or lack of proper installation and improper maintenance or storage.
To locate your nearest Senix service provider call toll free at 800-261-3981 or email us at [email protected].

Cortadora de arbustos con motor de
gasolina de 4 ciclos, 1,62 pulgadas
Manual del Operador
Modelo: HT4QL-L
Para el servicio de asistencia al cliente, llame al 1-800-261-3981 o envíe un correo electrónico a:
CONSERVE ESTE MANUAL PARA FUTURAS CONSULTAS.

20 WWW.SENIXTOOLS.COM
6Ë0%2/26'(6(*85,'$'(,17(51$&,21$/(6
Este manual del operador describe los símbolos de seguridad e internacionales y las imágenes que puedan
aparecer sobre el producto. Lea el manual del operador para ver la información completa sobre seguridad,
funcionamiento, mantenimiento y reparación.
El usuario debe leer el manual de
instrucciones para disminuir el riesgo de
sufrir lesiones.
Use protección para las manos
Use calzado de seguridad antideslizante
Si no mantiene las manos alejadas de las
cuchillas, se puede producir una lesión
personal grave
Evite los cableados eléctricos, y use la
unidad en entornos secos
No exponga la sierra a la lluvia
Los objetos despedidos y el ruido fuerte
pueden causar lesiones oculares graves
y pérdida de oído. Al operar esta unidad,
utilice protecciones oculares conforme con
las normas actuales ANSI Z87.1 además
de protecciones auditivas. Al operar esta
unidad, use un protector para la cabeza. Los
objetos que caen pueden causar lesiones
graves Utilice una máscara facial completa
cuando sea necesario. Indica peligro, advertencia o precaución.
Precauciones que implican su seguridad
6XSHU¿FLHFDOLHQWH1RWRTXHHOVLOHQFLDGRUR
el cilindro calientes. Podría quemarse. Estas
partes se calientan en extremo durante el
funcionamiento. Se mantienen calientes
durante un periodo breve luego de apagar la
unidad.
Los objetos que se desprenden pueden
rebotar y causar lesiones personales o
daños a la propiedad.
Todos los transeúntes deben encontrase al
menos a 15 m de distancia.
¡PELIGRO!
¡Riesgo de electrocución!
ADVERTENCIADE NO USAR
COMBUSTIBLE E85 CON ESTA UNIDAD:
Se ha probado que el combustible
que contiene más del 10% de etanol
probablemente dañará el motor y se anulará
la garantía.
Utilice siempre combustible limpio, nuevo y
sin plomo. Consulte el manual del operador
para saber cuál es el tipo de aceite correcto.
Table of contents
Languages:
Other Senix Trimmer manuals

Senix
Senix GTX2-M User manual
Senix
Senix GTSX5-M-0 User manual

Senix
Senix HTE3.8-L User manual

Senix
Senix HTX5-M User manual
Senix
Senix GTS4QL-M2 User manual

Senix
Senix HTX2-M User manual

Senix
Senix GTBCU4QL-M User manual
Senix
Senix HTPX2-M User manual

Senix
Senix GTE2.5-L-EU User manual

Senix
Senix GTC4QL-L User manual
Popular Trimmer manuals by other brands
Kraftixx
Kraftixx KX-AHS 1858 Li Kit Original operating instructions

DeWalt
DeWalt DCM563PB Original instructions

Craftsman
Craftsman evolv 172.740100 Operator's manual

Black & Decker
Black & Decker ST4500 Instruction manua

Flymo
Flymo MULTITRIM CT250X Important information

Remington
Remington RM4522TH Operator's manual
