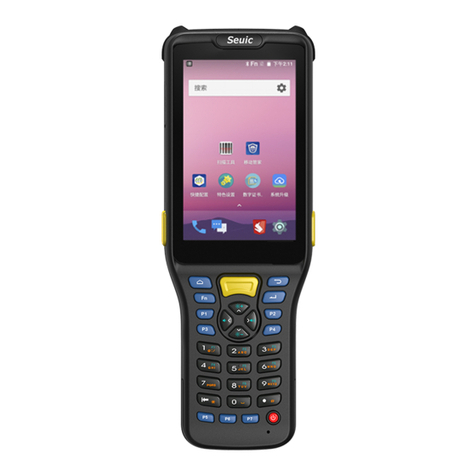
Seuic AUTOID Q9 User manual

SEUIC
Reference Manual
AUTOID Q9 Industrial Smartphone
Android Product UserManual
Version 1.0
SEUIC Technologies Co., Ltd.

SEUIC Technologies Co., Ltd.
Copyright Notice
The information contained in this manual is provided on an "AS IS" basis and is
subject to change without further notice.
Seuic makes no warranties of any kind with respect to the contents of this manual,
including, but not limited to, implied warranties of merchantability and fitness for a
particular purpose. Seuic shall not be liable for errors contained in this manual or for
incidental or consequential damages arising out of the supply, performance, or use
of this manual or the examples contained herein.
Software Copyright 2021 SEUIC Company
If you need more product information and support, please contact our sales
representative, or go to our website directly.
SEUIC Technologies Co., Ltd.
15 Xinghuo Road, Jiangbei New Area, Jiangsu, China
Postcode: 210032
Phone: 86-25-52261298
Fax: 86-25-52268995
Corporate Website: www.Seuic.com
Product Website: www.ChinaAUTOID.com
Service Hotline: 4006770876
Service Email: AUTOID@seuic.com

SEUIC Technologies Co., Ltd.
Contents
Chapter 1. Instructions for Use .........................................................................................5
1.1 Cautions for laser scanning engines .................................................................. 5
1.2 Cautions for safety ...............................................................................................5
1.3 Cautions for maintenance .................................................................................. 5
Chapter 2. Appearance .................................................................................................... 7
Chapter 3. Keyboard ....................................................................................................... 10
Chapter 4. Quick Start Guide ......................................................................................... 12
4.1 Power on ............................................................................................................ 12
4.2 First use .............................................................................................................. 12
4.3 Power off .............................................................................................................12
4.4 Restart .................................................................................................................12
4.5 Install SIM card ................................................................................................. 12
4.6 Install SD card ................................................................................................... 13
4.7 Install battery and battery cover ..................................................................... 13
Chapter 5. About Charging ............................................................................................14
5.1 Charging time .................................................................................................... 14
5.2 Charging temperature ....................................................................................... 14
5.3 Battery charging ................................................................................................ 14
5.4 Cautions for battery use ................................................................................... 14
5.5 LED indicators .................................................................................................... 15
Chapter 6. Main screen .................................................................................................. 16
6.1 Status bar icons ................................................................................................. 16
Chapter 7. Settings .......................................................................................................... 18
7.1 Network & internet ........................................................................................... 18
7.1.1 WLAN ...................................................................................................... 18
7.1.2 Mobile network ...................................................................................... 24
7.1.3 Data usage .............................................................................................. 28
7.1.4 Hotspot & tethering ................................................................................ 28
7.1.5 VPN .......................................................................................................... 30
7.1.6 Airplane mode ........................................................................................ 30
7.2 Connected devices ........................................................................................... 30
7.2.1 Bluetooth ................................................................................................ 31
7.2.2 NFC ...........................................................................................................35
7.3 Apps & notifications ......................................................................................... 35
7.4 Battery ............................................................................................................... 35
7.5 Display .................................................................................................................36

SEUIC Technologies Co., Ltd.
7.6 Sound ................................................................................................................. 39
7.7 Storage ............................................................................................................... 40
7.8 Location ............................................................................................................. 41
7.9 Security .............................................................................................................. 41
7.10 Accounts .......................................................................................................... 42
7.11 Accessibility ..................................................................................................... 43
7.12 System ...............................................................................................................44
7.12.1 Languages & input ................................................................................ 44
7.12.2 Gestures ................................................................................................ 45
7.12.3 Date & time ............................................................................................45
7.12.4 Reset options ........................................................................................ 46
7.12.5 About phone ......................................................................................... 47
Chapter 8. Introduction of typical applications ............................................................ 48
8.1 Scanner .............................................................................................................. 48
8.2 System Update .................................................................................................. 53
8.3 Mobile Butler .................................................................................................... 55
8.4 Quick Configuration .......................................................................................... 62
8.4.1 Import ..................................................................................................... 62
8.4.2 Export .......................................................................................................65
8.4.3 User Configuration .................................................................................. 67
8.5 Feature Key Settings ......................................................................................... 69
8.5.1 Fn Sticky Keys .......................................................................................... 70
8.5.2 Block P5 Function Key ............................................................................ 70
8.5.3 Block P7 Function Key ............................................................................ 70
8.5.4 Touchscreen Glove Mode ...................................................................... 70
8.5.5 Disable Status Bar Dropdown ................................................................ 71
8.5.6 Prohibit Passing Scan Key Value to Apps .............................................. 71
8.5.7 Show Scan Float Button ......................................................................... 71
8.5.8 Hardware Keyboard Tones ..................................................................... 71
8.5.9 Prohibit Fall Detection ........................................................................... 71
8.6 Digital Certificates Whitelist ............................................................................. 71
8.7 Hotkey Settings ................................................................................................. 74
Chapter 9. Troubleshooting ........................................................................................... 78
Optional Accessories ......................................................................................................80

SEUIC Technologies Co., Ltd.
Chapter 1. Instructions for Use
1.1 Cautions for laser scanning engines
Laser radiation! Do not look directly at the laser beam.
1.2 Cautions for safety
Use only the batteries and chargers specified by our company for your device.
Using other products may result in battery leakage, overheating, bursting and
fire.
Do not short the charger as this may cause electric shock, smoke and damage to
the charger.
Do not use the charger with a damaged power cord, as this may lead to fire and
electric shock.
Do not disassemble or modify the charger as this may result in personal injury,
electrical shock, fire and damage to the charger.
Grasp the charger when unplugging; pulling the power cord may damage the
cord and cause electrical shock and fire.
Clean the device, battery and charger with a soft, dry cloth.
Do not wipe the equipment with alcohol, thinner or benzene solutions.
1.3 Cautions for maintenance
This product is waterproof and dustproof, but should not be operated in extreme
high temperature, low temperature or wet environment. Please refer to the
product specifications for temperature and humidity standards.
Pressing the screen with force may damage the screen. Do not touch the screen
with aresistive touchscreen pen to avoid scratching or damaging the screen. To
clean the screen, spray a small amount of commercial LCD cleaner on a soft cloth.

SEUIC Technologies Co., Ltd.
Do not spray cleaner directly on the screen.
Do not use any chemical cleaner to wipe the LCD screen.
Keep the scan window clean and free of smudges and do not carve or scrape
with sharp objects.
If this product is not used for long, be sure to download the data to your
computer for storage.
It will take a long time to charge the battery when the device is usedfor the first
time or reused afterlong storage.
If there is a malfunction, write down the information about themalfunction and
contact the service personnel.

SEUIC Technologies Co., Ltd.
Chapter 2. Appearance
Figure 2- 1 Front View

SEUIC Technologies Co., Ltd.
Figure 2-2 Back View

SEUIC Technologies Co., Ltd.
Figure 2-3 Battery Compartment Back View

SEUIC Technologies Co., Ltd.
Chapter 3. Keyboard
The keyboard on the AUTOID Q9 device is 24 keys + 2 side scan keys+ 1 PTT key,
and there are 3 buttons on the touchscreen (Menu, Home, Back).
Keys Description:
Table 3- 1 Keys Description
Key
Main Function
Description
Home button
Press to return to Home screen.
Task button
Press to display opened applications.
Back button
Press to return to the parent screen or exit the
application.
In the text entry screen, press to close the on-
screen keyboard
Scan key
Scan key for barcode scan.
Side-Scan key
Scan keyfor barcode scan.
PPT key
Intercom function, press and hold to talk to each
other.
ESC key
Exit
Delete key
Delete
Direction key: up
Becomes Backlight+ in Fn mode
Direction key:
down
Becomes Backlight- in Fn mode
Direction key:
left
Becomes Volume+ in Fn mode
Direction key:
right
Becomes Volume- in Fn mode
Long- press together with Power key for screenshot
function.

SEUIC Technologies Co., Ltd.
Enter key
Confirm
Fn Lock key
Lock keyboard input for Fn function input
1
Number 1, Symbol@:/
Becomes F1 key in Fn mode
2
Number 2, Letters A.B.C
Becomes F1 key in Fn mode
3
Number 3, Letters D.E.F
Becomes F1 key in Fn mode
4
Number 4, Letters G.H.I
Becomes F1 key in Fn mode
5
Number 5, Letters J.K.L
Becomes F1 key in Fn mode
6
Number 6, Letters M.N.O
Becomes F1 key in Fn mode
7
Number 7, Letters P.Q.R.S
Becomes F1 key in Fn mode
8
Number 8, Letters T.U.V
Becomes F1 key in Fn mode
9
Number 9, Letters W.X.Y.Z
Becomes F1 key in Fn mode
Custom keys
Configurable as per user requirements
Power button
Sleep/wake up, shutdown
.
Symbol .
Becomes * key in Fn mode
0
Number 0
Becomes Space in Fn mode
#
Enter factory pattern/the same function as the #
key on the mobile phone

SEUIC Technologies Co., Ltd.
Chapter 4. Quick Start Guide
4.1 Power on
Take out the device and the battery, slide the battery cover lock to open state,
install the battery and close the battery cover, then slide the battery lock to close the
cover, and press and hold the power button to turn on the device.
4.2 First use
The first time you boot up or open some applications, a quick tutorial will pop up
to guide you through using your PDA.
When in the system working state, press the power button to wake up the
device. When in the sleep state, press the power button to wake up the system and
light up the screen.
4.3 Power off
Press and hold the power button to open an option menu, tapPower Off to shut
down the device.
4.4 Restart
When the device is powered on under non-sleep state, press and hold the power
button for 2 s to open the power menu, then select Restart and tap Confirm to turn
off and restart the device normally.
4.5 Install SIM card
Follow the instructions below to install Nano SIM card:
Remove the battery, and the left card holder is a Nano SIM- 1 card holder, follow

SEUIC Technologies Co., Ltd.
the direction on the label and insert the Nano SIM- 1 card; the right card holder is a
Nano SIM-2 card holder, follow the direction on the label and insert the Nano SIM-2
card.
4.6 Install SD card
Follow the instructions below to install SD card:
Remove the battery, the center card holder is the memory card holder, and
follow the direction on the label to insert the memory card.
4.7 Install battery and battery cover
Slide the battery cover lock to the right side to unlock, remove the cover and
then the battery. Install the battery and cover as labelled, slide the cover lock to the
left side to lock up.

SEUIC Technologies Co., Ltd.
Chapter 5. About Charging
Since the battery only has a small amount of power for testing before shipping
out of the factory, it must be charged first when received before use. The device can
be charged via a USB Cable, Single Charging Dock or Tetra Charging Dock.
5.1 Charging time
Battery: first charge takes about 3 hours chargingvia the adapter. The LED lights
up in solid red when charging and turns solid green when fully charged.
5.2 Charging temperature
The best operating temperature is room temperature 18~25C.
Batteries will not be charged at temperatures below 0°C or above 50°C.
5.3 Battery charging
The battery can also be charged separately using a Single Charging Dock for the
device or a Tetra Charging Dock for the battery.
Tip: If this product is not used for long, please charge the device at least once
every two months.
5.4 Cautions for battery use
If the battery is exhausted, it is normal that the device may not power on
immediately when plugged in the charger. Please keep charging for a period
of time before powering on.
The battery can be recharged repeatedly, but is consumable and should be
replaced when the device standby time is significantly reduced.
The charging time of the battery varies according to the temperature

SEUIC Technologies Co., Ltd.
conditions and battery usage, so please charge the battery within a
reasonable temperature.
When the battery level is low, the device will pop up a low battery alert.
When the battery level is too low, the device will automatically turn off.
5.5 LED indicators
The LED indicators on both sides of the device indicate the battery status and
charging status in different colors.
When NOT connected to the USB or charging adapter, the flashing red light
on the right-side LED indicates that the battery is too low and should be
charged in time.
When connected to the USB or charging adapter, the solid red light on both
side LEDs indicates that the battery is charging.
When connected to the USB or charging adapter, the solid green light on
both side LEDs indicates that the battery is fully charged.
When the device scans a barcode, the LEDs on both sides flash once in green,
indicating that the barcode has been read.

SEUIC Technologies Co., Ltd.
Chapter 6. Main screen
AUTOID Q9 has two home screens, configurable at your preference.
Figure 6- 1 Main Screen
Table 6- 1 Main Screen Items
① Status Bar: displays notifications and status icons.
② Display Area: used to p lace application icons, desktop folders and widgets.
③Shortcut Bar: tap to enter the corresponding application.
④Application Tray: slide up to enter the main screen to view all applications.
6.1 Status bar icons
The status bar icons and the notification bar icons are located at the top of the
screen and display device status information and notifications, as shown in the table
below.

SEUIC Technologies Co., Ltd.
Icon
Description
Icon
Description
Available WLAN network
detected
No SIM card
Connected to WLAN network
Signal strength
Portable WLAN enabled
Mobile network connected
Vibration mode
Airplane mode
Missed call
Scan ON
New message
Battery charging
Screenshot captured
Battery fully charged
Alarm clock
Low battery
Preparing the microSD card
Multiple notification icons, out
of display range
Bluetooth
GPS locating
Uploading data
Downloading data
USB debugging
Table 6-2 Status Icons and Notification Bar Icons

SEUIC Technologies Co., Ltd.
Chapter 7. Settings
7.1 Network &internet
Find this icon:
-> Settings
-> Network & internet
Figure 7- 1 Network & internet
7.1.1 WLAN
Wi- Fi 2.4G provides a wireless network access range of up to 450 feet (150m),
and Wi- Fi 5G provides a range of up to 300 feet (100m) (Note: industrial-grade APs,
open space). To use the Wi- Fi on your device, you must connect to a wireless access
point or hotspot.
Note: Wi- Fi signal availability and coverage depends on the signal number, the
infrastructure, and the objects that the signal penetrates.
Turn on Wi- Fi and connect to a wireless network
1. Tap the WLAN Off/On button to enable Wi- Fi, And the system automatically

SEUIC Technologies Co., Ltd.
scans for available wireless networks.
2. The Wi- Fi network list will then display the network names and security
settings (open or encrypted) of the discovered Wi- Fi networks.
3. Tap one of the Wi- Fi networks to connect. When you select an open network,
you are automatically connected to that network. If you select an encrypted network,
Figure 7-2 Wi-Fi menu
4. WLAN Frequency Band ([WLAN Advanced Settings] --> [WLAN Frequency
Band]), when you choose to use only 5GHz/2.4GHz, you can only search for APs in
5GHz/2.4GHz.
you must first enter the appropriate password before connecting.
Tap to connect to the
network
Tap to open and
search network

SEUIC Technologies Co., Ltd.
Figure 7-3 WLAN Frequency Bands
5. Roaming RSSI Threshold and Roaming RSSI Difference can be set on demand
through Advanced Settings.
Figure 7-4 WLAN roaming settings
(1) Roaming RSSI Threshold: if the actual signal strength of the current connect
AP is less than the threshold value (premise: in a roaming environment), then the
roaming will be triggered. As shown in the figure, the roaming threshold value is set
to -65d Bm, when the signal strength is lower than that, the roaming mechanism is
triggered.
Other manuals for AUTOID Q9
1
Table of contents
Other Seuic Touch Terminal manuals

