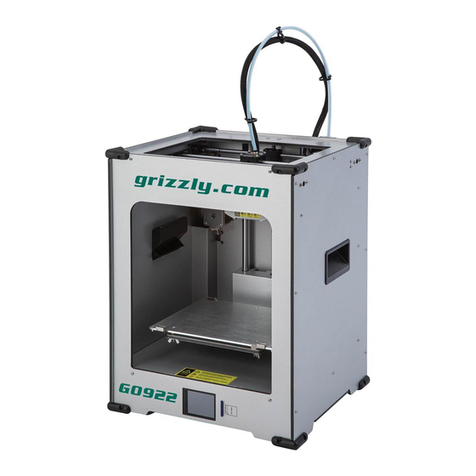
SHAREBOT VIKING User manual

USER MANUAL
SHAREBOT
VIKING
VER. 1.1
09/01/2020
SHAREBOT VIKING – User Manual

Warning
As with all professional pro ucts, Sharebot Viking, as well as its accessories
an materials must be han le carefully an professionally to ensure a
secure working environment an high urability of the evice.
It shoul therefore be note that any mo ification of the printer will voi the
warranty. The same applies to any printer malfunction cause by improper
use.
Do not open the front oor of the 3D printer while the machine is running.
Never look irectly into the projecte light an wear protective goggles
throughout the printing operation.
The material trays is spare part an is not covere by the warranty.
The lc igital mask is spare part an is not covere by the warranty.
The projector LEDs have a set service life.
Regular maintenance will ensure consistent results over the entire perio .
You can fin further etails on safe use of the printer on the technical ata
sheet an the material pro ucers manufacturer’s gui elines.
The accessories kit contains cutters an /or other sharp tools. Han le these
with care.
Sharebot Viking is a 3 printer base on CE-certifie igital mask technology:
- 2006/42/CE
- 2014/20/UE
- 2011/65/UE
Correct use is a prerequisite for achieving optimum results.
Technical features
Printing range 192 x 120 x 200 mm
Accuracy XY 75 μm (+/- 25 μm)
Accuracy Z 50-100 μm, epen ing on the relevant material
parameter
2K / UV projector 2560 x 1600 pixel
Wavelength 405 nm (+/- 5nm)
Printer imensions 39x29x47 cm
Weight Approx. 21,5 kg
Working
temperature
18°- 25° C
This ata is subject to change for technical reasons.
SHAREBOT VIKING – User Manual

Quick-start
Opening the package
You have just receive your Sharebot Viking, containing the following:
- Sharebot Viking 3D printer;
- Accessories box;
- CE eclaration;
Before starting
First of all you nee to prepare the workplace in which you inten to install the
3D printer.
Ensure that you have remove all obstacles from the area, that it is well-
ventilate an that it is not expose to any irect natural light.
Ensure that all si es of the 3D printer are accessible an that there is
sufficient space for the manufacturing kit for finishing work of the printe
objects.
Ensure that the surface on which the 3D printer is positione is level an
stable.
To use the printer you nee :
•Power socket with 100-240 VAC, 50-60 Hz.
•PC with Win ows operating system for installing the slicing software
with the following requirements: i5 processor, at least 8GB RAM,
Win ows 7.
Options:
•a lan network or a Win ows PC with an ethernet port to sen files an
manage the 3D printer.
•a wireless network to sen files an manage the 3D printer.
Open the package of your Sharebot Viking, carefully remove the
manufacturing kit from the packaging an place it on the work surface.
Remove the 3D printer from the packaging carefully an place it upright on
the work surface.
Open the semi-transparent front oor an remove the transport locks in the
printing range of the evice.
Insert the material tray in the relevant position.
SHAREBOT VIKING – User Manual

Insert the buil ing plate in the appropriate position an lock the quick-release
lock.
Connect on the back of Sharebot Viking:
-Power line 1;
-LAN cable 2;
-USBa-USBb bridge 3;
SHAREBOT VIKING – User Manual

Optionally: connect the USB HUB 4.
Turn on the 3d printer
1-Relese the 4 screw on the two si e of the printing plate;
2- From the printer interface, sen the UTILITIES file “Z-AXIS
CALIBRATION”, follow the instruction on the lc screen an the printing plate
will move own;
SHAREBOT VIKING – User Manual

3- Be shure that the printing plate is parallel an is touching the bottom of the
resin tank, now tighten the 4 screw on the printing plate si es;
4- At the en of the preview operation, confirm it on lc , an move the printing
plate up of 50mm with the UTILITIES file “Z UP 50mm”.
SHAREBOT VIKING – User Manual

Printing process
Sharebot Viking 3D printer has an internal operating system that allows it to
be manage without the nee to use any other evice.
There are two ways to access the printer interface, uploa files an manage
printing operations: from the machine LCD interface or from network
interface.
LCD interface
For operations on the machine, the LCD interface locate on the front of the
printer is use , through the isplay it is possible to copy the files to the
internal memory, start the UTILITY programs, sen a file to print an set the
network parameters.
The main screen is as follows:
Note: The functions of the LCD interface may vary from one firm are
version to the next.
Menu structure
• "Homepage" Sharebot logo
◦ always returns to the main page;
• "Print" 3D printer symbol
◦ Files from internal memory
◦ File from USB stick
SHAREBOT VIKING – User Manual

• "Settings" wheel symbol
◦ Network
▪ Ethernet IP
▪ Wireless IP
◦ Utilities
▪ Cleaning Cycle
▪ Z-Axis Calibration
▪ Plate up 50mm
Net ork settings
Lan connection
Sharebot Viking is set by efault for DHCP connection, it is possible to
manually assign fixe IP a resses via the web interface.
Connect the printer via an RJ45 cable to the network LAN an via the LCD
interface go to "Settings" – "Network".
SHAREBOT VIKING – User Manual

From this page you can view the IP a ress assigne to the printer.
From a PC connecte to the same network, open a browser an enter the
printer a ress, the access cre entials to the web interface will be requeste
( efault login "admin" passwor "admin") an the main screen of the web
interface will be isplaye :
Wifi connection
Sharebot Viking can be connecte to Wifi networks. From the printer's web
interface, by selecting "Configure" - "Wireless-Lan" it is possible to scan an
connect to one of the available Wifi networks. The IP a ress assigne by the
Wifi network is visible from the Lc interface "Settings" - "Network".
Installation and use of the Pyramis slicing soft are
Refer to the software gui e.
In the settings of the Pyramis slicing software it is possible to set the IP
assigne to the printer for irect access to uploa ing files via the network.
SHAREBOT VIKING – User Manual

Web interface of the printer
Once the esire access mo e has been configure , it will be possible to
access the printer management web interface.
The main functions available are two:
• the ashboar that allows the isplay of the machine status an the
interruption of the current print;
• file management for loa ing the mo els an starting the printing process
accessible via the "FILE MANAGER" - "CWS FILES" menu.
The ashboar or status page
The ashboar is the first page that is isplaye when you connect to the
machine or access it by selecting the wor ing "DASHBOARD" from the main
menu, on this page you can see the status of the machine.
In the “Overview” section is shown the status of the print operation. Here you
can suspen the print operation at any time by clicking “Stop” button.
Meaning of the fiel s shown:
Object Name of the running print job
Current layer Number of layers that have alrea y been printe
Total layers Total numbers of layers
Time elapse How long the printer has alrea y been running
Total time Expecte time for the entire print
Progress Percentage-base progress of the print operation
There are two other isplays at the top right:
SHAREBOT VIKING – User Manual

The le with the “Online” label is green when the printer is rea y for
operation. The le with the “Printing” label is re when a print is currently
running.
Attention: If the “On ine” ed is not green, contact the support service.
Managing files
If you select the “File manager” menu an the “CWS file” option you can
access the file manager. Here you can uploa prepare print jobs, elete
save jobs an start a new buil ing process.
Click on “Uploa CWS” option to loa a file into the printer.
When you select this option the uploa win ow will open, then using the
“Select file” option you will be able to uploa the esire object.
With the “Local”, “USB” an “All” options you can isplay the files in the
internal printer memory, the USB stick or both.
Each file can be printe via the “Print” button or elete using “Delete” button.
First print
Attention: If you are working with iquid resin for the first time, p ease
observe a precautionary measures.
Fill the material tray with the correspon ing resin. The resin may be fille to a
maximum of half the height of the e ge of the tray.
SHAREBOT VIKING – User Manual

Ensure that no resin is spille out of the tray. Take special care to ensure that
no resin rips into the machine. If liqui resin oes rip into the machine
isconnect the power cable an clean.
After filling the tray properly (Fig. 6), close the front oor of the printer.
Start a printing operation
Is possible to start a printing job both from the lc interface or the web
interface:
Web interface
–connect to the printer’s web interface;
–select from the left menù “File manager”;
–select “CWS FILES”;
–press the “Print” button of the file that you want to buil (if you want to
print the object from a USB stick select “USB”);
–confirm the start of the printing process;
SHAREBOT VIKING – User Manual

After the end of a printing process
At the en of a printing process a itional steps nee to be carrie out to
finish the object an clean the printer.
Remove and finish the object
Warning! A ways remove the printing p ate before the resin tray.
The correct proce ure for removal an post treatment of the object is:
–Ensure that the buil ing plate is not expose to natural light;
–Put the manufacturing kit within proximity of the printer;
–Wear the gloves (nitrile);
–Open the printer's front oor;
–Remove the buil ing plate with the object;
–Continue with the cleaning an finishing following the instructions of the
material manufacturer or the applications protocol;
Cleaning
Once the printing operation is finishe you have to clean the 3D printer so:
–Remove the material tray from the printer with the remaining resin;
–Pour the remaining resin into a bottle (if necessary, you can filter the
resin with an appropriate filter);
–Clean the resin tray with a proper solvent an a paper napkin;
–Insert the resin tray into the printer;
–Clean the buil ing plate an place it in the printer;
SHAREBOT VIKING – User Manual

–Alternatively, you can store the fille material tray in a ark an close
space so that it is not expose to natural light an is safely store . This
will allow you to quickly reuse the material for the next printing process.
Please observe the instructions of the material manufacturer.
Maintenance
Proper use of the material tray
Han le the tray with care in or er to guarantee a long service life an achieve
high-quality objects, follow these rules:
•As soon as the printing operation is complete, empty the tray an clean
the base with a paper towel;
•Take care not to amage the base of the tank if you have to remove
objects;
•To achieve an optimum printing result, use a tank for a max. of 2 kg
resin, worn can epen on the use material;
•Use a ifferent tray for each resin in or er to avoi contamination;
Lubrications of the axes
A a rop of the oil containe within the accessories kit to the top of the Z
axis ballbearing screw an the Z axis gui e.
Ensure the correct ventilation
The printer has cooling fans on the bottom an rear.
Ensure that no ust or any other pow er-like substances inhibit ventilation.
SHAREBOT VIKING – User Manual

Firm are update
Up ating the firmware for the 3D printer:
•Downloa the “up ater.img” file;
•Copy the file to an empty pen rive;
•Insert the pen rive in the 3 printer usb port;
•Shut own an restart the machine;
•Remove the pen rive from the 3 printer usb port;
•Follow the LCD interface instructions.
Adding resin during a printing process
It is possible to a resin uring a printing process without excee ing the half
tray limit.
Pay attention to the temperature an mixing of the a e resin, it coul leave
marks on the object layer.
Cleaning of residues and impurities from the bottom of the tray
In this case it is possible to start the automatic cleaning cycle, from the
machine UTILITIES, "Cleaning Cycle". The resin on the bottom of the tray is
polymerize . After this cycle, carefully remove the layer of polymerize resin
from the bottom of the resin tray, taking care not to amage the bottom of the
tray.
How To
Resin escaping from the material tray.
Suspen the printing operation. Remove the ischarge resin before it gets
har er on the printer or the projector, an then restart the process.
Object is not fixed to the building plate.
The print is lost an may become stuck in the tray. In this case stop the print
operation, then remove the buil ing plate an start the cleaning cycle also
available in the “UTILITIES” section. Carefully remove the polymerize
material from the resin tray bottom.
Before you restart the printing operation, make the following checks:
–Check that the base of the tank an the buil ing plate are clean an not
worn;
–Check that the istance between the printing plate an the base of the
tray has not change . A calibration of the buil ing plate may be
necessary;
SHAREBOT VIKING – User Manual

–Check that the object has sufficient stability;
–Check that enough supports are in place.
The object base and support are attached to the printing plate but the
object is on the bottom of the tank
Check the support size, position an the orientation of the object.
Check the temperature of the resin an that the room temperature are in the
operative range, usually 18 – 25 °C.
The resin is almost empty during a printing process.
You can refill some resin uring the printing process. Press the “Pause”
comman on the lc interface then refill the tray material up to the level sign
of the tray.
The resin leaves behind residue and impurities on the base of the tray.
In this case you can start the tray base automatic cleaning cycle. You will fin
the function in the “UTILITIES” irectory. During the cycle the resin on the
base of the tray is polymerize , at the en carefully remove the polymerize
resin layer.
Technica resources
Online resources
The network is rich in resources concerning 3D mo eling, 3D printing
management, creative projects an tips for working better.
It is possible to take inspiration from these resources, however Sharebot
isclaims any responsibility for the proce ures or contents present on sites
not connecte to the company.
Technical assistance
Before each request for technical assistance, check the two sections: FAQ
an HOW-TO from the site www.sharebot.it
In case of any problem not present in the in icate resources, contact our
technical support by filling in the e icate form or write an email to
SHAREBOT VIKING – User Manual
Other manuals for VIKING
1
Table of contents
Other SHAREBOT 3D Printer manuals
