Sharp AR 168D - Digital Imager B/W Laser User manual

DIGITAL MULTIFUNCTIONAL
SYSTEM
OPERATION MANUAL
(for general information)
Page
PREPARATIONS
LOADING PAPER
MAKING COPIES
SET UP THE SOFTWARE
PRINTER/SCANNER
FUNCTIONS
USER SETTINGS
TROUBLESHOOTING AND
MAINTENANCE
9
14
20
36
57
62
69
90
92
CONVENIENT COPY
FUNCTIONS 26
OPTIONAL EQUIPMENT
APPENDIX
AR-168S
AR-168D
MODEL
AR-168D
AR-168S
ED IN CHINA
KS
TINSE1205QSZZ
2003M 1

For users in the USA
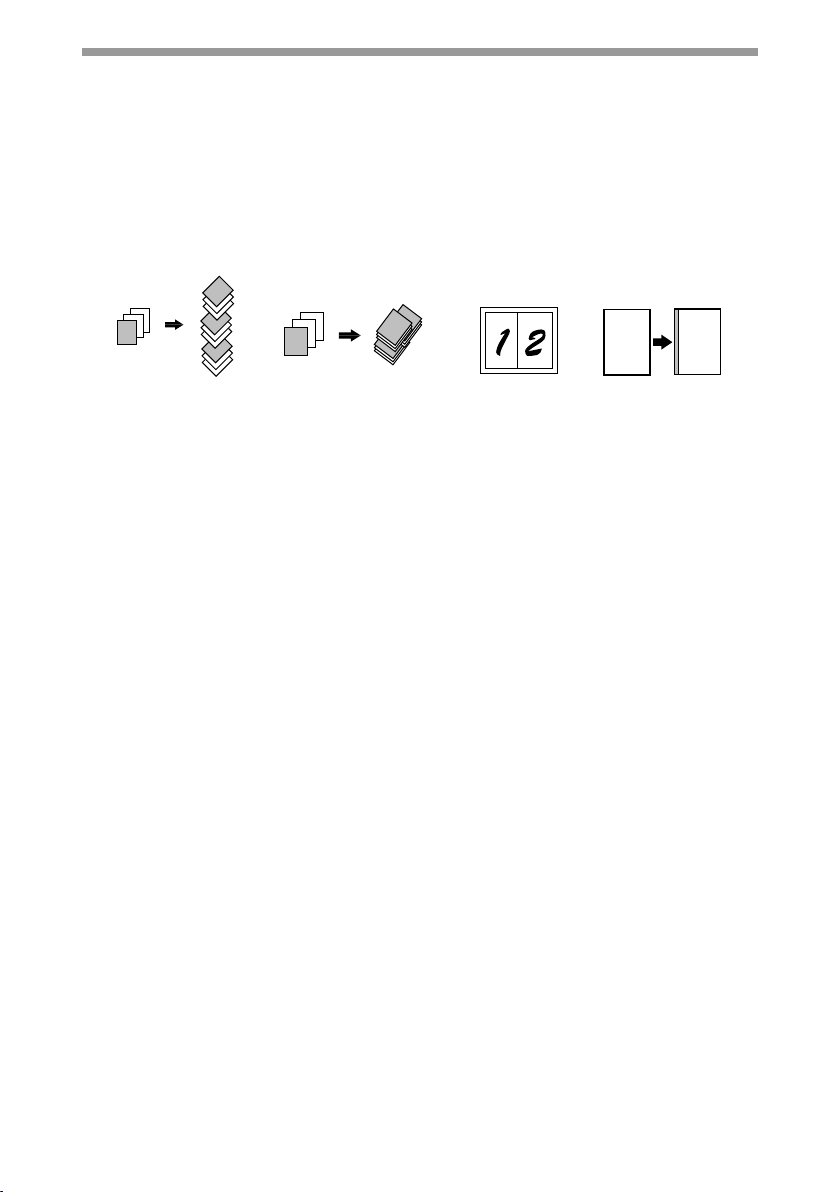
Do not make copies of anything which is prohibited from copying by law. The
following items are normally prohibited from copying by national law. Other
items may be prohibited by local law.
Money Stamps Bonds Stocks Bank drafts
Checks Passports Driver's licenses
FOR YOUR RECORDS ...
To protect against loss theft, record and retain for reference the
copier's serial number located on the back of the unit.
Model Number
Serial Number
Date of Purchase
Authorized Sharp Copier
Service Department Number
NOTICE
BE SURE TO ASK YOUR AUTHORIZED SHARP DEALER ABOUT THE WARRANTY THAT YOUR
SELLING DEALER EXTENDS TO YOU. In order to assure you, the end-user, of warranty protection,
Sharp extends a limited warranty to each of its authorized dealers and, in turn, requires each of its
authorized dealers to extend its own warranty to you on terms that are no less favorable than those
given to the dealer by Sharp.You should be aware, however, that Sharp does not itself extend any
warranties, either express or implied, directly to you, the end-user, and no one is authorized to make
any representations or warranties on behalf of Sharp. Specifically, SHARP DOES NOT EXTEND TO
YOU, THE END-USER, ANY EXPRESS WARRANTY OR ANY IMPLIED WARRANTY OF
MERCHANTABILITY, FITNESS FOR USE OR FITNESS FOR ANY PARTICULAR PURPOSE IN
CONNECTION WITH THE HARDWARE, SOFTWARE OR FIRMWARE EMBODIED IN, OR USED
IN CONJUNCTION WITH THIS PRODUCT. Sharp is not responsible for any damages or loss, either
direct, incidental or consequential, which you, the end-user, may experience as a result of your
purchase or use of the hardware, software or firmware embodied in or used in conjunction with this
Product. Your sole remedy, in the event that you encounter any difficulties with this Product, is
against the authorized dealer from which you purchased the Product.
AR-168S Digital Multifunctional System
AR-168D Digital Multifunctional System
In the event that this authorized dealer does not honor its warranty commitments, please contact the
General Manager, Business Products Group, Sharp Electronics Corporation, Sharp Plaza, Mahwah,
NJ07430-2135, so that Sharp can try to help assure complete satisfaction of the warranty rights to
which you are entitled from the authorized dealer.

1
CAUTIONS................................................................................................................ 3
ENVIRONMENTAL INFORMATION ......................................................................... 5
INTRODUCTION....................................................................................................... 6
MAIN FEATURES ..................................................................................................... 7
1PREPARATIONS
PART NAMES ................................................................................................... 9
POWER ON AND OFF.................................................................................... 12
2LOADING PAPER
PAPER ............................................................................................................ 14
LOADING THE PAPER TRAY ........................................................................ 15
BYPASS FEED (including special paper)........................................................ 17
CHANGING A TRAY'S PAPER SIZE SETTING ............................................. 19
3MAKING COPIES
NORMAL COPYING........................................................................................ 20
SELECTING THE TRAY ................................................................................. 23
MAKING A COPY DARKER OR LIGHTER..................................................... 24
REDUCTION/ENLARGEMENT/ZOOM........................................................... 25
4CONVENIENT COPY FUNCTIONS
AUTOMATIC TWO-SIDED COPYING (AR-168D only) .................................. 26
SORT COPY ................................................................................................... 29
COPYING MULTIPLE ORIGINALS ONTO A SINGLE SHEET OF PAPER
(2 IN 1 copy) .................................................................................................... 31
CREATING MARGINS WHEN COPYING (Margin shift)................................. 34
5SET UP THE SOFTWARE
SOFTWARE FOR AR-168S/168D .................................................................. 36
BEFORE INSTALLATION ............................................................................... 37
INSTALLING THE SOFTWARE ...................................................................... 38
SETTING UP BUTTON MANAGER................................................................ 51
CONNECTING THE MACHINE TO YOUR COMPUTER................................ 55
CONTENTS

2
6PRINTER/SCANNER FUNCTIONS
USING THE PRINTER MODE ........................................................................ 58
BASIC PROCEDURE FOR PRINTING ........................................................... 58
USING THE SCANNER MODE....................................................................... 59
SCANNING USING THE KEYS ON THE MACHINE ...................................... 59
SCANNING FROM YOUR COMPUTER ......................................................... 60
OPERATION IN COPY, PRINTER, AND SCANNER MODES ....................... 60
HOW TO USE THE ONLINE MANUAL........................................................... 61
7USER SETTINGS
USER PROGRAMS......................................................................................... 62
SELECTING A SETTING FOR A USER PROGRAM...................................... 67
8TROUBLESHOOTING AND MAINTENANCE
DISPLAY MESSAGES .................................................................................... 69
TROUBLESHOOTING THE MACHINE........................................................... 71
PROBLEMS DURING SETUP THE SOFTWARE........................................... 75
MISFEED REMOVAL ...................................................................................... 79
TONER CARTRIDGE REPLACEMENT.......................................................... 83
SCAN HEAD LOCKING SWITCH ................................................................... 86
CHECKING THE TOTAL COUNT ................................................................... 87
MAINTENANCE REQUIRED .......................................................................... 87
CLEANING THE MACHINE ............................................................................ 88
9OPTIONAL EQUIPMENT
SYSTEM CONFIGURATION........................................................................... 90
FACSIMILE EXPANSION KIT (AR-FX9)......................................................... 90
NETWORK EXPANSION KIT (AR-NB2 N) ..................................................... 90
250-SHEET PAPER FEED UNIT (AR-D16).................................................... 90
10 APPENDIX
SPECIFICATIONS........................................................................................... 92
SOFTWARE LICENSE.................................................................................... 97
MATERIAL SAFETY DATA SHEET................................................................ 99
INDEX............................................................................................................ 107

3
CAUTIONS
Caution label on the machine
The label ( ) in the fusing area of the machine indicates the following:
: Caution, risk of danger
: Caution, hot surface
Cautions on using the machine
Follow the cautions below when using this machine.
Warning:
• The fusing area is hot. Exercise care in this area when removing misfed paper.
• Do not look directly at the light source. Doing so may damage your eyes.
• Do not switch the machine rapidly on and off. After turning the machine off, wait 10
to 15 seconds before turning it back on.
• Machine power must be turned off before installing any supplies.
Caution:
• Place the machine on a firm, level surface.
• Do not install the machine in a humid or dusty location.
• When the machine is not used for a long time, for example for consecutive
holidays, turn the power switch off and remove the power cord from the outlet.
• When moving the machine, be sure to turn the power switch off and remove the
power cord from the outlet.
• Do not cover the machine with a dust cover, cloth or plastic film while the power is
on. Doing so may prevent heat radiation, damaging the machine.
• Use of controls or adjustments or performance of procedures other than those
specified herein may result in hazardous radiation exposure.
• The socket-outlet shall be installed near the machine and shall be easily
accessible.
Important points when selecting an installation site
Do not install your machine in areas that are:
• damp, humid, or very dusty
• exposed to direct sunlight
• poorly ventilated
• subject to extreme temperature or humidity changes, e.g., near an air conditioner
or heater.
Be sure to allow the required space around the
machine for servicing and proper ventilation. 8" (20cm)
4"
(10cm)
4"
(10cm)

4
Cautions on handling the machine
Be careful in handling the machine as follows to maintain the performance of this
machine.
Do not drop the machine, subject it to shock or strike it against any object.
Do not drop the unit, subject it to shock or strike it against any object.
Store spare toner cartridges in a cool dry place without removing from the
package before use.
• If they are exposed to direct sunlight or excessive heat, poor copies may result.
Do not touch the photoconductive drum (green portion).
• Scratches or smudges on the drum will cause dirty copies.
Trademark acknowledgements
•Microsoft
®Windows®operating system is a trademark or copyright of Microsoft
Corporation in the U.S.A. and other countries.
• Windows®95, Windows®98, Windows®Me, Windows NT®4.0, Windows®2000,
and Windows®XP are trademarks or copyrights of Microsoft Corporation in the
U.S.A. and other countries.
• IBM and PC/AT are trademarks of International Business Machines Corporation.
• Acrobat®Reader Copyright
©
1987- 2002 Adobe Systems Incorporated. All rights
reserved. Adobe, the Adobe logo, Acrobat, and the Acrobat logo are trademarks of
Adobe Systems Incorporated.
• All other trademarks and copyrights are the property of their respective owners.

5
ENVIRONMENTAL INFORMATION
For users in the USA
For users in Canada
As an ENERGY STAR®Partner, SHARP has determined that
this product meets the ENERGY STAR®guidelines for energy
efficiency.
Safety precautions:
This Digital Copier is rated Class 1 and complies with 21 CFR 1040.10 and
1040.11 of the CDRH standards. This means that the unit does not produce
hazardous laser radiation. For your safety, observe the precautions below.
• Do not remove the cabinet, operation panel or any other covers.
• The unit’s exterior covers contain several safety interlock switches. Do not
bypass any safety interlock by inserting wedges or other items into switch slots.
A small amount of ozone is produced within the unit during operation. The
emission level is insufficient to cause any health hazard.
Note:
The present recommended long term exposure limit for ozone is 0.1ppm
(0.2mg/m3) calculated as an 8hr. time-weighted average concentration.
However, since the small amount that is emitted may have an objectionable odor, it
is advisable to place the unit in a ventilated area.
The Environmental Choice Program guidelines are applied to
the products only in Canada. The products that meet the
Environmental Choice Program guidelines carry the logo
shown to the left. The products without the logo may not meet
the Environmental Choice Program guidelines.
USB 2.0 compatible
When connecting the machine by USB 2.0 (Hi-Speed mode),
be sure to read "System requirements for USB 2.0 (Hi-Speed
mode)" (p.57) to verify that your system and the machine
settings are configured appropriately.

6
INTRODUCTION
Using the manual
This machine has been designed to provide convenient copying features in a
minimum amount of office space and with maximum operational ease. To get full use
of all machine features, be sure to familiarize yourself with this manual and the
machine. For quick reference during machine use, keep this manual in a handy
location.
About the operation manuals
The operation manuals for the machine are as follows:
Operation Manual (this manual)
Explains the machine and how to use it as a copier. Also explains how to install the
software that allows the machine to be used as a printer and scanner for your
computer.
Online Manual (on the accessory CD-ROM)
This manual explains the procedures for using the machine as a printer or a
scanner.
Conventions used in this manual and online manual
• The illustrations in this manual show the AR-168D. The appearance of your
machine may be different depending on the model and options installed, however,
the basic operations are the same.
• Where "AR-XXXX" appears in this manual, please substitute the name of your
model for "XXXX". For the name of your model, see the operation panel on the
machine.
• Illustrations of driver screens and other computer screens show the screens that
appear in Windows XP Home Edition. Some of the names that appear in these
illustrations may differ slightly from the screens that appear in other operating systems.
• The explanations in this manual assume that the person who will install the product
and the users of the product have a working knowledge of Microsoft Windows.
• This operation manual refers to the Single Pass Feeder as the "SPF", and the
Reversing Single Pass Feeder as the "RSPF".
• In this manual, the following icons are used to provide the user with information
pertinent to the use of the machine.
Some model may not be available in some countries.
Warns that injury may result if the contents of the warning are
not properly followed.
Cautions that damage to the machine or one of its components may
result if the contents of the caution are not properly followed.
Notes provide useful information on the specifications, functions,
performance, and operation of the machine.
The display screens, messages, and key names shown in the manual may differ
from those on the actual machine due to product improvements and modifications.
Note
Warning
Caution
Note

7
Difference between models
This manual covers the following models.
MAIN FEATURES
High-speed laser copying
First-copy time*1at 300 dpi*2is only 9.6 seconds.
Copying speed is 16 copies per minute. This is ideal for business use and provides a
big boost to workplace productivity.
*1The copy time in the case when the power is turned on and copying using the
document glass is started immediately after the power save indicator goes off (A4,
paper fed from paper tray).
The first-copy time may vary depending on machine operating conditions and
ambient conditions such as temperature.
*2"dpi" ("dots per inch") is unit that is used to measure resolution. Resolution
indicates how much detail can be reproduced in a printed or scanned image.
High-quality digital image
• High-quality copying at 600 dpi is performed.
• In addition to automatic exposure adjustment, two original modes can be selected:
"TEXT" for text-only originals, and "PHOTO" for photographs. The exposure can
be adjusted to five levels in each mode.
• The photo mode copying function allows clear copying of delicate halftone original
images such as monochrome photos and color photos.
Model AR-168D AR-168S
Appearance
Automatic two-sided
copying/printing
Available Not available
SPF/RSPF RSPF SPF

8
Enhanced copying features
• Zoom copies can be made from 25% to 400% in increments of 1%. (When the
SPF/RSPF is being used, the zoom copy ratio range is 50% to 200%.)
• Continuous copying of up to 99 copies is possible.
• Sets of output can be offset from each other for easy separation (offset function).
• Sorting by sets is possible without the need for a sorter or other special device
(Sort copy).
• Includes convenient features such as margin shift, 2 IN 1 copy, and automatic two-
sided copying.
Scan once/Print many
• The machine is equipped with a memory buffer allowing the machine to scan an
original once and make up to 99 copies of the scanned image. This improves
workflow, reduces operating noise from the machine and reduces wear and tear
on the scanning mechanism, which provides for a higher reliability.
LCD panel displays messages
• The LCD panel displays messages that show function settings and the status of
the machine.
Laser printer function
• The accompanying printer driver can be installed to enable use of the machine as
a printer.
Color scanner function
• The accompanying scanner driver can be installed and the machine connected to
a computer using a USB cable to enable use as a scanner.
Fax function (option)
• The optional Facsimile Expansion Kit can be installed to enable the machine to be
used as a fax machine. (Facsimile Expansion Kit Operation Manual)
Network connection (option)
• The optional Network Expansion Kit can be installed to enable the machine to be
used as a network printer and network scanner. (Network Expansion Kit Operation
Manual)
Environment and people friendly design
• Preheat mode and auto power shut-off mode are provided to reduce power
consumption when the machine is not in use.
• A universal design has been implemented in the product whereby the height of the
operation panel and shape of the keys are designed to be usable by as many
people as possible.
A
Margin shift
Sort copy Offset function 2 IN 1 copy
2
1
3
2
1
3
1
23
2
1
3
1
1
1
23
A

9
1Chapter 1
1
This chapter provides basic information that you should know before using the machine.
PART NAMES
The following illustration shows the part names of the AR-168D.
The illustrations in this manual show the AR-168D. The appearance of
your machine may be different depending on the model, however, the
basic operations are the same.
Document glass Paper output tray extension
Operation panel Power switch
Front cover Handles
Paper tray Power cord
Side cover
Fusing unit release lever
Side cover open button Transfer charger
Bypass tray paper guides Charger cleaner
Paper output tray Paper holder arm
Note
Photoconductive
drum
SPF/RSPF
Exit area
Reversing tray (RSPF only)
2
3
4
1
5
7
6
8
9
10
11
13
14
15
Bypass tray
Original guides
Document feeder tray
Document
feeder cover
5
3
12
11
Toner cartridge
Interface
USB
connector
Parallel
connector
16
19
2
10
3
11
4
12
5
13
6
14
7
15
8
16
PREPARATIONS

PREPARATIONS
10
Operation panel
[MODE SELECT] key / Mode indicators
Press this key to select the mode. The
indicator of the selected mode lights (copy,
printer, scanner, fax mode indicators).
Display
This shows messages indicating the
machine status and any problems that
occur, as well as user programs and
function setting menus.
Numeric keys
Use these to enter the number of copies
and other numerical settings.
The keys can also be used to select
items in function setting menus.
[CLEAR] key ( )
Use this to clear the set number of
copies, as well as cancel a job that is in
progress. When a setting menu appears,
use this key to move back to the
previous menu level.
Power save indicator
This lights up when the power save
function is activated.
SPF/RSPF indicator
This lights up when an original is placed
in the SPF/RSPF.
Error indicator
This lights steadily or blinks when a
paper misfeed or other error occurs.
[TRAY SELECT] key ( )
Use to select the paper tray that has the
desired paper for copying.
Tray location indicator
Indicates the selected paper tray. The
indicator blinks when the tray is out of
paper or is not closed.
[MENU] key
Press this key to select the paper size for
copying, to configure a user program or
to display the total count.
[2-SIDED COPY] key (AR-168D only)
Press to select the automatic two-sided
copying mode.
[E-SORT/SP.FUN] key
Press to select the sort function, 2 IN 1
copy function, or margin shift function.
[ ] key ( ), [ ] key ( ),
[ENTER] key
Press the [ ] key ( ) or [ ] key
( ) to select an item in a function setting
menu.
Press the [ENTER] key to enter a selection.
[EXPOSURE] key
Use to switch from auto exposure
adjustment to text mode or photo mode.
1
1
1
2
3
3
3
4
4
4
5
5
5
6
6
6
7
7
7
8
8
8
9
9
9
10
10
10
11
11
11
12
12
12
13
13
13
14
14
14
AR-168D
6 7 8 9
10 11 12 13 14 15
1 2

PREPARATIONS
11
1
[COPY RATIO] key
Press to select an enlargement or
reduction ratio.
To select a preset ratio setting, press the
[COPY RATIO] key and select the
desired preset ratio. To select a ratio
that is not preset, press the [COPY
RATIO] key, select the preset ratio that
is closest to the desired ratio, and then
press the [ ] key ( ) or [] key
( ) to increase or decrease the ratio in
increments of 1%.
[START] key ( ) / Ready indicator
The ready indicator lights up when
copying or scanning is possible.
To begin copying, press the [START]
key ( ).
The [START] key ( ) is also pressed
to return to normal operation from auto
power shut-off mode.
[CLEAR ALL] key ( )
This returns all functions to the default
settings. When pressed in a setting
menu, this returns the settings and
display to the initial state.
Shows the current copy ratio.
Shows the selected paper size.
Shows the number of copies that has
been entered with the numeric keys.
A checkmark " " appears when the
exposure has been changed, or when
two-sided copying, sort, 2 IN 1, or
margin shift is selected.
15
15
15
16
16
16
17
17
17
18
19
20
21
READY TO COPY.
100% 8.5x11 0
Display
16 17 18 19 20 21
3 4 5

12
POWER ON AND OFF
The power switch is located on the left side of the machine.
Power on
Turn the power switch to the "ON" position.
The ready indicator will light up and other
indicators which show the initial settings of the
display will also light up to indicate the ready
condition. For the initial settings, see the
"Initial settings" (below).
You can select copy settings and press the [START] key ( ) during warm-up.
Copying will start after warm-up.
Language setting
The first time the power is turned on after shipment from the factory, a message will
appear in English in the display prompting you to select the language. Select the
language with the [ ] key ( ) or [ ] key ( ) and then press the [ENTER] key.
The language can also be changed in the user programs (p.65).
Initial settings
The machine reverts to the initial settings when it is first turned on, when the [CLEAR
ALL] key ( ) is pressed, or when no keys are pressed for the preset "AUTO
CLEAR" time following the end of a copy job. When the machine reverts to the initial
settings, all settings and functions selected to that point are canceled. The "AUTO
CLEAR" can be changed in the user programs. (p.62)
If you use the machine in a country other than the country
where the machine was purchased, you will need to make sure
that your local power supply is compatible with your model. If
you plug the machine into an incompatible power supply,
irreparable damage to the machine will result.
Only insert the power cord into a properly grounded wall socket.
Do not use extension cords or power strips.
Copy ratio: 100%, Exposure: Automatic
Copy quantity: 0, All special copier modes: Off
Warning
Caution
AR-168D
FAX
The main screen of copy mode appears.
READY TO COPY.
100% 8.5x11 0
When in the copy mode

PREPARATIONS
13
1
About the scan head
The scan head lamp remains on constantly when the machine is in the ready
condition (when the ready indicator is illuminated).
The machine adjusts the scan head lamp periodically to maintain copying quality. At
this time, the scan head moves automatically. This is normal and does not indicate
machine trouble.
Power off
Make sure that the machine is not in operation and then turn the power
switch to the "OFF" position.
If the power switch is turned off while the machine is
in operation, a misfeed may occur and the job that
was in progress will be canceled.
In cases where the machine will not be used for a
long time, turn off the power switch and remove the
power cord from the outlet.
Check the following to make sure the machine is not in operation:
•The ready indicator is lit. (Initial state)
•The power save indicator is lit. (preheat mode or auto shut-off mode)
Power save modes
Preheat mode
This function automatically switches the machine to a low power consumption state if
the set duration of time elapses without the machine being used when the power is
on. In this mode, the power save indicator lights up. Normal operation automatically
resumes when a key on the operation panel is pressed, an original is placed, a print
job is received.
Auto power shut-off mode
This function automatically switches the machine to a state that consumes even less
power than preheat mode if the set duration of time elapses without the machine being
used when the power is on. The power save indicator lights up, the display shows a
message indicating that the machine is in auto power shut-off mode. To resume normal
operation, press the [START] key ( ). Normal operation also resumes automatically
when a print job is received or scanning is begun from a computer. While in auto power
shut-off mode, no keys (except the [START] key ( )) can be used.
The machine has two power save modes to reduce overall power
consumption and thereby reduce the cost of operation. In addition,
these modes conserve natural resources and help reduce
environmental pollution. The two power save modes are preheat
mode and auto power shut-off mode.
The preheat activation time and the auto power shut-off time can be
changed with "PREHEAT MODE" and "AUTO SHUT-OFF TIME" in the
user programs. It is suggested that you set times that are appropriate
for your usage of the machine. (p.62)
Note

14
2Chapter 2
The tray location indicator will blink when there is no paper in the selected paper
tray, or when the selected paper tray is not installed or is improperly installed.
PAPER
For best results, use only SHARP recommended paper.
*1The number of sheets of paper that can be loaded varies depending on the weight of
the paper.
*2Do not use non-standard envelopes or envelopes that have metal clasps, plastic
snappers, strings, windows, linings, self-adhesive strips, patches or synthetic materials.
Do not use envelopes that are filled with air or envelopes that have labels or stamps
attached. These will damage the machine.
*3When loading paper larger than 8-1/2" x 11" (A4) size, do not use paper of weight
greater than 28 lbs. (105 g/m2).
Paper tray type Paper type Size Weight Capacity
Paper tray Standard paper
Recycled paper
5-1/2" x 8-1/2"
(Invoice)
8-1/2" x 11" (Letter)
8-1/2" x 13"
(Foolscap)
8-1/2" x 14" (Legal)
15 lbs. to 21 lbs.
(56 g/m2to
80 g/m2)
250 sheets *1
(The paper
should not
exceed the
line on the
tray)
Bypass tray Standard paper
Recycled paper
3-1/2" x 5-1/2" to
8-1/2" x 14"
15 lbs. to 21 lbs.
(56 g/m2to
80 g/m2)
50 sheets *1
Thick paper 14 lbs. to 34.5 lbs.
(52 g/m2to
128 g/m2)*3
Load one
sheet at a
time in the
bypass tray.
Transparency
film/Labels
Envelopes *2Monarch
(3-7/8" x 7-1/2")
Commercial 9
(3-7/8" x 8-7/8")
Commercial 10
(4-1/8" x 9-1/2")
LOADING PAPER

LOADING PAPER
15
2
Special papers
Follow these guidelines when using special papers.
●Use SHARP recommended transparency film and label sheets. Using other
than SHARP recommended paper may result in misfeeds or smudges on
the output. If other than SHARP recommended media must be used, feed
each sheet one at a time using the bypass tray (do not attempt continuous
copying or printing).
●There are many varieties of special paper available on the market, and
some cannot be used with this machine. Before using special paper,
contact a SHARP service center.
●Before using other than SHARP recommended paper, make a test copy to
see if the paper is suitable.
LOADING THE PAPER TRAY
1Raise the handle of the paper tray
and pull the paper tray out until it
stops.
2Fan the paper and insert it into the tray. Make sure that the
edges go under the corner hooks.
Make sure that the paper is not torn, is free of dust, and has no wrinkles
or curled edges.
•Do not load paper above the maximum height line ( ).
Exceeding the line will cause a paper misfeed.
•If the paper is not fanned, double-feeds or misfeeds may occur.
•Make sure the stack of paper is straight before loading it. When
adding paper, take the remaining paper out and combine it into a
single stack with the new paper.
•Make sure that all the paper in the stack is the same size and type.
•When loading paper, ensure that there is no space between the
paper and the guide, and make sure that the guide is not set too
narrow and causes the paper to bend. Incorrect loading will cause the
paper to skew or misfeed.
Note
Note

LOADING PAPER
16
3Gently push the paper tray back into the machine.
•If you loaded a different size of paper than was loaded previously in
the tray, go to "CHANGING A TRAY'S PAPER SIZE SETTING"
(p.19)
•When not using the machine for an extended period, remove all
paper from the paper tray and store it in a dry place. If paper is left in
the machine for an extended period, the paper will absorb moisture
from the air, resulting in paper jams.
Note

17
2
BYPASS FEED (including special paper)
The bypass tray can be used to feed standard paper, transparency film, labels,
envelopes, and other special purpose paper.
Important points when inserting paper in the bypass tray
Up to 50 sheets of standard copy paper can be inserted in the bypass tray. (Capacity
will vary depending on the type of paper loaded.)
Be sure to place envelopes horizontally as shown in the following diagram.
•When loading envelopes, make sure that they are straight and flat and do not have
loosely glued construction flaps (not the closure flap).
•Special papers except SHARP recommended transparency film, labels, and
envelopes must be fed one sheet at a time through the bypass tray.
•When adding paper, first remove any paper remaining in the tray, combine it with
the paper to be added and then reload as a single stack. The paper to be added
must be the same size and type as the paper already in the tray.
•Do not use paper that is smaller than the original. This may cause smudges or
unclean images.
•Do not use paper that has already been printed on by a laser printer or plain paper
fax machine. This may cause smudges or unclean images.
Envelopes
Do not use the following envelopes, as misfeeds will occur.
•Envelopes with metal tabs, clasps, strings, holes, or windows.
•Envelopes with rough fibers, carbon paper, or glossy surfaces.
•Envelopes with two or more flaps.
•Envelopes with tape, film, or paper attached to the flap.
•Envelopes with a fold in the flap.
•Envelopes with glue on the flap to be moistened for sealing.
•Envelopes with labels or stamps.
•Envelopes that are slightly inflated with air.
•Envelopes with glue protruding from the seal area.
•Envelopes with part of the seal area peeled off.
•Be sure to select com9, com10 or Monarch in the paper size setting of the printer
driver. (For detailed information on the printer driver, refer to the online manual.)
Available Not
Available

LOADING PAPER
18
Loading paper in the bypass tray
1Open the bypass tray and extend the tray.
2Set the bypass tray paper guides to the paper width. Insert the
paper (print face down) all the way into the bypass tray.
3Press the [TRAY SELECT] key ( ) to select the bypass tray.
•Paper must be fed narrow side first into the feed slot.
•Special papers such as transparency film, labels, and envelopes
must be fed one sheet at a time through the bypass tray.
•When copying onto transparency film, remove each copy promptly.
Do not let copies stack up.
To close the bypass
tray, perform step 1
and then step 2 in
the illustration and
push the round
projections at the
right of the tray until
they click.
Note
Note
Print face
This manual suits for next models
1
Table of contents
Other Sharp All In One Printer manuals

Sharp
Sharp CPD-3830 User manual

Sharp
Sharp CR4 Cloud Series User manual

Sharp
Sharp MX-C250E Guide

Sharp
Sharp MX-2651 Instruction manual

Sharp
Sharp AR-M550N User manual

Sharp
Sharp MX-B402SC User manual

Sharp
Sharp MX-7081 Instruction manual

Sharp
Sharp AR-122E N User manual

Sharp
Sharp AR-M355N User manual

Sharp
Sharp AR-6020 User manual

Sharp
Sharp MX-M264N User manual

Sharp
Sharp MX-C402SC Guide

Sharp
Sharp MX-M905 Operating instructions

Sharp
Sharp MX-C301W User manual

Sharp
Sharp AR-BC320 User manual

Sharp
Sharp AR-C360P Programming manual

Sharp
Sharp FO-IS115N User manual

Sharp
Sharp MX-2310U User manual

Sharp
Sharp MX-C380P User manual

Sharp
Sharp FO-47IF User manual