Sharp Z2 User manual

Quick Guide
Z2
(Model :FS8002)

1
Introduction
Thank you for choosing Sharp Z2 phone. It is
recommended that you first read this Quick Guide to
understand the basic operation of the phone.
Content
Your Phone ..................................................................2
Installing SIM Card(s) and Memory Card .....................3
Charging the Battery ....................................................4
Initial Start Up ...............................................................4
Home Screen ...............................................................4
Making Your First Call ..................................................5
Contacts ....................................................................... 6
Sending a Text Message .............................................7
Setting up WLAN ..........................................................7
Setting up Email Account .............................................8
Sending and Receiving Emails .....................................8
Using Browser .............................................................. 9
Using Bluetooth ..........................................................10
Taking Photos and Videos .........................................10
Viewing Photos and Videos .......................................12
Changing Basic Phone Settings .................................12

2
Your Phone
Status LED
Earpiece
Front camera
Sensor
Touch screen
Micro SD
Nano SIM1
Nano SIM 2
Type-C USB port
SpeakerMicrophone 1
Volume (+) button
Volume (-) button
Power button
Rear camera
Microphone 2
Proximity sensor/
Dual-LED Flash
Infrared receiver Headset jack
Fingerprint
scanner
3
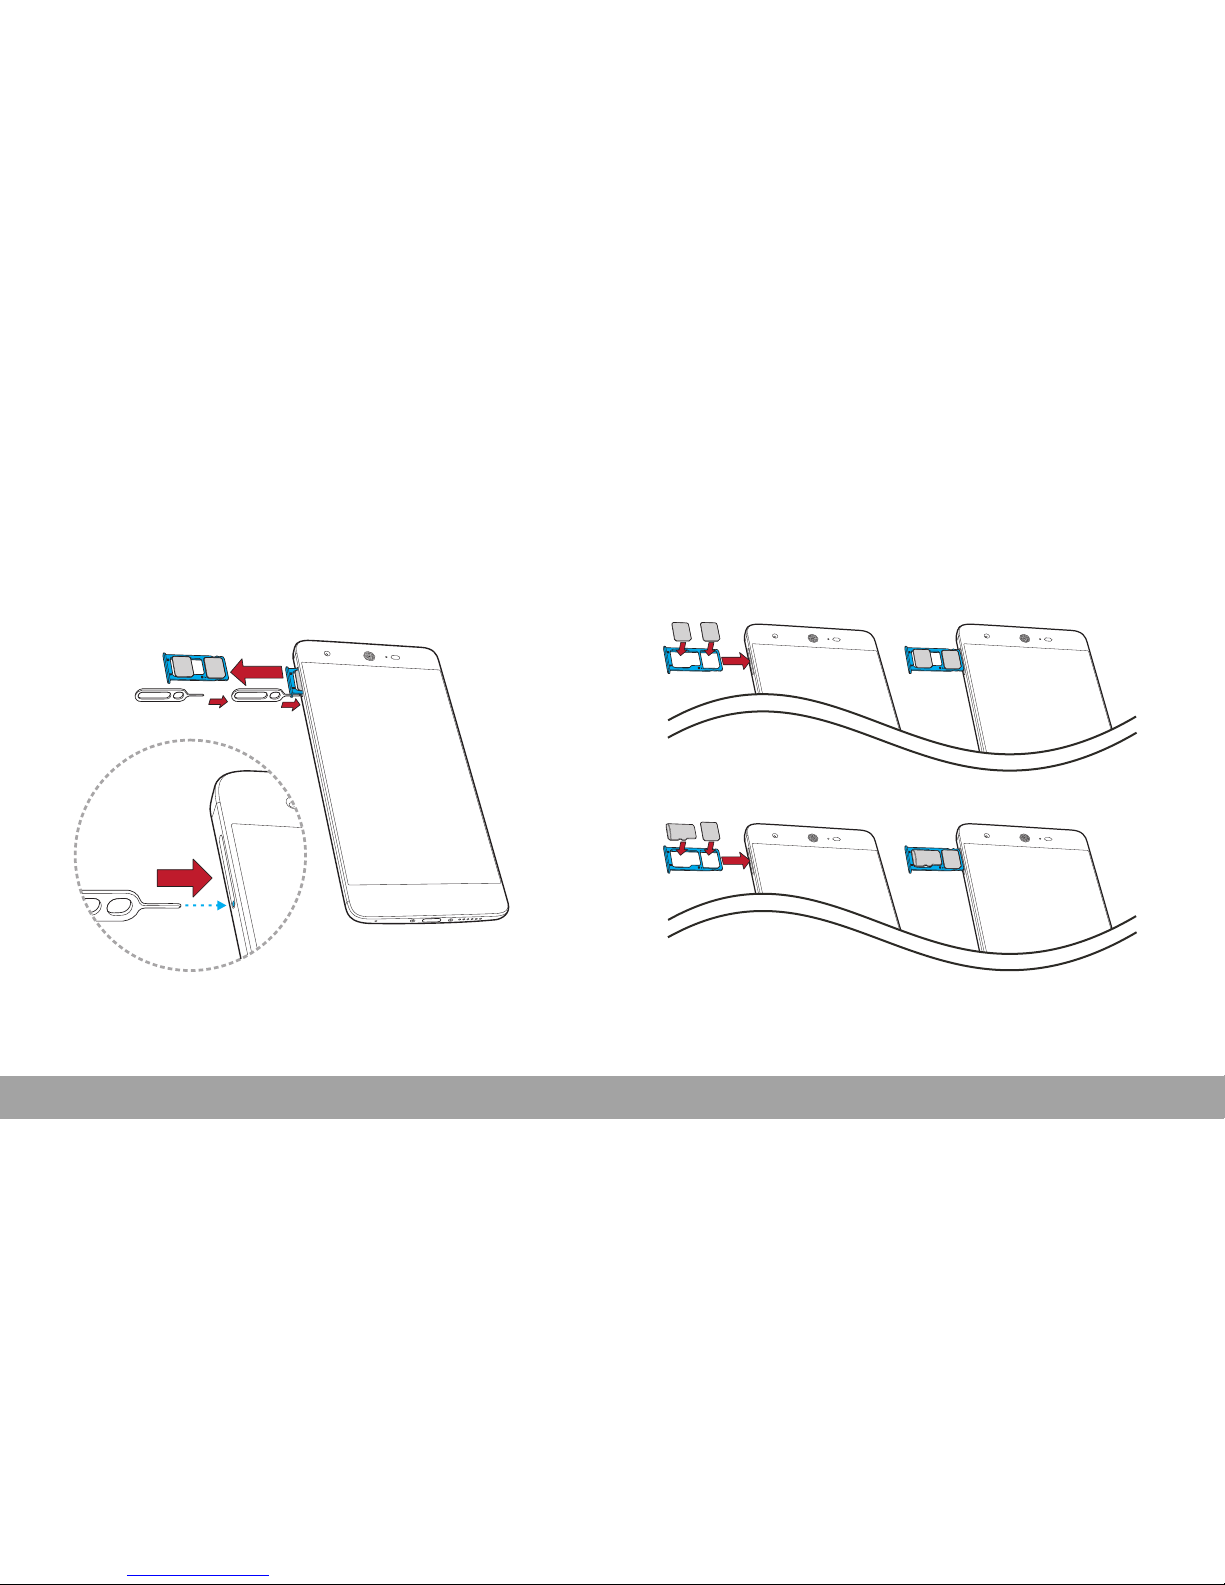
Installing SIM Card(s) and Memory
Card
1. Insert the thimble tool into the hole near SIM card and
push it until the card tray pops out. Then remove the
card tray from the slot.
2. Put the SIM1 or SD card into the card tray slot
labeled as “SIM1/SD” and the SIM2 into the card tray
slot labeled as “SIM2”. Then insert and push the card
tray into its respective slot in the phone.
SIM 2
SIM 1/SD
Nano SIM1
Nano SIM2
SIM 1/SD
1
SIM 2
SIM 1/SD
Nano SIM1
Nano SIM2
Micro SD
SIM 2
SIM 1/SD
Nano SIM1
Nano SIM2
SIM 2
SIM 1/SD
Nano SIM
SIM 2
SIM 1/SD
Nano SIM
Micro SD
4
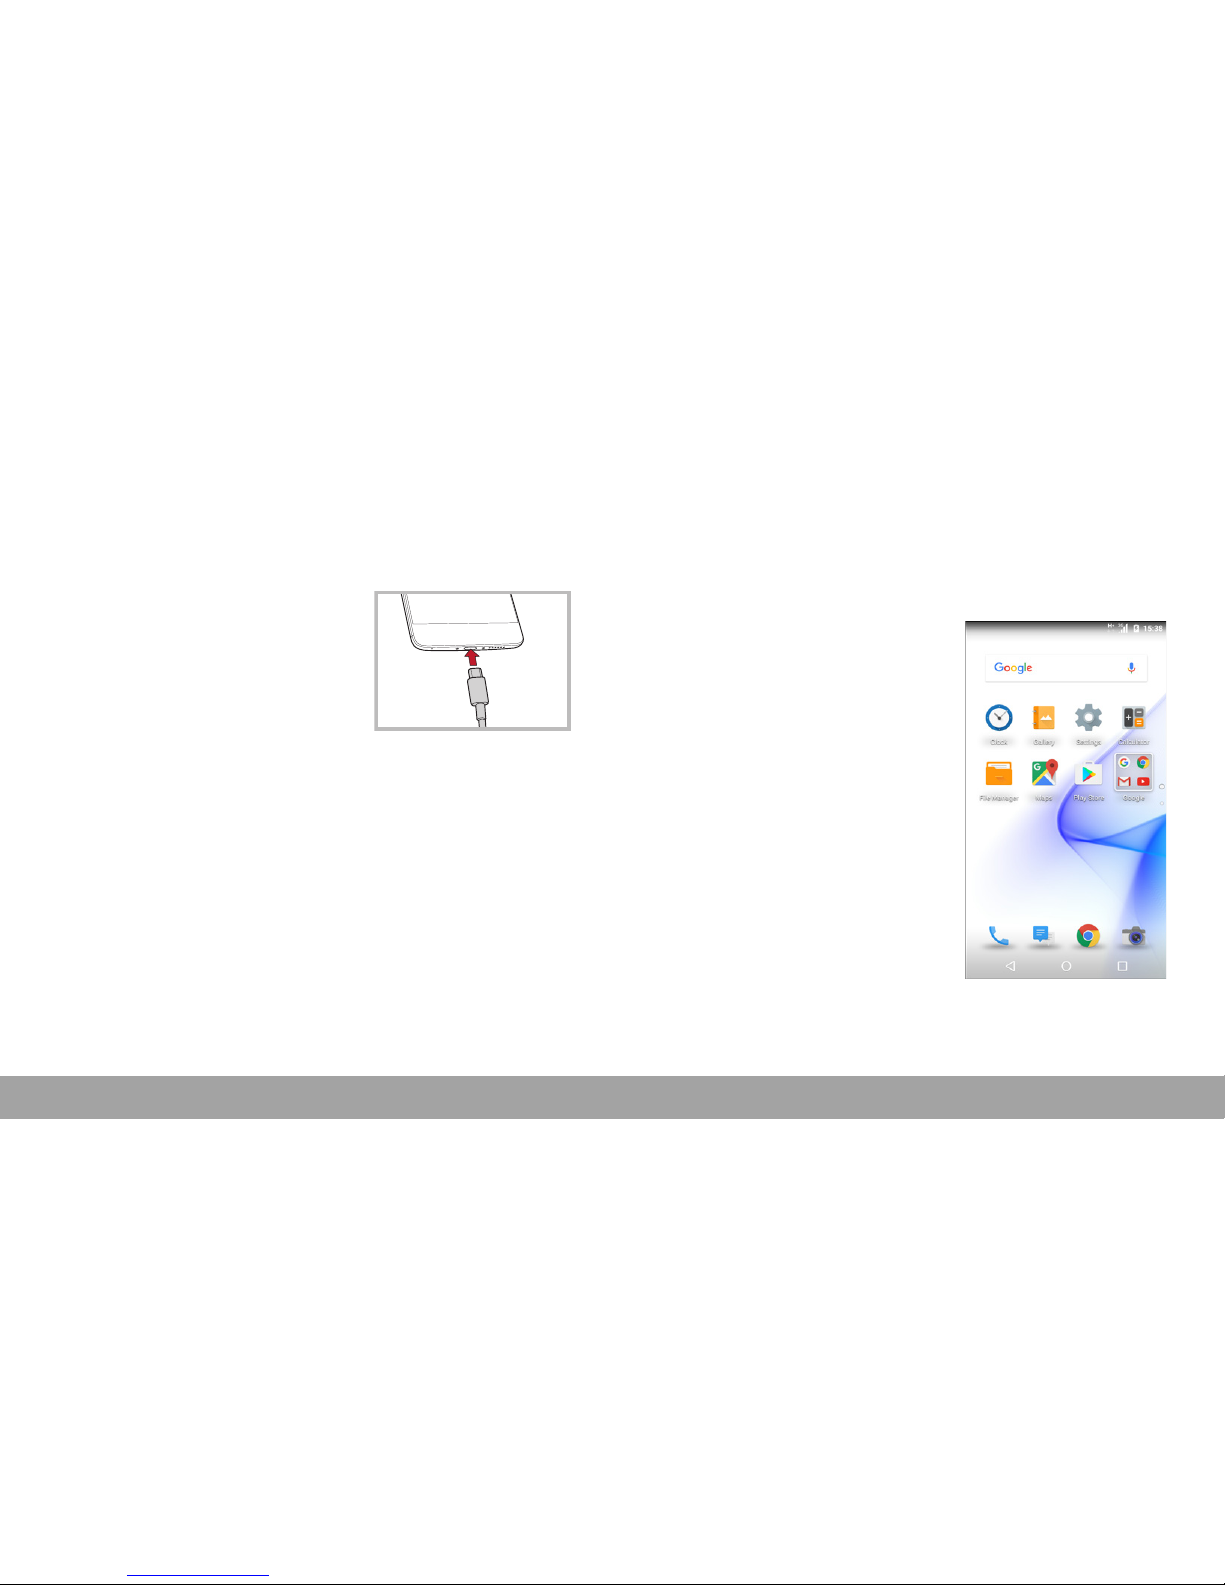
Charging the Battery
It is recommended to fully charge the battery before using
the phone for the first time.
1. Connect the smaller end of
the USB cable to the USB
port of the device.
2. Connect the other end of the
cable to the USB charger or
other USB port with power
source (for example, laptop).
3. Plug the AC adapter to a wall outlet to start charging.
Warning
•Charge only indoors and in dry environments.
•For safety, the overheat protection will be active during
charging. If the system temperature reaches above the
maximum level, the device will automatically stop
charging. The device will only resume charging when
normal operating temperature is reached.
•If there is no response after you press the
Power
button
or touch the screen, press and hold the
Power
button for
8 seconds to initiate forced shutdown. If you hold the
Power
button for an additional 2 seconds, the phone will
restart.
Initial Start Up
After installing the SIM card(s) and charging the battery,
the device is ready to be used.
Home Screen
From the Home screen, you can
quickly access common features
and view notifications of missed
calls, received messages, check
battery and connection status.
Swipe the screen up or down or
to the left or right to access the
applications installed on the
device.

5
Making Your First Call
From the Home screen, tap .
To make a call
1. Tap the phone number on the
keypad.
NOTE:
If you have inserted two
SIM cards, you can choose
which SIM card you want to use
for the call.
2. Tap to erase a wrong
number. Tap and hold to
erase the entire number.
NOTE: To call a contact, tap
the contact from the list.
3. Tap to make a call.
4. Tap to end the call.
To receive a call
To answer a call, tap and drag it to the right ( ).

6
Contacts
Adding contacts
1. From the Home screen, swipe up and tap the Comm.
folder. Then tap .
2. Tap CREATE A NEW
CONTACT if you are adding a
contact for the first time or tap
to add a contact.
3. Select one of the location to
store the contact to.
4. Enter the contact information
such as name, phone
number, email address, etc.
5. Tap Done to save the
contact.
Importing contacts
1. From the Home screen, swipe up and tap the Comm.
folder. Then tap .
2. Tap > Import/export, and
choose one of the Import
options.
3. Select the contacts location
that you want to copy to.
4. Select the contacts to copy
and tap Done.
7
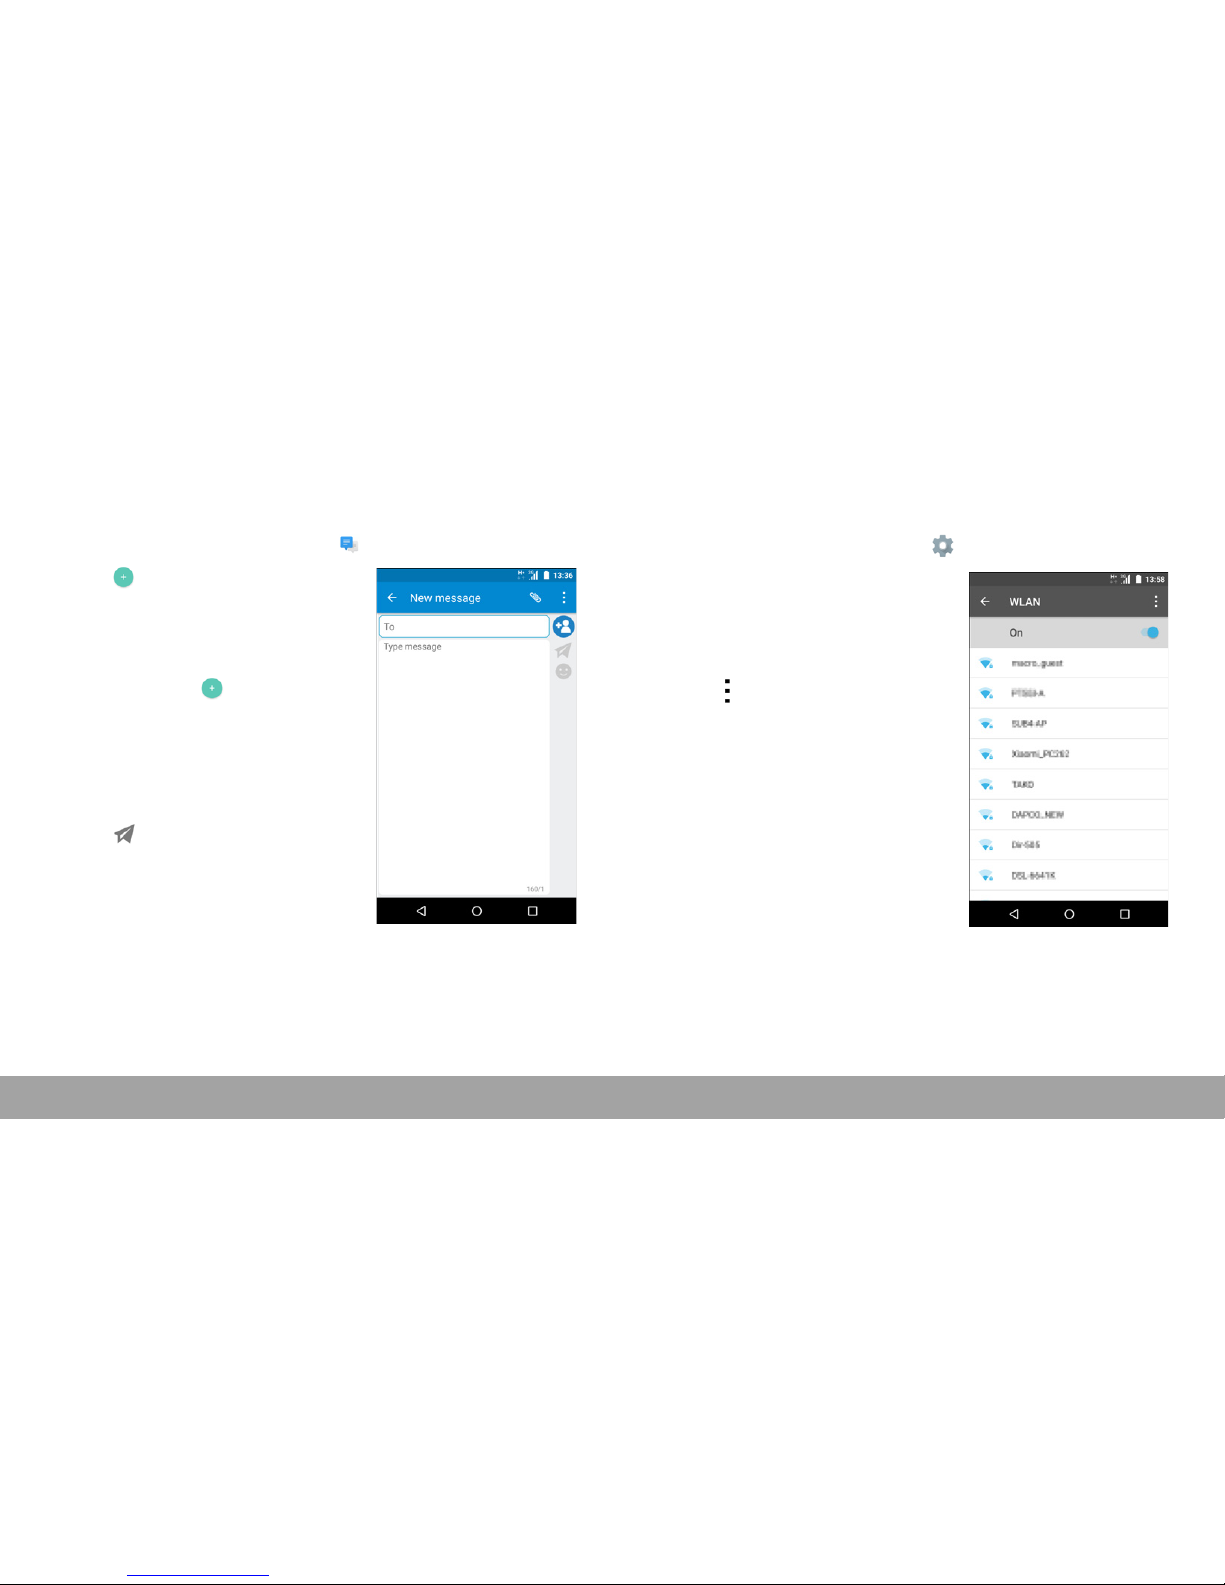
Sending a Text Message
1. From the Home screen, tap .
2. Tap .
NOTE: If you have inserted
two SIM cards, select the
desired SIM network first
after tapping .
3. In the To field, enter the
recipient’s phone number or
name.
4. Compose your message.
5. Tap to send your
message.
Setting up WLAN
1. From the Home screen, tap .
2. In Wireless & networks, tap
WLAN and turn it to on.
3. Available networks are listed.
Tap a network to connect to
or tap to manually add a
connection.
NOTE: Connecting to a
secured network will prompt
for a password. Enter the
password, then tap Connect.

8
Setting up Email Account
1. From the Home screen, tap the Google folder, then
tap .
2. Tap and select your email
service provider.
3. Follow the on-screen
instructions to set up your
email account.
Sending and Receiving Emails
Composing and sending emails
1.
From the Home screen, tap
the
Google
folder, then tap
.
NOTE: If you have more than
one email account, select an
email account you want to
access.
2. Tap .
3. In the To field, enter the
recipient’s email address.
4. Tap Subject and type a
subject.
5. Compose your email.
6. Tap to add an attachment.
7. Tap to send your email.
9
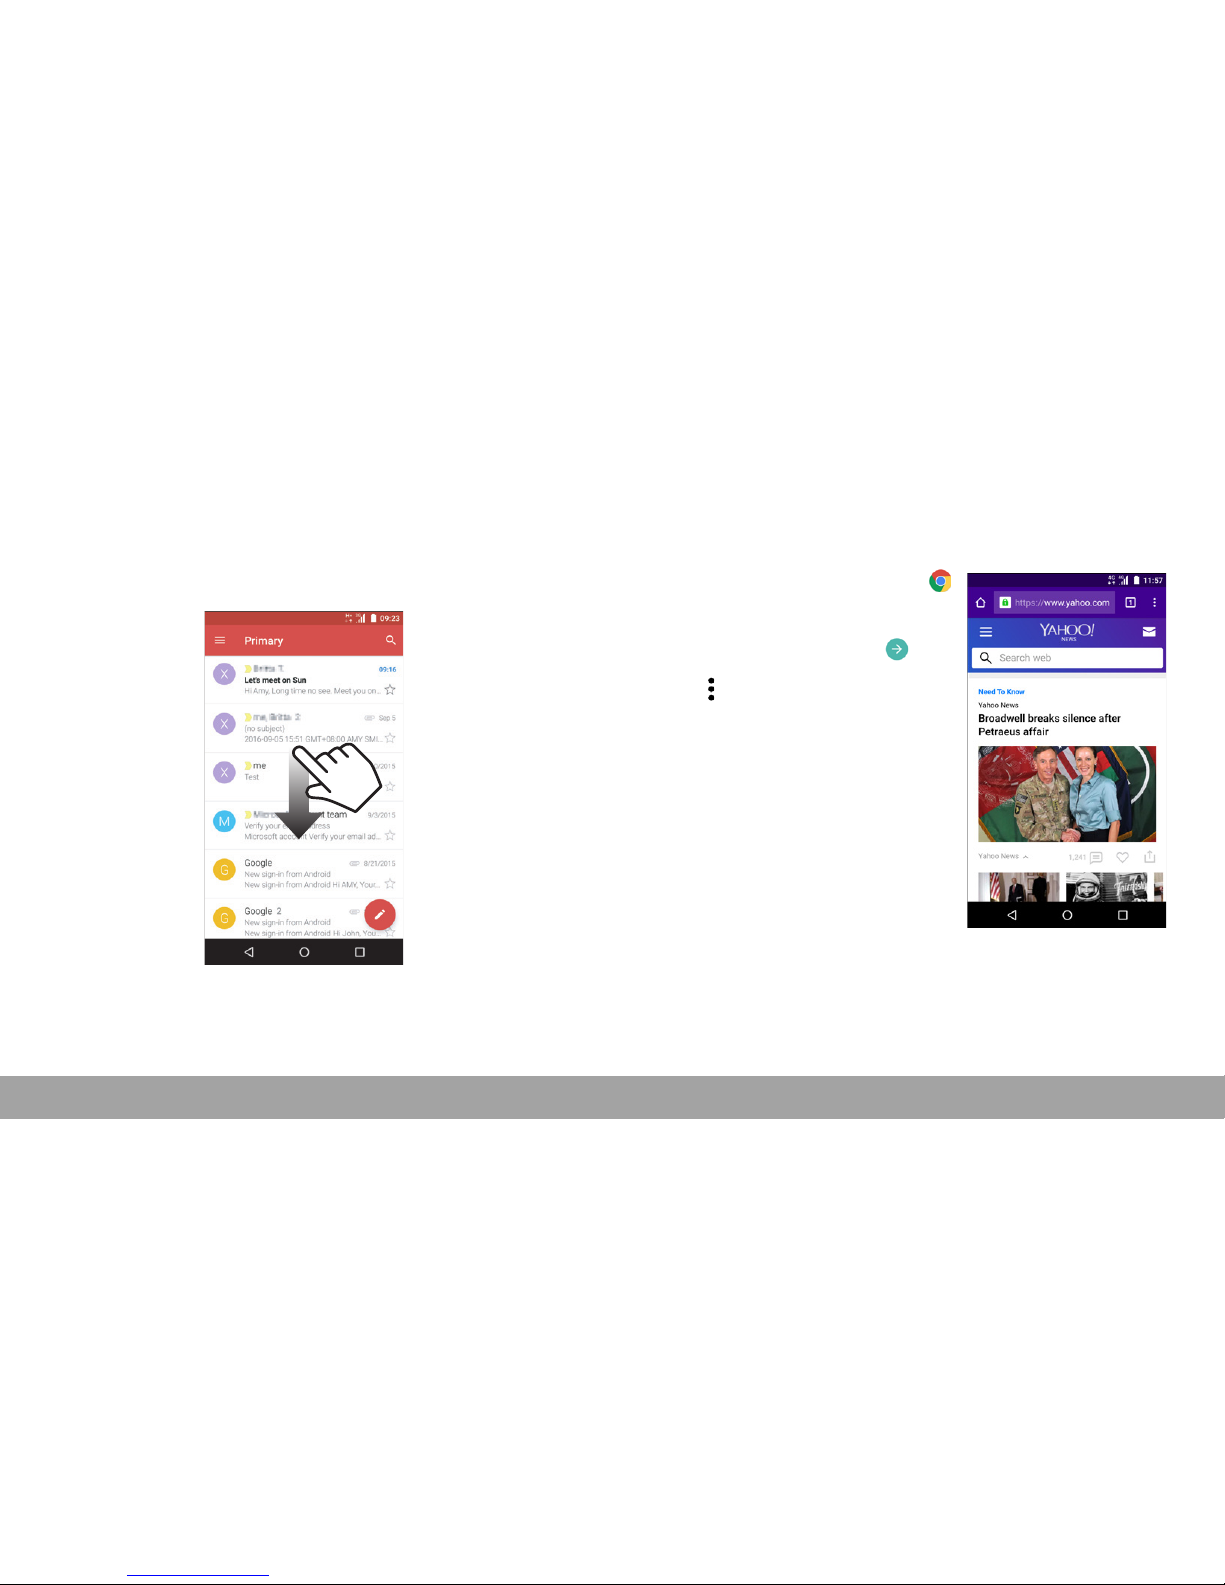
Receiving emails
Emails are automatically received in the Inbox folder
when the device connects to a network. To manually
retrieve new emails, swipe down to refresh.
Using Browser
To open a web page
1. From the Home screen, tap .
2. Tap the address bar.
3. Enter the URL and tap .
4. Tap to access more
functions.
Table of contents
Other Sharp Cell Phone manuals

Sharp
Sharp 802 User manual

Sharp
Sharp AQUOS Crystal User manual

Sharp
Sharp WX-T92 User manual

Sharp
Sharp AQUOS R compact SHV41 Service manual

Sharp
Sharp TQ-CX1 User manual

Sharp
Sharp Aquos Serie User manual

Sharp
Sharp AQUOS K SHF32 Service manual

Sharp
Sharp Docomo AQUOS Ever SH-02J User manual

Sharp
Sharp GX15T User manual

Sharp
Sharp GX10i User manual

Sharp
Sharp Aquos Xx2 User manual

Sharp
Sharp SX862 User manual

Sharp
Sharp NTT docomo SH-06E User manual

Sharp
Sharp TM100 User manual

Sharp
Sharp AQUOS wish User manual

Sharp
Sharp GX30 User manual

Sharp
Sharp 701SH User manual

Sharp
Sharp AQUOS sense8 User manual

Sharp
Sharp AQUOS R User manual

Sharp
Sharp AQUOS Sense User manual


