1 – 4
UX-178C/188C/108C/118C
FO-175LU/375C
7. Use of Document Carrier Sheet
A document carrier sheet must be used for the following documents.
•Those with tears.
•Those smaller than size 140 mm (W) x 140 mm (L).
•Carbon-backed documents
NOTE: To transmit a carbon-backed document, insert a white sheet of
paper between the carbon back of the document and the docu-
ment carrier.
•Those containing an easily separable writing substance (e.g., trac-
ing paper written on with a soft, heavy lead pencil).
NOTES: •When using the document carrier, carefully read the in-
structions written on the back.
•If the document carrier is dirty, clean it with a soft, moist
cloth, and then dry it before using for transmission.
•Do not place more than one document in the carrier at a
time.
[4] Installation
1. Site selection
Take the following points into consideration when selecting a site for this
model.
ENVIRONMENT
•The machine must be installed on a level surface.
•Keep the machine away from air conditioners, heaters, direct sun-
light, and dust.
•Provide easy access to the front, back, and sides of the machine. In
particular, keep the area in front of the machine clear, or the original
document may jam as it comes out after scanning.
•The temperature should be between 5°and 35°C.
•The humidity should be between 30% and 85% (without conden-
sation).
ELECTRICITY
120V, 60Hz, grounded (3-prong) AC outlet is required.
Caution!
•Connection to a power source other than that specified will cause
damage to the equipment and is not covered under the warranty.
•Ifyourareaexperiences a high incidence of lightning orpowersurges,
we recommend that you install a surge protector for the power and
telephonelines.Surge protectors canbepurchasedatmosttelephone
specialty stores.
If the machine is moved from a cold to a warm place...
If the machine is moved from a cold to a warm place, it is possible that
the reading glass may fog up, preventing proper scanning of documents
for transmission. To remove the fog, turn on the power and wait approxi-
mately 2 hours before using the machine.
TELEPHONE JACK
A standard RJ11C telephone jack must be located near the machine.
This is the telephone jack commonly used in most homes and offices.
•Plugging the fax machine into a jack which is not an RJ11C jack may
result in damage to the machine or your telephone system. If you do
notknowwhat kind of jack you have, or needed to have one installed,
contact the telephone company.
2. Connections
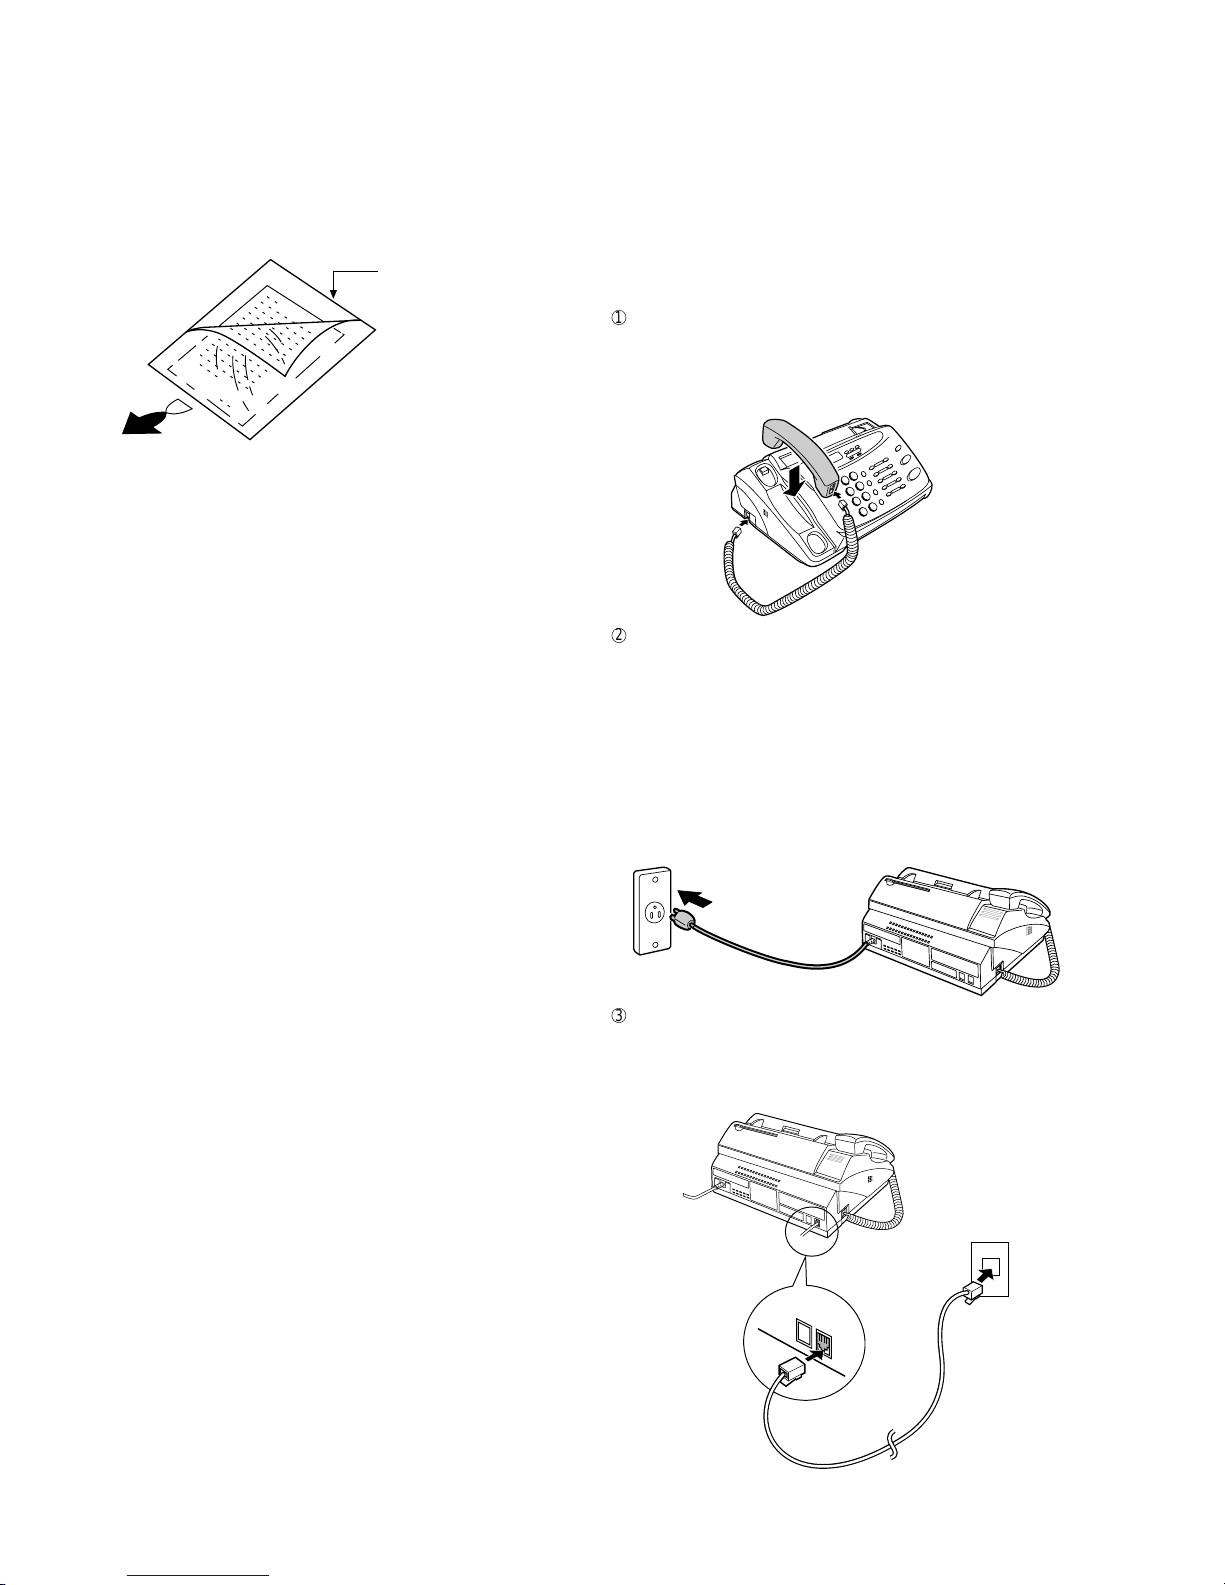
1
Connect the handset as shown and place it on the handset rest.
♦Make sure the handset cord goes into the unmarked jack on the
side of the machine!
♦Use the handset to make ordinary phone calls, or to transmit and
receive documents manually.
2
Plug the power cord into a 120 V, 60 Hz, grounded (3-prong) AC
outlet.
♦Caution: Do not plug the power cord into any other kind of outlet.
This will damage the machine and is not covered under the war-
ranty.
♦The machine does not have a power on/off switch, so the power
is turned on and off by simply plugging or unplugging the power
cord.
Note: If your area experiences a high incidence of lightning or power
surges, we recommend that you install surge protectors for the
power and telephone lines. Surge protectors can be purchased
from your dealer or at most telephone specialty stores.
3
Insert one end of the telephone line cord into the "TEL. LINE" jack.
Insert the other end into a standard (RJ11C) single-line telephone
wall jack.
♦Be sure to insert the telephone line cord into the "TEL. LINE"
jack. Do not insert into the "TEL. SET" jack.
Direction of insertion
Make print straight
across paper
E.G.
Place the document
carrier in the document
feeder with the clear film
side down
TEL.
SET TEL.
LINE