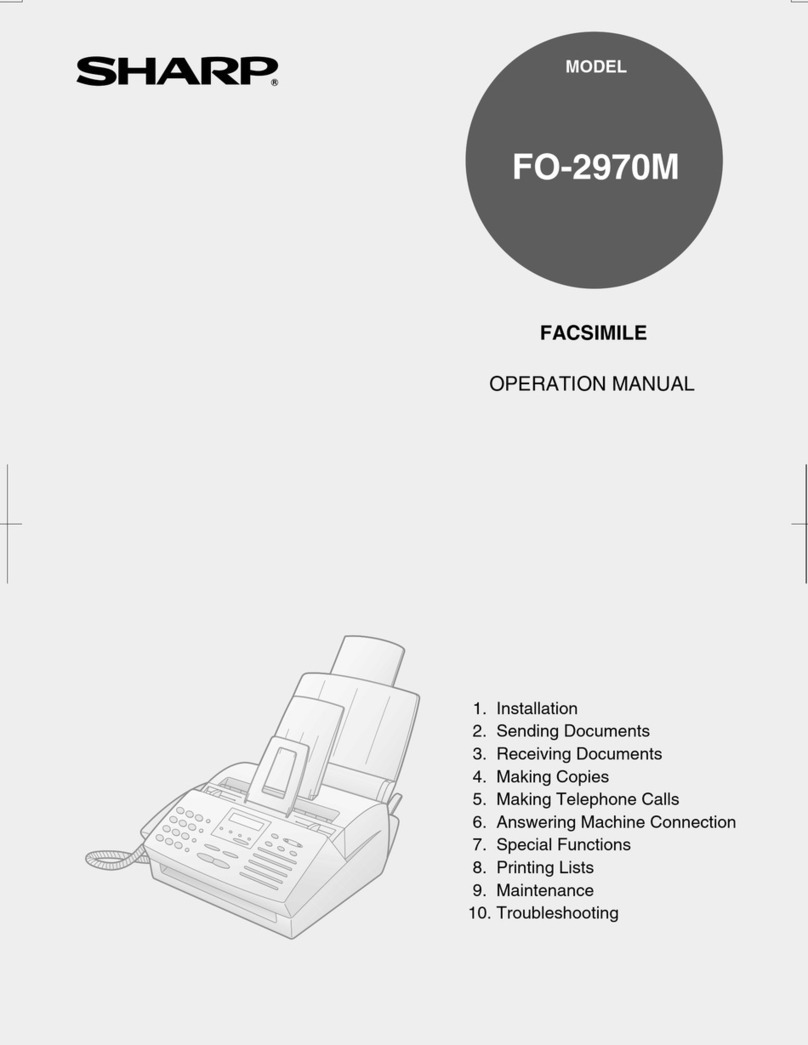
Sharp FO-5600 User manual

OPERATION MANUAL
FACSIMILE
MODEL
FO-5600
1. INSTALLATION
2. INITIAL SETTINGS
3. BASIC OPERATIONS
4. SPECIAL FUNCTIONS
5. OPTIONAL SETTINGS
6. PRINTING OUT REPORTS AND LISTS
7. MAINTENANCE
8. TROUBLESHOOTING
SPECIFICATIONS
QUICK REFERENCE GUIDE
INDEX

FO5600A-INBU
YF <P=001>
INTRODUCTION
Welcome to the FO-5600 and thank you for choosing Sharp! In addition to providing
you with the ease and convenience of plain-paper printing, the FO-5600 features a
variety of special functions designed to increase the range and power of your
communications.
This manual gives you easy-to-follow instructions for installing and using the FO-5600.
The Table of Contents will show you where instructions for using each feature are
located. Whilst you may not need to read every section in detail at first, we
recommend you at least review them briefly.
If you have any questions or problems which cannot be solved by reading this manual,
please contact your Sharp dealer.
Important:
••
This facsimile machine is not designed for use on a line which has call waiting, call
forwarding, or certain other special services offered by your telephone company. If you
attempt to use the fax machine on a telephone line using any of these services, you may
experience errors during transmission and reception of facsimile messages.
••
This facsimile machine is not compatible with digital telephone systems.
•Foryoursafety,ifanyofyourequipmentisnotoperating properlyorshouldanyphysical
damage occur to the equipment where internal parts may become exposed, the
equipmentshouldbe immediatelydisconnected fromthephone lineandthenthe power
line and returned to a SHARP authorised Service Centre for inspection, repair, or
disposal.
••
This facsimile machine is designed to operate in Australia and New Zealand only.
WARNING NOTICE:
NO calls can be made to or from this fax during a mains power failure.
i

<P=002>
Important safety information
•The socket-outlet must be installed near the equipment and must be easily accessible.
•Never install telephone wiring during a lightning storm.
•Never install telephone sockets in wet locations unless the socket is specifically
designed for wet locations.
•Never touch uninsulated telephone wires or terminals unless the telephone line has
been disconnected at the network interface.
•In Australia, installing or modifying telephone lines should only be done by an ACA
licensed serviceman. In New Zealand, installing or modifying telephone lines should be
done in accordance with Telecom wiring practices.
•Avoid using a telephone (other than a cordless type) during an electrical storm. There
may be a remote risk of electric shock from lightning.
•Do not use a telephone in the vicinity of a gas leak.
•Do not install or use the machine near water, or when you are wet. Take care not to
spill any liquids on the machine.
Your fax machine and the telephone system
For Australia: The Ringer Equivalence Number (REN) for this equipment is written
on the back of the machine.
The sum of all the Ringer Equivalence Numbers (REN’s) on your telephone line
should not exceed 3 to assure correct service from your telephone company.
INTRODUCTION
ii

<P=003>
WARNING NOTICE:
NO calls can be made to or from this fax during a mains power failure.
WARNING Australian Communications Authority (ACA) regulations state that no
unauthorised changes or modifications to this equipment are permitted.
Note: Complies with ACA and NZ TELECOM standard AS/NZS3548 regarding
emission of electromagnetic interference.
These limits are designed to provide reasonable protection against interference in an
installation. This equipment generates, uses and can radiate radio frequency energy
and, if not installed and used in accordance with the instructions, may cause
interference. However, there is no guarantee that interference will not occur in a
particular installation.
If this equipment does cause interference to radio or television reception, which can
be determined by turning the equipment off and on, the user is encouraged to try to
correct the interference by one or more of the following measures:
Reorient or relocate the receiving antenna.
Increase the separation between the equipment and the receiver.
Connect the equipment to an outlet on a different circuit to that which
the receiver is connected.
Consult the dealer or an experienced radio/TV technician for help.
For Australia: The Ringer Equivalence Number (REN) for this equipment is written on
the back of the machine.
The sum of all the Ringer Equivalence Numbers (REN’s) on your telephone line
should not exceed 3 to assure correct service from your telephone company.
INTRODUCTION
iii

<P=004>
IMPORTANT NOTICE FOR NEW ZEALAND USERS
Please note:
The grant of a Telepermit for any item of terminal equipment indicates only that
Telecom has accepted that the item complies with the minimum conditions for
connection to its network.
It indicates no endorsement of the product by Telecom, nor does it provide any sort
of warranty. Above all, it provides no assurance that any item will work correctly in all
respects with another item of Telepermitted equipment of a different make or model,
nor does it imply that any product is compatible with all of Telecom’s network
services.
This equipment is not capable, under all operating conditions, of correct operation at
the higher speeds for which it is designed. Telecom will accept no responsibility
should difficulties arise in such circumstances.
This equipment shall not be set up to make automatic calls to the Telecom ’111’
Emergency Service.
To avoid telephone charges for local calls, be sure to store numbers "withoutò area
code in your rapid or speed dial locations.
This equipment may not provide for the effective hand-over of a call to another
device connected to the same line.
Not all standard telephones and answering machines will respond to imcoming
ringing when connected to the extenison socket of the equipment.
INTRODUCTION
iv

FO5600A-TCTC
YF <P=001>
TABLE OF CONTENTS
1. INSTALLATION 1-1
Unpacking Checklist . . . . . . . . . . . . . . . . . . . . . . . . . . . . . . . . . . 1-1
Installing the Printer Cartridges . . . . . . . . . . . . . . . . . . . . . . . . . . . . 1-2
Attachments and Connections . . . . . . . . . . . . . . . . . . . . . . . . . . . . . 1-5
Loading Printing Paper . . . . . . . . . . . . . . . . . . . . . . . . . . . . . . . . 1-8
2. INITIAL SETTINGS 2-1
A Look at the Operation Panel . . . . . . . . . . . . . . . . . . . . . . . . . . . . . 2-1
Entering Your Name and Fax Number . . . . . . . . . . . . . . . . . . . . . . . . . 2-4
Entering Letters for Names . . . . . . . . . . . . . . . . . . . . . . . . . . . . . . 2-5
Setting the Date and Time . . . . . . . . . . . . . . . . . . . . . . . . . . . . . . . 2-6
Distinctive Ring (FaxAbility and Fax Duet) . . . . . . . . . . . . . . . . . . . . . . . 2-7
Storing Numbers for Automatic Dialling . . . . . . . . . . . . . . . . . . . . . . . . 2-8
Volume Adjustment . . . . . . . . . . . . . . . . . . . . . . . . . . . . . . . . . 2-12
3. BASIC OPERATIONS 3-1
Sending Documents . . . . . . . . . . . . . . . . . . . . . . . . . . . . . . . . . . 3-1
Receiving Documents . . . . . . . . . . . . . . . . . . . . . . . . . . . . . . . . 3-14
Making Copies . . . . . . . . . . . . . . . . . . . . . . . . . . . . . . . . . . . . 3-17
4. SPECIAL FUNCTIONS 4-1
Broadcasting . . . . . . . . . . . . . . . . . . . . . . . . . . . . . . . . . . . . . . 4-1
Confidential Operations . . . . . . . . . . . . . . . . . . . . . . . . . . . . . . . . 4-3
Relay Request . . . . . . . . . . . . . . . . . . . . . . . . . . . . . . . . . . . . . 4-7
Polling . . . . . . . . . . . . . . . . . . . . . . . . . . . . . . . . . . . . . . . . 4-12
Timer Operations . . . . . . . . . . . . . . . . . . . . . . . . . . . . . . . . . . 4-17
Batch Transmission . . . . . . . . . . . . . . . . . . . . . . . . . . . . . . . . . 4-23
Entering and Using Programs . . . . . . . . . . . . . . . . . . . . . . . . . . . . 4-25
Department Control . . . . . . . . . . . . . . . . . . . . . . . . . . . . . . . . . 4-33
Anti Junk Fax . . . . . . . . . . . . . . . . . . . . . . . . . . . . . . . . . . . . 4-35
Duplex Scanning . . . . . . . . . . . . . . . . . . . . . . . . . . . . . . . . . . . 4-36
Print Hold . . . . . . . . . . . . . . . . . . . . . . . . . . . . . . . . . . . . . . 4-37
5. OPTIONAL SETTINGS 5-1
6. PRINTING OUT REPORTS AND LISTS 6-1
7. MAINTENANCE 7-1
8. TROUBLESHOOTING 8-1
Problems and Solutions . . . . . . . . . . . . . . . . . . . . . . . . . . . . . . . . 8-1
Messages and Signals . . . . . . . . . . . . . . . . . . . . . . . . . . . . . . . . . 8-3
Clearing Paper Jams . . . . . . . . . . . . . . . . . . . . . . . . . . . . . . . . . 8-5
SPECIFICATIONS Spec-i
QUICK REFERENCE GUIDE Quick-i
Index Index-i
v

vi

FO5600A-ISUN
YF <P=001>
1 INSTALLATION
UNPACKING CHECKLIST
After unpacking your fax, make sure you have all the items shown below. If any are
missing, contact your dealer.
Telephone line
cord Rapid key labels
Document
carrier
Operation
manual
Original document
OUT tray
Received
document tray
A4 paper
size labels
Toner cartridge
Drum cartridge
Precautions before setting up
♦The printing unit in the fax generates a small amount of ozone during operation.
The amount is not large enough to be harmful; however, the fax should only be in-
stalled in a ventilated room.
♦The fax must be installed on a level surface.
♦Keep the fax away from air conditioners, heaters, direct sunlight, and dust.
♦If your area experiences a high incidence of lightning or power surges, we recom-
mend that you install surge protectors for the power and telephone lines. Surge pro-
tectors can be purchased at most telephone specialty stores.
♦If the fax is moved from a cold to a warm place, it is possible that condensation may
form on the reading glass, preventing proper scanning of documents for transmis-
sion. To remove the condensation, turn on the power and wait approximately two
hours before using the fax.
Adapter
(for Australia)
Adapter
(for New Zealand)
Business products dealer
installation report
INSTALLATION 1-1

FO5600A-ISPC
YF <P=001>
INSTALLING THE PRINTER CARTRIDGES
The laser printer in your fax creates printed text and images by applying toner to the
page with a photoconductive drum. Follow the steps below to install or replace the
toner cartridge and the drum cartridge.
1 Press the button on the side of the
printer compartment, and open the
printer cover.
•• Caution! The ribs on the bottom of the
inside of the printer cover become very
hot during printing. Be careful not to
touch them.
•• If you are installing the cartridges for
the first time, go to Step 4.
2 If you are replacing the cartridges,
grasp the handle on the toner
cartridge, and pull the toner cartridge
out of the compartment.
•• If you are only replacing the drum car-
tridge, place the toner cartridge on a
piece of paper on a horizontal surface.
•• If you are only replacing the toner car-
tridge, go to Step 6.
3 Pull the old drum cartridge out of the
compartment, by grasping the handle.
4 Remove the new drum cartridge from
its packaging.
1-2 INSTALLATION

<P=002>
5 Align the arrowhead on the right side
of the drum cartridge (the right side is
marked "R") with the arrowhead
pointing down which is marked on the
right side of the compartment, and
insert the cartridge into the
compartment so that the ends of the
cartridge move along the guides on
the sides of the compartment. Make
sure the cartridge clicks into place
firmly.
•• Place the old drum cartridge (if you re-
moved one) in the empty drum car-
tridge bag, seal the bag, and dispose
of it in a way that conforms to any local
regulations that may exist in your area.
•• If you are not replacing the toner car-
tridge, go to Step 7.
6 Remove the new toner cartridge from
its packaging, and shake several
times as shown.
•• This ensures that the toner is well dis-
tributed inside the cartridge.
Left
L
R1
Right
7 Hold the handle of the toner cartridge
so that the "2" marked on the
cartridge is to the right, and insert the
cartridge into the compartment so
that the two knobs on each side of the
cartridge move along the two guides
on each side of the compartment.
Press the handle down so that the
cartridge sets into place.
•• Place the old toner cartridge (if you re-
moved one) in the empty toner car-
tridge bag, seal the bag, and dispose
of it in a way that conforms to any local
regulations that may exist in your area.
2
Left
Right
INSTALLING THE PRINTER CARTRIDGES
INSTALLATION 1-3
<P=003>
8 Close the printer cover.
9 If you replaced the toner cartridge,
reset the toner counter by pressing
the LIFE key (flip up the Rapid Key
overlay if necessary), then the "2"
key, and the START key.
10 If you replaced the drum cartridge,
reset the drum counter by pressing
the LIFE key (flip up the Rapid Key
overlay if necessary), then the "3"
key, and the START key.
Note:
If you ever need to move or ship the fax, remove the toner cartridge and drum cartridge
from the fax first.
LIFE
V
2
START
LIFE
V
3
START
Replacing the cartridges
The laser printer in your fax uses the following toner cartridge and drum cartridge.
These can be obtained at your dealer or retailer.
FO-45DC TONER CARTRIDGE
FO-45DR DRUM CARTRIDGE
The sample toner cartridge provided with your fax is capable of printing approximately
3700 pages if A4 size paper is used and 4% of each page is covered with toner. The
FO-45DC toner cartridge is capable of printing approximately 5600 pages.
When the toner cartridge nears empty (about 100 pages can still be printed), the
&
indicator on the operation panel will begin to blink. When the cartridge is empty, the
indicator light will remain on and REPLACE TONER will appear in the display.
Replace the toner cartridge as described above.
The drum cartridge is capable of printing approximately 20,000 pages. When the drum
cartridge nears the end of its life, the
%
indicator on the operation panel will begin to
blink. The indicator will continue to blink until the cartridge life is over, at which point
the indicator will remain on and DRUM LIFE OVER will appear in the display. Replace
the drum cartridge as described above.
INSTALLING THE PRINTER CARTRIDGES
1-4 INSTALLATION

FO5600A-ISAC
For
Australia
For New Zealand
DD <P=001>
ATTACHMENTS AND CONNECTIONS
Power lead
Plug the power lead into a 230-240 V,
50 Hz, earthed (3-prong) AC outlet.
•• Caution: When disconnecting the fax,
unplug the telephone line cord before
unplugging the power lead.
Telephone line cord
Insert one end of the telephone line
cord into the adapter. Insert the other
end of the line cord into the socket on
the back of the fax marked "TEL.
LINE". Plug the adaptor into the
telephone socket on the wall.
•• If desired, you can connect an exten-
sion telephone to the socket on the fax
marked "TEL.SET".
TEL.
SET
TEL.
LINE
OFF 0
ON |
Important: In New Zealand, not all standard
telephones will respond to incoming ringing
when connected to the extension socket of the
equipment.
••
Your fax is set for tone dialling. If you are on a pulse only dial line, you must set the fax for
pulse dialling by changing Option Setting 21. This procedure is described in Chapter 5,
"Optional Settings".
Moving your fax and reconnecting
Should it be necessary to move your fax to a new location, first disconnect the
telephone line cord before disconnecting the power lead. When reconnecting, it is
necessary to connect the power lead before connecting the telephone line cord.
INSTALLATION 1-5

<P=002>
Trays
Attach the original document OUT
tray by inserting the tabs into the
holes in the fax as shown.
Attach the received document tray by
inserting the tabs into the holes in the
fax as shown.
Verification Stamp
When transmitting a document, you can have your fax stamp each document page as
it is scanned. After scanning, you can check to see if all documents have been
stamped to verify that no double feeds occurred. (A double feed is when two pages
are fed through the scanner at once, which means that one of the pages is not
scanned.) To turn on this function, set Option Setting 27 as described in Chapter 5,
"Optional Settings".
ASSEMBLY AND CONNECTIONS
1-6 INSTALLATION

<P=003>
Connection to a computer
If desired, you can connect the FO-5600 to the serial port of any compatible computer.
If you have the proper software, this will allow you to perform fax operations from your
computer.
Important:
••
Use only the provided PC interface cable to connect your fax to your computer.
1Insert the male end of the PC interface
cable into the port on the rear of fax
as shown. Tighten the attached
screws with a screwdriver.
2Insert the female end of the PC
interface cable into the serial
(RS-232C) port on your computer.
Tighten the attached screws with a
screwdriver.
3Set Option Setting 27 "PC INTERFACE
MODE" to YES to enable the PC
connection. Set Option Setting 28
"RECEIVE UNIT" to choose whether
you want incoming documents to be
received in the computer or printed
out by the fax.
•• The procedure for making these set-
tings is described in Chapter 5, "Op-
tional Settings".
Comments:
••
For information on computer software which can be used with the PC-fax connection,
consult your dealer.
••
If the fax is connected to a computer, there may be occasions when you will not be able to
use the operation panel of the fax. On those occasions the message "COMMUNICATING
W/ PC" will appear in the fax display.
ASSEMBLY AND CONNECTIONS
INSTALLATION 1-7

FO5600A-ISLP
YF <P=001>
LOADING PRINTING PAPER
The paper cassette and the paper tray hold the paper on which received documents
are printed. If needed, a second cassette (FO-45A4) is available as an option from
your dealer.
The paper cassette can hold 500 sheets of A4-size paper. The paper tray can hold
150 sheets of A4-size paper.
♦Your fax has been set at the factory to automatically select the source from which it
draws paper. If desired, you can change this setting to give priority to the tray, the
upper cassette, or the lower cassette (if you have one) by resetting Option Setting
14 (see Chapter 5, "Optional Settings").
♦When paper runs out in the currently used source (cassette or tray), your fax will
automatically start drawing from the other source if you have one cassette, or the
source set with Option Setting 14 if you have two cassettes. NO PAPER will appear
in the display, followed by the empty source in parenthesis. If desired, you can stop
changeover to the other source by changing Option Setting 15. In this case,
received documents will be stored in memory.
Caution!
••
Do not use paper which has already been printed on one side by a laser printer or copier.
Loading the paper cassette
1Grasp the hand hold on the cassette
as shown, lift the cassette slightly,
and then pull it out until it stops.
Press down on the green levers on
each side of the cassette to release it,
and then pull it completely out of the
fax using both hands.
1-8 INSTALLATION

<P=002>
2Push the pressure plate down until it
locks into position.
3Place a stack of paper in the cassette,
print side up. Make sure the two far
corners of the paper go under the
paper holders as shown.
•• Make sure the stack of paper is not
higher than the tabs at the top of the
paper guide. If it is, remove some of
the paper.
4Put the cassette back in the fax.
5If desired, attach an A4 label to the
cassette.
LOADING PAPER
INSTALLATION 1-9

<P=003>
Loading the paper tray
1Rotate the received document tray
back. Grasp the hand hold on the
original document IN tray as shown,
and open it.
2Place the paper in the tray.
3Close the original document IN tray.
4If desired, attach an A4 label to the fax
as shown.
LOADING PAPER
1-10 INSTALLATION

FO5600A-IPOP
AY <P=001>
CHANGEOVER
LINE-STATUS RESOLUTION
IN USE STANDARD
FINE
SUPER FINE
HALF TONE
2 INITIAL SETTINGS
A LOOK AT THE OPERATION PANEL
Before you can begin using your fax, there are some settings which must be made
using the keys on the operation panel. First take a moment to familiarize yourself with
the operation panel, and then make the settings as described on the following pages.
Paper out indicator
This blinks when one of the
paper sources (cassette or
tray) is out of paper, and lights
steadily when all sources are
out of paper.
Toner cartridge indicator
This blinks when toner nears
empty, and lights steadily
when the toner cartridge
needs replacement.
Drum cartridge indicator
This blinks when the drum
cartridge nears the end of its
life, and lights steadily when the
drum cartridge needs
replacement.
Service indicator
This lights when a
problem occurs which
must be fixed by a
service engineer.
Display
This displays various
messages during operation
and programming.
LINE STATUS light
This lights when the fax machine or
other device sharing the same line
is using the telephone line.
CHANGEOVER key
Two types of information appear in the
display: prompts related to operations
you are performing, and information
about how the fax is using the telephone
line (transmitting, receiving, etc.). Press
this key to switch between the two types
of information.
RESOLUTION key
Press this key to adjust
the resolution before
sending or copying a
document.
INITIAL SETTINGS 2-1

<P=002>
CLEARSPSHIFTSPACE
A
I
Q
Y
B
J
R
Z
C
K
S
D
L
T
E
M
U
F
N
V
G
O
W
H
P
X
01
09
17
25
02
10
18
26
03
11
19
04
12
20
05
13
21
06
14
22
07
15
23
08
16
24
27 28 29 30 31 32
CLEARSPSHIFTSPACE
A
I
Q
Y
B
J
R
Z
C
K
S
D
L
T
E
M
U
F
N
V
G
O
W
H
P
X
33
41
CONTRAST
SEARCH DIAL
34
42
PAGE COUNTER
35
43
CONFIDENTIAL
36
44
TIMER
37
45
RELAY
38
46
39
47
MEM.STATUS
40
48
LIFE
DOWN UP
DUPLEX SCAN
Rapid Dial keys
Press one of these keys to dial a fax
number automatically (these keys
also serve as letter entry keys when
storing a name).
CONTRAST key
Press this key to adjust the
contrast before sending or
copying a document.
PAGE COUNTER key
Press this key to have a slash and
the total number of pages added
after each page number on the
pages of a transmitted document.
CONFIDENTIAL key
Press this key to send or
print out a confidential
document.
TIMER key
Press this key to set an
operation to be performed
automatically at a later time.
RELAY key
Press this key to send a
document to another fax machine
and have that machine in turn
send the document to a number
of end receiving machines.
LIFE key
Press this key, followed
by the "1" key, to check
the total number of
pages printed by the fax
machine.
MEM. STATUS key
Press this key to
check the documents
that have been
scanned into memory
for transmission,
reception or copying.
SEARCH DIAL key
Press this key to
search by name for
a number stored
for automatic
dialling.
UP and DOWN keys
Press these keys to adjust
the volume of the speaker
when the SPEAKER key
has been pressed, or the
volume of the ringer at all
other times.
SPACE key
Press this key to enter a
space when storing a name.
→key,← key
Press these keys to move
the cursor forward and
backward when storing
names and numbers.
CLEAR key
Press this key to
clear mistakes
when storing
names and
numbers.
SP key
Press this key to enter
symbols when storing
a name.
SHIFT key
Press this key to switch
between upper and
lower case when storing
a name.
(Flip up the
Rapid Key
overlay)
DUPLEX SCAN key
Press this key to
transmit or copy
two-sided documents.
A LOOK AT THE OPERATION PANEL
2-2 INITIAL SETTINGS

<P=003>
Dial keypad
(numeric keys)
Use these keys to direct
dial and program numbers.
FUNCTION key
Press this key to select
various special functions.
COPY key
Press this key to make
a copy of a document.
REPORT key
Press this key to print out
a report on the transaction
just completed.
DOCUMENT key
Press this key to
transmit a
document without
reading it into
memory.
COVER SHEET key
Press this key to include
a cover sheet with a
transmitted document.
PRIORITY key
Press this key when
you want to transmit
a document ahead of
other documents
waiting in memory for
transmission.
BROADCAST key
Press this key to send a
document to a group of
receiving fax machines.
SPEED DIAL key
Press this key to dial a
Speed Dial number.
SPEAKER key
Press this key to hear
the line and fax tones
through the speaker
when sending a
document.
REDIAL key
Press this key to automatically
redial the last number dialled.
STOP key
Press this key to stop
operations before they
are completed.
START key
Press this key to send a
document or start an
operation.
123
456
789
0
ABC
GHI
DEF FUNCTION
COPY REPORT DOCUMENT
BROADCAST
STOP START
PRIORITY
SPEED DIAL
REDIAL
SPEAKER
JKL MNO
PQRS TUV WXYZ
COVER SHEET
A LOOK AT THE OPERATION PANEL
INITIAL SETTINGS 2-3
Table of contents
Other Sharp Fax Machine manuals

Sharp
Sharp FO-P610 User manual

Sharp
Sharp F-2700M User manual

Sharp
Sharp FO-77 User manual

Sharp
Sharp UX-P200 User manual

Sharp
Sharp FO-D60 User manual

Sharp
Sharp FO-130 User manual

Sharp
Sharp FO-5700 User manual

Sharp
Sharp FO-175 User manual

Sharp
Sharp UX-B800SE - B/W Inkjet - Fax User manual

Sharp
Sharp UX-53 User manual