RL
Recording monitor
0dB-4dB-12dB
L+ R+ L- R-
L R GND
4-pole plug for mobile
1-bit digital amplifier
Conventional 3-pole plug
LR
PC hard disk
(BeatJam) USB connection
MD portable
recorder compatible
with Net MD
NOTES
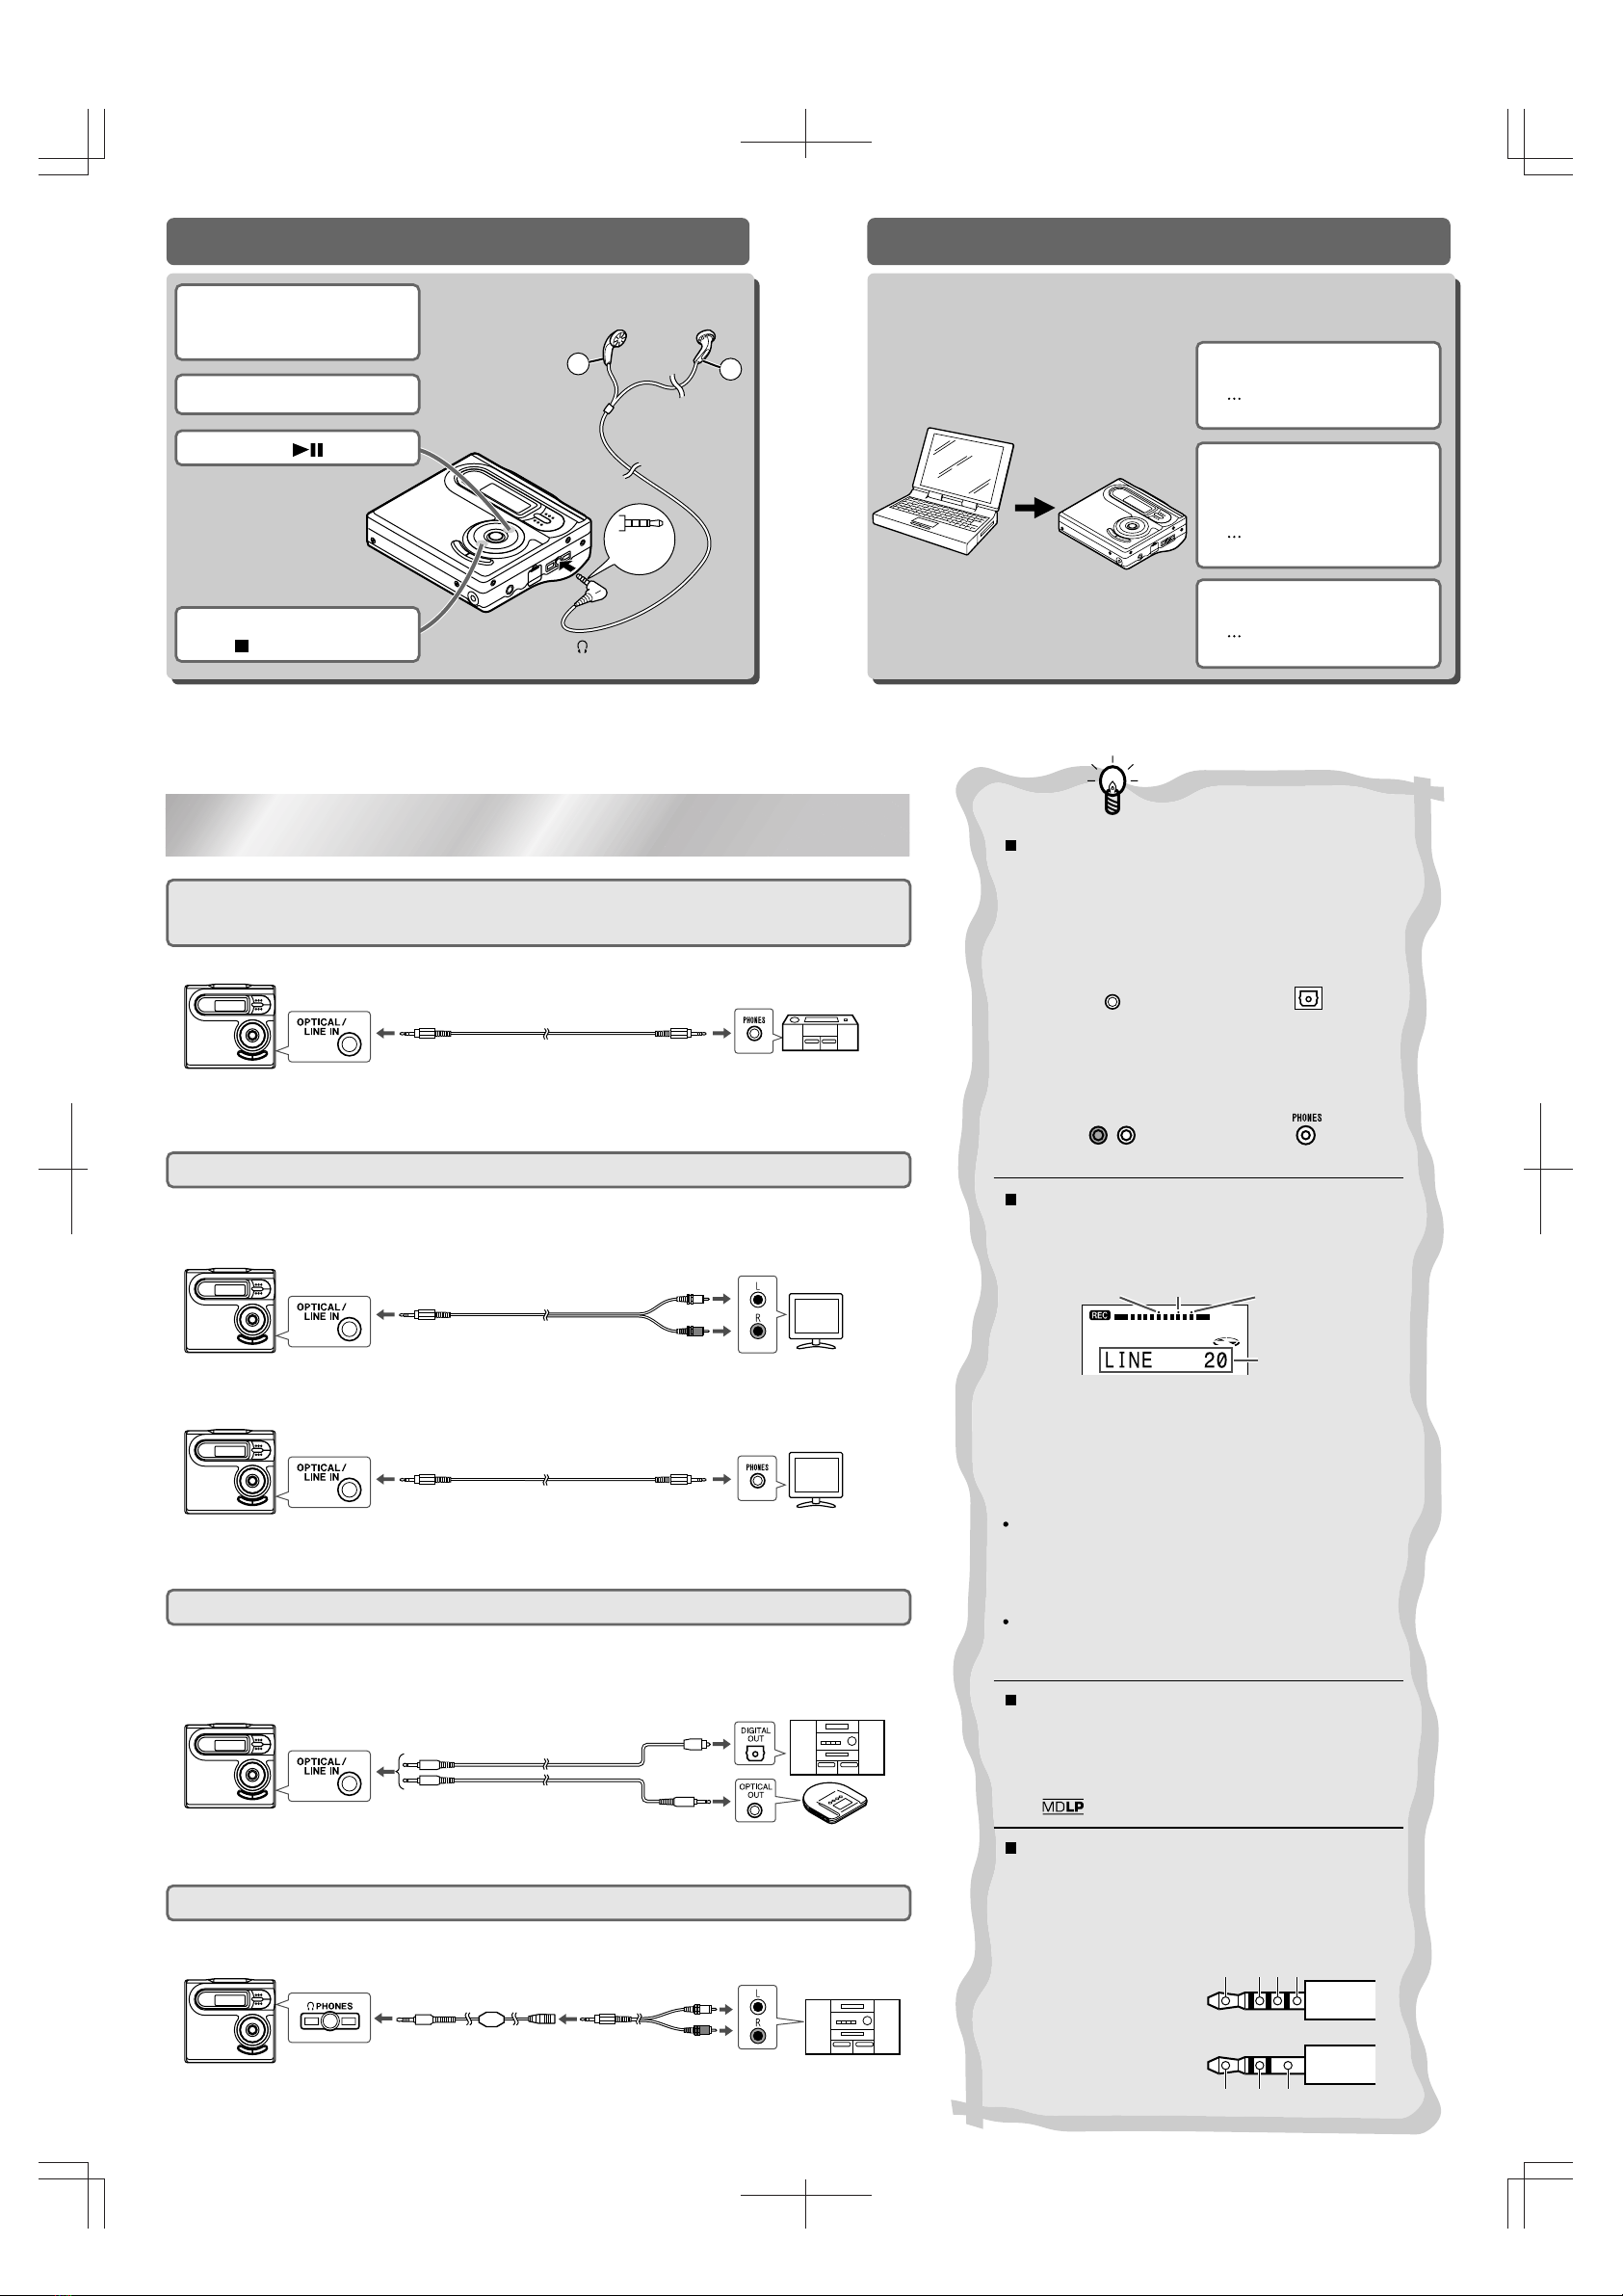
Digital and analogue recording
OPTICAL OUT DIGITAL OUT
AUDIO/LINE OUT socket Headphone socket
Adjusting the recording level
MiniDisc recorded in a long-recording mode
Use a headphone socket.
This is analogue recording. Adjust the recording level manually.
Recording TV sound
Check the output terminal of your TV and connect to the unit as follows.
< Recording from an audio output socket >
< Recording from a headphone socket >
The above are analogue connections. Adjust the recording level manually.
Recording from an optical digital socket
< With an audio input socket >
Useful tips
To the headphone socket
To the headphone socket
Radio cassette recorder
Commercially available
connection cable
Supplied output conversion
cable (4-pole to 3-pole plug
conversion)
Stereo system, CD player, etc.
Stereo system
Optional
optical digital cable
Optional
optical digital cable
White : to the left
Red : to the right
TV
TV
To the AUDIO OUTPUT socket
Supplied connection cable
Supplied connection cable
To the OPTICAL/DIGITAL OUTPUT socket
To the LINE INPUT
socket
White : to the left
Red : to the right
Recording from a radio cassette recorder or stereo system without
audio output sockets (LINE OUT, AUX OUT, REC OUT, etc.)
High quality sound can be ensured.
Use a supplied connection cable or a commercially available optical digital cable.
Optional accessory: AD-M1DC
Optional accessory: AD-M2DC
The differences are described below.
Digital recording
A digital signal from a CD or MiniDisc is recorded as it is
on the original.
Compared with analogue connection recording, a digital
connection will ensure higher quality.
Analogue recording
Sound from a stereo system or radio cassette recorder
(analogue signals) can be recorded.
Adjust the recording level so that the maximum sound
volume from the source makes the reading swing some-
where between -4 dB and 0 dB.
Recording monitor appears when adjusting the recording
level.
<Connecting with a digital cable >
The recording monitor displays D.L. -10dB to D.L.
+10dB.
If recording from a CD, set to "D.L. 0dB". Set to around
"D.L. +8dB" if it is a CS tuner or other equipment.
< Connecting with an analogue cable >
The recording monitor displays LINE 0 to LINE 30.
If you are using a headphone socket of external equip-
ment, set the volume on the equipment (avoid creaking
noise) and then adjust the recording level on the unit.
Play back the MiniDisc on the equipment compatible
with .
Listening to music through another system
Tracks recorded in 2 times long recording and 4 times
long recording modes cannot be played with the unit that
does not support these modes.
"4-pole plug earphone" optimizes
"Mobile 1-bit digital amplifier"
Sharp has adopted "4-pole plug" earphone that
completely separate the right and left channels.
Enjoy the high quality sound of the "Mobile 1-bit digital
amplifier".
Net MDMD Playback
1Insert the earphones
plug into the PHONES
socket. 1
2
3
2
Insert a MiniDisc.
Right
channel
Left
channel
4-pole
plug
To the PHONES
socket
To stop playback, press
the :OFF/HOLD button.
3
4
Press the button.
Audio data saved on the hard disk of a PC can be transferred to a Net MD-com-
patible recorder using the provided software "BeatJam".
Not only the basic operations but also the title editing of audio data on an MD can
be performed via the PC.
Commercially available
connection cable
Install the software on
your PC.
For details, refer to page
41 of the operation manual.
Connect your PC with
the MD portable recor-
der with the supplied
USB connection cable.
For details, refer to page
42 of the operation manual.
Perform operations with
BeatJam on the PC.
For details, refer to the
BeatJam manual.


