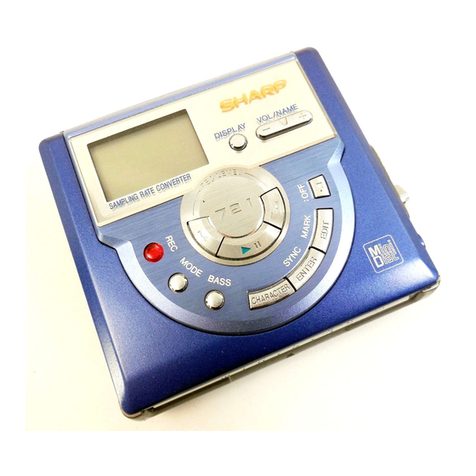
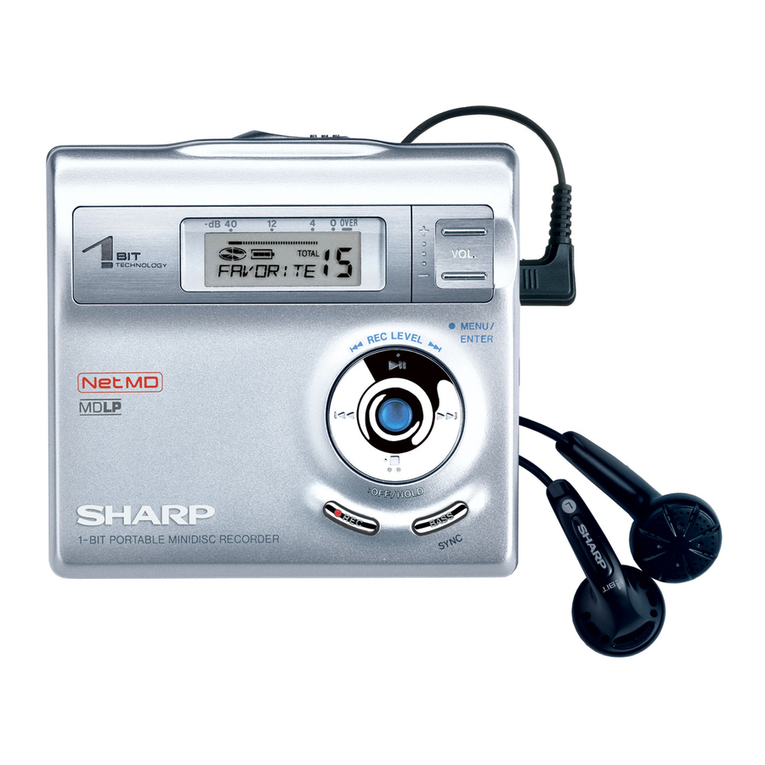
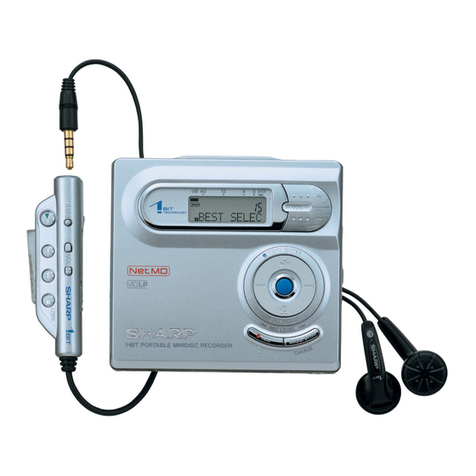
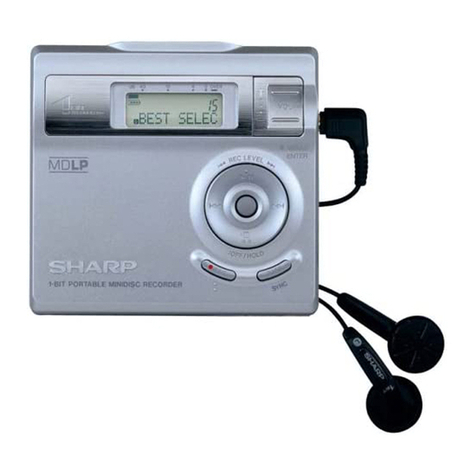
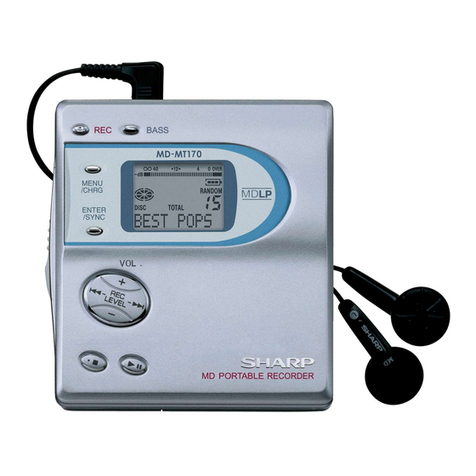
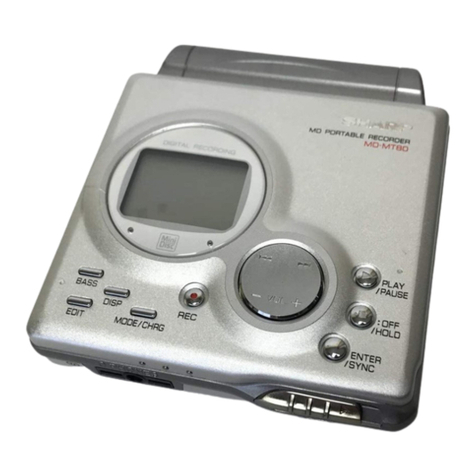
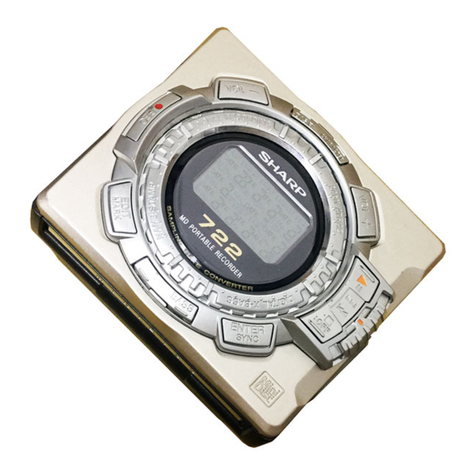
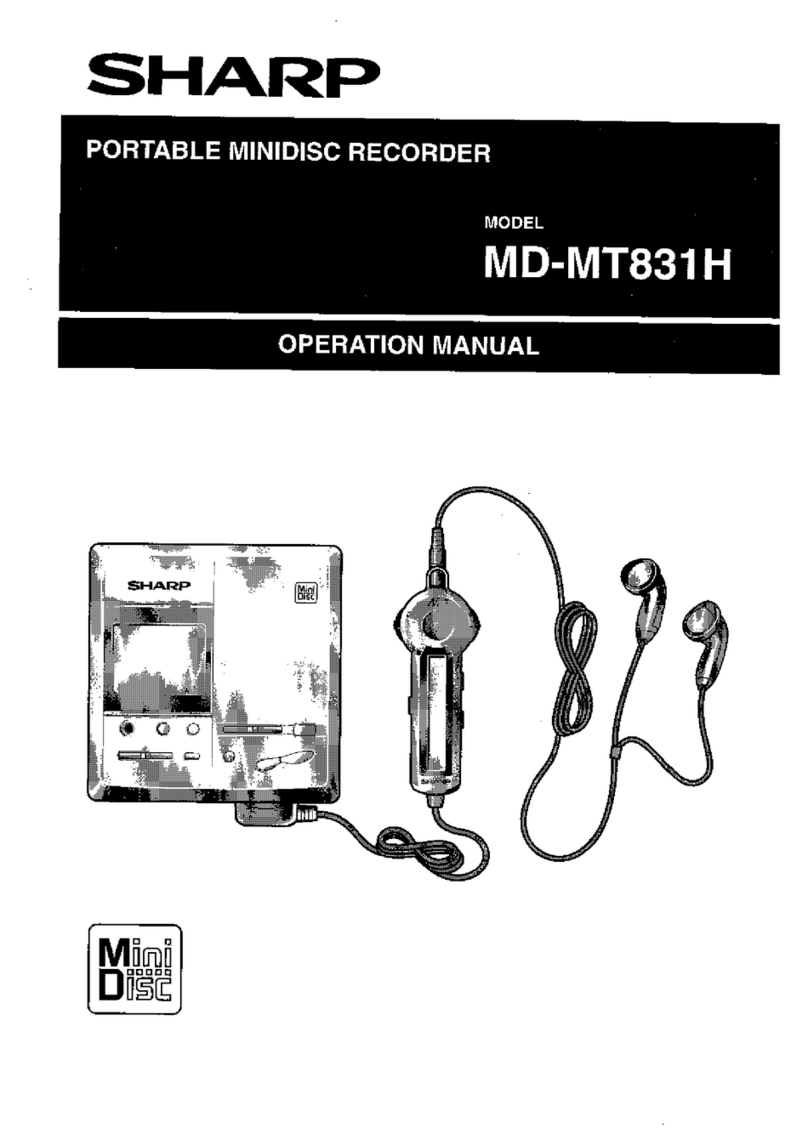
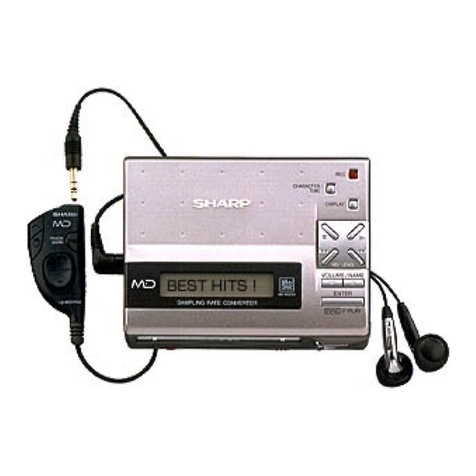
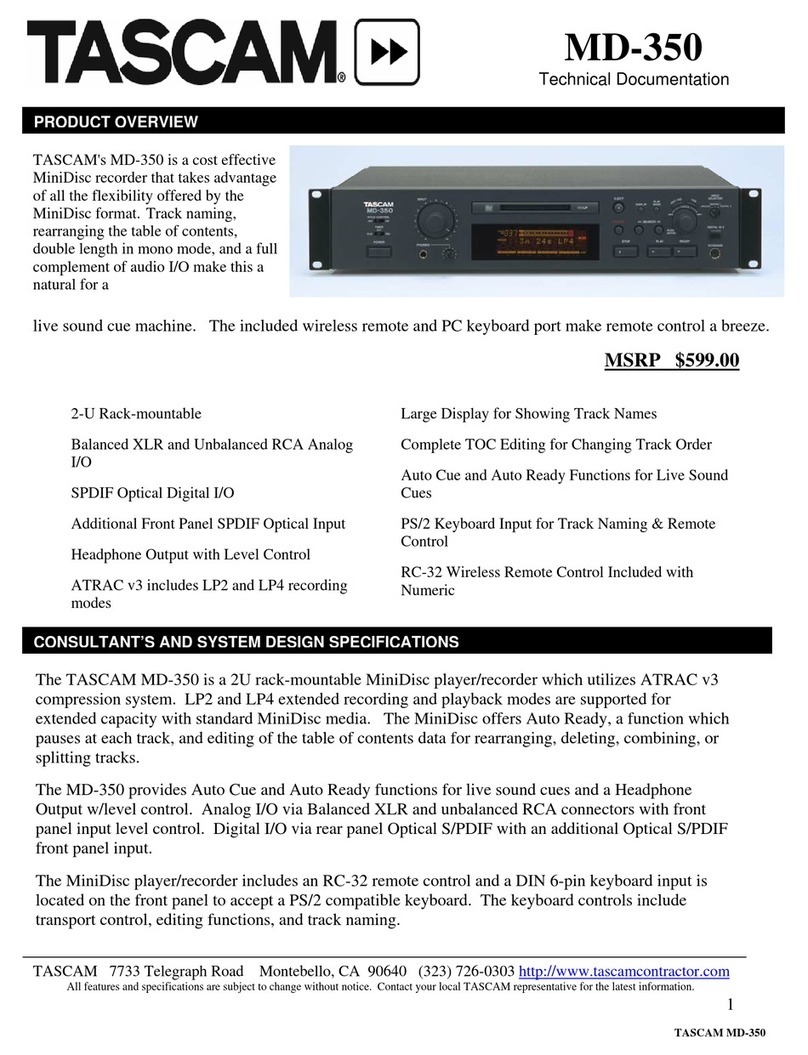
Sharp MD-MT180H User manual

GRABADOR/REPRODUCTOR MINIDISC PORTÁTIL
BÄRBAR MINISKIVINSPELARE
GRAVADOR PORTÁTIL DE MINIDISCO
PORTABLE MINIDISC RECORDER
MODELO
MODELL
MODELO
MODEL
MD-MT180H
MANUAL DE MANEJO
BRUKSANVISNING
MANUAL DE OPERAÇÃO
OPERATION MANUAL
ESPAÑOL ······ Consulte las páginas i al vi y
S-1 al S-42.
SVENSKA ······ Hänvisa till sidorna i till vi och
V-1 till V-42.
PORTUGUÊS ······ Favor consultar as páginas i a vi e
E-1 a E-42.
ENGLISH ······ Please refer to pages i to vi and
E-1 to E-42.
for SEES
TINSZ0781AWZZ

2i
NOTAS ESPECIALES
SÄRSKILDA ANMÄRKNINGAR
NOTAS ESPECIAIS
SPECIAL NOTES
●Dieses Gerät entspricht den Anforderungen der EG-
Richtlinien 89/336/EWG und 73/23/EWG mit Änderung
93/68/EWG.
●Ce matériel répond aux exigences contenues dans les
directives 89/336/CEE et 73/23/CEE modifiées par la di-
rective 93/68/CEE.
●Este aparato satisface las exigencias de las Directivas
89/336/CEE y 73/23/CEE, modificadas por medio de la
93/68/CEE.
●
Denna utrustning uppfyller kraven enligt riktlinjerna 89/336/
EEC och 73/23/EEC så som kompletteras av 93/68/EEC.
●Quest’ apparecchio è conforme ai requisiti delle direttive
89/336/EEC e 73/23/EEC, come emendata dalla direttiva
93/68/EEC.
●Dit apparaat voldoet aan de eisen van de richtlijnen 89/
336/EEG en 73/23/EEG, gewijzigd door 93/68/EEG.
DENNA APPARAT ÄR ANSLUTEN TILL 230 V
VÄXELSTRÖM NÄR STICKPROPPEN ÄR INSKJUTEN I
VÄGGUTTAGET. FÖR ATT FULLSTÄNDIGT KOPPLA
IFRÅN APPARATEN V.G. DRAG UT STICKPROPPEN.
0103
ønsker man at tilslutte en DC-adaptor såskal def vaere en
godkendt type med indbygget sikring.
Vid anslutning till yttre likspänningskälla skall det alltid finnas
en säkring i kretsen.
Käytettäessäakkua tai mutta ulkopuolista tasajännitelähdettä
on laitteen ja jännitelähteen välilläboltava sulakkeella
varustettu adaptori.
When connecting the appliance to an external DC-source,
ensure that there is a fuse protection in the circuit.
●El material audiovisual puede consistir en trabajos que
tengan derechos de autor y que no deben grabarse sin la
autorización del poseedor de dichos derechos de autor.
Sírvase consultar las leyes aplicables en su país.
●Audiovisuellt
●Os materiais audiovisuais podem ter exclusividade de
direitos e não podem ser gravados sem a devida
autorização do proprietário dos direitos.
Favor verificar as leis relacionadas no seu país.
material kan innehålla upphovsrättsarbete
som inte skall mångfaldigas utan tillstånd av copy-
rightinnehavaren. Se den tillämpliga lagen i ditt land.
●Audio-visual material may consist of copyrighted works
which must not be recorded without the authority of the
owner of the copyright. Please refer to relevant law in your
country.
0103
ii
●Este equipamento obedece às exigências das directivas
89/336/CEE e 73/23/CEE, na sua versão corrigida pela
directiva 93/68/CEE.
●
This equipment complies with the requirements of Directives
89/336/EEC and 73/23/EEC as amended by 93/68/EEC.
●Dette udstyr overholder kravene i direktiv nr. 89/336/EEC
og 73/23/EEC med tillaeg nr. 93/68/EEC.
●Dette produktet oppfyller betingelsene i direktivene 89/336/
EEC og 73/23/EEC i endringen 93/68/EEC.
●Tämälaite täyttää direktiivien 89/336/EEC ja 73/23/EEC
vaatimukset, joita on muutettu direktiivillä93/68/EEC.
●
0103
0103
0103
Advertencia:
Para
Cuidado:
Para evitar incêndio ou choque eléctrico, não exponha este
aparelho a gotejamento ou salpicamento de água.
Não coloque objetos com água como, por exemplo, vaso de
flores, em cima do aparelho.
evitar incendios y descargas eléctricas, no exponga el
aparato a goteo o salpicadura de líquidos. No deberán ponerse
encima del aparato objetos que estén llenos de líquido, como
por ejemplo un florero.
Varning:
Utsätt inte enheten för dropp eller stänk för att förhindra brand
eller elektriska stötar. Inga vätskefyllda föremål såsom vaser
bör placeras påenheten.
Warning:
To prevent fire or shock hazard, do not expose this appliance
to dripping or splashing. No objects filled with liquids, such as
vases, shall be placed on the apparatus.

4
Advarsel:
Til at forbygge ild og stød risiko, lad vaere med at undsaette
denne indretning for drypning eller overstaenkning.
Der måikke anbringes nogen genstande fyldt med vand, som
for eksempel vaser, pådette apparat.
Advarsel:
For åunngåbrann eller kortslutning, utsett ikke produktet for
vann eller fuktighet.
Gjenstander som inneholder væske, feks. en blomstervase, må
ikke plasseres oppåapparatet.
Varoitus:
Älävie laitetta sateeseen tai kosteisiin tiloihin. Jos laite on
kostunut, anna sen kuivua ennen kuin käytät sitäverkkovirralla.
Nestettäsisältäviäastioita kuten esim. kukkamaljakoita ei saa
asettaa laitteen päälle.
iii
PRECAUCIÓN:
La audición prolongada a alta potencia de un equipo estéreo
personal puede causar daños en los oídos del usuario.
El modelo satisface la ley relacionada con el empleo de los au-
riculares SHARP (número de modelo RPHOH0011AWZZ). En
caso de avería, pida unos auriculares adecuados.
VARNING:
Lyssna till personlig stereo med full volym under längre tid kan
skada hörseln.
Modellen överenstämmer med lagstadgade bestämmelser för
användning med SHARP hörlurar (RPHOH0011AWZZ). Vid
skador beställ riktiga hörlurar.
ATENÇÃO:
A audição prolongada em alto volume do aparelho estéreo indi-
vidual pode danificar o ouvido do usuário.
O modelo estáconforme a lei em caso de usá-lo com auricu-
lares SHARP (modelo número RPHOH0011AWZZ).Encomende
auriculares apropriados caso aqueles que acompanham o
aparelho se danificarem.
CAUTION:
At full power prolonged listening to a personal stereo may dam-
age the user’s hearing.
The model is in compliance with the law in case of using it with
the SHARP earphones (model number RPHOH0011AWZZ).
Order proper earphones if it comes in to damage.

iv
●Este producto estáclasificado como un PRODUCTO LASER
DE CLASE 1.
●Denna
●Este produto éclassificado como PRODUTO LASER DE
CLASSE 1.
produkt klassificeras som KLASS 1 LASERPRODUKT.
●This product is classified as a CLASS 1 LASER PRODUCT.
●Dette produktet er klassifisert som et KLASSE 1
LASERPRODUKT.
●Dette produkt er klassificeret som et KLASSE 1
LASERPRODUKT.
●Tämälaite on luokiteltu LUOKAN 1 LASERLAITTEEKSI.
●Denna produkt klassificeras som KLASS 1 LASERAPPARAT.
●
●
0103
●PRECAUCIÓN
●CUIDADO
U
Use o gravador portátil de minidisco somente de acordo com
as instruções fornecidas neste manual.
Não tente interferir com o interruptor de intertravamento ou
efectuar qualquer outro ajuste, pois isso pode causar uma
exposição perigosa àradiação.
tilice el grabador/reproductor portátil minidisc sólo de acuerdo
con las instrucciones dadas en este manual y no intente
interferir el interruptor de bloqueo ni realizar ningún otro ajuste
porque podría ocasionar la exposición a radiación peligrosa.
●OBSERVERA
Använd den bärbara miniskivinspelaren endast i enlighet med
anvisningarna i denna bruksanvisning och försök inte påverka
låsningsströmbrytaren eller göra andra inställningar som kan
leda till risk för farlig strålning.
●CAUTION
Use the portable minidisc recorder only in accordance with
the instructions given in this manual and do not attempt to
interfere with the interlock switch or make any other adjust-
ment as this may result in exposure to hazardous radiation.
0103

0103
6
Propiedades del diodo láser
●Material: GaAlAs
●Longitud de onda: 785 nm
●Tiempos del pulso:
Modo de lectura: 0,8 mW continuo
Modo de escritura:
máx. 10 mW 0,5s
Ciclo mín. 1,5s
Repetición
Laserdiodens egenskaper
●Material: GaAlAs
●Våglängd: 785 nm
●Impulstider:
Läsfunktion: 0,8 mW kontinuerlig
Skrivfunktion: max. 10 mW 0,5 S
min. cykel 1,5 S
Repetition
Propriedades do Diodo de Laser
●Material: GaAIAs
●Comprimento de onda: 785 nm
●Tempo de pulsação:
Modo de leitura: 0,8 mW, Contínuo
Modo de escrita: máx. 10mW 0,5S
Ciclo mín. 1,5S
Repetição
v
Laser Diode Properties
●Material: GaAlAs
●Wavelength: 785 nm
●Pulse time:
Read mode: 0.8 mW Continuous
Write mode: max 10 mW 0.5S
min cycle 1.5S
Repetition
Laserdiodens egenskaber
●Materiale: GaAlAs
●Bolgelaengde: 785 nm
●Impulstider:
Laesemodus: 0,8 mW kontinuerlig
Skrivemodus: max 10 mW 0,5 S
min cyklus 1,5 S
Repetition
Laserdiodens egenskaper
●Material: GaAlAs
●Bølgelengde: 785 nm
●pulstid:
Lese-modus: 0,8 mW kontinuerlig
Skrive-modus: maks. 10 mW 0,5 S
min. syklus 1,5 S
Gjentakelse

Advertencia:
El adaptador de CA suministrado no contiene partes que
pueda reparar el usuario. Ni saque nunca las cubiertas a
menos que estécualificado para ello.
Contiene tensiones peligrosas. Desenchufe siempre la clavija
de alimentación del tomacorriente antes de cualquier
operación de servicio y cuando no se proponga utilizar el
aparato durante períodos prolongados.
Observera:
Medföljande nätadapter innehåller inga delar som kan
åtgärdas av användaren.
Tag aldrig bort höljet utan behörig kompetens. Det har farliga
spänningar. Dra alltid ur stickproppen från nätuttaget före
underhållsarbeten eller när apparaten inte ska användas un-
der längre tid.
Cuidado:
O adaptador de CA fornecido não contém peças que possam
ser consertadas pelo usuário.
Não remova as tampas a menos que vocêtenha qualificação
para tal.
O aparelho contêm potências perigosas. Assim, sempre re-
tire o plugue principal da tomada de saída principal para
efectuar quaisquer serviços ou quando o aparelho ficar fora
de uso por um período prolongado.
Warning:
The supplied AC adaptor contains no user serviceable parts.
Never remove covers unless qualified to do so.
It contains dangerous voltages, always remove mains plug
from the main outlet socket before any service operation or
when not in use for a long period.
vi
VAROITUS! LAITTEEN KÄYTTÄMINEN MUULLA KUIN TÄSSÄ
KÄYTTÖOHJEESSA MAINITULLA TAVALLA SAATTAAALTISTAA
KÄYTTÄJÄN TURVALLISUUSLUOKAN 1 YLITTÄVÄLLE
NÄKYMÄTTÖMÄLLE LASERSÄTEILYLLE.
VARNING - OM APPARATEN ANVÄNDS PÅANNAT SÄTT ÄN I
DENNA BRUKSANVISNING SPECIFICERAS. KANANVÄNDAREN
UTSÄTTAS FÖR OSYNLIG LASERSTRÅLNING, SOM
ÖVERSKRIDER GRÄNSEN FÖR LASERKLASS 1.
0103
01/10/5 180H_E_1.fm
E-1
MD-MT180H
ENGLISH
ENGLISH
Important Introduction
-Introduction/Contents-
Introduction
Contents
Page
Important Introduction
Special Notes . . . . . . . . . . . . . . . . . . . . . . . . . . . . . . . . 2
Accessories . . . . . . . . . . . . . . . . . . . . . . . . . . . . . . . . . 2
Optional Accessories . . . . . . . . . . . . . . . . . . . . . . . . . 2
Names of Controls and Indicators . . . . . . . . . . . . . 3-4
Precautions. . . . . . . . . . . . . . . . . . . . . . . . . . . . . . . . . . 5
Power Source
Using with the Rechargeable Battery. . . . . . . . . . . 6-7
Using with the AC Adaptor . . . . . . . . . . . . . . . . . . . . . 7
Using with the Alkaline Battery . . . . . . . . . . . . . . . . . 8
Preparation
Inserting a MiniDisc . . . . . . . . . . . . . . . . . . . . . . . . . . . 9
Connections . . . . . . . . . . . . . . . . . . . . . . . . . . . . . . . . 10
Basic Operation
Recording . . . . . . . . . . . . . . . . . . . . . . . . . . . . . . . 11-13
Playback . . . . . . . . . . . . . . . . . . . . . . . . . . . . . . . . 14-15
Hold Function . . . . . . . . . . . . . . . . . . . . . . . . . . . . . . . 15
Page
Useful Features
Advanced Playback. . . . . . . . . . . . . . . . . . . . . . . . 16-17
Advanced Recording . . . . . . . . . . . . . . . . . . . . . . 18-23
Checking Displays . . . . . . . . . . . . . . . . . . . . . . . . 24-25
Changing Default Settings . . . . . . . . . . . . . . . . . . . . 26
Advanced Features
Titling a MiniDisc. . . . . . . . . . . . . . . . . . . . . . . . . . 27-30
Editing a Recorded MiniDisc . . . . . . . . . . . . . . . . 31-33
Listening through Another System . . . . . . . . . . . . . 34
References
Other Features and Caution. . . . . . . . . . . . . . . . . . . 35
MiniDisc System Limitations . . . . . . . . . . . . . . . . . . 36
Error Messages . . . . . . . . . . . . . . . . . . . . . . . . . . . 37-38
Troubleshooting . . . . . . . . . . . . . . . . . . . . . . . . . . 39-40
Maintenance . . . . . . . . . . . . . . . . . . . . . . . . . . . . . . . 40
Specifications . . . . . . . . . . . . . . . . . . . . . . . . . . . . 41-42
Thank you for purchasing this SHARP product. For the best performance, read this manual carefully. It will guide you
in operating your SHARP product.

01/10/5 180H_E_1.fm
E-2
MD-MT180H
ENGLISH
Important Introduction
-Special Notes/Accessories/Optional Accessories-
Special Notes
US and foreign patents licensed from Dolby Laboratories.
The AC adaptor supplied with the MD-MT180H must not
be used with other equipment.
When recording important selections, make a preliminary
test to ensure that the desired material is properly
recorded.
SHARP is not liable for damage or loss of your recording
arising from malfunction of this unit.
The letters in brackets contained in the model number
indicate the colour of the product only. Operation and
specifications are unaffected.
Accessories
Notes:
Optional Accessories
Battery case (AD-M18BC)
Car adaptor (AD-CA20X)
Cassette adaptor (AD-CT14)
Connection cable (for digital recording) (AD-M1DC)
Connection cable (for digital recording) (AD-M2DC)
Earphones x 1 AC Adaptor
(RADPA7057AWZZ) x
1
Connection Cable (for
analogue recording) x
1
Rechargeable Nickel-
Metal Hydride battery
(AD-N55BT) x 1
Battery Carrying
Case x 1
Parts and equipment mentioned in this operation manual other than those detailed above are not included.
The AC adaptor may be different from the one in the drawing.

01/10/5 180H_E_1.fm
E-3
MD-MT180H
ENGLISH
Important Introduction
-Names of Controls and Indicators-
Names of Controls and Indicators
Main unit
Reference page
1. Record/Track Mark Button . . . . . . . . . . . . . . 11, 22
2. Menu/Charge Button . . . . . . . . . . . . . 6, 12, 20, 26
3. Bass/Delete Button . . . . . . . . . . . . . . . . . . . 15, 28
4. Enter/Fast Play/Synchro Button . . . . . . 12, 17, 20
5. Volume/Cursor/Fast Forward/Fast Reverse/Record-
ing Level/Name Select Button . . . . . . .11, 14, 16, 27
6. Open Lever . . . . . . . . . . . . . . . . . . . . . . . . . . . . . . 9
7. Stop/Power Off/Hold Button . . . . . . . . . 12, 14, 15
8. Rechargeable Battery Cover . . . . . . . . . . . . . . . . 6
9. Play/Pause Button . . . . . . . . . . . . . . . . . . . . 12, 14
10. Battery Case Connection Terminals . . . . . . . . . . 8
11. 5 V DC Input Socket . . . . . . . . . . . . . . . . . . . . . . . 7
12. Optical/Line Input Socket . . . . . . . . . . . . . . . . . 10
13. Earphones/Line Output Socket . . . . . . . . . . 14, 34
12345
6
78
9
10 11 12 13

01/10/5 180H_E_1.fm
E-4
MD-MT180H
ENGLISH
Important Introduction
-Names of Controls and Indicators-
Display panel
Reference page
1. Level Meter . . . . . . . . . . . . . . . . . . . . . . . . . . . . . 11
2. Stereo Recording Indicator . . . . . . . . . . . . . . . . 18
3. Long-play/Recording Mode Indicator . . . . . . . . 18
4. Repeat Indicator . . . . . . . . . . . . . . . . . . . . . . . . . 17
5. Monaural Mode Indicator . . . . . . . . . . . . . . . . . . 18
6. Record Indicator . . . . . . . . . . . . . . . . . . . . . . . . . 11
7. Disc Mode Indicator
8. Synchro Recording Indicator . . . . . . . . . . . . . . . 20
9. Total Track Number Indicator . . . . . . . . . . . . . . . 24
10. Disc Name Indicator . . . . . . . . . . . . . . . . . . . . . . 24
11. TOC Indicator . . . . . . . . . . . . . . . . . . . . . . . . . . . . 12
12. Battery Indicator . . . . . . . . . . . . . . . . . . . . . . . . . 25
13. Random Indicator . . . . . . . . . . . . . . . . . . . . . . . . 17
14. Track Number Indicator . . . . . . . . . . . . . . . . . . . 24
15. Character/Time Information Indicator

01/10/5 180H_E_1.fm
E-5
MD-MT180H
ENGLISH
Important Introduction
-Precautions-
Precautions
Important
To avoid accidental electric shock or other possible
problems, observe the precautions listed below.
Do not disassemble or modify the unit.
Do not drop or subject the unit to shock.
Do not use the unit near open flames.
Do not spill liquid on the unit.
Do not use an external power supply, other than the 5V
DC supplied with this unit, as it may damage it.
SHARP is not responsible for damage due to improper
use. Refer all servicing to a SHARP authorised service
centre.
Storing the unit
Avoid using or leaving the unit in the following places.
Places exposed to direct sunlight for many hours (espe-
cially in cars with the doors and windows closed) or near
heaters. (The cabinet may deform, change colour or the
unit may malfunction.)
Places exposed to excessive dust.
Places exposed to water.
Places where temperatures are excessively high or low.
Places (bathrooms) where the humidity is extremely high.
Places with strong magnetic fields such as TVs or loud-
speakers.
Places exposed to vibration.
Places where sand can easily enter the inside of the unit
(beaches etc.).
If the unit is used near radio tuners or TVs, noise and/or
picture interference may result. If you experience these
problems, move the unit away from such devices.
Do not wear your earphones when you are crossing
streets or near traffic.
Do not use your earphones whilst driving a
motor vehicle, it may create a traffic haz-
ard and may be illegal. Remember to obey
all of the safety rules in your area.
Do not play the unit at a high volume.
Hearing experts advise against extended
listening at high volume levels.
If you experience ringing in your ears, reduce the volume
or discontinue use.
No naked flame sources, such as lighted candles, should
be placed on the apparatus.
Attention should be drawn to the environmental aspects of
battery disposal.
The apparatus is designed for use in moderate climate.
This portable MD should only be used within the range of
0°C - 40°C (32°F - 104°F).
It is not recommendable to put the
MiniDisc into a rear pocket, as this
may damage the product when sit-
ting.

01/10/5 180H_E_2.fm
E-6
MD-MT180H
ENGLISH
Power Source
-Using with the Rechargeable Battery-
Using with the Rechargeable Battery
Charging the rechargeable battery
When the rechargeable battery is used for the first time
or when you want to use it after a long period of disuse,
be sure to charge it fully.
After the rechargeable battery is charged or used, it
will get slightly warm. This is normal.
When the portable MD is turned on or operating, the
battery will not be charged.
For information about the battery life, see the battery
item in the "Specifications" on page 42.
Do not force the
battery cover
open too far.
AC 230V,
50/60Hz
To the DC IN
5V socket
Insert from
the – side.
1Insert the rechargeable battery.
A rechargeable battery other than the AD-N55BT
cannot be charged.
2Plug the AC adaptor into the wall socket, and
then insert the plug on the other end into the DC
IN 5V socket.
3Press the MENU/CHRG button.
The battery indicator will scroll, and battery will be-
gin charging.
Scrolling

01/10/5 180H_E_2.fm
E-7
MD-MT180H
ENGLISH
Power Source
-Using with the AC Adaptor-
About charging time
After about 3.5 hours have passed, " " will
go out. The battery is charged up to 90% if it is
completely discharged.
To charge the battery fully, continue charging for about 2
more hours. In this case, you do not need to press the
MENU/CHRG button. Even if the MENU/CHRG button is
pressed, " " will not appear.
Notes:
Caution:
Using with the AC Adaptor
Plug the AC adaptor into the wall socket, and then insert the
plug on the other end into the DC IN 5V socket.
Caution:
Insert the plugs firmly.
When the unit is not in use for extended periods, remove
the AC adaptor from the wall socket.
Note:
If power failure occurs whilst playing a disc using the AC
adaptor, disconnect it from the wall socket. Otherwise,
playback may start automatically when electricity
resumes.
Charge the battery within the
range of 5°C - 35°C (41°F - 95°F).
The unit can be left in the charg-
ing state after it is completed.
Carry the battery in the supplied
case. (Insert the side first.)
Use the specified battery AD-N55BT only. Do not
charge a battery (nickel-cadmium, alkaline, etc.) other
than that specified.
Do not remove the outer cover of
the rechargeable battery. It may
cause heat generation, fire, or ex-
plosion.
Do not dip the battery in water, do
not dispose of it in a fire, and do
not take it apart.
If the rechargeable battery terminal is dirty, charging
may not start. In such a case, wipe off the dirt with a
dry cloth.
Do not disassemble the battery.
AC 230V, 50/60Hz
To the DC IN 5V socket

01/10/5 180H_E_2.fm
E-8
MD-MT180H
ENGLISH
Power Source
-Using with the Alkaline Battery-
Using with the Alkaline Battery
If you use the separately available battery case (AD-
M18BC) and the supplied rechargeable battery at the
same time, the MD can play much longer than with only
one source of battery power.
Use one commercially available alkaline battery (LR6,
"AA" size).
When using the alkaline battery, be sure to insert the
rechargeable battery also.
Caution:
Whilst you are using the rechargeable battery and the
alkaline battery at the same time, do not remove either
of them. If you do, when the unit is in the play mode,
playback will stop. When in the recording mode, the
recorded contents will be erased, and the power may
be disconnected.
Do not replace the battery or the rechargeable battery
during operation.
Do not use rechargeable battery (nickel-cadmium
battery etc.) in the battery case.
If the unit is not used for a long period of time, remove
the battery. (Even if the power is turned off, the battery
will be drained slowly but continuously.)
2
1
RELEASE LOCK
Open
Press
Back of the
portable MD
1Open the case cover.
2Insert an alkaline battery into the battery case.
3Attach the battery case to the portable MD.

01/10/5 180H_E_2.fm
E-9
MD-MT180H
ENGLISH
Preparation
-Inserting a MiniDisc-
Inserting a MiniDisc
Notes:
Do not place the MiniDisc under the holder.
If any resistance is felt, do not force the MiniDisc into
the unit, as it may cause damage to the unit. If resis-
tance is felt, remove the MiniDisc and reload it.
The lid cannot be opened if "TOC" is displayed; refer
to the instruction on page 13.
Recording
prevented
Recordable
When you record on a MiniDisc,
check that the erase prevention
tab is set to the "Recordable"
position.
1Slide the OPEN lever to release the compart-
ment door.
2Lift it up.
3Insert a MiniDisc as shown.
4Close the compartment door.

01/10/5 180H_E_2.fm
E-10
MD-MT180H
ENGLISH
Preparation
-Connections-
Connections
You can record your favourite CDs or tapes to MD.
When recording, it is recommended to use the AC adaptor and also install the battery. Should the power failure occur, the power
source would be automatically switched to the battery.
DIGITAL OUT
LEFT
RIGHTLEFT
RIGHT
■
To connect to a stereo system with "LINE OUT" or "AUDIO OUT" sockets
(Analogue connection)
To the wall socket
Red : To Right
White : To Left
Supplied
connection
cable
■ To connect to a stereo system with a "DIGITAL OUT" or
"OPTICAL OUT" socket (Digital connection)
Compared to analogue connection recording,
it allows high-quality recording.
Some audio systems do not have a DIGITAL OUT socket.
Check before connecting.
If the audio system has only one pair of sockets, they are usually
for input only and recording via this connection is not possible.
AC
230V,
50/60Hz
Separately available
connection cable
(AD-M1DC)
To the DC IN
5V socket
To the LINE IN/
OPTICAL socket

01/10/11 180H_E_3.fm
E-11
MD-MT180H
ENGLISH
Basic Operation
-Recording-
Recording
Before recording
Cancel the hold mode.
The portable MD does not work whilst in the hold mode.
As for the details, see page 15.
1Press the REC button.
2Begin playback on the stereo system connected
to this portable MD.
3Press the REC LEVEL or button to adjust
the recording level.
Analogue recording
Adjust the recording level so that the maximum sound
volume from the source makes the reading swing
somewhere between -4 dB and 0 dB.
Level meter indicator
Digital recording
You can adjust the level in 1 dB increments between
+12 dB and -12 dB.
+12 dB to -12 dB
Once you adjust the digital recording level, the setting
is retained even after the recording stops. (For cancel-
lation instructions, see page 26.)
4Press the PAUSE button on the stereo system
to enter the playback pause mode.
Here you can search for the track to be recorded.

01/10/11 180H_E_3.fm
E-12
MD-MT180H
ENGLISH
Basic Operation
-Recording-
Notes:
Changing the volume level whilst recording does not affect
the recording.
You cannot adjust the bass level whilst recording.
Complete the operation within 7 seconds whilst selecting
the menus.
To interrupt recording
Press the button.
To resume recording, press the button again.
The track number will be increased by one each time
the recording is interrupted.
To stop recording
Press the :OFF/HOLD button.
Notes:
Whilst "TOC" appears, the MiniDisc recorded contents
have not yet been updated.
To prevent the new recording from being lost, it is not
possible to remove the MiniDisc whilst "TOC" is dis-
played.
To update the recorded contents of the Mini-
Disc
Press the :OFF/HOLD button whilst in the stop mode.
The power turns off after recorded contents have been
updated on the MiniDisc.
5Press the MENU/CHRG button repeatedly to select
"REC MODE".
6Press the ENTER/SYNC button.
7Press the MENU/CHRG button repeatedly to select
the recording mode (page 18).
8Press the ENTER/SYNC button.
The mode will be set automatically after 7 seconds
even if the ENTER/SYNC button is not pressed.
9Press the button to start the MiniDisc unit re-
cording.
10Begin playback on the stereo system, the output
will be recorded.
(2 times long recording)
(4 times long recording)
(Monaural recording)
(Stereo recording)
TOC display

01/10/11 180H_E_3.fm
E-13
MD-MT180H
ENGLISH
Basic Operation
-Recording-
Recording (continued)
About the TOC
After any recording or editing function, "TOC" (Table Of
Contents) is displayed. To finalise the recording or editing
function, turn the power off. During this process "TOC"
will flash and "TOC EDIT!" will be displayed. During any
recording or editing function, the MiniDisc unit lid is
locked, and the MiniDisc cannot be removed until the pro-
cess is finalised.
Warning:
If the power is removed (Battery/AC adaptor) whilst
"TOC" is displayed, the MiniDisc unit lid will remain
locked until the battery/main power is restored and the
unit is turned on. Your new recordings or edited changes
will be lost and your MiniDisc may become unusable.
Caution:
Whilst "TOC" or "TOC EDIT!" is displayed, follow the
instructions below.
Otherwise, tracks may not be recorded properly.
To prevent recorded MiniDiscs from being
erased accidentally
Slide the accidental erase prevention tab, located on the
side of the MiniDisc, in the direction indicated by the
arrow.
The MiniDisc will then be protected against accidental
erasure.
To add a recording to such a MiniDisc, slide the acciden-
tal erase prevention tab back to its original position.
Helpful tip when attaching a label
When attaching a label to an MiniDisc cartridge, be sure
to note the following. If the label is not attached properly,
the MiniDisc may jam inside the unit and you may not be
able to remove it.
- Do not jerk or bump the unit.
- Do not unplug the AC adaptor.
- Do not remove the battery.
- Do not subject the unit to shock.
If the label peels off or partially lifts
away, replace it with a new one.
Do not put a new label on top of an ex-
isting one.
Attach the label only in the specified
location.
Recording
prevented
Recordable
Other manuals for MD-MT180H
2
Table of contents
Other Sharp Mini Disc Recorder manuals

Sharp
Sharp MD-MS200H User manual

Sharp
Sharp MD-MT20H User manual

Sharp
Sharp MD-MT180H User manual

Sharp
Sharp IM-DR420H User manual

Sharp
Sharp IM-DR420H User manual

Sharp
Sharp IM-DR410E User manual

Sharp
Sharp MD-R3 User manual

Sharp
Sharp MD-MS721H User manual

Sharp
Sharp MD-DR370H User manual

Sharp
Sharp MD-MT877S User manual

Sharp
Sharp IM-DR400E User manual

Sharp
Sharp MD-SR50H User manual

Sharp
Sharp MD-MT821H Quick start guide

Sharp
Sharp MD-MS701W User manual

Sharp
Sharp MD-MS722H User manual

Sharp
Sharp MD-MT200H User manual

Sharp
Sharp MD-MT831H User manual

Sharp
Sharp MD-MT88H User manual

Sharp
Sharp MD-MT80W User manual

Sharp
Sharp IM-DR420H User manual