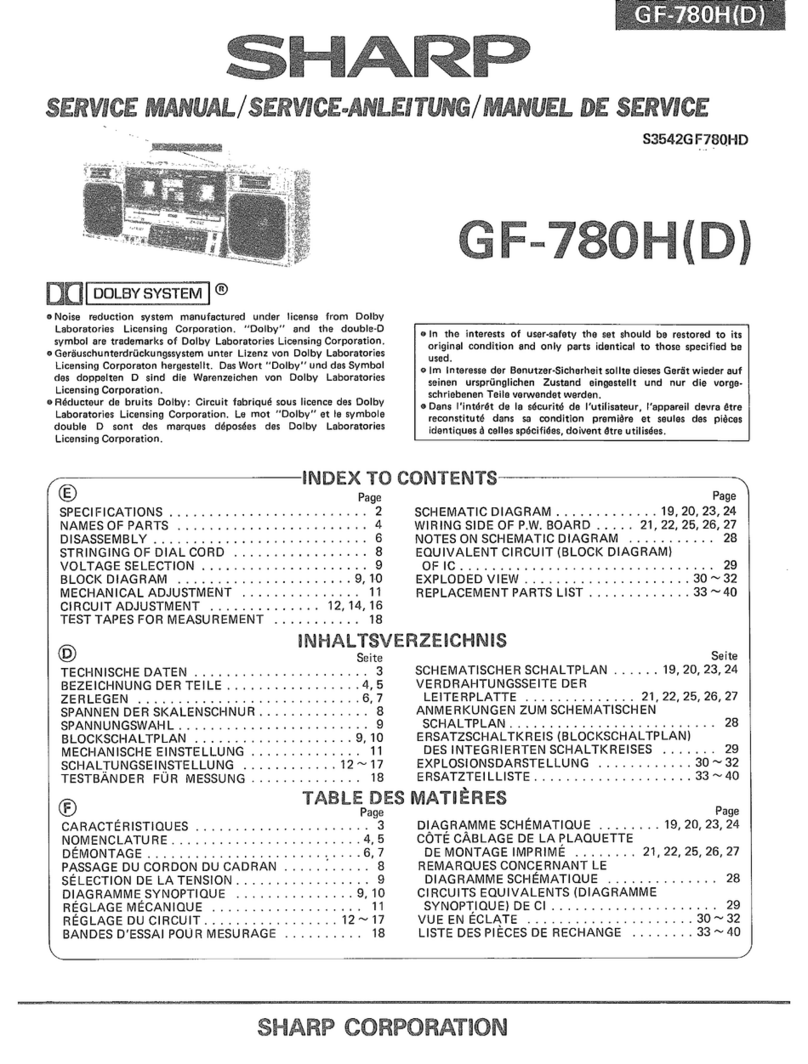
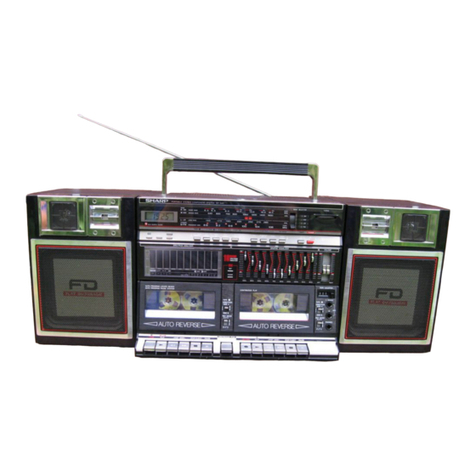
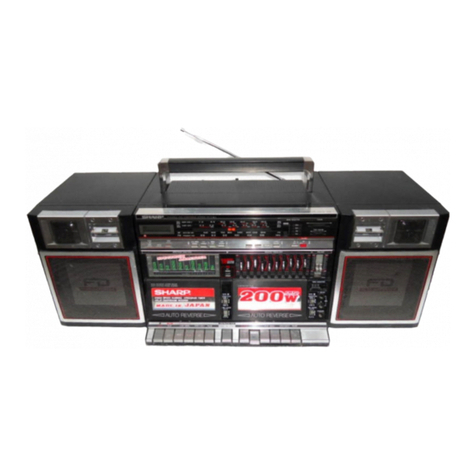
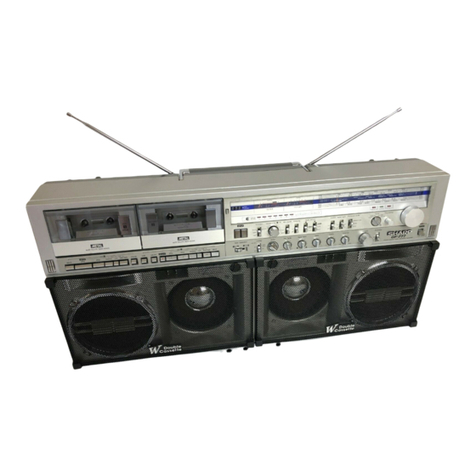
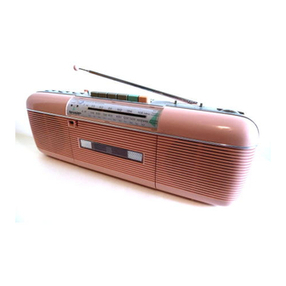
Sharp WF-1100W MK2 User manual

2008/Octo- WF-1100W(MK2)_FRONT
Favor consultar as páginas P-1 a P-16.
Please refer to pages E-1 to E-16.
Se reporter aux pages F-1 à F-16.
Thank you for purchasing this SHARP product. To obtain the best
performance from this product, please read this manual carefully.
It will guide you in operating your SHARP product.
Nous vous remercions d’avoir porté votre choix sur ce produit
SHARP. Pour en tirer le meilleur parti, veuillez lire ce mode d’emploi
très attentivement. Il vous guidera dans l'utilisation de votre
produit SHARP.
Parabéns por comprar este produto SHARP. Para obter o melhor
desempenho deste produto, por favor leia este manual
cuidadosamente. Ele mostrará como operar seu produto SHARP.
PORTABLE STEREO
MODEL
MODÈLE
MODELO
WF-1100W MK2
COMPONENT SYSTEM
SYSTÈME STÉRÉO PORTABLE
OPERATION MANUAL
MODE D’EMPLOI
MANUAL DE OPERAÇÃO
SISTEMA STEREO PORTÁTIL

E-1
ENGLISH
2008/November/6 WF-1100W_MK2-EN
WF-1100W
MK2
ENGLISH
General Information
Special notes
WARNINGS:
Accessory
Note:
Only the above accessory are included.
Contents
Page
General Information
Precautions . . . . . . . . . . . . . . . . . . . . . . . . . . . . . . . . . . . . . . . . . . 2
Controls and indicators . . . . . . . . . . . . . . . . . . . . . . . . . . . . . . . . 3
Preparation for Use
System connections . . . . . . . . . . . . . . . . . . . . . . . . . . . . . . . . 4 - 6
Basic Operation
Sound control . . . . . . . . . . . . . . . . . . . . . . . . . . . . . . . . . . . . . . . . 7
Radio
Listening to the radio . . . . . . . . . . . . . . . . . . . . . . . . . . . . . . . . . . 8
Tape Playback
Listening to a cassette tape (TAPE 1 or TAPE 2) . . . . . . . 8 - 10
Tape Recording
Recording to a cassette tape . . . . . . . . . . . . . . . . . . . . . . 10 - 12
Advanced Feature
Enhancing your system . . . . . . . . . . . . . . . . . . . . . . . . . . . 12 - 14
References
Troubleshooting chart . . . . . . . . . . . . . . . . . . . . . . . . . . . . 14 - 15
Maintenance . . . . . . . . . . . . . . . . . . . . . . . . . . . . . . . . . . . . . . . . 15
Specifications . . . . . . . . . . . . . . . . . . . . . . . . . . . . . . . . . . . . . . . 16
When the FUNCTION switch is set at STAND-BY position, mains
voltage is still present inside the unit.
This unit contains no user serviceable parts. Never remove covers
unless qualified to do so. This unit contains dangerous voltages,
always remove mains plug from the socket before any service
operation and when not in use for a long period.
To prevent fire or shock hazard, do not expose this appliance to
dripping or splashing. No objects filled with liquids, such as vases,
shall be placed on the apparatus.
AC power lead 1

E-2
ENGLISH
WF-1100W
1
2008/November/6 WF-1100W_MK2-EN
MK2
General Information
Precautions
General
Do not place anything on top of the unit.
Do not expose the unit to moisture, to temperatures higher than
60˚C (140˚F) or to extremely low temperatures.
If your system does not work properly, disconnect the AC power
lead from the wall socket. Plug the AC power lead back in, and
then turn on your system.
In case of an electrical storm, unplug the unit for safety.
Hold the AC power plug by the head when removing it from the
wall socket, as pulling the lead can damage internal wires.
The AC power plug/AC power input socket is used as a
disconnect device and shall always remain readily operable.
Do not remove the outer cover, as this may result in electric shock.
Refer internal service to your local SHARP service facility.
The ventilation should not be impeded by covering the ventilation
openings with items, such as newspapers, tablecloths, curtains,
etc.
No naked flame sources, such as lighted candles, should be
placed on the apparatus.
Attention should be drawn to the environmental aspects of battery
disposal. The apparatus is designed for used in moderate
climates.
This unit should only be used within the range of 5˚C - 35˚C
(41˚F - 95˚F).
Warning:
The voltage used must be the same as that specified on this unit.
Using this product with a higher voltage other than that which is
specified is dangerous and may result in a fire or other type of
accident causing damage. SHARP will not be held responsible for
any damage resulting from use of this unit with a voltage other than
that which is specified.
Volume control
The sound level at a given volume setting depends on speaker
efficiency, location and various other factors. It is advisable to avoid
exposure to high volume levels. Do not turn the volume on full at
switch on and listen to music at moderate levels. Excessive sound
pressure from earphones and headphones can cause hearing loss.
Condensation
Sudden temperature changes, storage or operation in an extremely
humid environment may cause condensation inside the cabinet
(tape heads, etc.) or on the transmitter on the remote control.
Condensation can cause the unit to malfunction. If this happens,
leave the power on with no cassette in the unit until normal playback
is possible (about 1 hour). Wipe off any condensation on the
transmitter with a soft cloth before operating the unit.
Please ensure that the equipment is
positioned in a well-ventilated area
and ensure that there is at least
10 cm (4") of free space along the
sides, top and back of the
equipment.
Use the unit on a firm, level surface free from vibration.
Keep the unit away from direct sunlight, strong magnetic fields,
excessive dust, humidity and electronic/electrical equipment
(home computers, facsimiles, etc.) which generate electrical
noise.
10 cm
(4")
10 cm (4")

E-3
ENGLISH
WF-1100W
2008/November/6 WF-1100W_MK2-EN
MK2
General Information
Controls and indicators
Front panel
Reference page
1.
(TAPE 1) Cassette Compartment . . . . . . . . . . . . . . . . . 8, 9, 11
2.
Headphone Socket . . . . . . . . . . . . . . . . . . . . . . . . . . . . . . . . . 14
3.
Mixing Microphone Socket . . . . . . . . . . . . . . . . . . . . . . . . . . 13
4.
Built-in Microphone . . . . . . . . . . . . . . . . . . . . . . . . . . . . . . . . 11
5.
Extra Bass Control . . . . . . . . . . . . . . . . . . . . . . . . . . . . . . . . . . 7
6.
Graphic Equaliser Controls . . . . . . . . . . . . . . . . . . . . . . . . . . . 7
7.
Power/(TAPE 2) Play Direction Indicators . . . . . . . . . . . . . 8, 9
8.
Function Selector Switch . . . . . . . . . . . . . . . . . . . . 8, 9, 11, 13
9.
Volume Control . . . . . . . . . . . . . . . . . . . . . . . . . . . . . . . 7, 13, 14
10.
Surround Switch . . . . . . . . . . . . . . . . . . . . . . . . . . . . . . . . . . . . 7
11.
Surround Indicator . . . . . . . . . . . . . . . . . . . . . . . . . . . . . . . . . . 7
12.
FM Stereo Indicator . . . . . . . . . . . . . . . . . . . . . . . . . . . . . . . . . 8
13.
Fine Tuning Control . . . . . . . . . . . . . . . . . . . . . . . . . . . . . . . . . 8
14.
Dubbing Speed/Built-in Microphone/
FM Mode Switch . . . . . . . . . . . . . . . . . . . . . . . . . . . 8, 11, 12, 13
15.
Tuning Control . . . . . . . . . . . . . . . . . . . . . . . . . . . . . . . . . . 8, 11
16.
Band Selector Switch . . . . . . . . . . . . . . . . . . . . . . . . . . . . . . . . 8
17.
(TAPE 2) Cassette Compartment . . . . . . . . . . . . . 9, 10, 11, 13
18.
(TAPE 1) Record Button . . . . . . . . . . . . . . . . . . . . . . 11, 12, 13
19.
(TAPE 1) Play Button . . . . . . . . . . . . . . . . . . . . . . . . 8, 9, 10, 11
20.
(TAPE 1) Rewind Button . . . . . . . . . . . . . . . . . . . . . . . . . . . 8, 9
21.
(TAPE 1) Fast Forward Button . . . . . . . . . . . . . . . . . . . . . . 8, 9
22.
(TAPE 1) Stop/Eject Button . . . . . . . . . . . . . . . . . . . . . . 8, 9, 10
23.
(TAPE 1) Pause Button . . . . . . . . . . . . . . . . . . . . . . 8, 9, 10, 11
24.
(TAPE 2) Reverse Mode Button . . . . . . . . . . . . . . . . . . . . 9, 10
25.
(TAPE 2) Play Button . . . . . . . . . . . . . . . . . . . . . . . 9, 10, 11, 13
26.
(TAPE 2) Fast Wind Buttons . . . . . . . . . . . . . . . . . . . . . . . . . . 9
27.
(TAPE 2) Stop/Eject Button . . . . . . . . . . . . . . . . . . . . . . . . 9, 10
28.
(TAPE 2) Direction Button . . . . . . . . . . . . . . . . . . . . . . 9, 10, 11
Rear panel
Reference page
1.
FM/SW Telescopic Rod Aerial . . . . . . . . . . . . . . . . . . . . . . . . . 8
2.
AUX IN Sockets . . . . . . . . . . . . . . . . . . . . . . . . . . . . . . . . . . . 12
3.
Beat Cancel Switch . . . . . . . . . . . . . . . . . . . . . . . . . . . . . . . . 11
4.
Speaker Terminals . . . . . . . . . . . . . . . . . . . . . . . . . . . . . . . . . . 4
5.
AC Power Input Socket. . . . . . . . . . . . . . . . . . . . . . . . . . . . . . . 5
6.
AC Voltage Selector . . . . . . . . . . . . . . . . . . . . . . . . . . . . . . . . . 5
7.
Battery Compartment . . . . . . . . . . . . . . . . . . . . . . . . . . . . . . . . 6
Speaker system
12345 6 7 8 9101112 13 14 15 16 17
18 19 20 21 22 23 24 25 26 27 28
123 456
7
1. Piezo
2
.
Bass Reflex Duct
3. Woofer
4. Speaker Release
Lever
5. Speaker Wire 5
4
1
2
3

E-4
ENGLISH
WF-1100W
1
2008/November/6 WF-1100W_MK2-EN
MK2
Preparation for Use
System connections
Detachable speakers
Mounting the speakers to the main unit
Fit the grooves of the speaker to the guides on the main unit, and
then slide the speaker all the way down to lock it in place.
Removing the speakers from the main unit
Push the RELEASE lever as shown in the illustration to unlock the
speaker, and then lift up the speaker to remove it from the main unit.
Speaker connection
Connect each speaker wire to the SPEAKER terminals as shown.
Use speakers with an impedance of 6 ohms or more, as lower
impedance speakers can damage the unit.
Caution:
Note:
The speaker grille is not removable.
Set the FUNCTION switch to STAND-BY before connecting or
disconnecting the speakers.
Connect the black wire to the minus (–) terminal, and the red wire
to the plus (+) terminal.
Do not mix the right channel and left channel wiring when
connecting the speakers to the unit.
Do not let the bare speaker wires touch each other as this may
damage the amplifier and/or speakers.
Do not stand or sit on the speakers. If the speakers fall or collapse,
you may be injured.
1 2 3
Right speaker Left speaker
RedRed
Black
SPEAKER (6Ω)
RIGHT LEFT

E-5
ENGLISH
WF-1100W
2008/November/6 WF-1100W_MK2-EN
MK2
Preparation for Use
System connections (continued)
AC power connection
AC plug adaptor
In areas (or countries) where an AC socket as shown in illustration
2
is used, connect the unit using the AC plug adaptor supplied with
the unit, as illustrated. The AC plug adaptor is not included in areas
where the AC wall socket and AC power plug can be directly
connected (see illustration
1
).
Notes:
If the unit will not be used for a long period of time, remove the AC
power lead from the AC socket.
Connection of the AC power lead to the unit disconnects the
batteries.
Never use a power lead other than the one supplied. Use of a
power lead other than the one supplied may cause an electric
shock or fire.
If a humming noise occurs, turn the power plug upside down
where it is connected to the AC power input socket on the unit.
110-127/220-240 V
50/60 Hz
AC 220V
- 240V
AC 110V
- 127V
AC 220V
- 240V
AC 110V
- 127V
1
2
To AC INPUT
To the wall socket
VOLTAGE
SELECTOR
VOLTAGE
SELECTOR
Check the setting of the AC voltage selector located on the rear
panel before plugging the unit into a wall socket. If necessary, adjust
the selector to correspond to the AC power voltage used in your
area.
Selector adjustment:
Slide the selector with a screwdriver to the appropriate voltage
number (AC 110 - 127 V or AC 220 - 240 V).

E-6
ENGLISH
WF-1100W
1
2008/November/6 WF-1100W_MK2-EN
MK2
Preparation for Use
Operation with batteries
Precautions for battery use:
Insert the batteries according to the direction indicated on the rear
panel. Installing the batteries incorrectly may cause the unit to
malfunction.
Remove the batteries if they are weak or if the unit will not be used
for long periods of time. This will prevent potential damage due to
battery leakage.
Replace all old batteries with new ones at the same time.
Do not mix old and new batteries.
Caution:
Do not use rechargeable batteries (nickel-cadmium battery, etc.).
Batteries (battery pack or batteries installed) shall not be exposed
to excessive heat such as sunshine, fire or the like.
Battery replacement:
Replace the batteries when they become weak and/or recording or
playback is impaired. This may occur even though radio broadcasts
are audible.
1Disconnect the AC power lead, and remove the battery
compartment cover.
Connection of the AC or DC power lead to the unit disconnects
the batteries.
2Insert 10 “D”, size batteries (UM/SUM-1, R20, HP-2 or similar)
into the battery compartment.
When inserting or removing the batteries 5and !, push them
towards the ·battery terminals.
Batteries are not included.
3Replace the battery compartment cover.
1
2
3
5
4
7
6
9
10
8

E-7
ENGLISH
WF-1100W
2008/November/6 WF-1100W_MK2-EN
MK2
Basic Operation
Sound control
Volume
Rotate the VOLUME control towards MAX to increase the volume
and towards MIN to decrease the volume.
Extra bass (X-BASS)
Move the X-BASS control towards MAX to emphasise bass sound.
The centre position represents a normal setting.
Graphic equaliser
Move the GRAPHIC EQUALIZER control for any frequency towards
+10 to boost the level for that frequency, and towards -10 to lower the
level.
Surround
“Surround” refers to an acoustical effect similar to the ambience of a
concert hall, where the listener has the feeling of being “surrounded”
by the sound.
Note:
The surround effect cannot be obtained from monaural sound
signals.
Volume X-BASS
Graphic equaliser Surround
V
O
L
U
M
E
MIN
XAM
MAX
MIN
X-BASS
400Hz 1kHz 4kHz 10kHz
+10
+10
-10
-10
-10
-10
+10
+10
-10
-10
00
SURROUND
ON OFF
To enjoy the surround effect:
Set the SURROUND switch to ON.
(Continued)
SURROUND
indicator

E-8
ENGLISH
WF-1100W
1
2008/November/6 WF-1100W_MK2-EN
MK2
Tape Playback
Listening to the radio
Tuning
After use:
Set the FUNCTION switch to STAND-BY.
Listening to a cassette tape
(TAPE 1 or TAPE 2)
Tape 1 playback (one tape side only)
Fast forward/rewind:
To advance the tape, press the STOP/EJECT button, then press the
F FWD button. To rewind, press the STOP/EJECT button, then press
the REWIND button.
1Set the FUNCTION switch to RADIO.
The POWER indicator will light up.
2Set the BAND SELECTOR switch to FM, MW, SW1 or SW2.
3Use the TUNING control to tune in the desired station. The
FINE TUNING control functions only for SW1 and SW2
bands.
4To receive an FM stereo transmission, set the FM MONO/
FM STEREO switch to FM STEREO.
The FM STEREO indicator lights up when an FM broadcast
is in stereo.
5If the FM reception is weak, set the FM MONO/FM STEREO
switch to FM MONO.
Although the reception changes to monaural, the sound
becomes clearer.
POWER
FINE
TUNING
TUNING
FM
STEREO
BAND
SELECTOR
FM MONO/
FM STEREO
FUNCTION
SW1/SW2MW/SW1
FM
Aerial adjustment
Before playback:
For playback, use normal or low-noise tapes for
the best sound. (Metal or CrO2tapes are not
recommended.)
Do not use C-120 tapes or poor-quality tapes, as
they may cause malfunctions.
Before loading a tape into the cassette compartment,
tighten the slack with a pen or a pencil.
1Set the FUNCTION switch to TAPE.
2Press the STOP/EJECT button and load a cassette into the
TAPE 1 cassette compartment.
3Press the PLAY button of TAPE 1.
The POWER indicator will light up.
REWIND
F FWD PAUSE
STOP/EJECT
PLAY
TAPE 1
POWER
FUNCTION

E-9
ENGLISH
WF-1100W
2008/November/6 WF-1100W_MK2-EN
MK2
Tape Playback
Listening to a cassette tape (TAPE 1 or TAPE 2) (continued)
Notes:
When the end of tape is reached during the fast forward and
rewind mode, the unit will continue running in fast forward/rewind
state and the F FWD or REWIND button will not be released.
Press the STOP/EJECT button.
Auto stop system is only activated during playback and recording
mode.
To interrupt playback:
Press the PAUSE button during playback.
Press the PAUSE button again to resume playback.
To stop playback:
Press the STOP/EJECT button.
Precautions:
Be sure not to press the PLAY and REWIND buttons
simultaneously, or the tape will become damaged.
Before changing from one tape operation to another, press the
STOP/EJECT button.
If TAPE 1 and TAPE 2 are played simultaneously, only the sound
from TAPE 2 will be audible.
The TAPE 2 DIRECTION indicator refers to the travel direction for
TAPE 2 [side A(1) or side B(2)]. It is not related to the movement
of TAPE 1.
Tape 2 playback (both tape sides)
To change the side of tape:
Press the DIRECTION switch during playback.
To listen to side A(1), the TAPE 2 DIRECTION “A” indicator will be
illuminated.
To listen to side B(2), the TAPE 2 DIRECTION “B” indicator will be
illuminated.
To fast wind the tape:
Press the STOP/EJECT button, then the FAST button ( or ) as
desired.
1Set the FUNCTION switch to TAPE.
2Press the STOP/EJECT button and load a cassette into the
TAPE 2 cassette compartment.
3Set the REVERSE MODE switch to to listen to each
tape side once, or for endless repeat of the entire tape.
When the setting of the REVERSE MODE switch is
selected, playback always stops at the end of side B(2).
4Press the PLAY button of TAPE 2.
The POWER indicator will light up.
STOP/EJECT
PAUSE
PLAY
DIRECTION
STOP/EJECTPLAY
FAST
REVERSE
MODE
POWER/TAPE 2
DIRECTION
TAPE 1 TAPE 2
FUNCTION

E-10
ENGLISH
WF-1100W
1
2008/November/6 WF-1100W_MK2-EN
MK2
Tape Recording
Caution:
When the end of the tape is reached during fast forward/rewind
operation, the tape will stop, but the motor will continue to rotate.
Press the STOP/EJECT button immediately.
To stop playback:
Press the STOP/EJECT button.
Continuous playback (TAPE 2 to TAPE 1)
Note:
When in the continuous play mode, pressing the STOP/EJECT
button of TAPE 2 will start TAPE 1 automatically.
Recording to a cassette tape
1Press the STOP/EJECT button and load cassettes into the
TAPE 1 and TAPE 2 cassette compartments.
2Set the REVERSE MODE switch to .
The continuous playback function will not operate when the
REVERSE MODE switch is set to .
3Press the PLAY button of TAPE 2.
4Press the PAUSE button of TAPE 1.
5Press the PLAY button of TAPE 1.
When TAPE 2 stops at the end of the tape, the PLAY button
of TAPE 2 and the PAUSE button of TAPE 1 will be
automatically released, and TAPE 1 will start playing.
6Select side A(1) or side B(2) on TAPE 2 with the DIRECTION
switch.
When playback begins from side A(1) on TAPE 2, the
playback sequence will be as follows:
TAPE 2 side A(1) →side B(2) →TAPE 1 side A(1) →stop.
When playback begins from side B(2) on TAPE 2, the
playback sequence will be as follows:
TAPE 2 side B(2) →TAPE 1 side A(1) →stop.
Before recording:
When recording important selections, make a preliminary test to
ensure that the desired material is properly recorded.
SHARP is not liable for damage or loss of your recording arising
from malfunction of this unit.
The volume and sound controls can be adjusted with no effect
on the recorded signal (Variable Sound Monitor).
For recording, use only normal tapes. Do not use metal or
CrO2tapes.
Erase-prevention tab of cassette tapes:
When recording on a cassette tape, make sure that the
erase-prevention tabs are not removed. Cassettes have
removable tabs that prevent accidental recording or erasing.
To protect the recorded sound, remove the tab after recording.
Cover the tab hole with adhesive tape to record on the tape
without the tab.
Tab for side B Tab for side A
Side A

E-11
ENGLISH
WF-1100W
2008/November/6 WF-1100W_MK2-EN
MK2
Recording to a cassette tape (continued)
Recording from the radio
Beat cancel switch:
If a whilstling noise occurs when recording from an MW, SW1 or
SW2 station, set the BEAT CANCEL switch to A, B or C, whichever
gives the best reception.
Recording from the built-in microphone
Notes:
Do not connect anything to the MIX MIC socket.
Monitoring of the recording is not possible.
Recording from the built-in microphone is not in stereo.
Dubbing from tape to tape
1Tune in to the desired station (See page 8).
2Load a cassette into the TAPE 1 cassette compartment.
3Press the PAUSE button of TAPE 1.
4Press the RECORD button of TAPE 1, which also engages
the PLAY button.
5Press the PAUSE button of TAPE 1 again to begin
recording.
RECORD
PAUSE
PLAY
DIRECTION
PLAY
AC
B
BEAT CANCEL
FUNCTION
FINE TUNING
TUNING
DUBBING SPEED
BUILT-IN
MIC
TAPE 1 TAPE 2
1Set the FUNCTION switch to TAPE.
2Set the DUBBING SPEED switch to MIC.
3Load a cassette into the TAPE 1 cassette compartment.
4Press the PAUSE button of TAPE 1.
5Press the RECORD button of TAPE 1, which also engages
the PLAY button.
6Press the PAUSE button again to begin recording.
1Set the FUNCTION switch to TAPE.
2Load a pre-recorded cassette into the TAPE 2 cassette
compartment. Insert a blank tape into the TAPE 1 cassette
compartment.
3Set the DUBBING SPEED switch to NORMAL for normal
speed dubbing, HIGH for high-speed dubbing.
4Press the PAUSE of TAPE 1.
5Press the RECORD button of TAPE 1, which also engages
the PLAY button.
6Choose either side A(1) or side B(2) of TAPE 2 with the
DIRECTION switch.
7Press the PLAY button of TAPE 2.
The PAUSE button of TAPE 1 will be released automatically
and dubbing from TAPE 2 to TAPE 1 will begin
(Synchronous dubbing start).
Tape Recording

E-12
ENGLISH
WF-1100W
1
2008/November/6 WF-1100W_MK2-EN
MK2
Advanced Feature
Notes:
Do not change the setting of the DUBBING SPEED switch during
dubbing.
Do not connect anything to the MIX MIC socket.
Erasing recorded tapes
Note:
Do not connect anything to the MIX MIC socket.
Enhancing your system
Set the FUNCTION switch to STAND-BY before connecting or
disconnecting any component.
1Load the tape to be erased into TAPE 1 cassette
compartment.
2Set the FUNCTION switch to TAPE.
3Set the DUBBING SPEED switch to HIGH or NORMAL.
Check to ensure that TAPE 2 is out of operation.
4Press the RECORD button of TAPE 1 to begin erasing.
CD player
AUX
IN L
R

E-13
ENGLISH
WF-1100W
2008/November/6 WF-1100W_MK2-EN
MK2
Advanced Feature
Enhancing your system (continued)
AUX IN
To listen to or record signals from external units such as CD players.
Notes:
To prevent noise and interference when using the tuner, turn off
the power to your CD player.
To prevent hum interference, do not place this unit near television
receivers.
Mixing from a microphone and TAPE
To listen to or record mixed signals from an external microphone and
TAPE 2.
Notes:
Place the microphone about 10 - 15 cm (4 - 6") away from the
source.
If howling occurs, lower the volume or move the microphone as far
as possible from the speaker.
To record the microphone signals only, load a cassette into the
TAPE 1 cassette compartment, set the FUNCTION switch to
TAPE and the DUBBING SPEED switch to NORMAL. Then, press
the RECORD button.
Caution:
When not using the microphone, remove the microphone plug.
1Use an RCA lead to connect the desired external unit to the
AUX IN sockets.
(red →→
→→ right channel, white →→
→→ left channel)
2Set the FUNCTION switch to AUX.
3Operate the CD player or other external unit.
4To record the sound from the external unit, perform steps
2 - 5 of the “Recording from the radio” section on page 11.
MIX MIC
PLAY
RECORD
DUBBING
SPEED
VOLUME
FUNCTION
1To protect the speakers from shock noise and to avoid
disturbing noises, set the VOLUME control to minimum.
Be sure that the microphone has a 3.5 mm (1/8") diameter
plug, and is of 600 ohms impedance: if not, use an
appropriate adaptor.
2Connect the microphone plug to the MIX MIC socket.
3Set the FUNCTION switch to TAPE.
4Set the DUBBING SPEED switch to NORMAL.
Mixing recording is not possible if the DUBBING SPEED
switch is set to HIGH or MIC.
5Load a blank tape into the TAPE 1 cassette compartment
for recording or insert a pre-recorded cassette into the
TAPE 2 cassette compartment.
6Adjust the volume of the audio source and the microphone
using the VOLUME control.
7For mixing playback, press the PLAY button of TAPE 2. For
mixing recording, press the PLAY button of TAPE 2 and
RECORD button of TAPE 1.

E-14
ENGLISH
WF-1100W
1
2008/November/6 WF-1100W_MK2-EN
MK2
References
Headphones
Before plugging in or unplugging the headphones, reduce the
volume.
Be sure your headphones have a 3.5 mm (1/8") diameter plug and
impedance between 16 and 50 ohms. The recommended
impedance is 32 ohms.
Plugging in the headphones disconnects the speakers
automatically. Adjust the volume using the VOLUME control.
Caution:
Do not turn the volume on to full at switch on and listen to music
at moderate levels. Excessive sound pressure from earphone and
headphone can cause hearing loss.
Troubleshooting chart
Many potential problems can be resolved by the owner without
calling a service technician.
If something is wrong with this product, check the following before
calling your authorised SHARP dealer or service centre.
General
Tuner
PHONES
Symptom Possible cause
When a button is pressed,
the unit does not respond.
Set the unit to the power stand-
by mode and then turn it back on.
No sound is heard. Is the volume level set to “0”?
Are the headphones connected?
Are the speaker wires
disconnected?
Symptom Possible cause
The radio makes unusual
noises continuously.
Is the unit placed near the TV or
computer?
Is the FM aerial placed properly?
Move the aerial away from the
AC power lead if it is located
nearby.

E-15
ENGLISH
WF-1100W
2008/November/6 WF-1100W_MK2-EN
MK2
References
Troubleshooting chart (continued)
Cassette deck
If problem occurs
When this product is subjected to strong external interference
(mechanical shock, excessive static electricity, abnormal supply
voltage due to lightning, etc.) or if it is operated incorrectly, it may
malfunction.
If such a problem occurs, do the following:
1 Set the unit to the stand-by mode and turn the power on again.
2 If the unit is not restored in the previous operation, unplug and
plug in the unit, and then turn the power on.
Maintenance
Internal care
Dirty heads, capstans or pinch rollers can cause poor sound and
tape jams. Clean these parts with a cotton swab moistened with
commercial head/pinch roller cleaner or isopropyl alcohol.
After long use, the deck’s heads and capstans may become
magnetised, causing poor sound. Demagnetise these parts once
every 30 hours of playing/recording time by using a commercial
tape head demagnetiser. Read the demagnetiser’s instructions
carefully before use.
External care
Periodically wipe the cabinet with a soft cloth and a diluted soap
solution, then wipe with dry cloth.
Do not use chemically treated cleaning cloths or other chemicals.
Symptom Possible cause
Cannot record. Is the erase-prevention tab
removed?
Cannot record tracks with
proper sound quality.
Is it a normal tape? (You cannot
record on a metal or CrO2tape.)
Cannot erase completely.
Sound skipping. Is there slack in the tape?
Cannot hear treble. Is the tape stretched?
Sound fluctuation. Are the capstans, pinch rollers,
or heads dirty?
Cannot remove the tape. If a power failure occurs during
playback, the heads remain
engaged with the tape. Do not
open the compartment with great
force.
TAPE 1
TAPE 2

E-16
ENGLISH
WF-1100W
1
2008/November/6 WF-1100W_MK2-EN
MK2
References
Specifications
As part of our policy of continuous improvement, SHARP reserves
the right to make design and specification changes for product
improvement without prior notice. The performance specification
figures indicated are nominal values of production units. There may
be some deviations from these values in individual units.
General
Speaker section
Radio
Tape recorder
Power source AC 110 - 127/220 - 240 V ~ 50/60 Hz
DC 15 V , (UM/SUM-1, HP-2 or R20) x
10
Power consumption
32 W
Output power PMPO: 200 W (Total) (AC operation)
MPO: 50 W (25 W + 25 W) (AC operation,
10% T.H.D)
RMS: 25 W (12.5 W + 12.5 W)
(AC operation,10% T.H.D)
Output terminal Headphones: 16 - 50 ohms (recommended:
32 ohms)
Input terminals Mixing Microphone: 600 ohms
AUX IN: 350 mV/47 kohms
Dimensions Width: 300 mm (11-13/16")
Height: 240 mm (9-29/64")
Depth: 220 mm (8-11/16")
Weight 3.9 kg (8.6 lbs.) without batteries
Type 2-way type
Speakers 12 cm (4-3/4") Free-edge + Piezo
Speaker x 2
Maximum input
power 25 W
Rated input power 12.5 W
Impedance 6 ohms
Dimensions Width: 235 mm (9-1/4")
Height: 262 mm (10-5/16")
Depth: 220 mm (8-11/16")
Weight 1.6 kg (3.5 lbs.)/each
...
Frequency range FM: 88 - 108 MHz
SW1: 2.3 - 7.3 MHz
SW2: 7.3 - 22 MHz
MW: 540 - 1600 kHz
Frequency response 60 - 10,000 Hz (Normal tape)
Signal/noise ratio 40 dB
Wow and flutter 0.15% (WRMS)
Motor DC 9 V electric governor
Bias system AC bias
Erase system Magnet erase

2008/Octo-
MEMO/MÉMORANDUM/MEMORANDO

2008/Octo-
MEMO/MÉMORANDUM/MEMORANDO

2008/July/24 WF-1100W_MK2_BACK
08E R MW 1
92L87511000101
Table of contents
Other Sharp Portable Stereo System manuals

Sharp
Sharp QT-CD132H User manual

Sharp
Sharp QT-CD111H User manual

Sharp
Sharp GX-M10H(OR) User manual

Sharp
Sharp WF-2100W User manual

Sharp
Sharp QT-UH4H User manual

Sharp
Sharp GX-BT9 User manual

Sharp
Sharp GF-777 Installation instructions

Sharp
Sharp ZC-D830H User manual

Sharp
Sharp GX-M10H(OR) User manual

Sharp
Sharp WF-940H User manual

Sharp
Sharp GF-9696 User manual

Sharp
Sharp QT-CH300H Quick start guide

Sharp
Sharp WF-T380H User manual

Sharp
Sharp WF-939Z User manual

Sharp
Sharp GX-M10 (OR) User manual

Sharp
Sharp QT-50Z User manual

Sharp
Sharp GF-9000H User manual

Sharp
Sharp WQ-740W User manual

Sharp
Sharp WF-A500H User manual

Sharp
Sharp GF-320A User manual