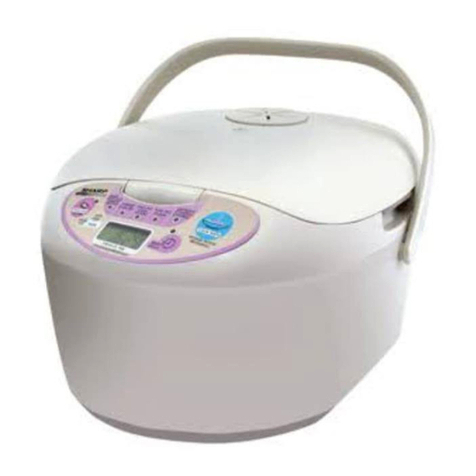
Sharp KS-COM18 User manual

SHARP CORPORATION
SHARP SERVICE MANUAL
TABLE OF CONTENTS
PARTS IDENTIFICATION .............................................................................................................
SPECIFIC INFORMATION ...........................................................................................................
PART SPECIFICATION ................................................................................................................
IMPORTANT SAFEGUARDS .......................................................................................................
PRECAUTIONS ............................................................................................................................
CAUTIONS FOR USE ..................................................................................................................
WIRING DIAGRAM AND CIRCUIT DIAGRAM .............................................................................
EXPLANATION OF CIRCUIT .......................................................................................................
REPLACING METHOD FOR MAIN PARTS .................................................................................
COOKING/WARMING TEST METHOD ........................................................................................
TEST MODE SPECIFICATION .....................................................................................................
BEFORE CALLING FOR SERVICE .............................................................................................
SERVICING ..................................................................................................................................
POST-REPAIR INSPECTION .......................................................................................................
TROUBLESHOOTING GUIDE .....................................................................................................
SERVICE PARTS LIST .................................................................................................................
2
3
4
5
5
5 - 7
8 - 10
11
12 - 16
17 - 18
19
20
21
21
22 - 24
25 - 27
Page
ELECTRONIC JAR RICE
COOKER/WARMER
MODEL KS-COM18
In the interests of user-safety (Required by safety
regulations in some countries) the set should be restore
to its original condition and only parts identical to those
specied should be used.

Body
Key sheet
Latch button
Inner pot
Steamer rack
2
Steam vent hole
Inner lid
Lid
Inner pot handle
Handle
Panel ring
OPERATION BOARD
Display
Slow cook button
Timer button
Plain rice button
Porridge/Congee button
Mixed rice button
Cake/Bread button
Glutinous rice button
Warm lamp indicator
Warm/Off button
Cooking Time button
Power cord
Lid
Lid cap
PARTS IDENTIFICATION

Approximately one watt of power is consumed even when the rice cooker is in OFF mode as long as it is
plugged in. To conserve, unplug when not in use.
During warming the power in the parentheses is the average power at a room temperature of 20oC.
Model
A.C. Line Voltage (V/Hz)
Power consumption
Rice cooking (W)
Warming maximum (W)
Warming (average) (W)
Timer Type
Setting range
Display
Capacity (l)
Cooking method
Outside dimensions
(mm.)
KS-COM18
220 / 50 A.C. only
830
118
40
Present time to nish
1 to 24 hours
Process display of clock/cooking/warming
0.36 - 1.8
Direct heating type
Width
Depth
Weight of product (approx.) kg
Height
296
408
242
4.1
Safety device Temperature fuse; 169oC
Cooking Chart
Cooking time may varying, depend on the kind or volume of rice or ingredients.
Cooking time is set at specied voltage, room temperature 20-25oC, water temperature 20-25oC and
under standard water level.
No need to soak the GLUTINOUS RICE before cooking.
For cooking Kiaw Ngu Glutinous Rice should be reduced a little water.
Use the broken for cooking Congee, it will became better result.
3
MODEL
PROGRAM
KS-COM18
Volume of rice
(cup)
Time (approx.)
(hr : min)
PLAIN RICE
BROWN RICE
GLUTINOUS RICE
CONGEE
PORRIDGE
SLOW COOK
CAKE / BREAD
2 - 10 0:28 - 0:41
2 - 7 0:57 - 1:57
2 - 6 0:55 - 1:03
0.5 - 2.5 0:49 - 1:04
0.5 - 1.5 0:55 - 1:02
Depending on the water quantity / seasonings /
ingredients for cooking.
SPECIFIC INFORMATION

PART SPECIFICATION
4
Name of part
Cord reel ass’y
Heater plate ass’y
Side heater ass’y
PCB ass’y
Lid heater ass’y
Part specication
Inner lid frame ass’y
Thermistor plate ass’y
Part No.
Cord length 1.03 m. 22N405ASY
220V 830W (rating wattage) 22N402
Thermistor type (with connector)
Temperature fuse (169oC 10A)
22N403ASY
Power 77W
Resistance 484 Ω5%
Resistance wire spec. 547.2 Ω/m
220V
22J3031ASY
22N401
+
-
Power 30W
Resistance 1613.3 Ω5 %
Resistance wire spec. 1210 Ω/m
22J33112
Power 30W
Resistance 1613.3 Ω5 %
Resistance wire spec. 1210 Ω/m
22A109TASY
+
-
+
-

When using electrical appliances, basic safety precautions should always be followed, including the following.
1. Read all instructions.
2. Do not touch hot surfaces. Use handles or knobs.
3. Keep the rice cooker out of the children’s reach, especially when cooking rice.
4. Unplug from wall outlet when not in use and before cleaning. Allow to cool before putting on or taking off
parts.
5. Do not operate the appliance with a damaged cord or plug or after the appliance malfunctions or has been
damaged in any manner.
6. Use of accessory attachments no recommended by SHARP may cause injuries.
7. Do not use outdoors.
8. Extreme caution must be used when moving an appliance containing hot food, water or other hot liquids.
9. Do not use the appliance for other than intended use.
10. Always unplug and let the rice cooker cool down before cleaning.
11. Do not let cord hang over edge of table or counter or touch hot surfaces.
IMPORTANT SAFEGUARDS
1. Be sure to remove the sheet of protective paper located between the inner pot and heater plate
before using the rice cooking.
2. Avoid using the rice cooker, if the power supply cord becomes hot. Should this happen, have a qualied
electrician check the rice cooker.
3. Use on a at, stable surface.
4. Use the inner pot only in the rice cooker; never on the range top or in the microwave oven.
5. Do not turn the rice cooker on without both rice and water in the inner pot. Avoid using the rice cooker to
heat just water.
PRECAUTIONS
5
1. Place of use
Do not use the cooker on a wet oor, under direct sunlight or near the gas table.
Do not use the rice cooker within 1 m of TV or radio to prevent the interference.
While cooking, do not put the rice cooker on or near combustible materials such as curtains or vinyl
carpets.
2. How to handle before use
Do not disassemble or repair the cooker by yourself. It may cause trouble such as a re or electric
shock. Consult your nearest dealer.
The electrical requirements are a 220V 50Hz, a.c. only protected electrical supply.
It is recommended that a separate circuit serving only this appliance be provided.
To protect against electrical shock, do not immerse the set in water or sprinkling water on the heater plate.
Do not allow children to operate.
Move the rice cooker by handle only.
Never carry it by using of the inner pot holders projecting on both sides of the closed cooker.
Use the plastic spoon provided as accessory.
For porridge use a plastic or wooden deep plastic spoon available on the market.
Never share an electric wall outlet with other appliances.
Never connect the plug with your wet hand as it may be dangerous from electric leakage.
Disconnect the plug from the wall outlet when you do not use the rice cooker.
In case the power cord is broken, it must be replaced by manufacturer or appointed service providers
or equivalent professionals to avoid any damages.
In case the power cord is broken, it must be replaced by manufacture or appointed service providers or
equivalent professionals to avoid any damages.
CAUTIONS FOR USE

6
3. How to use it
(1) Before cooking
Do not use the inner pot for washing rice.
Wash rice quickly and thoroughly.
Insufcient washing will cause scorching and odor.
Use clean, clear water.
Do not use any other inner pot except the provided one.
Insert the plug into wall outlet rmly and when disconnecting, hold the plug and pull it out without
touching the power cord.
Do not use the inner pot with other heating appliances such as a gas table. The pot may be
transformed and it may cause poor cooking result.
Do not use the damaged inner pot. It may cause in malfunction.
The water level marking is a standard guide and may be adjusted slightly depending on the kind of
rice or your liking. Remember that adding too much water may cause boiling over.
Carefully align marks when replacing the lid cap on the lid.
Foreign matter adhered to the outside of the inner pot, heater plate and thermistor plate must be
washed off before use. If not, it may cause inadequate cooking or a damage of the rice cooker.
Rice with ingredients containing seasonings should not be cooked by using delay start setting.
Because the settling or decay of the seasoning is likely to cause inadequate cooking.
Hints for determining the amounts of ingredients and seasonings :
The amounts of rice and seasonings that can be cooked vary depending on the menu.
A standard for the amount of ingredients is 30-50 % of the mass of rice to be cooked, but follow
the amounts given in the recipe pages of the operation manual.
After measuring the amounts of rice, seasonings and ingredients adjust the water level and stir
well with a plastic spoon. If the seasonings are settled, it is possible to result inadequate cooking.
Cut the ingredients rather ne, put them on the rice and not mix with rice.
Stirring may result in unsatisfactory cooking.
(2) Cooking rice
During cooking rice clicking sound is heard but this is due to ON-OFF action of the relay and quite
normal.
During the cooking of the rice, a zzing sound may be heard, This is due to the remaining water on
the outside of the inner pot and is not a problem.
Do not opening the lid when during boiling because touched hot steam.
During or immediately after cooking, the areas near the steam vent hole are kept at high temperature.
Do not touch those areas to avoid burns.
Do not place a wiping cloth or the like on the lid or the handle during use.
It may cause the damage to the operation board and the deformation and/or discoloration of the lid.
Stir rice well using the plastic spoon provided within 30 minutes after cooking.
It will allow escape of the excessive steam and uffy appearance of the cooked rice will result.
Immediately after cooking some sticky lm may be formed in the surface of the cooked rice with the
central portion sunken but this means no problem. This is phenomenon called spherical cooking.
In the following cases heavy scorch may occur.
When rice washing is insufcient.
When the rice is soaked in water for a long time.
When rice other than plain rice is cooked with seasoning (especially sake, sugar, ketchup,
tomato-puree and etc.).
7
(3) Warming
Because to keep the lid closed even at meals.
Use for 12 hours or less for best results.
Avoid using for a small amount of rice.
Use for keeping warm rice warm, the setting is not intended to be used for refrigerated or room
temperature rice.
Use for keeping plain rice warm.
Do not keep rice warm with any utensil, such as the plastic spoon, in the rice.
(4) After use
Press the “WARM/OFF” button, then remove plug from wall outlet.
After use wash the inner pot and the lid cap as soon as possible.
Otherwise, corrosion and bad smelling may possibly be caused.
If the customer used the correct method for cooking the rice and there is a bad odor, the problem may
be caused from bacteria. If this is the case the unit should be sterilized and disinfected by performing the
following.
The inner pot and the lid cap is thoroughly washed and immerse in hot water for 30-60 min.
And then wipe off water thoroughly with dry cloth and disinfect by sunlight sufciently.
Be careful to plastic parts because they are easy to deform by heat.
Wipe the inside lid, inside body heater plate and thermistor plate using a slightly damp detergent
cloth.
And then disinfect; by sunlight for a couple of hours. Never wash the cooker or the lid with water.

8
WIRING DIAGRAM
CIRCUIT DIAGRAM

9
SCHEMATIC DIAGRAM
Faston tab terminal
Faston receptacle terminal
Connector (Housing side)
Connector (Post side)

10

EXPLANATION OF CIRCUIT
BLOCK DIAGRAM
VDD Power supply
circuit
11
VR Power supply
circuit
CONTROL UNIT
Power supply frequency
SYNC signal generating
circuit
Model change
Cooking heater drive
circuit
Warming heater
drive circuit
VREF Power supply
and detector circuit
Temp. detector circuit
TH1
Room temperature thermistor
Thermistor plate ass’y
Display
User interface circuit
Thermistor
temperature (oC)
Thermistor resistance
(kΩ)
TH1 TH Plate
-5.0
0.0
20.0
30.0
50.0
60.0
66.0
68.0
70.0
75.0
100.0
125.0
45.74
34.70
12.61
8.00
3.51
2.42
1.71
1.45
0.680
205.6
159.2
61.48
39.72
17.72
12.20
9.83
9.16
8.55
7.20
3.23
1.58
MODEL NAME MODEL CHANGE
KS-COM18
R72
10k
OPEN
R73

REPLACING METHOD FOR MAIN PARTS
12
REMOVE OF BODY
REMOVE OF CORD REEL ASS’Y
1. Upside down the rice cooker and remove 4 screws xing the body.
2. Remove body from the panel ring.
3. Remove cord reel from the body.
4. Remove the nut holding lead wire earth with body.
5. Now the body is free.
1. Upside down the rice cooker and remove 4 screws xing the body.
2. Remove body from the panel ring.
3. Remove cord reel from the body.
4. Remove the screw holding the contact plate cover.
5. Remove 3 terminals from the cord reel ass’y.
6. Now the cord reel ass’y is free.
The method of removing these wires is shown. (Terminal of earth lead wire)
Fig. 1.
Screw
Cord reel ass’y
Contact plate cover
Earth lead wire
Black lead wire
Blue lead wire
Screw
Body
Terminal
With this claw being
pressed inward

13
REMOVE OF LID COVER
REMOVE OF LID ASS’Y
1. Remove the lid ass’y in accordance with “REMOVE OF LID ASS’Y”.
2. Push the both sides of the lid assembly outward at the claws A , B , C . Unlock the lid from claw D
by pull the lid up.
3. Pry 6 claws of the holder plate ass’y from the lid cover.
4. Turning the holder plate ass’y counterclockwise.
5. Now the lid cover is free.
1. Remove the lid cap from the unit.
2. Remove the body in accordance with “REMOVE OF BODY”.
3. Remove the screw holding the hinge cover.
4. Disconnect lead wire (Lid heater) from PCB ass’y and remove the screw holding lead wire earth from
outer pot.
5. First release the latch button and open it to a normal degree.
6. Remove the lid ass’y from the panel ring.
7. Now the lid ass’y is free.
PCB ass’y
Inner lid lead wire connector Fig. 2
Fig. 3
Lid cover
Claw of lid heater
Screw
Outer pot
Earth lead wire
B
C
AA
B
C
D
Claw
Lid
Claw
Claw
Claw
Lid
Remove lid ass’y
Panel ring

The inner pot should be in the position to prevent the heater plate from falling when removing 3 screws.
Heater plate xing screws
Lead wires of lid heater
Inner lid lead wire connector
Fig. 5.
Fig. 4
14
CAUTION
Lead wire
1
2
3
4
5
6
7
REMOVE OF HEATER PLATE ASS’Y
1. Remove the body in accordance with “REMOVE OF BODY”.
2. Disconnect all lead wires of heater plate from the PCB ass’y. (Fig. 5.)
3. The heater plate ass’y comes off by removing 3 screws. (Fig. 5.)
4. Now the heater plate ass’y is free.
CAUTION
When assembling, be sure not to catch the lead wires for the inner lid heater.
As shown in Fig. 4, the lead wires of the lid heater are to be passed under the rib of the lid cover
and passed above the hinge pin.
After assembly, make sure not to have deformation of inner lid packing. Otherwise, it may cause
steam leakage.

REMOVE OF THERMISTOR PLATE ASS’Y
1. Remove the body in accordance with “REMOVE OF BODY”.
2. Disconnect all lead wire of the thermistor plate ass’y from PCB ASS’Y.
3. Unbend the lead wire band bounding all the lead wire.
4. Remove the heater plate ass’y in accordance with “REMOVE OF HEATER PLATE ASS’Y”.
5. Twist 2 claws of thermistor plate ass’y.
6. Now the thermistor plate ass’y is free.
15
DISENGAGE PCB ASS’Y
1. Remove body in accordance with “REMOVE BODY”.
2. Disconnect all the lead wires of PCB ass’y.
3. Remove the 3 screws xing the PCB ass’y to the panel ring. (Fig. 6.)
4. Now the PCB ass’y is free.
Fig. 6.
Always replace the display cushion because it may be damaged.
CAUTION
Fig. 7.
1. Remove body in accordance with “REMOVE OF BODY”.
2. Remove thermistor plate ass’y in accordance with “REMOVE OF THERMISTOR PLATE ASS’Y.
3. Turning the outer pot counterclockwise.
4. Now the outer pot is free.
REMOVE OF OUTER POT
Outer pot
Screw
PCB ass’y
Upper ring

16
REMOVE OF LATCH BUTTON
1. Insert at type screwdriver into the gap between a latch button and panel ring.
2. Pry the latch button from the panel ring.
3. Now the latch button and the latch spring are free.
Fig. 10.
CAUTIONS IN ASSEMBLY
1. Setting cord reel ass’y.
Be sure to set the cord reel lead wires through type holes provided in the recess of the
body.
2. Afxing the display cushion.
Peel the backing from the display cushion and afx the display cushion inside the border of the
key top.
3. Installing the body.
When installing the body, make sure internal lead wires are not routed over the spacer before
tightening screws (4).
Latch button
Panel ring
Flat type screwdriver

COOKING/WARMING TEST METHOD
When rice cannot be cooked well (resulting in marked scorching or under cooking), a temperature test may be
done in the following way.
1. Simple test method (Simulated rice cooking)
(1) Test conditions
1. Power voltage 220V.
2. 90 ml (1/2 of the measuring cup provided as accessory) of water is poured into the inner pot.
(Water temperature may be close to the ambient temperature.)
3. The ambient temperature may be 20-30 OC.
4. The rice cooker is required to be sufciently cool. (The temperature of the cooker and the bottom
temperature sensor reading shall be close to the ambient temperature.)
5. The rice cooker shall be put on a level place.
6. The steam vent cap shall be xed properly.
(2) Test method
1. Pour the designated amount of water into the inner pot, close the lid, press the cooking key and
measure the time required for completion of cooking.
2. Open the lid when steam come out through the vent and conrm the bubbling condition on the
bottom of the inner pot. (Conrm that the inner pot is stabilized in close contact with the heater plate.
This conrmation shall be done quickly lest it should inuence the “operating time”.)
Note
If conrmation of bubbling is difcult, it is easy that a separate test may be done with 180 ml of water.
3. If the bubbling condition is good, close the lid again and energize.
4. Immediately after completion of the simulated cooking measure the time (the warming lamp ON) and
simultaneously open the lid and conrm against presence or not of water in the inner pot.
(3) Judging criteria
The rice cooker may be judged to be roughly good when the display is normal and the following
conditions are satised.
1. Contact with the heater plate is close enough, if the bubbling condition is uniform along the periphery
of the inner pot as shown in Fig. (A).
If as in Fig. (B), bubbling is absence more than 1/3 of the pot
periphery, foreign matter adhesion to the heater plate or
deformation or ow of the inner pot are supposed.
(If adherence of foreign matter is the case, things may be
the inner pot is deformed, replacement with a new inner pot
is recommended, the same being the case when the heater plate
is deformed.)
2. There is no residual water in the inner pot or a very small
amount of water (approx. 20 ml) is remaining in the recessed
part of the inner pot bottom when the lid is opened immediately after completion of cooking.
3. When the time from start of cooking to completion thereof is:
1.8L 0:28-0:41 min.
This is nothing more than a simple test and the time of cooking completion may vary depending on
test condition such as difference between the water temperature and ambient temperature or the
amount of water.
If the test result is marginal such as when only slightly longer than above mentioned completion time,
actual rice cooking test is recommended.
Bottom of the inner pot
Fig. (A) Fig. (B)
Bubble
Good bubbling
condition
Bad bubbling
condition
17

18
2. Actual rice cooking test method
(1) Test conditions
1. Power supply voltage ...... 220V.
2. 2-cup of “PLAIN RICE” cooking.
3. Ambient temperature 20 - 30oC.
4. Standard water level according to water level scale.
(2) Judging criteria
1. Each indicator shall be switched over as follows.
Display show select menu “PLAIN RICE”.
“WARM” indicator lights.
“Warming” is continued.
2. Check the degree of rice scorching on the bottom of the inner pot.
Slight scorching............Normal.
Excessive scorching ......Thermistor plate ass’y or PCB ass’y is faulty.
3. Warming temperature measuring method (when room temperature is approx. 20oC)
(1) With the inner pot empty, put a bar thermometer
100oC in full scale in the inner pot and close the lid.
Press select “PLAIN RICE” program and
after energizing about 2 minutes the “WARM/OFF”
button is pressed to [cancel].
Then press the “WARM/OFF” button to select
“warming” and continue warming for about 1 hour.
(2) It is OK, if the reading of the bar thermometer is within the following range.
(3) When the above temperature specication is not satised, replace the thermistor ass’y in the
[Replacing method for main parts (How to remove heater plate ass’y and thermistor ass’y)].
Remember that with a bar thermometer available on the market there is a permissible error of
1 degree or so.
Warming temperature 70-76oC
Jig made of a chip
of packing case.
Approx. 30 mm.
100oC bar
thermometer
Inner pot
Check the temperature quickly because the reading of the thermometer falls rapidly with the lid open.
The bar thermometer is to be elevated from the inner pot bottom using a chip of packing case lest it
should come into direct contact with the inner pot.
CAUTION

19
TEST MODE SPECIFICATION
[ To enter TEST MODE]
A plug is inserted with key “Timer” & “Warm/OFF” Pushed at the same time.

20
BEFORE CALLING FOR SERVICE
Did you use
the
measuring
cup
provided
with the
rice cooker (not
a standard
measuring cup) ?
Check
Problem
Did you wash
the
rice cleanly ?
Did you check
the
water level ?
Was the lid
closed tightly ?
Was the lid cap
install correctly ?
Was there
any foreign
matter on the
lid cap, outside
of the inner pot
or heater plate ?
Was the rice
kept warm in
the rice cooker
for more than
12 hours ?
During cooking
operation
Immediately
after cooking
When rice is kept warm
Power interruption occurred. Rice may not be cooked properly.
Because power interruption make programmed time clear.
Steam appear from other than the
steam vent.
Rice is too hard and uncooked at
the core. Rice is too soft.
Rice is scorched.
Rice becomes dry.
Boiling water overows.
Rice becomes sticky.
A large amount of water is on
inner lid.
Rice become yellowish.
Rice has a strange smell.
Table of contents
Other Sharp Rice Cooker manuals

Sharp
Sharp KSH-777/T User manual

Sharp
Sharp KS-H777DW User manual

Sharp
Sharp KS-ZT10 User manual

Sharp
Sharp KS-M102 User manual

Sharp
Sharp KSH-Q11 User manual

Sharp
Sharp KS-ZA10HH User manual

Sharp
Sharp KS-H777DW User manual

Sharp
Sharp KS-1800 User manual

Sharp
Sharp KS-COM183MV-WH User manual

Sharp
Sharp KS-R19S User manual