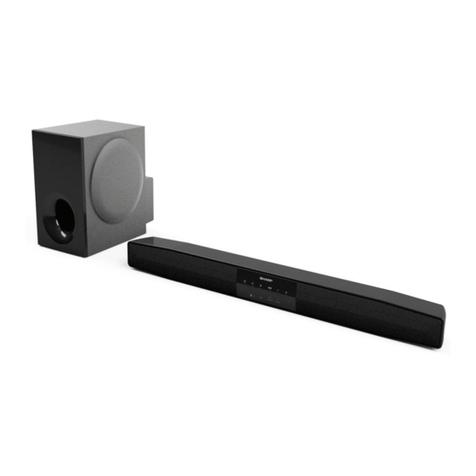
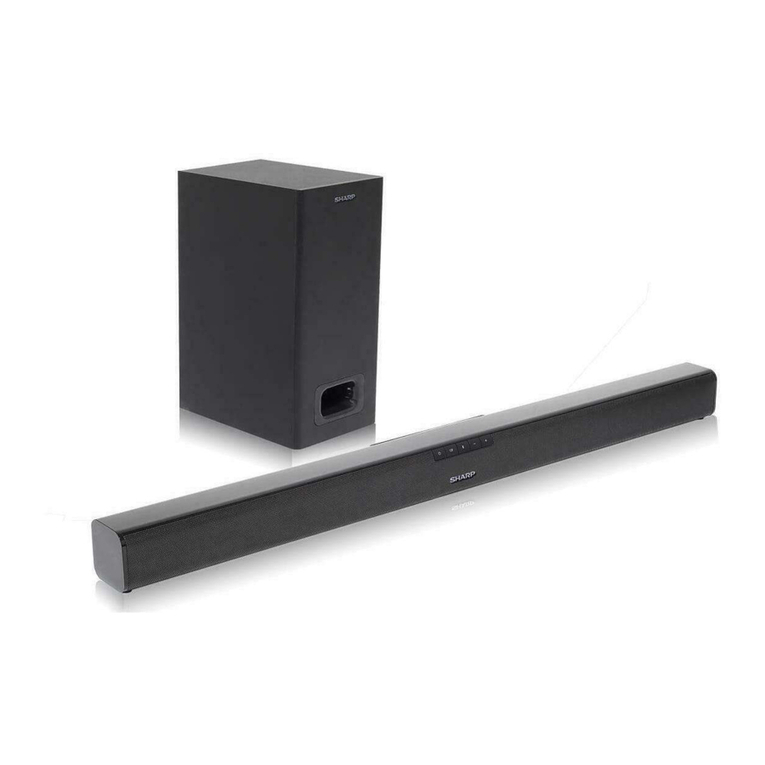
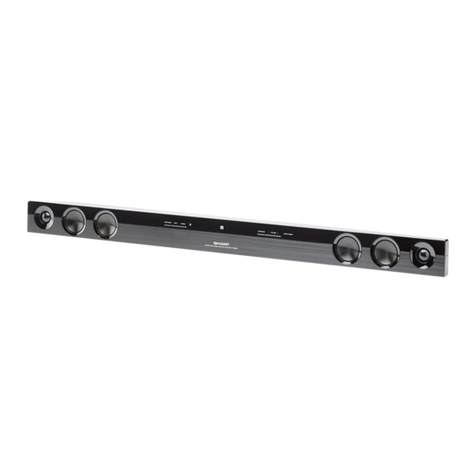
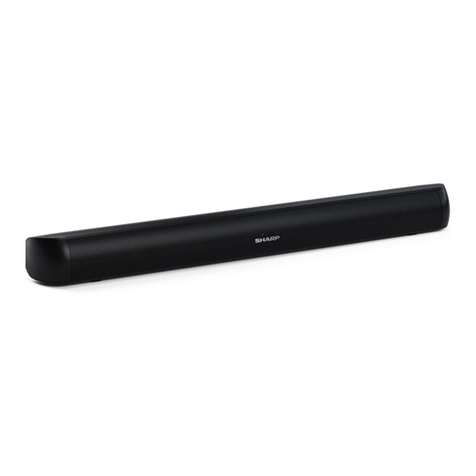
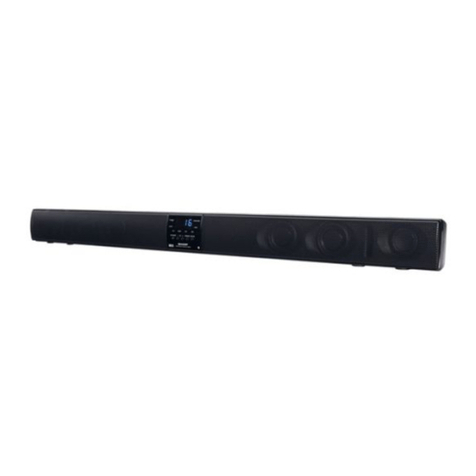
Sharp HT-SB116 User manual

®
Thank you for purchasing this SHARP product. To obtain the best
performance from this product, please read this manual carefully. It will guide
you in operating your SHARP product.
ENGLISH
MODEL
HT-SB116
SOUND BAR HOME THEATER SYSTEM
OPERATION MANUAL
Note:
This product is recommended for at panel TV (LED, LCD and plasma).
TINSEA568AWZZ 21L R MW 1
Printed in Malaysia

E-1
The following accessories are included.
Remote control x 1
“AAA” size battery
(UM/SUM-4, R3, HP-16
or similar) x 2
Accessories
The Bluetooth®word mark and logos are registered trademarks owned by
Bluetooth SIG, Inc. and any use of such marks by SHARP is under license.
Other trademarks and trade names are those of their respective owners.
Special notes
Supply of this product does not convey a license nor imply any right to
distribute content created with this product in revenue generating broadcast
systems (terrestrial, satellite, cable and/or other distribution channels),
revenue-generating streaming applications (via Internet, intranets and/or
other networks), other revenue-generating content distribution systems (pay-
audio or audio-on-demand applications and the like) or on revenue-generating
physical media (compact discs, digital versatile discs, semiconductor chips,
hard drives, memory cards and the like).An independent license for such use
is required. For details, please visit http://mp3licensing.com
MPEG Layer-3 audio coding technology licensed from Fraunhofer IIS and
Thomson.
“The terms HDMI, HDMI High-Denition Multimedia Interface, and the
HDMI Logo are trademarks or registered trademarks of HDMI Licensing
Administrator, Inc.”

E-2
●Please ensure that the equipment
is positioned in a well ventilated
area and ensure that there is a
free space along the sides, top
and back of the equipment as
below.
●Use the sound bar on a rm, level
surface free from vibration.
●Keep the sound bar away
from direct sunlight, strong
magnetic elds, excessive dust,
humidity and electronic/electrical
equipment (home computers,
facsimiles, etc.) which generate
electrical noise.
●Do not place anything on top of
the sound bar.
●Do not expose the sound bar to
moisture, to temperatures higher
than 60°C (140°F) or to extremely
low temperatures.
●If the sound bar does not work
properly, unplug and plug it in
again. Then turn it on.
●In case of an electrical storm,
unplug the sound bar for safety.
●Hold the AC power plug by the
head when removing it from the
wall socket, as pulling the lead
can damage internal wires.
●The AC power plug is used as
a disconnect device and shall
always remain readily operable.
●Do not remove the outer cover,
as this may result in electric
shock. Refer internal service
to your local SHARP service
facility.
●The ventilation should not
be impeded by covering the
ventilation openings with items,
such as newspapers, tablecloths,
curtains, etc.
●No naked ame sources, such as
lighted candles, should be placed
on the apparatus.
●Attention should be drawn to the
environmental aspects of battery
disposal.
●This sound bar should only be
used within the range of 5°C -
35°C (41°F - 95°F).
●The apparatus is designed for use
in moderate climates.
●SHARP is not responsible for
damage due to improper use.
Refer all servicing to a SHARP
authorised service centre.
● Do not use chemicals for cleaning
(benzine, thinner or alcohol). Also
do not allow volatile substances
such as insecticides, cosmetics
(perfumes, creams, sprays, etc.),
sunscreens, insect repellents, etc.
to adhere to the unit’s surface. It
may damage the surface nish or
cause discolouration.
General
Precaution
10 cm (4") 10 cm (4")

E-3
Precaution (continued)
Warnings:
●The voltage used must be the
same as that specied on this
sound bar. Using a higher voltage
is dangerous and may result in
a re or other type of accident
causing damage. SHARP will
not be held responsible for any
damage resulting from such
usage.
●When the button is set at
STANDBY position, mains
voltage is still present inside the
sound bar. The sound bar may
be brought into operation by the
remote control.
●This sound bar contains no user
serviceable parts. Never remove
covers unless qualied to do so.
This sound bar contains dangerous
voltages, always remove mains
plug from the socket before any
service operation and when not in
use for a long period.
●To prevent re or shock hazard,
do not expose this appliance to
dripping or splashing. No objects
lled with liquids, such as vases,
shall be placed on the apparatus.
● This equipment is a Class
II or double insulated electrical
appliance. It has been designed in
such a way that it does not require
a safety connection to electrical
earth.
The sound level at a given volume
setting depends on speaker
efciency, location and various
other factors. It is advisable to avoid
exposure to high volume levels,
which occurs whilst turning the
sound bar on with the volume control
setting up high, or while continually
listening at high volumes.
Volume control

E-4
1
4 4
2
3
HDMI (ARC) USB AUDIO
IN OPTICAL
IN
1. LED Indicators
2. Wall bracket holes
3. Remote Control Sensor
4. Duct ports
5. button
Switch the sound bar between
ON and STANDBY mode.
6. button
Select the input function.
7. button
Press to activate the pairing
function in Bluetooth mode or
disconnect the existing paired
Bluetooth device.
8. button
Play or pause in Bluetooth and
USB modes.
9. buttons
Decrease or increase the volume
level.
Controls and indicators
Front panel
5 6 7 8 9
RED In Standby mode
MAGENTA In USB mode
BLUE In Bluetooth mode
WHITE In HDMI mode
GREEN In Audio In mode
ORANGE In Optical In mode

E-5
Controls and indicators (continued)
HDMI (ARC) USB AUDIO
IN OPTICAL
IN
1 2 3 4
1. HDMI ARC terminal
Connect to a TV via HDMI cable.
2. USB terminal
Plug in USB device to playback
audio les from it.
3. Audio In terminal
Connect to an external audio
device.
4. Optical In terminal
Optical input socket.
Rear panel

E-6
1. button – Switch the sound
bar between ON and STANDBY
mode.
2. button – Increase the volume
level.
3. button – Skip to previous
sound track.
4. button – Select the input
function.
5. button – Press to activate
the pairing function in Bluetooth
mode or disconnect the existing
paired Bluetooth device.
6. EQ button – Select a preset
sound mode.
7. button – Mute or resume the
sound.
8. button – Play or pause
playback.
9. button – Skip to next sound
track.
10. button – Decrease the volume
level.
11. BASS button – Change the
bass level.
12. TREBLE button – Change the
treble level.
Controls and indicators (continued)
Remote control
1 7
8
9
10
11
12
3
4
5
6
2

E-7
Installation image:
Place the system as shown.
Note:
The front panel of the sound bar is
not removable.
Caution:
●Do not change the installation
direction when the sound bar is
turned on.
●Do not stand or sit on the sound
bar as you may be injured.
●Do not allow any objects to fall into
or to be placed in the bass reex
duct.
Safety wires (not supplied) are useful
to prevent the sound bar from falling.
Placing the system Falling prevention
Sound Bar
Digital Tuner BD player
Safety wires
(not supplied)
Screw eye (not supplied)
Sound bar
Wall
When mounting on the wall
When placing on the shelf/
table
Sound bar
Safety wires
(not supplied)
Screw eyes
(not supplied)
Shelf or
table

E-8
Cautions:
●Be very careful to prevent the
sound bar [1.7 kg (3.7 lbs.)] from
falling when mounting on the wall.
●Before mounting, check the wall
strength. (Do not put on the
veneer plaster or whitewashed
wall. The sound bar may fall.)
If unsure, consult a qualied
service technician.
●Mounting screws are not
supplied. Use appropriate ones.
●Check all wall mount angle
screws for looseness.
●Select a good location. If not,
accidents may occur or the sound
bar may get damaged.
●SHARP is not responsible
for accidents resulting from
improper installation.
SHARP designed the sound bar so
you may hang it on the wall. Use
proper screws (not supplied). See
below for size and type.
Sound bar preparation
Make sure to unplug the AC
power lead before installing
the sound bar or changing the
position.
To mount the sound bar on the
wall.
Driving screws
1/8" (3.2 mm)
3/8" (9 mm)
Min. 7/8" (22 mm)
3/16"
(5 mm)

E-9
Sound bar preparation (continued)
Installing the sound bar
1. Mark two screw points on the
wall as below distance.
2. Make a hole on the wall
following the screw point
marks by using a drill.
3. Fix a wall mount plug into the
hole using a hammer, until it is
ushed with the wall surface.
403 mm
Ø5.5 ~ 6mm
32m
Wall
surface
1-1/4" (32 mm)
3/8"
(8-9 mm)
Wall
surface
1-1/4" (32 mm)
3/8"
(8-9 mm)
4. Fasten the screws to the wall
as shown below. (Total screw
is 2 pieces)
5. Hang the sound bar onto the
screws.
Screw using
Wall surface
a screwdriver
4.5mm - 5mm
Gap from
wall surface

E-10
System connection
Caution:
Turn off all other equipment before making any connections.
Notes:
●To connect to TV/player, use HDMI ARC, AUDIO IN or OPTICAL IN
terminals located at the rear of the sound bar.
●Refer the operation manual of the equipment to be connected.
●Fully insert the plugs to avoid fuzzy pictures or noises.
●If the TV volume is continuously at low level, the sound bar will
automatically power off. Increase the TV output volume to enjoy the sound
from the system.
●If the TV volume is continuously at low level, the sound bar will
automatically power off. Increase the TV output volume to enjoy the sound
from the system.
●To avoid desynchronised audio and video when using an external player,
connect the output signal from the player to TV and the audio output (from
TV) to the sound bar.

E-11
The ARC (Audio Return Channel)
function allows you to send audio
from your ARC- compliant TV to
your sound bar through a single
HDMI connection. To enjoy the
ARC function, please ensure your
TV is both HDMI-CEC and ARC
compliant and set up accordingly.
When correctly set up, you can use
your TV remote control to adjust the
volume output (VOL +/- and MUTE)
of the sound bar.
●Connect the HDMI cable (not
included) from the sound bar’s
HDMI (ARC) terminal to the
HDMI (ARC) terminal on your
ARC compliant TV. Then press
the remote control to select HDMI
ARC.
Notes:Notes:
●Your TV must support the HDMI-
CEC and ARC function. HDMI-
CEC and ARC must be set to On.
●The setting method of HDMI-CEC
and ARC may differ depending
on the TV. For details about ARC
function, please refer to your TV
owner’s manual.
●Only HDMI cables of version 1.4
or higher can support the ARC
function
●270 degree HDMI L-shaped
adaptor (commercially available)
with length 23mm or less is
recommended for wall mount
installation as shown below.
HDMI (ARC) USB AUDIO
IN OPTICAL
IN
HDMI (ARC)
HDMI ARC input
System connection (continued)
HDMI (ARC) USB AUDIO
IN OPTICAL
IN
< 23mm
270 Degree HDMI adaptor

E-12
Remove the protective cap of the
OPTICAL terminal, then connect an
OPTICAL cable (not included) to the
TV’s OPTICAL OUT terminal and the
OPTICAL terminal on the sound bar.
Note:Note:
While in HDMI ARC or OPTICAL
mode, if there is no sound output
from the sound bar and the HDMI
ARC or OPTICAL indicator blinks
quickly, you may need to activate
PCM signal output on your source
device (E.g. TV, DVD or Blu-ray
player).
A. Use a 3.5mm to 3.5mm
audio cable to connect the
TV’s or external audio device
headphone terminal to the Audio
In terminal on the sound bar.
B. Use an RCA to 3.5 mm audio
cable (not included) to connect
the TV’s audio output terminals
to the Audio In terminal on the
sound bar.
Note:
When you use the headphone output
on the TV set, you will be able to
adjust the volume level directly using
the TV remote control depending on
the TV’s condition.
System connection (continued)
Optical input Audio In
HDMI (ARC) USB AUDIO
IN OPTICAL
IN
HDMI (ARC) USB AUDIO
IN OPTICAL
IN
A
B
AUDIO
IN
< 21mm
L-shaped adaptor or cable head with
length 21mm or less is recommended
for wall mount installation.

E-13
●Before connecting the AC power
cord, ensure you have completed
all other connections.
●Risk of product damage!
Ensure that the power supply
voltage corresponds to the
voltage printed on the back or the
underside of the sound bar.
●Connect the mains cable into a
mains socket.
Wall socket
(AC 100 - 240 V ~ 50/60 Hz)
HDMI (ARC) USB AUDIO
IN OPTICAL
IN
Connect to power
System connection (continued)
Make sure to unplug the AC power lead before installing the sound
bar or changing the position.

E-14
1. Open the battery cover.
2. Insert the battery according to the
terminal indicated in the battery
compartment. When inserting
or removing the battery, push it
toward the (–) battery terminals.
3. Close the cover.
Caution:
●Replace all old batteries with new
ones at the same time.
●Do not mix old and new batteries.
●Remove the battery if the sound
bar will not be used for a long
period of time. This will prevent
potential damage due to battery
leakage.
●Do not use rechargeable battery
(nickel-cadmium battery, etc.).
●Installing the battery incorrectly
may cause the sound bar to
malfunction.
●Batteries (battery pack or
batteries installed) shall not be
exposed to excessive heat such
as sunshine, re or the like.
Notes concerning use:
●Replace the batteries if the
operating distance is reduced or
if the operation becomes erratic.
Purchase 2 “AAA” size batteries
(UM/SUM-4, R03, HP-16 or
similar)
●Periodically clean the transmitter
on the remote control and the
sensor on the sound bar with a
soft cloth.
●Exposing the sensor on the
sound bar to strong light may
interfere with operation. Change
the lighting or the direction of the
sound bar.
●Keep the remote control away
from moisture, heat, shock, and
vibrations.
The remote control can be used
within the range shown below:
Remote control
Battery installation
Remote sensor
0.2 m - 6 m
Test of the remote control

E-15
●When you rst connect the sound
bar to the main socket, it will be
in STANDBY mode. The LED
indicator will light up red.
●Press the button on the sound
bar or remote control to switch
the sound bar ON or OFF.
●Disconnect the main plug from the
main socket if you want to switch
off the sound bar completely.
Note:
The system will automatically power
on if TV or similar component which
supports HDMI CEC, is turned on.
To set the sound bar to standby
mode:
●During stand by mode, the sound
bar will automatically power on if
it detects audio signal from HDMI/
ARC, OPTICAL connection that
has been set up between the
sound bar and your device.
●When the sound bar has no input
signal for over 15 minutes, it will
automatically switch to Standby
mode.
●The rst time the sound bar is
plugged in, it will enter standby
mode (Eco mode off). LED
indicator turns red.
●To cancel the standby mode,
perform the following procedure.
During standby mode, press and
hold the button for 6 seconds.
Sound bar indication light turns off.
Note:
When turning on the power from Eco
mode, it may take some time until
the power is turned on.
Caution:
During Eco mode, very small power
is consumed when the power cord is
connected.
To cancel the Eco mode:
When the sound bar is turned off,
press and hold the button for 6
seconds. LED indicator lights up in
red.
General control
To turn the power on Eco mode

E-16
General control (continued)
●Press the + or – buttons on the
sound bar or remote control to
adjust the volume.
●If you wish to turn the sound off,
press the button on the remote
control. Press the button again
or press the + or – buttons on the
sound bar or remote control to
resume normal listening.
●While adjusting the volume, each
time the + or – button is pressed,
the status indicator blinks 1 time.
●When the volume level reaches
its minimum or maximum level,
if + or – button is pressed again,
the status indicator blinks 3 times.
If you wish to turn the sound off,
press the button on the remote
control. Press the button again
or press the + or – buttons on the
sound bar or remote control to
resume normal listening.
Press the EQ button on the remote
control repeatedly to select between
preset equalisers.
Press the button on the sound
bar or remote control repeatedly
to select the desired mode. LED
indicator :
Volume control
Muting (remote control)
Select Equaliser (EQ)
effect
NEWS Magenta LED ashes in
2 seconds
MOVIE White LED ashes in 2
seconds
MUSIC Green LED ashes in 2
seconds
GAME Orange LED ashes in 2
seconds
MAGENTA In USB mode
BLUE In Bluetooth mode
WHITE In HDMI mode
GREEN In Audio In mode
ORANGE In Optical In mode
Function selection

E-17
General control (continued)
Audio format
During the HDMI ARC and OPTICAL IN function the LED indicator will light
up to indicate the audio format.
Note:
While in HDMI ARC or OPTICAL mode, if there is no sound output from the
sound bar and the HDMI ARC or OPTICAL indicator blinks quickly, you may
need to activate PCM signal output on your source device (E.g.. TV, DVD or
Blu-ray player).
Audio format LED
indicator
PCM
(Pulse
code
modulation
This is a general term for digitally encoded
audio signals on a CD or DVD. This sound bar
lets you enjoy playback of digital signals from
sources such as CD or DVD.
GREEN

E-18
Auto power on function works only
during standby mode. It will not
work if the sound bar is in low power
consumption mode .
Optical In:
Turn off the external source. The
sound bar will automatically power
on if the external source is turned on
again.
The sound bar will automatically go
to standby mode if:
Optical In:
No audio signal is detected after
approximately 15 minutes.
Bluetooth:
Not connected condition, in the
pause or stop mode and no
incoming signal from device after
approximately 15 minutes.
USB:
In the stop mode or no USB device
is plugged in after approximately 15
minutes.
Bass control:
1. Press the BASS button.
2. Within 5 seconds, press the + / -
button to adjust the bass.
Treble control:
1. Press the TREBLE button.
2. Within 5 seconds, press the + / -
button to adjust the treble.
Auto power on function
Auto power off and auto
detect signal
Bass and treble control
(remote control)
General control (continued)

E-19
1. Ensure that the sound bar is
connected to the TV or audio
device.
2. While in power on mode, press
the button on the sound bar
or remote control repeatedly to
select the desired mode.
3. Operate your audio device
directly for playback features.
4. Press the + or – button to adjust
the volume to your desired level.
Note:
While in HDMI ARC or OPTICAL
mode, if there is no sound output
from the sound bar and the HDMI
ARC or OPTICAL indicator blinks
quickly, you may need to activate
PCM signal output on your source
device (E.g. TV, DVD or Blu-ray
player).
First time you connect your Bluetooth
device to this sound bar, you need to
pair your device to this sound bar.
Notes:
●The operation range between this
sound bar and a Bluetooth device
is approximately 8 meters (without
any object between the Bluetooth
device and the sound bar).
●Before you connect a Bluetooth
device to this sound bar, ensure
you know the device’s capabilities.
●Compatibility with all Bluetooth
devices is not guaranteed.
●Any obstacle between this sound
bar and a Bluetooth device can
reduce the operation range.
●If the signal strength is weak,
your Bluetooth receiver may
disconnect, but it will re-enter
pairing mode automatically.
●Bluetooth pairing from your device
to this sound bar can be done
during stand by and power on
mode at all functions. However,
Bluetooth playback from the
source device is applicable at
Bluetooth function only.
AUDIO IN / OPTICAL /
HDMI ARC
Bluetooth operation
Pair Bluetooth-enabled
devices
WHITE In HDMI mode
GREEN In Audio In mode
ORANGE In Optical In mode
Table of contents
Other Sharp Speakers System manuals

Sharp
Sharp HT-SB602 User manual

Sharp
Sharp MD-MX30 MD User manual

Sharp
Sharp HT-SB95 User manual

Sharp
Sharp HT-SB107 User manual

Sharp
Sharp RSP-ZA007WJN2 User manual

Sharp
Sharp CP-USB50 Parts list manual

Sharp
Sharp HT-SB106 User manual

Sharp
Sharp GX-BT7 User manual

Sharp
Sharp XL-HF401PH User manual

Sharp
Sharp HT-SBW110 User manual

Sharp
Sharp CD-K477W User manual

Sharp
Sharp MD-MX20 User manual

Sharp
Sharp HT-SB602 User manual

Sharp
Sharp HT-SBW110 User manual

Sharp
Sharp HT-SB95 User manual

Sharp
Sharp HT-E300 User manual

Sharp
Sharp PS-919 User manual

Sharp
Sharp CD-BK100W User manual

Sharp
Sharp CD-C472 User manual

Sharp
Sharp PS-919 User manual