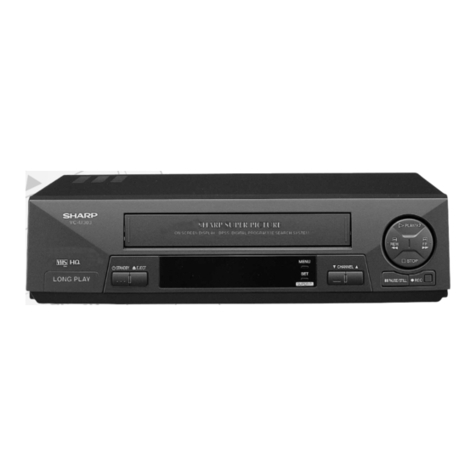
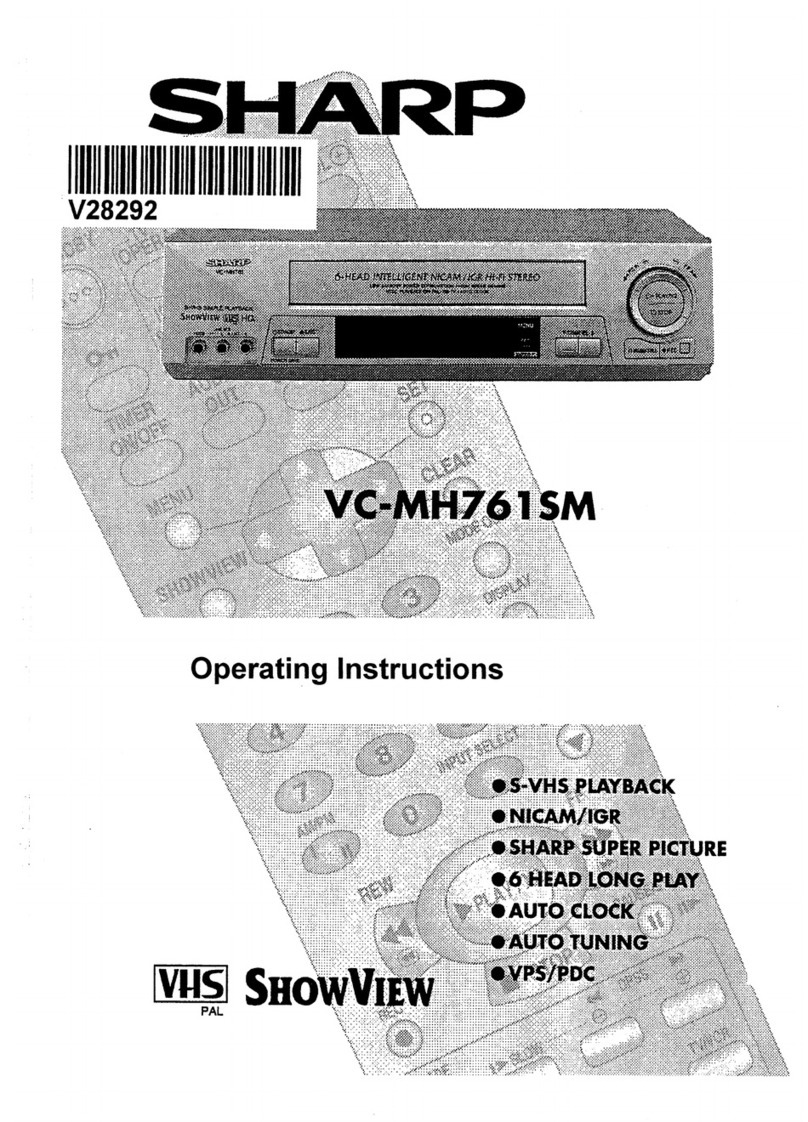
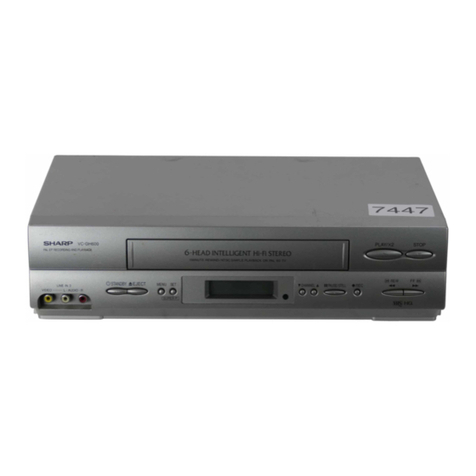
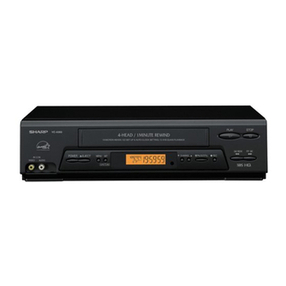
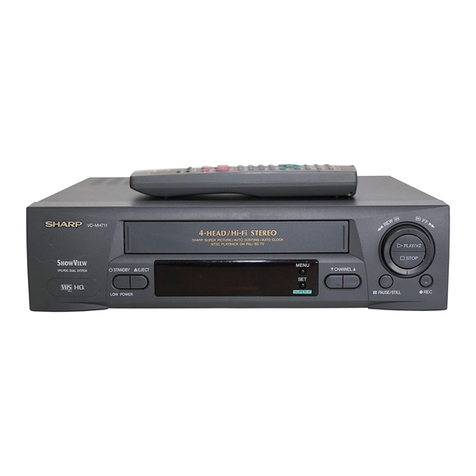
Sharp VC-H85X User manual


.Aaleap
dJeyS
.moA
IXJUO~
‘6u!ssy
ale
he
41
y3~
.moA
qyM
papryxy
11e
ax
sayossam2
Gu!Mo~~o~
ayl
pyi
ams
ayEn
;;
..........................................................................
SNOllV31~133dS
l
.......................
t1m
trnon
01
t13at103ww
v
wow
tmllia3.
zz
..............................................
33lAElS
kiOzi
!3NlllV3
Xl0339
l
ti:
m---m-----m*--m-‘m’
(W31SAS
H3klElS
3
Vu
WVkEIOtld
lVll9lO)
SSdCl
l
.............................................................
t131Nfl03
3dWl
t1V3Nll
l
61
.......................................................
kl3WIl9NlOkl033~
3ldWIS
l
L
I.
...................................................
kl3WIl3Hl
HllM
9NlOt1033kl
l
z:
..................................................
(y301-3)
)13o1
,00tld-allH3
.
........................................................................
lW3d3U
WOClNVkl
l
pL
...............................................
3WWVkl9Okld
Al
V
9NlClkl033tl
l
El
......................................................
~0113~n~
Avid
olnv
im
.
L
L
....................................................................................
)13v8Avld
.
F
...........................................................
Sl3NNWH3
3Hl
FINllElS
l
..................................................................
)13013
3Hl
3Nlu3S
.
2
......................................................................
10tllN03 310w3tl
.
............................................
13NNWH3 03CllA
3Hl9NIlSflrtlV
l
P
.............................................................................
SNOl133NN03
l
E
......................................
t13A
klIlOA JO
SlN3NOdW03
tlOl’VW l
2
--~-‘-““‘--~---“-
SNOllfIV33kld
CJNW
SOtlVfI93jWS
1NVltlOdWI
l
yeu
‘m
ayl
AJE:,
ley~
sadel
awssw
oap!n
Aluo
asn
~s~eu6!s
oap!n
p~spue$s
m
sasn USA
s!yl
:3dt/l3113SSV3
‘2~
0~
‘A()QZ
at/
s!
USA
s!y~
40
ymumynba~
lmod
ayl
:lN3L’ElHlfKEltl
H3MOd
uo!gxmj luawa3ueyu-j
6u!ypg
.
(axmpy
auwj/paadS
alqnoa/uo!goyy
MolS
alqt?!xA/ll!gS
ssalas!oN)
yxqheld
Iwo!ywn4-!glnN .
leadaH
uropue~
.
40
salu!l
Eiu!pug
pue 6u!uu!6ag
6u!g$aS
~04
lalu!l
Gu!pAoDau
aldLu!S
.
Y’ol
4ooJd-Pl!W
l
Aaunl
paz!saqiuAS
a6elloA
IasaAd
lauu-eq3-gv
.
yxg
oAaz
oiny
Y$!M
ja$unoD
adpl
xeaull
!!6!a-s
.
(alqixuuw6o~d
hlyaaM/Al!ea)
~aur!l
&m3-$3
%ea-~gE
.
uo!lwnj
&Id
olnv
llnj
.
uksyxpayy
Gu!p~ol
Iln
j
qy~
wqs
yyno
.
a31
L/J!M
lOJ~l.lO=)
alourau alqeurum6o.id .
uraphs
yweag
awuw6o~d
ley6!a/SSda .
~-w-v3
(Mm3
~QH)
OH
l
Gu!pAosaH
yl6ual-alqnoa/hld
6~01
peaH-p
.
puns
oaws
!+!H
SHA l
LualshS
lo~luo3
amlmd
olnt/
.
urapAs
low03
6uyml
ojnv.
LuaisAS
6uyeal3
peaH
o]ny.
:sapnlm!
‘uralsAS
a.my,j
(amaB!yaluI
1e9!4!y-l\y’)
1~
(1)
sa.my,j
Ayleno
.Iay6!H
pue
&!yqri?lS
~04
urs!uet@ayy
palunoyy
aJiua3
(1)
(MatsAS
a.m!3!d
Iv
B
urs!uey3al/y
paiunoyy-aya3
MaN)
3Alua-alw
.

Caution
BEFORE OPERATING YOUR NEW VCR, PLEASE CAREFULLY READ THIS
OPERATION MANUAL AND THEN SAVE IT FOR FUTURE REFERENCE AS
IT WILL BE USEFUL IF YOU HAVE ANY PROBLEMS OPERATING YOUR
VCR IN THE FUTURE.
Location and Handling
1.
2.
3.
4.
5.
6.
Air vents are provided in the VCR cabinet to
prevent excessive temperatures inside the
unit. Do not place your VCR in closed
spaces, cover it, or otherwise block the
vents.
Do not place the VCR in direct sunlight, or
near heat sources.
Keep the VCR and tapes away from strong
magnetic objects.
Do not insert or drop anything into the VCR
through the air vents or cassette
compartment as this could cause serious
damage, possibly resulting in fire.
Do not place any object containing water or
other liquids on the VCR. In the event that
liquid should enter the cabinet, unplug the
VCR immediately and contact the retailer or
service centre approved by Sharp
immediately.
Do not remove the VCR cabinet. Touching
parts inside the cabinet could result in
electric shock and/or damage to the VCR.
For service and adjustment inside the
cabinet call a qualified dealer or service
centre approved by Sharp.
Moisture Condensation
Rapid temperature changes and storage or operation in extremely high
humidity environments may cause “dew” to condense inside the VCR cabinet.
Dew can cause serious damage to your tapes and the video heads. Should
dew form inside the unit, the dew indicator will light up and all normal VCR
operations will be inoperable.
l If the dew indicator lights up, wait until
the moisture evaporates. When the
power is on, the drum spins, and the dew
evaporates more quickly.
*
As an extra measure of protection for the
video heads, wait another 5 minutes after
if-~:
$vRindicator
goes out before using
l The dew sensor may take a few minutes to detect moisture. Accordingly,
when the VCR is first hooked up or when the power cord is plugged into the
socket again, wait about 30 minutes and confirm that the dew indicator has
not lit up before attempting to operate the unit.
Service
Do not attempt to service this VCR yourself. Please refer any service to the
nearest service centre approved by Sharp.
Others
Copyright may exist on material you wish to record. Copying such material
without permission of the relevant licensees or owners of the copyright is
prohibited by law. Sharp is not in a position to authorize the recording of
copyrighted works and nothing in this operation manual should be read or
implied as giving that authority.
This VCR is not equipped with a mains power switch. Accordingly, nominal
current to drive the clock is drawn at all times when the power cord is plugged
into a wall socket. If the VCR is not to be used for an extended period, be
sure to unplug the cord.
2

‘-Pi!MS
+iO/NO
9lS
IS31
ap!su!
Maa
r
J0~eqpl.y
Maa
s.~o~eapu!
apou
uo!ge.mdO
kN01133~~03
aas)
sww-w
hwuuo=>
/
lay~os
~~03
.iaMod
3t/
neati
(op
04
tc
lauuey3)
(~=JNN~/H~)
la!sn[pe
IauueyD
lndlno
AauaAuoz
huanbaA4
O!PE+J
(6u!Ma!n
~04
slauuey
Izalas)
suojlnq
unnopldn
Y~NN~/H~
(3UAlWtlOOtrd
Al
t’
DNlaki033HM3w9Awld
aas)
SuolUV
6wwado
bi3waAWld
aas)
suofnq
~U!Y~U
(S-I~NNWH~
SHI
CINIEIS
aas)
sums
6uv-m
iauuev3
loop
pyuadg
I
/
I
WOJd
yo~~uo3
alouraJ
ayl
~014
pan!aDaA
aAtz
SIEU~!S
JO
passaAd
ale
H~A
ayl
uo suollnq
ayl
uaym
spuoms Ma4
e
A04
sayselj
.
~o~mpu~
low03
uo!gwadgP
I
ww
i33r3
(3vUWWtr9Otrd
Al
W
!3NlClki033klM3W8AWld
aas)
IuaLuyedLuoD
a!lassez
(suo!ymlsu!
uo!gwado
lnoy6nojyt
payeldxa)
Aelds!p
uo!gmn4-!glnyy
moiinq
s!yJ
40
ssalp.re6aJ
y.JOM
II!M
Aelds!p
y3013
W/u0
t131
su.m)
uow
3iw3do

Cable Connections
Disconnecting TV Cable
Disconnect the aerial cable from the
back of your TV set.
Connecting Aerial Cable to VCR
Connect the aerial cable to the
ANTENNA IN terminal of your VCR.
Connecting VCR to TV
Connect the supplied coaxial cable to
the RF OUT terminal of the VCR.
Plug the other end into your TV’s
ANTENNA IN terminal.
Connecting AC Power Cord
Plug the provided AC power cord into
the AC power cord socket on the rear
of the VCR.
L
L
ANTENNA IN
Connected to outdoor or indoor
aerial cable
nel
ANTENNA IN
From AUDIO OUT
I
I
From VIDEO OUT
To ANTENNA IN +
To VIDEO IN
NOTES:
l Stereo sound output is only possible using the AUDIO OUT terminals.
Sound from the radio frequency converter (RF OUT) is mono only.
l The power cord should not be plugged into the power outlet until the above
connections have been completed.
l If TV reception is weak, use a TV signal booster (not supplied).
4

I

The remote control lets you operate your VCR at a
distance. Just aim the front of the remote control at
the photoreceptor window situated on the front panel
of your VCR and press the control buttons as you
would on your VCR.
Inserting the Batteries
Slid
e out Slide in
Battery Cover The remote control
operates on two R6
(UMSUM-3,
AA) 1.5 volt
batteries (included). If the
remote control does not
operate or fails to function
normally, use new
batteries, which can be
purchased at electronics or
camera stores.
0
Open the battery cover. (Remove any old
batteries that may be in the remote control.)
@
Insert new batteries, matching their polarities (+
and -) to the markings inside the remote control.
@
Replace the cover.
l You can set the clock and timer recordings using
the remote control.
Clock setting: see SETTING THE CLOCK
Timer recording: see RECORDING WITH THE
TIMER
NOTES:
l Do not subject the remote control to shock, water or
excessive humidity.
l The remote control may not function if the VCR
sensor is in direct sunlight or any other strong light.
If so, move the VCR or alter the lighting.
l Incorrect use of batteries may cause them to leak or
burst.
l Do not mix old and new batteries, or mix brands in
use.
l Batteries are available in rechargeable and
disposable configurations. Read the battery
warnings and use the batteries properly.
l Remove the batteries if the remote control will not
be operated for an extended period of time.
Remote Control LCD
[Inside the panel] VCRt-tTV button
SHARP
VIDEO
CASSETTE
RECORDER
OPERATE
button-
EJECT button
CHANNEL up/down
buttons
PLAY button
REW button
FF button
STOP button
‘AUSE/STILL button
SLOW O/O buttons
DISPLAY button
DPSS buttons
*
When TV mode is selected, (press
the button once and
m
lights on
th6
LCD), this remote control can
programme getting buttons
(TV CHANNEL up/down)
ZERO BACK button
(TV VOL. down)
C-LOCK button (TV VOL. up)
Simple
Recording
Timer
buttons
x2 button
PROG button
PROG CALL button
Numeric buttons
l Used to set the
time
and the
timer, and to select the
channel
directly.
l If a number greater than 47 IS
selected, the channel position
will not change.
Press the CHANNEL
w/down
buttons to select AV channel
position situated after channel
47 and before channel 0.
DISPLAY button
CLEAR button
-SlMUL
button
I-
DIgIt
select button
*
Used to select either
single-
digit or double-digit entry of a
channel
posltion
when it is
entered
with
the 0 to 9
-----CLOCK button
buttons.
REPEAT button SP/LP
button
REC button
---TV-AV
button (works only
in TV mode)
__
AUDIO OUT button
6

/
uow
VJd/W

Press the CLOCK button.
“12H”
disappears, and
“12:OO
AM”
starts flashing. You can set the
present time using either the
0
and
0
buttons or the numeric
buttons (0 to 9).
If you press the
0
or
0
button,
the ‘minute’ digits begin to
change. As you continue
pressing, the ‘minute’ digits will
stop changing (after “00” has
been displayed twice) and the
‘hour’ digits only will begin to
change. First set the ‘hour’ digits,
and then the ‘minute’ digits.
If you use the numeric buttons (0
to 9) to set the time, first set the
‘hour’, and then the ‘minute’
digits (if there is only one ‘minute’
digit, first enter 0). (Set to
lo:28
AM.)
Press the CLOCK button. “IO:28
AM” disappears, and “1 DO1 M”
(the day and month) starts
flashing. You can set the date
using either the
0
and
0
buttons
or the numeric buttons (0 to 9). If
you press the
0
or
0
button to
set the day and month, the ‘day’
digits begin to change. As you
continue pressing, the ‘day’ digits
will stop changing (after “1” has
been displayed twice) and the
‘month’ digits only will begin to
change. First set the ‘month’
digits, and then set the ‘day’
digits.
If you use the numeric buttons (0
to 9) to set the date, first set the
‘day’, and then the ‘month’ digits
(if the month is a single digit, first
enter 0). (Set to
“15D02M”.)
0
0
Press the CLOCK button.
“15D02M”
disappears, and
“OOY”
starts flashing. Set the ‘year’
digits by pressing the
0
or
0
button, or the numeric buttons (0
to 9). (If the year is a single digit,
first enter 0.) (Set to “92Y’.)
Press the CLOCK button. “92Y”
disappears. The present time
(lo:28
AM) is displayed and
“:”
starts flashing to indicate the
clock is now operating.
Point the remote control at the
VCR and press the TRANSFER
button. The VCR display shows
the present time and the clock on
the VCR starts operating.
NOTES:
[VCR Display]
If you prefer the clock to display time in the 24-hour system, press
“24H”
in
step
@
and then follow steps
@
through
8.
To select AM or PM, when you set the clock to show 12-hour AM/PM time,
press the AM/PM button before step
0.
If you press the CLOCK button while the VCR is operating, you cannot
change channel positions until you have finished setting the clock.
If you make a mistake, repeat the above steps to set the time again.
If the precise clock time is required (within a second), after setting the year
(after completing step
0)
do not press the CLOCK button until the exact
start of the minute. The clock will start operating as soon as the CLOCK
button is pressed.

(.apour
I~UIJOU
ayl
01
umlaJ
01
a3yi
13s
H3 ssajd
‘aldurexa
s!y~
ul)
‘(BULIOU
01
umla.I
II!M
Lelds!p
~13~
ayl
vuuw
jHfl
e
u!
paunl
lsn!
amy
noA
4!
amo.
‘0
y6noAyl@ sdais
ieadaA
‘q~~eu~
lou op Al
ayl
uo
au0
ayl
PUB
01
u3A
ayl
paunl
noh
lauueq:,
ayi
41
.
.u!e6e
Al
AnOh
uo
lauuEq3
oap!A
ayl
K)alaS
@
‘Jaunl
Al
aq$
Gu!sn
L
lauuey
$Salas
‘L
4-w
s!
01
t13A
aw
paunl
noA
iauuey:,
wweolq
aye
ieyi
way3
01
B
.a6ueys
~o~mpu!
6yunl
ayl
pue
~o~mpu!
pueq ay! ‘pai3alas
s!
IauueyD hmanbaA4-y6!y
e
uayM
:310N
I
.hmanbal4
pan!aaaJ
ayl
saw!pu!
pue
klds!p
tj3A
ayi
uo
saysE?l4
JOKKI!~LI!
6u!unl
aye
‘passaAdap
aJe
suowq
asaw
al!YM
‘~1
Jnoh uo AlJeal3
u!
saLuo3
lauuey3
y5wpeo~q
paA!sap
ayi
I!yun
uofnq
7
JO
A
ayl
ssandaa
‘apour
lndu!
y6!p-alqnop
guavas
01
uowq
(--I-)
iDalas
y6!p
ayl
ssajd
‘~o~y~o~
a!oluaA
ayl
uo
suolyq
yaumu
ayl
Gu!sn
lauuey
1!6!p-alqnop
e
isalas
noh
uayM
:310N
(‘LP
uo!ysod
Isalas)
.suoUnq
cyaumu
ayl
.JO
suwnq
uMW/dn
-I~NNVH~
w
Gu!ssaAd
hq JaqLunu
uo!l!sod
IauueyD
ayi
IDalas
(s1o$w!pu!
aA!4
.xeul)
~o~rmpu!
Guynl
h
3~6~
0
uo!ysod
lauu~y~
pue
‘~o~s~!pu!
Gu!unl
‘,,y,,
~o~e~!pu!
puec~
(.puEq
jHA
!Dalas
‘aldurexa
s!yl
ul)
‘pueq
jHn
ayl
IDalas
01
a3!Ml.
JO
‘pwzq
jHA
ayl
IDalas
01
wug
.
u0w-w
13s
~3
w
ssald
I
Awha
WA
1
01
uow-4
31WIkiO
aw
SsaJd
‘Al
AnoA
uo
lauuey3
oapy
ayl
v2alas
63
0
0
0
y3A
ayi
40
-IV
uoysod
aurww6oJd ol
L
lauuey~
Guynl
:aldlusx3
6
/
su0u-q
qMOP
/dn
13NNVH3
,
-s~ollo4
SE?
lauuey3
ay!
!asaJ
‘~~UWI$I
paddys
e
lasaJ
01
~S!M nOh
4!
~0
IasaJd
auo
ayl
~0~4
lauuey3
$uaJa44.!p
B
U?M
noh
4!
%a13
IOU
s!
aJn!yd
ay!
41
.
.pasn
s!
uoUnq
0
JO
@
~auu~y~
aye
uayw
paddys
aq
01
$3~
I~JOKE~
uaaq amq
gp
01
~1
pm?
11
‘$3
‘p
‘6
‘
1
s~aqwnu
uo!ysod
lauueq3 .
ZEllON
slauueyz
paddys
9
zlHA
9
9P-E
1
VF1
IIHA
s
I
82
JHfl
I
11
lauueys
paddys
1
P
I
lauue~~
padd!ys
1
cc
lauueyz~
padd!yg
1
E
I
01 JHA
6
zlHA
01
Z zlHA
6
lauuey:, padd!ys
Z
1
lauueyz~
padd!ys
1
8
I
-
I cl I
UO!$!SOd
UO!Q!SOd
mo(aq
u~oys
se
ho1324
ayl]e
lasald
uaaq
aney
suo!ysod
lauusy
ayl
‘slauueys mDpeoJq
aAoqe
ay]
40
Lutz
01
las aq
~83
LQ~M
40
yea
‘suo!ysod
lauuey:,
alqmuuw6o~d
gp
sey
k~3A
JnoA
‘69
01
81
slauuEy3
jHn
pue
‘11
0~
0
slauuey3
jHA
aA!a3aJ
uw
u3A
.moA

Channel Skip Cancelling Channel Skip
If there are channel positions that are not preset, you can skip them by the
following procedure.
Select the video channel on your TV. Press the OPERATE button to turn
on the VCR.
Example: Skip Channel Position 12
0
0
Select the video channel on your TV. Press the OPERATE button to turn
0
on the VCR.
0
8
Select the channel position
number
youthweant
to skip by
pressing CHANNEL
up/down buttons or the numeric
buttons. (Select channel 12.)
@
Press the CH SET button to
select the channel setting mode.
0
Press the CLEAR button on the
remote control. The channel
position number starts flashing.
@
Press the CH SET button twice
to return to normal mode.
3
@
@
Repeat steps
@
through
@
for
skipping other channels.
NOTE:
l The skipped channel positions are not displayed when the CHANNEL
up/down buttons are used, but the skipped channels can be selected by
using the numeric buttons on the remote control.
Press the CH SET button to select the channel setting mode.
Press the CHANNEL up/down buttons to select the channel position
number you want to reset. (Select channel 12.)
Press the CLEAR button on the remote control. The channel position
number will stop flashing, and will remain lit. The channel-skip setting has
now been cancelled. Repeat steps
@
and
@
for resetting other skipped
channels.
Press the CH SET button twice to return to normal mode.
10

JS!OU
ampd
aseamp pm
amyd
ayi
UaJJos
[I!M
ljos
sp~e~ol
fkI!Unl
‘.ia.r%13
I!
ayeur
pue
‘adt-w!d
ay$
uadjeys
II!M
a!++j
S~J~MO~
6u!unl
~aXma@id
I~uosJad
Jnoh
01
(~00~
aw
w-w-w
pwws)
wuy
3~01
3t1n131d
aw
m!pv
l
‘apow
o)nE
ay!
$mlas
01
uollnq
=~(-~01r\l
tin0103
ayl
ssald
‘IuaAa
s!y!
UI
‘pa,molocJ
aq
ku
a.mp!d
ayl
‘tswpeolq
al!qM
pue
yyq
e
Gu!yaw
s!
JO
adei
a!!yM
pug
yselq
e
yaeq
fiu!hzld
s!
H~A
ayi
alym
apocu
inoloz
pax!4
01
las
s!
apour
moles
ayi
uayM
.
(3puo3as
Mai
e
lal4e
apoLu
sno!AaAd
ay$
oi
sumal
Aelds!p
ayl
Xelds!p
H~A
ayt
uo szadde
awv
ow
I
ar3obv
moron
t3axt-i
I
,,olnV,,
iw
wnq
3aow
moio3
w
SSajd)
~,,oinv,,
ol
ias
aq
wow
apow
riolo
ayj
‘rilleuho~
(.apow
sno!Aajd
ayi
01
sumjaj
hzlds!p
ayl
uay!
pue
‘spuoDas
Ma4
e
~04
helds!p
USA
ayl
uo
paAelds!p
s!
,,lvd,,)
.apolu
jnolo3
pax!4
iDalas
01
uomq
3aovv
t1nolcm
aw
ssajd
‘ayym
pue
y3elq
sulnl
uaams
ayl
uo
ajtyyd
ayl
pm
yeaM
s!
leu6!s
Ai
ay$
41
.
EEUON
‘papJo3aj
SE’M
spuo3as
Ma4
e
~04
~elds!p
kl3A
aW
uo
saWY4
<cAYId,,
pm
sa6e6ua
lua!s/(s
~OWIO~
Gu!ym~
we
au
(‘~0113~nd
Avid
oinv
i-m
w
aas)
~uwnq
At/id
ayl
ssald
‘papeO(
a~~assw
B
y$!~\
apou aw A-whp
Ol
uow
AVldSlCl
4
aq$
ssaAd
uayi
pu-e
‘u3A
ayl
uo
u.m
01
ww
3lw3do
aw
ssajd
bWs!a
mnl
.lauuey3
oap!n
ayi
13alas
pue
Al
.moh
uo
uml
m
‘P’WAeld
‘apow
Aq-pueis
ayl
u!
UayM
spuo3as
z
rioqe
u!
pa6e6ua
aq
uw
uo!gwado
awes
ay$
‘JaAaMoH
.pa6e6ua
s!
yzsqhzld
JO
Gu!ploDaJ
I!lun
spuoDas
p
lnoqe
sayel
I!
uollnq
Avid
Jo
~=J-J
ay!
6yssaAd
Ja$4I?
‘apow
Aq-puw
ayl
u!
IOU
s!
u3A
ayl
uayM
s!
apour
Aq-pusis ay!
‘sawu!Lu
s
inoqtz
104
panuguos
sey
apour
days
uayM
yeqAeld
.IO
Gu!ploDaj
Gu!ddois
JaJ4e
sawI!uI
sinoqe
U!IJ~M
JO
‘palXEU!
s!
a~lassw
oap!A
B
uayM
ycc?qhzld
pur?
Gu!pAosaJ
awpauy
MOIIB
01
(Lus!wyayy
Gu!pr?ol
Ilnj)
uo!$mn4
Aq
-pue$s
B
sey
tj3A
mob
‘apoLu
dols
u10~4
LlPaJ!p
yzreqkld pue
Gu!pAoDaJ
FT-J
cc
uw-4
O/O-MOlS
-
uwnq
iiilsmnvd
u0w-w
in0
olanv
laued
ayi
ap!sul
uonv hVidsia
uwnq
dOlS
uounq
~3
uwnq
M3kl
wnq
AV-ld
uowq
13x3
uounq
31VEldO
W-4
3NOl3kli-ll3ld
uwnq
3Nl)13Vkll
uwnq
iiilsmnvd
ww
dOlS
uwnq
3aoL/u
moio3
wnq
31VkEldO
wnq
AVld
‘uounq
13313
aq$
ssajd
‘aUassw
at#
aAoLuaJ
01
%elds!p
H~A
ayi
uo
weadde
,,dOlS,,
‘papeol
Al-radojd
uaaq sey aUassw
ayi
uayM
‘u3A
ayl
o$u!
allassw
au1
aw
IOU
oa
‘UO!wy
IOU
ll!M
U.JEWk
6U!.I’.ZO(
C3ljJ
‘~(~33LlOXl!
p~JJEKXI!
S!
aJ$asse~
oapin
e
6u!yasul

Al (Artificial Intelligence) Picture System
Video Search
This VCR has the functions described below to play back recorded tapes more
clearly, for more enjoyment.
Use the following procedure to quickly find the section you want, while viewing
the picture.
Auto Head Cleaning System
The VCR automatically cleans the heads when you insert a cassette tape or press
the EJECT button during playback or recording.
Auto Tracking Control System
l
Auto tracking engages when playback
begins from the stop mode or when
you press the TRACKING
v
and A
buttons at the same time. This function
automatically adjusts the tracking to
J
match the recorded tape. When auto
Picture adjusted by Auto
tracking engages, “PLAY” flashes on
Tracking Control System
the VCR display for a few seconds.
Picture with
unadjusted tracking
l When a poorly recorded tape is played back, auto tracking may not operate
normally. In this event, manually adjust the tracking with the TRACKING
v
or A
button to make any noise disappear.
NOTE:
l During playback, you can also adjust tracking manually with the CHANNEL
up/down buttons on the remote control.
Auto Picture Control System
When the played-back tape is very noisy, this function reduces the noise to make
the picture clearer. Set the AUTO PICTURE/EDIT switch to AUTO PICTURE to
use this function. High-quality recordings are played back with all the clarity and
fine detail of the original recording.
Editing Enhancement Function
Picture quality inevitably deteriorates each time you
dub from a VCR to another VCR. Edit function
minimizes the deterioration of the edited videos.
To use this function, set the AUTO PICTURE/EDIT
switch to EDIT.
After dubbing, reset the switch to AUTO PICTURE.
AUTO
EDIT
OFF PICTURE
kY
•JI
4
AUTO
EDIT
OFF PICTURE
0
During playback, press the FF button for forward video search, or the
REW button for reverse search.
Forward Video Search
Reverse Video Search
@
Whenever either button is pressed, the search speed changes (approx. 3
@
or 7 times normal playback speed).
Press the PLAY button to resume normal playback.
NOTE:
l There is no sound during video search.
l During video search of a tape recorded in the LP mode, the upper part of the picture
may be skewed to one side.
Fast Forwarding and Rewinding
@
To move through the cassette faster, press the STOP button and then
press the FF or REW button to fast forward or rewind the cassette. (The
picture cannot be viewed in this mode.)
Fast Forward Rewind
@
Press the STOP button to stop fast forward or rewind.
NOTE:
l Press the PLAY button to resume normal playback.
Slow Motion Playback
damage to the tape, your VCR will resume normal playback after about 5
@
minutes of slow motion playback.
Press the
0
and
0
buttons (to the right of the SLOW button on the remote
control) to vary the slow motion playback speed between
l/5
and
l/30
of
@
the normal playback speed.
If noise bars appear on the screen during slow motion playback, press the
TRACKING
v
or
A
button on the VCR to make the noise disappear.
@
Press the PLAY button to resume normal playback.
NOTE:
l There is no sound during slow motion playback.
l During slow motion playback of a tape recorded in the LP mode, the upper
part of the picture may be skewed to one side.
12

EC
‘~lpXqE?LUO~ne
uo
suNI
JaMOd
ay!
~a14e
uollnq
Avid
ayi
ssajd
‘parasol
s!
aloq
uo!gsalojd
aNw?~a
ayl
41
ZllON
I!
spa!a
‘adek
ayk
spu!/v\a~
Allw!gewowz USA
ayi
‘pua
sy
sayxa~
adrz$
ayl
uay~
.ade$
ayt
yxq
shyd
pue
JaMod
ayl
uo
swnl
&?3!geLuo~ne
USA Inoh
‘paAOUlasI
qei
uo!gzaioAd
3ItlSeJa
ayl
t.#M
a$$asse3
1?
&IaSu!
nOh
Ualjl\/\
‘cX333
~I!M
yxqhld
Ao[ua
noh
slal
uo!gwnj
yxqA~ld
olnt/
Ilnj
iueyaAuo3
ayl
.saAojdw!
punos
ayl
I!!un
uofnq
v
JO
A
~)~ly3t/ul
ayl
ssald
‘o!pne
ayi
u!
ayou
~LUOS
s!
a~ay~
4!
JO
‘paDnpoJdaA
IOU
s!
punos
ij4-j
41
:papJO%X
pUnOS
!j-!H
AlUO
aAa?y
lJD!yM
sad?zi
y3Eq
Gu$sld
Uay/\l\
.
.lndlno
ywl
~aug
ououl
aL#
l3alaS
~IIW!~WO~t-E
II!M
UsA
aL#
‘wiood
aq
IaAal
wdlno
!j-!H
ayl
plnOt.jS
.
:S310N
.passald
s!
uofnq
lno
olanv
aye
aur!g
yzza paleadaj
uay~
s!
awanbas
aAOql2
ayl
‘pal3alaS
S!
y3eJl
.Jeau!l
ououl
ayl
@JO
pus
u!Btk
SSaJd
.sJayeads
14a7
pun
$y6!~
ayl
yloq
uro.14
p~eay
s!
o!prw
lauuey
ly6!~
!j-!~
ayl
hluo
pue
u!efh
uofnq
ino
olany
ayl
ssaJd
xayeads
~4a7
pun
1y6!~
ayl
yloq
~10~4
way
s!
o!pne
iauueyo
14a-1
w-l
w4uo
pue
uwnq
in0
aant/
w
ssw
.indlno punos
oa~als
IBWJOU
pus
‘Aelds!p
kj3~
aye
uo
pahlds!p
q
puE’
q
l#M
‘apow !j-!H
ayl
01
las
hIIWU.W
s!
u3/\
ayl
‘lOJ~uO3
aioura~
ayl
uo
uollnq
ino
olanv
ayl
hq
pallo~luo~
s!
apo~u
IndIn
o!prw
ayl
~PW
whno
o!pw
‘yxq
paheld
ale sadel
!
j-!H
hluo-o!pnE
4!
yxlq
aq
II!M
uaa.Ds
ayl
.hluo
ouow
s!
(ino
AU)
JallaAuoD
huanbaj4
o!pw
ayl
wo~4
punos
yeu!wJa$
ino
olanv
ayl
Gu!sn
alq!ssod Quo
s!
lndlno
punos oa~ais .
ZUON
‘apotu
!
j-!H
ayl
u!
papJo3aJ
sadal
&O-O!pnk?
pus
oap!A
yloq
yxq
Aeld
II!M
USA
s!yl
sadel
papJO3a~
!
j-!H
40
y3lXJibld
‘ap!s
auo
01
paways aq
hxu
aAnyd ayl40
u-led
Jaddn
ayl
‘apow
di
aye
u!
papAoDaA
adei
B
40
yxqhzld
paads
alqnop
6u!Ana
.
(.pahzlds!p
s!
,,Ayyd,,)
.a6uey3
IOU
(I!M
Arzlds!p
ayl
uo
~olexpu!
ayl
.
.yxqkld
paads
alqnop
Guynp
punos ou
s!
alay
.
:S310N
yxqhld
IBUIJOU
alunsaJ
01
uoiyq
At/id
ayl
sswd
.leadd=!p
as!ou
aw
awu
ot
t13~
w
uo
u0w-q
v
10
A
!3~1)1~t/tli
a~
0
ssaAd
‘yxqAeld
paads
alqnop
Gu!Anp
uaa)x
ayl
uo
xadde
weq
as!ou
41
0
,paads
I~LUJOU
ayi
ac+wi
le
yxq
paheld
aq
II!M
adw
ayl
.yxqQd
Guynp
IOJ$UOD
a!ouraA
ay! uo
uollnq
zx
ayi
ssaAd
0
‘l=q~Wd
P=k
wnoa
‘ap!s
auo
o!
paMays
aq
hu
a.rw!d
ayi
40
wd
Jaddn
ayl
‘apOu
dl
ayl
u!
papJo3aJ
adei
e
YI!M
axEApe
aLuw4
pus
II!IS
6yna
.
QaAwhp
s!
ctl-us,)
apo~u
aw@
II!F
6uwp
tey! se
~LUI?S
ayi
s!
heldsip
ayl
uo
~ow!pu!
ayl
‘awEApe
au1e~4
6uyna
.
‘acwenpe
auw4
pw
aJnyd
II!IS
6uyp
punos ou
s!
aAaql .
:S310N
01
‘ww
hwd
aw
ssa.d
~0
‘~6~
uowq
iiwxisnvd
aw
ssw
0
‘axleApe
au.1~4
~04
apo~u
II!IS
Guynp
IOWOD
alo~ua~
ayl
uo
uofnq
Aat/‘j
ayl
ssaAd
0
xaddwp
~a!!
Cassette Erase Protection
ERASURE
m
cassettes have a removable tab to prevent
PROTECTION TAB
accidental erasure of recorded material. Removing the
tab prevents recording. To record on a video cassette
with the tab removed, place adhesive tape over the tab
opening.
Recording a TV Programme
0
Turn on your TV and select the video channel.
channel indicator.
@
Select the SP (Standard Play) or
LP (Long Play) recording speed
with the
SP/LP
button on the
remote control (“SP” or “LP” will
light up on the VCR display).
@
Select the channel position you wish
to
record
with
the
CHANNEL
uo/down
buttons
or
the
numeric
buttons:
NOTE:
When you select a double-digit
channel using the numeric buttons on
the remote control, press the digit
select
(-i--j
button to select double-
[
TOTAL
RECORDING
TIME
]
‘-.
--.__
Mode
Tape
‘\
SP
I
LP
._
E-240 240
min.
480
min.
E-180
180
min. 360 min.
E-120
120
min. 240 min.
E- 60
60
min.
120
min.
E- 30 30 min.
60
min.
covered.
Press the REC button. (If
the erasure protection hole is
uncovered, the cassette will be
ejected.) To pause during
r&cording’,
press
the
PAUSE/ STILL button. To resume recording, press
the PAUSE/STILL button again. (The pause/still mode disengages
automatically after about five minutes, and the VCR enters stop mode.)
NOTES:
AV mode
l
To record from an external source through
the
AUDlOiVlDEO
IN terminals on the rear
of the VCR, press the CHANNEL up/down
buttons to select the AV channel position
situated after channel 47 and before channel 0. (When the AV position is selected, “AV” is
displayed where a channel position number is usually displayed.)
l
If the TV signals are weak and the picture changes to monochrome, press the COLOUR
MODE button to select fixed colour mode.
(“PAL” lights on the VCR display for a few Fixed Colour Mode
seconds and then the display returns to the
previous mode.) Normally, the colour mode
should be set to “AUTO”. (Press the
COLOUR MODE button until “AUTO”
appears on the VCR display. The display Auto Colour Mode
returns to the previous mode after a few
seconds.)
To Watch Another TV Programme While
Recordina
After steps
@
to
@
have been completed, select the programme you wish to
zew
using the TV tuner.
At the end of the tape, your VCR will automatically stop recording, rewind the tape,
eject it, and turn off the power.
PAUSE/STILL
button
REC
h,
,++nn
II
I.,
CLOCK button
STOP button
I
OPERATE button
w--
-3
COLOUR MODE
button
OPERATE button
CHANNEL
up/down buttons
STOP
button
PAUSE/STILL
button
DISPLAY button
t
CHANNEL
up/down buttons
-AUDIO
OUT button
-
REC button
-
SPiLP button
~
DISPLAY button
14

0
-.
::
6
Y

With this feature, a desired programme or scene can be played back
repeatedly.
0
During playback, press the REPEAT button on the remote control at the
start of the desired programme.
“0”
flashes.
@
Press the REPEAT button at the
lights.
end of the desired programme.
“a”
0
The section of the tape between the first press and second press of the
REPEAT button is played back repeatedly.
NOTE:
Pressing the STOP button during random repeat cancels it.
START
END
\
.’
\
,
I
80
Press REPEAT button.
Press REPEAT button again.
Any selected mode on the VCR can be locked-in to prevent accidental change
to another mode by simply pressing the C-LOCK button on the remote control.
All modes remain locked (including power-off) until the Child-Proof Lock is
disengaged.
w
To Lock Any Operation Mode
l After the C-LOCK button is pressed during any operation mode, the mode
will continue even if other operation
w
To Lock the Power-Off buttons are pressed.
l After the C-LOCK button is pressed when the VCR is turned off, the VCR
will not turn on even if the OPERATE button is pressed.
/
Example: Engaging Child-Proof Lock during playback
0
Press the C-LOCK button on the
remote control for about 2
seconds.
“GFJ”
flashes on the VCR display.
@
Now regardless of what other operating buttons are touched, the VCR will
continue to play the tape.
Child-Proof Lock can be disengaged by either of the following methods:
(A)
@
Press the C-LOCK button on
the remote control for about 2
seconds.
“&J”
starts flashing.
@%3”
disappears, and the
CXhg;dgePdroof
Lock is
dis-
(B)
;;sVsCEe
ALL CLEAR button on
NOTES:
l If the Child-Proof Lock is disengaged by pressing the ALL CLEAR button,
the clock and timer memories must be reset.
l The Child-Proof Lock cannot be disengaged while the power back-up is
working (min. 60 minutes), even if the power cord is pulled out. Use only the
two methods shown above to disengage the Child-Proof Lock.
16

LC
(‘W
,,00:6,,
oi
w)
(W!4
PaJawa
aq
lsnw 0
‘yhp
,alnujcu,
au0
Aluo
s!
a~ayt
41)
3yi5p
,awyu,
ayl
uay~
pue
,moy,
aye
19s
1sl!4
‘(6
01
0)
suowq
zyaumu
ayl
asn
noh
41
3y6!p
,aw!w,
ayi
ias uayl
pue
‘s@!p
,moy,
ayt
Jas
ls.~!j
.a6uey3
oi
u!6aq
II!M
Quo
sy6!p
,moy,
ayi
pue
(a+y
paAelds!p
uaaq
seq
,,OO,,
.ral4e)
6u!6uey~
dols
II!M
sy6!p
,awI!w,
ayi
‘6u!ssaAd
anu!yoS
noA
st/
.a6usyD
01
u@aq
s1.!6!p
,a$nu!ur,
ayl
‘uoklnq
0
.IO
@
ayk
ssajd
noA
41
‘(6
01
0)
suowq
3!m.unu
ayl
JO
‘uoiyq
0
10
@
ayt
L#M
alu!Q
LEW
ay$
$aS
~6uysel4
syws
klds!p
aLu!i
I.~EZJS
ayl
pue
sleadde
-S!P
,,‘M
‘a,,
~uonnq
9otld
aqk
ssald
‘UOW”q
(6)
AlN33M
Jo
(8)
hilt/a
ayl
~0
‘uounq
0
~0
63
ayl
Gu!ssaAd
hq
yaaM
y3ea
awl
sum
ayl
p
plo3aJ
01
,;M,,
~0
kp
yea
auy
atms
ayi
1e
plo3aA
01
,;a,,
Isalas
‘as!MJay~g
9
dais
01
06
‘awo
Aluo
plozal
01
UEM
no
41
~6u!w~14
w-w
,;M ‘a,,
PUN
PaAwWp
s!
,,wsoas,,
.uounq
mtld
aw
ssajd
Lwoas,,
ot
Ias)
(‘~4
paAawa
aq
w-w
0
‘1!6!p
al6ys
I?
s!
ywou
ayl
41)
%6!p
,y~ou,
ayt
uay!
Pue
bp;
aW
tas
IsJ!4
‘(6 ol 0)
suoWq
3yawnu
ayi
asn
noA
41
‘s1!6!p
,kp,
ayl
las
uayi
pue
‘s1!6!p
,~WOIA,
ayi
las
~SJ!LJ
.a6ueyD
01
u!6aq
II!M
Quo
sy6!p
,yyou,
ay1
pus
(a3!~1
pahelds!p
uaaq
SI?~
,,c,,
Jaw)
6u!6uw
dw
II!M
sv6!p
,Aep,
ayl
‘6yssaAd
anu!luos
noA
sy
.a6upqz
01
u!6aq
sy6!p
,Aep,
ay!
‘uowq
0
JO
@
ayt
ssaAd
noh
41
‘suomq
(6
01
0)
CyJaumu
ay$
JO
‘uol$nq
@JO
@
ay$
qy~
6u!pAozaj
Aauy
~04
wp
aw
w
~6uw~14
ww
hoas
c)
aep
au
.uwnq
9oud
ayk
SsaJd
ayl
‘paJan
s!
aloy
uo!iDaloAd
amma
ayi
Guynsua
‘al$assw aql
peal
u0w-w
w3i3
uounq
hvldsla
U’W’q
dl/dS
wnq
hlwa
uavv
llV’3
30kld
uwq
kl3jSNWl
uMoP/dn
lZNNVH3
uwv
31VEIdO
uowq
31W3dO
3aovu
km0103
suollnq
uMOp/dn
I
uom
dOlS
~
I
‘7CC
I
I
6””
t
‘S
1
hmqaj
‘wt/
8z:O
1
s!
au.HQ
IuasaJd
ay!
4!
‘~66
1
“;
~&ml/~
‘my
Oc:Ol
0100:6
LIJOA~
apoLu
ds
u!
s
uo!ysod
lauusy3
Gu!pAoDau
:aldLuexg
~O.QUOS
aiouraJ
ay$
uo paymys
aAtz
suowq
Bu!llas
6u!plosaJ
lauy
ayl
.ade!
ayl40
~JJ!I
ayl
01
dn
s!seq
AIyaaM
JO
Al!ep
e
uo
paploDaA
aq
oi
las aq
uw
s$uaAa
ayi
40
yea
‘uo!yppe
UI
.po!Aad
Aep
cjgc
1?
Jane
s1uaAa
8
01
dn 40
Gu!pJosaJ
~!~eluo~ne
~04
las aq
uw
Jauy
ayl

Press the PROG button. The start time display
disappears and the stop (finish) time display
starts flashing. Set the stop time using the
0
or
0
button or numeric buttons (0 to 9) in the same
way as described in step
0.
(Set to “IO:30 AM”.)
Press the PROG button.
“lo:30
AM” disappears,
and the channel position number to be recorded
starts flashing. Set the channel number using
the
0
or
0
button or numeric buttons (if the
channel number is a single digit, first enter 0).
(Set to
“Y.)
NOTES:
l To record in the LP (Long Play) mode, press the
SP/LP
button once. (“LP”
will light up.) To return to SP (Standard Play) mode, press the
SP/LP
button
again
(‘SP”will
light up.)
l To record audio and video from an external source through the
AUDIO/VIDEO IN terminals on the rear of the VCR, select the AV channel
position situated after channel 47 and before channel 0.
l To record in the simulcast mode, press the SIMUL button (“SIMUL” lights).
Press the button again to cancel the simulcast mode.
NOTE:
The disolaved timer oosition number is [VCR Display]
cannot be ttansferred: (“PROG” flashes.) Transfer again after clearing the
timer.
Thirty seconds after the transfer or one minute after setting the
programmes, the display on the remote control automatically changes to
the present time.
To input additional timer programmes, repeat steps
@
through
0.
The
VCR can store up to 8 preset timer programmes. The contents of a
programme stored in the remote control will disappear 30 seconds after
transferring or 60 seconds after setting the programme.
Press the COLOUR MODE button inside the front panel to check that the
colour mode is set to auto mode (“AUTO” is displayed). If the mode is set to
fixed colour mode (“PAL” is displayed), press the COLOUR MODE button to
select the auto mode.
To set the VCR for automatic
timer recording, point the remote
control at the VCR, press the
TIMER ON/OFF button and
ensure the “TIMER” indication
lights on the VCR display.
NOTES:
l If the video cassette runs out before recording all the programmes, your VCR will
stop, eject the cassette, and shut off automatically.
l If power is interrupted for more than 60 minutes (power failure, etc.), all timer settings
will be cancelled.
l If the TIMER ON/OFF button is pressed when there is no cassette loaded, “TIMER”
flashes for 5 seconds, indicating that timer recording is not possible.
l If the TIMER ON/OFF button is pressed while a cassette with an uncovered erasure
protection hole is loaded, “TIMER” flashes and the cassette is ejected.
l When “TIMER” is lit, regular VCR operation, clock setting and
settingicancellingiconfirming
timer positions are not possible. For regular VCR
operation, clock setting and setting/cancelling/confirming timer positions, press the
TIMER ON/OFF button to disengage the timer (“TIMER” disappears), and then turn
on your VCR.
l During timer recording, the timer cannot be set or checked.
l To terminate timer recording, press the STOP button during timer recording.
l If no buttons are pressed within one minute while setting a timer programme position,
the mode automatically returns to the previous mode.
0
If the same time is input for the start time and the stop time, the timer setting will be
cancelled.
l “PROG” flashes during timer recording.
l Set the timer using the remote control.
Confirming Timer Settings
@
Press the TIMER ON/OFF button to disengage the timer. (“TIMER”
disappears.)
@
Press the PROG CALL button on the remote control. The lowest-
@
numbered of the unprogrammed timer positions will be displayed.
Press the
0
or
0
button to select the timer position number you wish to
confirm.
@
Each time you press the PROG CALL button, the position of the flashing
display changes, and all of the contents of a given preset timer position
@
are displayed.
Press the TIMER ON/OFF button again to engage the timer.
Cancelling Timer Settings
Press the TIMER ON/OFF button to disengage the timer. (“TIMER”
disappears.)
Press the PROG CALL button on the remote control. The lowest-
numbered of the unprogrammed timer positions will be displayed.
Press the
0
or
0
button to select the timer position number you wish to
cancel.
Make sure the selected timer position number is the one to be cancelled
and then press the CLEAR button on the remote control.
When you press the CLOCK button on the VCR, the display returns to the
present time.
NOTE:
l During timer setting, and when confirming or cancelling timer settings, you
cannot change the channel positions on the VCR with the remote control.
18

.
.
‘4
Table of contents
Other Sharp VCR System manuals

Sharp
Sharp VC-A36SM User manual

Sharp
Sharp VC-MH711GM User manual

Sharp
Sharp VC-MH770SM User manual

Sharp
Sharp VC-A50X User manual

Sharp
Sharp VC-H670X User manual

Sharp
Sharp VC-H726X User manual

Sharp
Sharp VC-GH611GM User manual

Sharp
Sharp VC-A270X User manual

Sharp
Sharp VC-488NS User manual

Sharp
Sharp VC-FH30FPM User manual

Sharp
Sharp VC-A10 User manual

Sharp
Sharp VC-A565U User manual

Sharp
Sharp VC-A136X User manual

Sharp
Sharp VC-M313HM User manual

Sharp
Sharp VC-A592U User manual

Sharp
Sharp VC-A410U User manual

Sharp
Sharp VC-M35SM User manual

Sharp
Sharp XA-920 User manual

Sharp
Sharp VC-S101U User manual

Sharp
Sharp VC-A598U User manual