manuals.online logo
Brands
  1. Home
  2. •
  3. Brands
  4. •
  5. Sharp
  6. •
  7. VCR System
  8. •
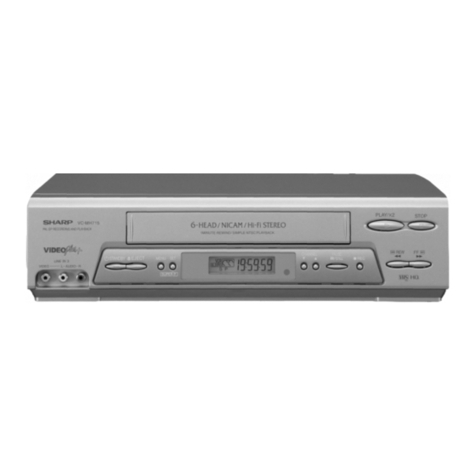
  9. Sharp VC-MH321HM User manual

Sharp VC-MH321HM User manual

MEN
VC-MH721HM
Dear
SHARP
Customer
Thank
you
for
buying
this
SHARP
VCR.
Given
proper
care
it
will
provide
years
of
entertainment
for
the
whole
family.
Please
read
this
operation
manual
carefully
before
attempting
to
operate
the
VCR.
Copyright
@
Audio-visual
material
may
consist
of
copyrighted
works
which
must
not
be
recorded
without
the
authority
of
the
owner
of
the
copyright.
Please
refer
to
the
relevant
laws
in
your
country.
@
No
part
of
this
publication
may
be
reproduced,
stored
or
transmitted
in
any
form
without
prior
permission
from
SHARP
Electronics
(Europe)
GmbH.
@
vines?
and
PlusCode
are
trademarks
of
Gemstar
Development
Corporation.
@
VIDEQ#4;-
system
is
manufactured
under
license
from
Gemstar
Development
Corporation.
THIS
MANUAL
COVERS
A
RANGE
OF
MODELS.
ALL
OF
THE
FEATURES
MENTIONED
MAY
NOT
NECESSARILY
APPLY
TO
YOUR
VCR.
SAFETY
WARNINGS
Observe
all
warnings
for
your
safety
and
to
ensure
trouble
free
use
of
your
VCR.
VCR
REMOTE
CONTROL
14.
BASIC
SHARP
TV
1.
STANDBY
CONTROLS
2.
INPUT
SELECT
15.
VOLUME
©/©
3.CHILD
LOCK
Gam
6.
ZERO
BACK
4.
TIMER
ON/OFF
2
ANRIOGIR
17.
SKIP
SEARCH
Seay
18.
SET
49.
MENU
SELECT
7.
SVNV+/TIMER
20.
CLEAR
21.
MODE
ON
SCREEN
DISPLAY
22.
DISPLAY
23.
CHANNEL
A/W
8.
AM/PM
or
Ga)
24,
INPUT
SELECT
9.
REWIND
25.
FAST
FORWARD
10.
RECORD
26.
PLAY/X2
27
PAUSE/STILL
11.STOP
12.
TAPE
SPEED
13.
SLOW
8.
DPSS
«
/
»
SLOW
SPEED
O/®
29.
TV/VCR
VCR
FRONT
PANEL/REMOTE
CONTROL
EQUIVALENT
FUNCTIONS.
lf
you
prefer,
or
if
remote
control
batteries
fail,
you
will
need
to
use
the
VCR
front
pane!
controls.
The
only
differences
in
function
are
shown
below:
FUNCTION
OPERATION
WITH
REMOTE
OPERATION
WITH
VCR
OSD
CONTROL
FRONT
PANEL
Moving
DOWN/UP
menu
[
a/'W
]
buttons
CHANNEL
4/
buttons.
Moving
LEFT/RIGHT
menu
[</p>
]
buttons
REW/FF
buttons.
(ii)
CALLING
FOR
SERVICE
@
If
you
are
unable
to
resolve
a
problem
using
the
TROUBLESHOOTING
guide,
do
not
remove
the
cabinet
or
attempt
to
service
this
VCR
yourself.
@
For
service
please
contact
your
dealer.
If
this
is
not
possible,
please
call
our
Customer
Information
Centre
for
details
of
your
nearest
Sharp
Service
Centre.
@
Please
note
that
for
repairs
during
the
guarantee
period,
you
will
need
to
produce
proof
of
purchase.
@
SCART
leads
can
be
obtained
from
the
SHARP
Parts
Centre:
Willow
Vale
Electronics
Limited
Tel.
Manchester
0161
682
1415/
Reading
01189
876444.
Most
credit/debit
cards
accepted.
89/336/EEC
and
73/23/EEC
This
equipment
complies
with
the
r
*
Specifications
are
subject
to
change
without
notice
as
part
of
our
policy
of
continuous
improvement.
*
No
liability
is
accepted
for
any
inaccuracies
or
omissions
in
this
publication,
although
every
possible
care
has
been
taken
to
make
it
complete
and
as
accurate
as
possible.
SHARP
ELECTRONICS
(U.K.)
Ltd.
Printed
in
U.K.
TINS-3297UMN1ZXQ
CONTENTS
BEFORE
USING
YOUR
VCR
impGria;nt
NOES
On
Your
VCRs
ck
Co
els
atu
ee
Sethe
aa
R
ae
EE
Rae
ed
2
Unpacking
the
accessones!
«4.56.
2
AG
io
ba
we
RES
Gre
OSE
Be
RS
3
INSTALLING
YOUR
VCR
Connecting
the
-Cables..
3.4
cane
ut
ceilings
15
Oecd
eae
Gin
oe
Sain
phew
Rag
4
MAING:GIS
TLV
IMOARE
VOR.
seus
hr
G49
gS
eer
PROSE
ESS
49
SG
bray
qlee
naunautes
5
AUG
SIAN
ANON
Ad
ane
Stearate
ace
RE
NGe
SY
aa
ete
eee
argos
e
alka Nee.
dk
Re
ba
6
BASIC
OPERATION
Important
notes
on
your
VCR
and
Video
Tapes...
..
ie
ee
ee
es
7
How'to
play
back
@
VIdEO
tape
«crv
news
Korky
ha
ee
lw
Oe
Ee
DA
a
PE
7
Pausing-
and
Slow
MOON
6
'.
en
a
ok
ok
ee
SS
ead
eee
Sate
A
8
Fast
Forwarding/Rewinding
.......
0...
cece
eee eee
ens
9
lmiMediate
RECORGING)
va.5.5-0-
6 a
x
sede
aceey
ak
PARA
Sd
Oe
Hehe
Sein
Bab
4G
Bee
hee
eae
Ss
10
How
to
use
VipEQMs7-
to
make
a
recording
....
6...
eee
es
11
Hew
to-set
a
delayed
TECOrginG)
<4.
4rid<s
0:4
54
yo
os
here
Ee
Beas
13
Checking,
changing
and
cancelling
a
recording
............
15
ADVANCED
OPERATION
Audio-and
your
VERS
545.545
ese
dl
aa
eas
ado
Slats
Hale
eb
ob
ee
EER
ee
TERS
16
Playback
Oa
Video
tape:
2i4
¢
crewed
e
sO
hah
ie
Pach
Oy
18
Checking
the
amount
of
tape
remaining
.............
00006
18
Playing
back
a
Video
tape
repeatedly
...........
2.000
eee
18
Playing
back
an
NTSC
tape
...
0...
cc
cee eee
eee
19
Digital
display:
<2
24.4
o.sw
eaten
oy
&
eA
mae
ee
ES
EON
&
FBS
ees
20
BUST
eos,
Sk
ae
helene
a
acy
eh
dear
ce
Bestia
arcade
HEE
Tas
BN
bet
She
whew
GSpogsBly
Siete
te
By
hehe
21
OIOUL?
og
sy
Grasdea
BOA
ue
deh
whee
ah
a
HE
a
a
Ae
Se
a,
Aen
snd
taneaet
ous
PG
oar
ee
BD
21
SGarching
Wie
VIGEO{ANE:
one's
cde
He
de
ee
eee
OOM
Help
ele
b
hated
ae eS
22
Skip
searching
the
Video
tape...
6...
ee
es
22
Digital
programme
search
system
(DPSS)
20...
.
ce
ee
23
Recording
from
other
G@quipment:
scion
cnr
8
ain
kOe
Re
RS
EB
OURS
ee
ew
ee
RS
24
SPECIAL
FEATURES
ON
YOUR
VCR
Post:
COde
Sect
-e-cie
crt
h
Se-PE
AA
GPW
NSB,
BONE
EAE
ORES
We
RENE
ERS
OA
URS
25
LOW
POWEN
FOALS
sie
cecayttaee
do
os
noe
kate
OO
aves
e
GOS
ek
Ray
Fe
aS
Bus
tran
GAA
48
ap
26
OU
LOCI
a
escheat
testa
Bei
Ra
aie
ib
Mes
g
cug
ns
etiet
i
asasss'ge
a
sta
me
ae
26
CUSTOMISED
INSTALLATION
Manually
toning:
channel:
4
12
24.62
Ae
a
edie
Se
Nee
ek
Cae
React
Bs
2/7
Manually
Sorting
channels...
604
146
Fa
65
e
E
Ra
Ew
OR
ERAR
GSES
E
STE
ew
Oe
OSs
28
Sorting
the
channels
into
your
preferred
order
............4.
28
Deleting
the
channels
...
0.0.2...
ce
ccc
eee
eee
eee
ees
29
ReTaming
channelsi
ws
ie
iw,
ave
Guha
tise
dk
4
¥
Raw
RES
30
Manually
settinig:-
the:
Clock.
s.0i
4p
eeaa
aoe
Se
Kata
Ro
ee
oe
en
Saw
tees
31
MORE
INFORMATION
ABOUT
YOUR
VCR
VCR
Gigtaldispiay:
tr.
cub
teu
eee
ea
nS
at
Eee
ee
CRESS
32
selecting
the
Outputirom.
the
VCR:
ie
or
vit
wk
eee
eee.
e
ne
Se ba
whet
Cow
eras
32
CRSCRESMGISDIGY:
55.523)
Ww.
978
staat
asi
gs
hee
eed
ac
ah
ON
bY
Gr
SE
Oe
a
ed
33
DHECHICAUONS:.
4c
aca
austere
d
wai
Beek
same
aoe
a
aad
& A
ee
NAS
Ae
ga
Ae
34
TOMBIESHOOUAG
5s
ax
erade
&
Ghose
ae
a
Ne Re
ie
8
bo
ws
FS
ee
Ben
oe
ERE
ees
35
GUSIAINGS
4.2.
ocar
stare bewta
o
Achaea
ls,
os
Op
ee
Rana
eae
ate
eae
’,.4
Be
Os
36
CONMECUNG
AOS
MAINS
Mong
4k
wore
Dae
Mia
Ow
A
Ma
HIT
ee
ON
ek
Cpe
ae
37
Calling
TOF
SCRVICE)
cant
re
a
wi
es
ee
Re
oe
oo
ew
eN
Back
Cover
BEFORE
USING
YOUR
VCR
IMPORTANT
NOTES
ON
YOUR
VCR
IDEAL
VCR
LOCATION
PLACE
THE
VCR..
@
..on
a
flat
level
surface
away
from
radiators
or
other
heat
sources
and
out
of
direct
sunlight.
@
..and
video
tapes
away
from
magnetic
sources
such
as
speakers
or
microwave
ovens.
@
..at
least
8”
(20cm)
away
from
the
TV.
®
..away
from
curtains,
carpets
or
other
materials
and
allow
ventilation
space
around
the
VCR.
DO
NOT..
@
..block
the
air-vent
openings.
@
..expose
the
VCR
to
excessive
dust,
mechanical
vibration
or
shock.
@
..place
any
heavy
object
or
liquid
on
top
of
the
VCR.
If
liquid
drops
inside
the
VCR
unplug
immediately
and
contact
your
SHARP
dealer.
Do
not
use
the
VCR.
@
..insert
or
drop
anything
into
the
tape
compartment
or
through
the
air-vents,
as
this
could
result
in
serious
damage,
fire
or
an
electric
shock.
POWER
SOCKETS
@
To
avoid
overheating
or
even
fire,
insert
the
plug
correctly
into
the
socket
DO
NOT..
@
..overload
power
sockets,
this
may
cause
a
fire
or
electric
shock.
@
..pull
the
power
cord
to
disconnect
the
plug
from
the
mains.
@
..bind
the
power
cords
together.
@
This
VCR
is
not
equipped
with
a
mains
power
switch.
Accordingly,
nominal
current
to
drive
the
clock
is
drawn
at
all
times
when
the
AC
power
cord
is
plugged
into
a
wall
socket.
If
the
VCR
is
not
to
be
used
for
an
extended
period
be
sure
to
unplug
the
cord.
BEFORE
USING
YOUR
VCR
UNPACKING
THE
ACCESSORIES
(TYPE
AA/R6/UMS3)
BATTERIES
(X2)
for
the
remote
contro}!
unit.
7
RF
CONNECTION
CABLE
connects
the
VCR
to
the
TV.
To
fit
the
batteries
into
the
remote
control
Remove
the
battery
cover
on
the
back
of
the
remote
control.
Fit
the
batteries:
OtoO
and
@to®
terminals.
Place
the
battery
cover
back
Battery
cover
into
position.
Remote
Control
@
Remote
Controi
must
be
pointed
towards
the
VCR
to
operate.
@
Do
not
expose
to
liquid
or
shock.
@
May
not
function
if
the
VCR
is
in
direct
suntight
or
any
other
strong
light.
@
Replace
both
alkaline
batteries
(type
AA/R6/UM3)
if
the
remote
control
fails.
@
Remove
the
batteries
and
keep
in
a
safe
place
if
you
do
not
plan
to
use
the
VCR
for
several
months.
@
Remove
and
dispose
of
flat
batteries
safely
and
promptly.
®@
Incorrect
use
of
batteries
may
cause
them
to
leak
or
burst.
s
INSTALLING
YOUR
VCR
CONNECTING
THE
CABLES
eee
AERIAL
OR
oo
~.-
CATV
CABLE
1=
Connect
your
existing
aerial
cable
to
xxx:
3
the
ANTENNA
IN
socket
on
your
Connect
the
VCR
to
the
Optional:
Connect
your
Satellite
receiver
or
decoder
to
the
VCR
using
a
scart
lead
to
LINE
2
IN/DECODER
socket
on
the
VCR.
:
Connect
your
TV
to
the
VCR
using
:!
the
supplied
RF
connection
cable,
i.e,
connect
the
VCR
RF
OUT
:
socket
to
the
TV
AERIAL
IN
socket.
BACK
OF
TELEVISION
|
DECODER
UNIT
OR
Optional
SCART
(not
supplied).
If
you
have
a
scart
lead
connect
it
to
your
SATELLITE
SVSTEM
TV
and
LINE
1
IN/OUT
socket
on
the
VCR.
J
The
VCR
is
correctly
connected.
4
INSTALLING
YOUR
VCR
TUNING
THE
TV
INTO
THE
VCR
IMPORTANT
NOTE:
By
pressing
the
STANDBY
button,
the
VCR
will
toggle
between
STANDBY
and
LOW
POWER
modes.
The
VCR
display
will
not
be
illuminated
in
low
power
mode.
1.
Ensure
your
VCR
is
still
in
the
STANDBY
mode
(not
low
power).
2.
Switch
on
the
TV.
Select
an
unused
channel
on
your
TV
for
your
VCR
(there
may
be
a
dedicated
video
channel
refer
to
your
TV
operation
manual).
3.
Press
and
hold
the
MENU
button
for3-
&-J.-
seconds.
The
VCR
will
search
and
display
the
ideal
RF
channel.
4.
Tune
the
selected
channel
on
your
TV
MENU
SCREEN
(refer
to
your
TV
manual)
until
the
menu
screen
appears.
5.
Press
SET
to
store
the
RF
channel
and
to
place
the
VCR
back
into
STANDBY.
lf
problems
persist
contact
SHARP
Consumer
Information
Centre
0990-274277
J
The
TV
is
tuned
to
the
VCR.
INSTALLING
YOUR
VCR
AUTO
INSTALLATION
Press
STOP
to
switch
on
your
VCR.
This
model
will
automatically
tune
in
the
TV
channels
in
your
area,
sort
them
into
a
standard
order
and
set
the
clock.
The
screen
opposite
should
be
showing
on
your
TV.
Follow
the
instructions
from
the
screens.
(Auto
sort
will
take
a
few
minutes
to
complete)
On
completion,
the
MOVE
MENU
will
appear
showing
the
present
channel
order.
Press
MENU
to
exit.
If
the
clock
is
NOT
automatically
set,
the
clock
screen
will
appear,
refer
to
MANUALLY
SETTING
THE
CLOCK.
To
check
the
clock
has
been
set
correctly,
press
DISPLAY
until
the
time
appears
on
the
display.
@
If
the
screen
above
does
not
appear,
follow
If
you
wish
to
customise
the
channel!
order
refer
the
procedure
VCR
RESET
below.
to
MANUALLY
SORTING
CHANNELS.
VCR
RESET
1.Press
STOP
to
switch
on
the
VCR.
2.Press
and
hold
MENU
and
Channel
©
buttons
together
on
the
front
of
the
VCR
for
10
seconds.
3.
The
AUTO
INSTALLATION
screen
should
now
be
showing
on
your
TV.
4.Follow
the
on-screen
display
to
proceed
with
auto
installation.
4
All
the
programmes
should
now
be
correctly
tuned
in
and
the
clock
set.
BASIC
OPERATION
IMPORTANT
NOTES
ON
YOUR
VCR
AND
VIDEO
TAPES
VIDEO
TAPES
@
If
you
use
only
good
quality
video
tapes,
generally
it
will
not
be
necessary
to
clean
the
video
heads.
@
If
poor
quality
tapes
are
used,
or
if
a
tape
is
loaded
after
changing
VCR
location,
oxide
from
the
tape
may
"clog"
the
video
heads.
This
will
cause
the
playback
picture
to
be
"snowy",
or
even
disappear.
@
To
remove
minor
contamination
run
a
video
tape
in
visual
search
mode.
If
this
fails,
you
will
need
to
have
the
heads
cleaned
by
a
SHARP
Service
Facitity.
Please
note,
if
cleaning
is
necessary
it
is
not
covered
by
the
guarantee.
@
Use
video
tapes
which
carry
the
mark.
AL
HOW
TO
PLAYBACK
A
VIDEO
TAPE
BEFORE
YOU
PLAYBACK
A
VIDEO
TAPE
Condensation
forms
in
the
VCR
when
it
is
moved
out
of
or
into
a
warm
place.
If
you
try
to
playback
or
record,
the
video
tape
and
VCR
may
be
damaged.
Turn
the
VCR
on
and
wait
for
about
two
hours
until
the
VCR
reaches
room
temperature
before
operating.
PLAYBACK
1.
Switch
on
your
TV
and
select
the
video
channel.
2.Carefully
push
a
pre-recorded
video
tape
into
the
tape
compartment.
This
will
switch
the
VCR
on.
@
If
the
record-protection
tab
has
been
removed,
the
VCR
will
start
playback
as
soon
as
the
video
tape
has
been
loaded.
Record-protection
tab
3.To
start
playback,
press
PLAY/X2
(P
).
BASIC
OPERATION
HOW
TO
PLAYBACK
A
VIDEO
TAPE
SHARP
SUPER
PICTURE
should
enhance
the
picture
quality
during
playback.
It
is
normally
set
to
ON,
To
turn
SHARP
SUPER
PICTURE
on
or
off
press
SUPER
P.
(SET)
on
the
VCR
front
panel.
@
For
double
speed
playback
(without
sound),
press
PLAY/X2
(>
)
again.
@
To
revert
to
normal
playback,
press
PLAY/X2
(P
)
again.
@
To
stop
the
video
tape,
press
STOP
(@
).
@
To
eject
the
tape
press
on
the
VCR.
PICTURE
DISTURBANCE
DURING
PLAYBACK
This
VCR
has
an
automatic
tracking
system
which
reduces
picture
disturbance
when
you
start
to
playback
a
video
tape.
When
auto-tracking
is
in
operation
“ye
flashes
on
the
on-screen
display.
If
the
picture
still
has
disturbance
you
may
need
to
manually
track
the
video
tape:
During
PLAYBACK
of
a
video
tape.
@
Press
CHANNEL
&
or
©
to
position
picture
interference
off
the
TV
screen.
(Manual
Tracking)
@
Press
CHANNEL
&
and
Y
buttons
together
to
start
Auto
Tracking.
PAUSING
AND
SLOW
MOTION
1.Press
PLAY/X2
(
P
)
to
start
the
video
tape
playing.
2.To
pause
the
video
tape,
press
PAUSE/STILL
(1B).
@
To
minimise
jitter
whilst
in
pause
mode
press
CHANNEL
&
or
V
.
@
Press
PLAY/X2
(P
)
to
resume
playback.
3.To
playback
in
slow
motion
(without
sound)
press
I>
SLOW
on
the
remote
control.
Slow
motion
speed
can
be
adjusted
using
the
O
or
©
buttons
next
to
the
slow
button.
Picture
disturbance
can
be
improved
by
using
the
CHANNEL
or
Y
during
stow
motion
playback.
@
Press
PLAY/X2
(
)
to
resume
playback.
BASIC
OPERATION
HOW
TO
PLAYBACK
A
VIDEO
TAPE
FAST
FORWARDING/REWINDING
A
VIDEO
TAPE
1.Press
STOP
(™
)
to
stop
the
video
tape.
2.Press
FAST
FORWARD
(PP)/
REWIND
(<<)
on
the
remote
contro!
or
turn
the
shuttle
ring
on
the
VCR
to
the
right/left
and
release.
3.To
stop
fast
forward/rewind,
press
STOP
(Mf
)
.
FORWARD/REVERSE
VISUAL
SEARCH
1.During
playback,
press
FAST
FORWARD
(>P)/REWIND
(<4<4
)
on
the
remote
control,
or
turn
the
shuttle
ring
fully
to
the
right/
left.
2.To
lock
search
mode
turn
the
shuttle
far
right/left
and
release.
3.To
decrease
the
speed,
press
FAST
FORWARD
(>>)
/REWIND
(<4
)
again,
or
turn
the
shuttle
to
the
halfway
position,
4.Press
PLAY/X2
(P
)
to
resume
playback.
BASIC
OPERATION
IMMEDIATE
RECORDING
SELECTION
OF
A
CHANNEL
Select
the
channel
by
using
the
number
buttons
on
the
remote
control,
or
select
the
next/previous
channel!
by
pressing
CHANNEL
Ao
V.
To
change
between
single
digit
and
2-digit
channel
numbers,
press
Gi),
For
example,
for
channel
24,
press
Giz)
then
press
2
4.
You
can
record
the
channel
you
are
watching
or
a
different
channel.
1.
Insert
a
video
tape
into
your
VCR.
2.Select
the
channel
you
wish
to
record
on
the
VCR.
3.To
start
recording,
press
RECORD
(@
).
4.To
pause
during
recording,
press
PAUSE/STILL
(fff).
5.To
continue
recording,
press
RECORD
(@).
6.To
stop
recording,
press
STOP
once.
SIMPLE
TIMED
RECORDING:
1.
To
specify
a
stop
time,
press
RECORD
(@
2.
Each
additional
press
of
RECORD
(@)
will
delay
the
stop
time
by
10
minutes.
3.
To
stop
recording
at
any
time,
press
STOP
(Mf
)
once.
10
BASIC
OPERATION
HOW
TO
USE
VIDE
TO
MAKE
A
RECORDING
»
fA
appears
on
the
VCR
display,
press
TIMER
ON/OFF
before
starting.
¢
Check
that
the
clock
is
displaying
the
correct
time.
VIDEOPLUS+
allows
you
to
program
the
VCR
to
record
up
to
eight
programmes
using
the
VIDEOPLUS+
numbers
published
in
TV
listings.
1.Press
[SV/V+/TIMER]
on
the
remote
control.
2.Enter
the
VIDEOPLUS+
number
from
the
TV
listing
using
the
NUMBER
BUTTONS.
3.Press
[.a/W
]
to
select
ONCE,
WEEKLY,
DAILY.
4.!f
you
want
to
make
additional
recordings
at
the
same
time
each
day
or
week,
then
use
[
</P>
]
to
select
the
WEEKLY,
or
DAILY
option
as
appropriate.
5.Press
SET
to
confirm.
The
first
time
that
you
use
VIDEOPLUS+
to
make
a
recording.
on
each
channel
Preset,
(PR)
may-be
highlighted
on
the
menu.
6.
Enter
the
channel
you
wish
to
record
using
the
NUMBER
BUTTONS,
for
example
if
you
wish
to
record
channel
2
press
O
2.
The
VCR
will
remember
this
for
the
future.
11
BASIC
OPERATION
HOW
TO
USE
VIDE
TO
MAKE
A
RECORDING
7.
[If
your
VCR
has
long
play
facility
and
you
wish
to
change
the
RECORDING
SPEED,
use
the
[
</>
]
to
highlight
SP.
Press
[.&/W
J]
to
select
standard
play
or
long
play
as
required.
8.
[See
NOTE
below].
For
VPS/PDC
setting
use
[
</>
]
to
highlight
the
final
column.
Using
the
[44/W
]
will
select
VPS/PDC
ON
or
OFF
(#
=
ON
~
=
OFF).
9.
Press
SET
to
confirm
the
programme.
The
VIDEOPLUS+
menu
will
reappear.
If
you
wish
to
enter
further
VIDEOPLUS+
recordings
repeat
this
procedure.
10.
When
you
have
completed
entering
timer
settings,
press
MENU
to
remove
the
menu
from
the
TV
screen.
11.
Press
TIMER
ON-OFF
once
to
place
the
VCR
in
TIMER
STANDBY
mode.
E)
wit!
be
shown
on
the
display.
BASIC
OPERATION
HOW
TO
SET
A
DELAYED
RECORDING
You
can
make
a
maximum
of
eight
delayed
recordings
up
to
a
year
in
advance.
The
example
shown
is
for
24-hour
clock
operation.
12-hour
clock
operation
can
be
selected
from
the
manual
clock
setting
menu.
12-hour
clock
am/pm
can
be
selected
using
the
AM/PM
(/-)
button
on
the
remote
control.
»
A
appears
on
the
VCR
display,
press
TIMER
ON/OFF
before
starting.
*
Check
that
the
clock
is
displaying
the
correct
time.
SETTING
A
RECORDING
For
example:
Recording
a
programme
on
channel
3
from
21:05
to
22:30
on
July
9th.
1.
Press
STOP
(@
)
to
switch
on
the
VCR.
_MENU
SCREEN
2.
Press
MENU.
3.Press
[4./Y
]
to
select
TIMER.
Press
SET
to
confirm.
4.The
position
which
is
initially
highlighted
is
the
next
available
timer
record
entry.
Press
SET
to
confirm
this.
@
The
display
will
automatically
show
today's
date.
Either:
lf
this
is
the
date
you
wish
to
make
the
recording
on,
press
SET
to
confirm
this.
Or:
enter
the
recording
date
using
the
NUMBER
BUTTONS.
Enter
two
digits
for
the
day,
then
two
for
the
month.
For
example
for
July
9th,
press
O
9
(9th),
then
O
7
(July).
5.Then
press
SET
to
confirm.
6.
If
you
want
to
make
additional
recordings
at
the
same
time
each
day
or
week,
use
[
&/W]
to
select
D
(daily)
or
W
(weekly).
Then
press
SET
to
confirm.
7.Enter
the
channel
using
the
NUMBER
BUTTONS.
For
example
to
record
a
programme
on
channel
3,
press
O
3.
Then
press
SET
to
confirm.
13
BASIC
OPERATION
HOW
TO
SET
A
DELAYED
RECORDING
8.
Enter
the
start
time
using
the
NUMBER
BUTTONS
-
hours
first
then
minutes
(when
entering
less
than
10
minutes
add
a
'O’
before
the
number),
for
example
for
21:05
start,
press
2
1
0
5.
Then
press
SET
to
confirm.
9.£nter
the
stop
time,
for
example
for
22:30
stop,
press
2
23
0.
10./f
your
VCR
has
long
play
facility
and
you
wish
to
change
the
RECORDING
SPEED,
use
the
[
</P>
]
to
highlight
SP.
Press
[4a/W
J]
to
select
standard
play
or
long
play
as
required.
11.[See
NOTE
below].
For
VPS/PDC
setting
use
[
4/P
]
to
highlight
the
final
column.
Using
the
[
4/W
]
will
select
VPS/PDC
ON
or
OFF
(*
=
ON
-
=
OFF).
12.Press
SET
to
confirm.
@
The
MENU
now
shows
all
the
timer
settings
you
have
entered.
If
you
wish
to
make
additional
timer
recordings,
repeat
this
procedure.
13.When
you
have
completed
entering
timer
settings,
press
MIENU
to
remove
the
menu
from
the
TV
screen.
14.Press
TIMER
ON-OFF
once
to
place
the
VCR
in
TIMER
STAND-BY
mode.
E)
will
be
shown
on
the
display.
14
BASIC
OPERATION
HOW
TO
SET
A
DELAYED
RECORDING
CHECKING,
CHANGING
AND
CANCELLING
A
RECORDING
CHECKING
A
RECORDING
1.
If
in
TIMER
STANDBY
mode,
press
TIMER
ON/OFF
to
exit.
MENU
SCREEN
2.Press
STOP
to
switch
on
the
VCR.
3.
Press
MENU.
|
4.Press
[
4&/W
]
to
select
TIMER.
Press
SET
to
confirm.
@
All
the
delayed
recordings
in
the
VCRs
memory
will
be
shown.
@
You
can
check
the
settings
and
change
or
cancel
them.
CHANGING
A
RECORDING
1.Follow
steps
1
to
4
of
CHECKING
A
RECORDING.
2.If
you
wish
to
change
a
delayed
recording,
press
[
44/W
J
to
highlight
the
recording,
then
press
SET.
3.Press
[<{/P
]
to
highlight
the
setting
to
be
changed
and
correct
it
by
using
the
[
&/Y
]
or
the
NUMBER
BUTTONS.
4.When
all
corrections
are
complete
press
SET,
then
press
MENU.
CANCELLING
A
RECORDING
1.
Follow
steps
1
to
4
of
CHECKING
A
RECORDING.
.
2.If
you
wish
to
cancel
a
delayed
recording,
press
{
aa/‘W
]
to
highlight
the
recording
to
be
cancelled,
then
press
CLEAR.
3.Press
MENU.
15
ADVANCED
OPERATION
AUDIO
AND
Your
ver
(HiFi
VCR’S
Only)
HI-FI
STEREO
SOUND
Stereo
sound
is
possible
from
Hi-Fi
VCR's
if
you
have
a
stereo
TV
connected
to
the
VCR
with
a
seart
lead,
or
audio
equipment
connected
with
audio
phono
leads.
The
VCR
is
normally
set
so
that
stereo
sound
is
possible.
The
sound
output
from
the
VCR
is
controlled
by
the
AUDIO
OUT
button
on
the
remote
control.
If
you
wish
to
change
the
sound
output
you
can
use
the
AUDIO
OUT
button
as
follows:
@
Press
AUDIO
OUT
once.
The
LEFT
audio
channel
will
be
sent
to
BOTH
speakers.
L
will
appear
on
the
VCR
display.
@
Press
AUDIO
OUT
twice.
The
RIGHT
audio
channel
will
be
sent
to
BOTH
speakers.
R
will
appear
on
the
VCR
display.
@
Press
AUDIO
OUT
three
times.
The
MONO
track
will
be
sent
to
BOTH
speakers.
L
and
R
will
disappear
from
the
VCR
display.
@
Pressing
AUDIO
OUT
a
fourth
time,
normal
Hi-Fi
stereo
sound
will
be
heard.
L
and
R
will
appear
on
the
VCR
display.
.
NICAM
Hi-Fi
STEREO
SOUND
Your
VCR
can
receive
and
record
NICAM
sound.
The
VCR
is
normally
set
so
that
NICAM
sound
is
possible
if
it
is
present
on
the
receiving
signal,
otherwise
the
VCR
will
automatically
switch
to
receive
the
mono
signal.
NICAM
sound
can
be
turned
off.
If
you
wish
to
do
this
follow
the
procedure
below:
1.Press
MENU
to
display
the
main
menu
on
the
screen,
2.Press
[
&/W
]
to
select
MODE.
3.Press
SET.
NICAM
will
be
selected.
4.Press
[
</>
]
to
select
OFF.
5.Press
SET
to
return
to
the
menu
screen.
6.Press
MENU
to
exit
to
normal
screen.
16

This manual suits for next models

2

Other Sharp VCR System manuals

Sharp VC-A220X User manual

Sharp

Sharp VC-A220X User manual

Sharp VC-A270X User manual

Sharp

Sharp VC-A270X User manual

Sharp VC-A410X User manual

Sharp

Sharp VC-A410X User manual
Sharp vc-a260x User manual

Sharp

Sharp vc-a260x User manual

Sharp VC-MH71SM User manual

Sharp

Sharp VC-MH71SM User manual

Sharp VC-G20SM User manual

Sharp

Sharp VC-G20SM User manual

Sharp VC-A560UA User manual

Sharp

Sharp VC-A560UA User manual

Sharp VC-MH711GM User manual

Sharp

Sharp VC-MH711GM User manual

Sharp WQ-T37OA User manual

Sharp

Sharp WQ-T37OA User manual

Sharp VC-MH780BM User manual

Sharp

Sharp VC-MH780BM User manual
Sharp VC-H600X User manual

Sharp

Sharp VC-H600X User manual

Sharp VC-H900X User manual

Sharp

Sharp VC-H900X User manual

Sharp VC-488NS User manual

Sharp

Sharp VC-488NS User manual

Sharp VC-A422U User manual

Sharp

Sharp VC-A422U User manual

Sharp VC-A200X User manual

Sharp

Sharp VC-A200X User manual

Sharp VC-A410X User manual

Sharp

Sharp VC-A410X User manual

Sharp VC-A240X User manual

Sharp

Sharp VC-A240X User manual

Sharp VC-GH61GM User manual

Sharp

Sharp VC-GH61GM User manual

Sharp VC-A415U User manual

Sharp

Sharp VC-A415U User manual

Sharp VC-A250X User manual

Sharp

Sharp VC-A250X User manual

Sharp VC-GH611GM User manual

Sharp

Sharp VC-GH611GM User manual

Sharp VC-MH711GM User manual

Sharp

Sharp VC-MH711GM User manual

Sharp VC-A36SM User manual

Sharp

Sharp VC-A36SM User manual

Sharp VC-A598U User manual

Sharp

Sharp VC-A598U User manual

Popular VCR System manuals by other brands

Philips SV2000 owner's manual

Philips

Philips SV2000 owner's manual

Zenith VCM321 Installation and operating guide

Zenith

Zenith VCM321 Installation and operating guide

RCA VR725HF user guide

RCA

RCA VR725HF user guide

Sylvania LV446G owner's manual

Sylvania

Sylvania LV446G owner's manual

Sony SLV-SE10 Service manual

Sony

Sony SLV-SE10 Service manual

GoVideo DDV9755 Specifications

GoVideo

GoVideo DDV9755 Specifications

RCA VR346 user guide

RCA

RCA VR346 user guide

Hitachi VT-M840ECT instruction manual

Hitachi

Hitachi VT-M840ECT instruction manual

Philips VRZ220AT Specifications

Philips

Philips VRZ220AT Specifications

JVC DR-MV5BEK Service manual

JVC

JVC DR-MV5BEK Service manual

JVC HR-S6600EK instructions

JVC

JVC HR-S6600EK instructions

Philips VR948/13M user manual

Philips

Philips VR948/13M user manual

Samsung SV-200X Service manual

Samsung

Samsung SV-200X Service manual

Sony SLV-798HF Service manual

Sony

Sony SLV-798HF Service manual

RCA VR688HF user guide

RCA

RCA VR688HF user guide

Panasonic AG-TL500 operating instructions

Panasonic

Panasonic AG-TL500 operating instructions

Toshiba D-VR40SF Service manual

Toshiba

Toshiba D-VR40SF Service manual

Hitachi VT-UX6430A owner's manual

Hitachi

Hitachi VT-UX6430A owner's manual

manuals.online logo
manuals.online logoBrands
  • About & Mission
  • Contact us
  • Privacy Policy
  • Terms and Conditions

Copyright 2025 Manuals.Online. All Rights Reserved.